The Best Fluffy Pancakes recipe you will fall in love with. Full of tips and tricks to help you make the best pancakes.
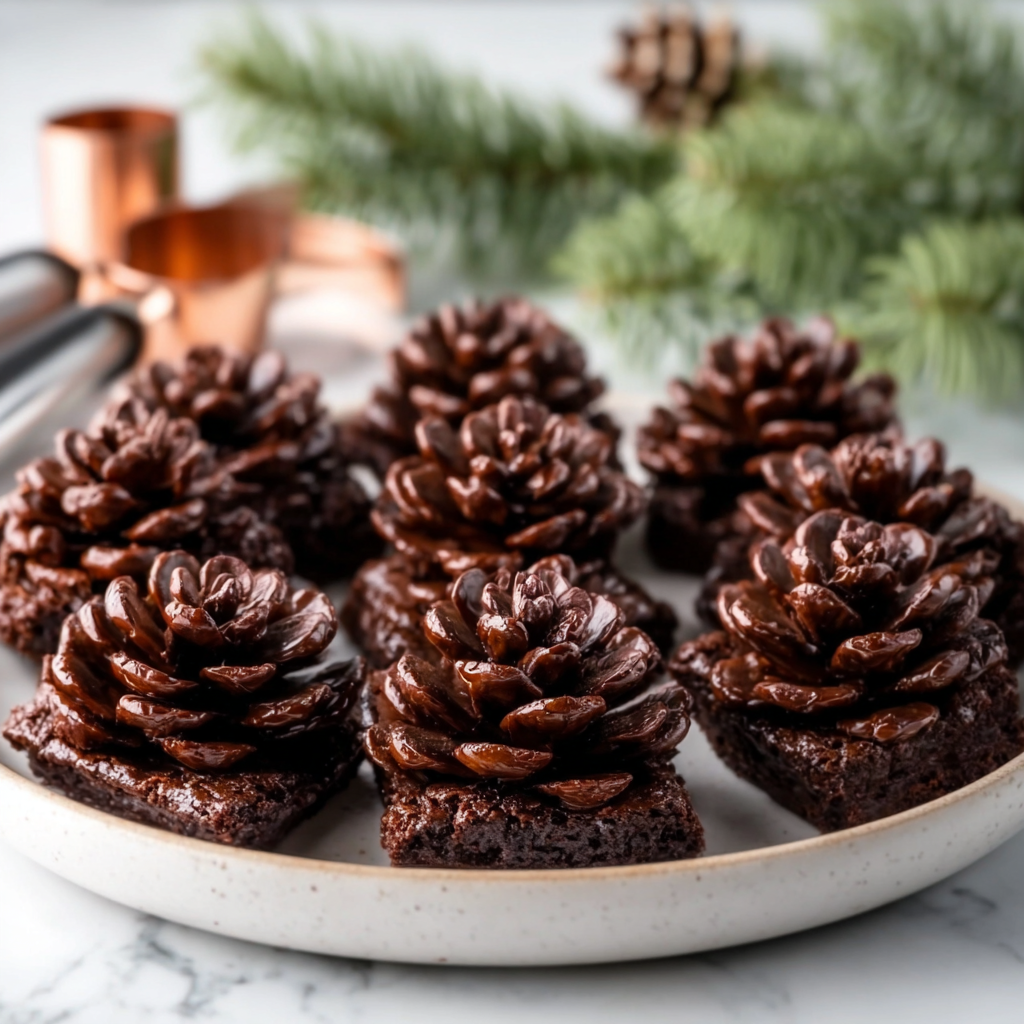
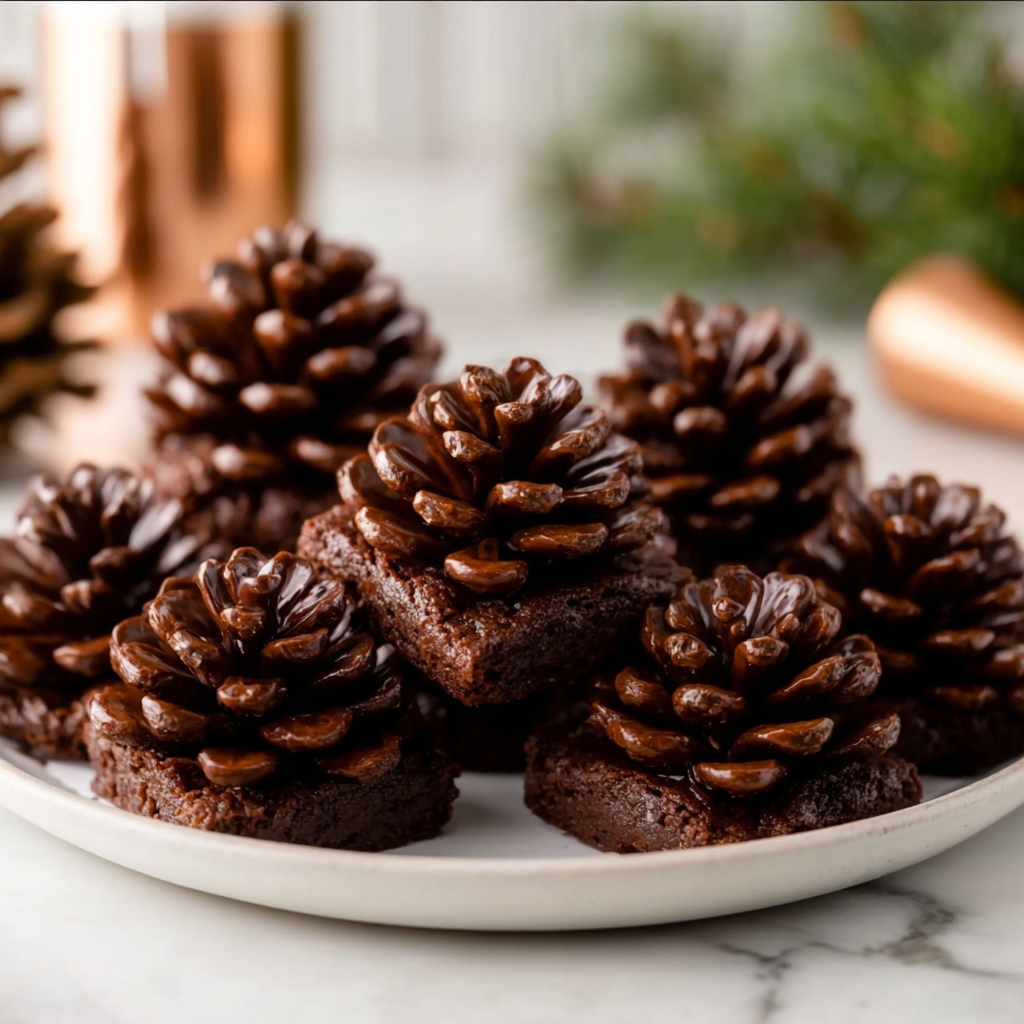
Holiday baking doesn’t have to be complicated to be impressive. In fact, some of the most eye-catching Christmas desserts require no intricate decorating skills at all — and these Easy Pine Cone Brownies are proof! Shaped to look like realistic pine cones, these chocolate treats combine soft, fudgy brownie centers with crunchy cereal “petals,” all coated with a snowy dusting of powdered sugar. They look elegant enough for a Christmas dessert table, yet they’re simple enough that even beginners can make them flawlessly.
If you’re searching for a dessert that delivers the WOW factor without hours in the kitchen, you’re in the right place. These pine cone brownies are:
- No-bake (once your brownies are prepared)
- Kid-friendly
- Make-ahead
- Completely customizable
- Perfect for parties, cookie exchanges, and gift boxes
The transformation from brownie crumble into a realistic pine cone shape is as fun as it is creative. Whether you’re planning a winter woodland-themed party, need a festive edible decoration, or just want something holiday-chic, this recipe is about to become a December staple.
Let’s jump right into it.
Why Pine Cone Brownies Are the Ultimate Holiday Treat
Most Christmas treats revolve around sugar cookies, gingerbread, peppermint bark, or classic fudge—but pine cone brownies bring something fresh, surprising, and delightfully cozy.
1. They look shockingly realistic.
The cereal “petals” create a perfect pine cone texture.
2. Minimal ingredients required.
All you need is brownies, chocolate frosting, and cereal.
3. No special tools.
Everything is shaped by hand. No molds or cutters needed.
4. Great edible gift idea.
Wrap individually in cellophane, tie with ribbon, and you’re done.
5. They’re fun for kids.
Kids LOVE assembling the “petals.”
6. Foolproof recipe.
Even messy shaping still looks like a rustic pine cone.
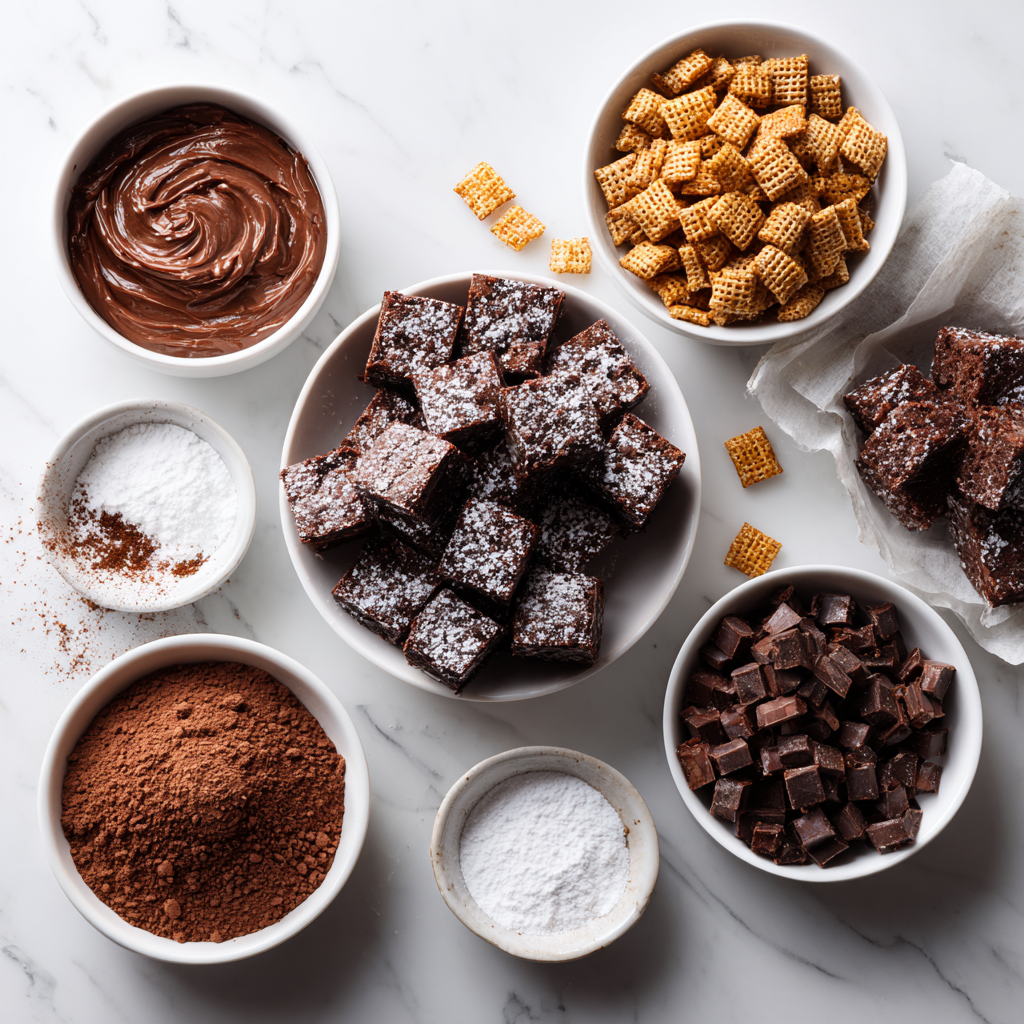
Ingredients Overview
Brownies
You can use:
- Homemade brownies
- Boxed brownies
- Store-bought brownies
As long as they’re soft, fudgy, and crumble nicely.
Chocolate frosting
Acts as edible glue for shaping the pine cone.
Chocolate cereal
The most common options:
- Chocolate Chex
- Cocoa Rice cereal
- Cocoa Krispies
- Cinnamon Chex for a lighter pine-cone color
Each cereal piece becomes a “scale” or “petal.”
Powdered sugar
To dust the finished pine cone brownies with a snowy effect.
How to Shape Pine Cone Brownies (Step-by-Step)
Here’s how to transform brownies into beautiful edible pine cones:
Step 1: Prepare the brownie mixture
Crumble the brownies into a mixing bowl.
Add chocolate frosting and mix until the mixture becomes sticky and moldable—similar to cake pops.
If too dry → add a bit more frosting.
If too sticky → add more brownie crumbs.
Step 2: Shape the base
Form the mixture into an oval shape — slightly pointed at one end and rounded at the other.
Think: pine cone silhouette.
Place on a lined tray.
Step 3: Add the cereal “petals”
Starting at the bottom of the pine cone shape, press cereal pieces into the brownie base one row at a time.
Tips:
- Angle the cereal pieces upward slightly.
- Work in circular rows around the pine cone.
- Add smaller pieces near the top.
Continue layering until the entire brownie is covered.
Step 4: Chill to set
Refrigerate pine cone brownies for 20–30 minutes to firm up.
This prevents the cereal from shifting and gives the dessert a clean finished look.
Step 5: Add the snowy finish
Dust lightly with powdered sugar to create a snowy woodland effect.
Optional: brush powdered cocoa lightly across the surface for a rustic look.
Easy Pine Cone Brownies
A fun and festive no-bake holiday dessert made with brownie crumble, chocolate frosting, and cereal ‘petals’ shaped into realistic pine cones.
Ingredients
Equipment
Method
- Crumble brownies and combine with chocolate frosting until moldable.
- Shape the mixture into a pine cone form on parchment paper.
- Press chocolate cereal pieces into the brownie base in layered rows to mimic pine cone petals.
- Chill for 20–30 minutes to firm up the shape.
- Dust lightly with powdered sugar before serving.
Notes
Fudgy brownies work best. For crunchier cones, add cereal just before serving.
Expert Tips for Perfect Pine Cone Brownies
1. Use fudgy brownies, not cakey ones.
They bind better and create a denser pine cone shape.
2. Don’t skip chilling.
The pine cone will hold its structure much better once cold.
3. Add cereal last-minute if serving outdoors or in humid spaces.
Cereal absorbs moisture and may soften overnight.
4. Use gloves or slightly wet hands for shaping.
This prevents sticking and helps smooth edges.
5. Mix flavors.
Try peanut butter brownies, mint brownies, or gingerbread brownies for unique twists.
Holiday Variations
1. Peppermint Pine Cones
Add peppermint extract to the frosting
Dip tips of cereal in melted chocolate
Dust with crushed candy canes
2. Snowy White Pine Cones
Use white chocolate cereal
Dust heavily with powdered sugar
3. Gingerbread Pine Cones
Mix in gingerbread spices: cinnamon, nutmeg, cloves, and ginger
4. Rocky Road Pine Cones
Add mini marshmallows and nuts inside the brownie mixture
5. Christmas Tree Pine Cones
Dip cereal tips in green candy melts for a festive touch
Serving Suggestions
- On holiday dessert boards
- On woodland-themed tables
- Individually boxed for cookies exchanges
- On charcuterie boards as edible décor
- Served with Christmas hot chocolate
- On a snowy winter dessert platter
These brownies photograph beautifully and are perfect for social media or themed parties.
Storage Instructions
- Store in an airtight container
- Refrigerate up to 3–4 days
- Keep away from moisture to protect the cereal crunch
Ingredients (List Format)
- 2 cups crumbled brownies (homemade or boxed)
- ½ cup chocolate frosting
- 1 ½ cups chocolate Chex cereal (or similar)
- Powdered sugar for dusting
- Cocoa powder (optional, for extra depth)
Instructions (Numbered Steps)
- Crumble brownies into a large bowl.
- Add chocolate frosting and mix until fully combined and moldable.
- Shape the mixture into a pine cone shape on parchment paper.
- Starting from the bottom, gently press cereal pieces into the brownie base in rows.
- Continue layering cereal pieces until the pine cone is fully covered.
- Chill for 20–30 minutes to firm up.
- Dust lightly with powdered sugar before serving.
- Store in the refrigerator until ready to serve.


