The Best Fluffy Pancakes recipe you will fall in love with. Full of tips and tricks to help you make the best pancakes.
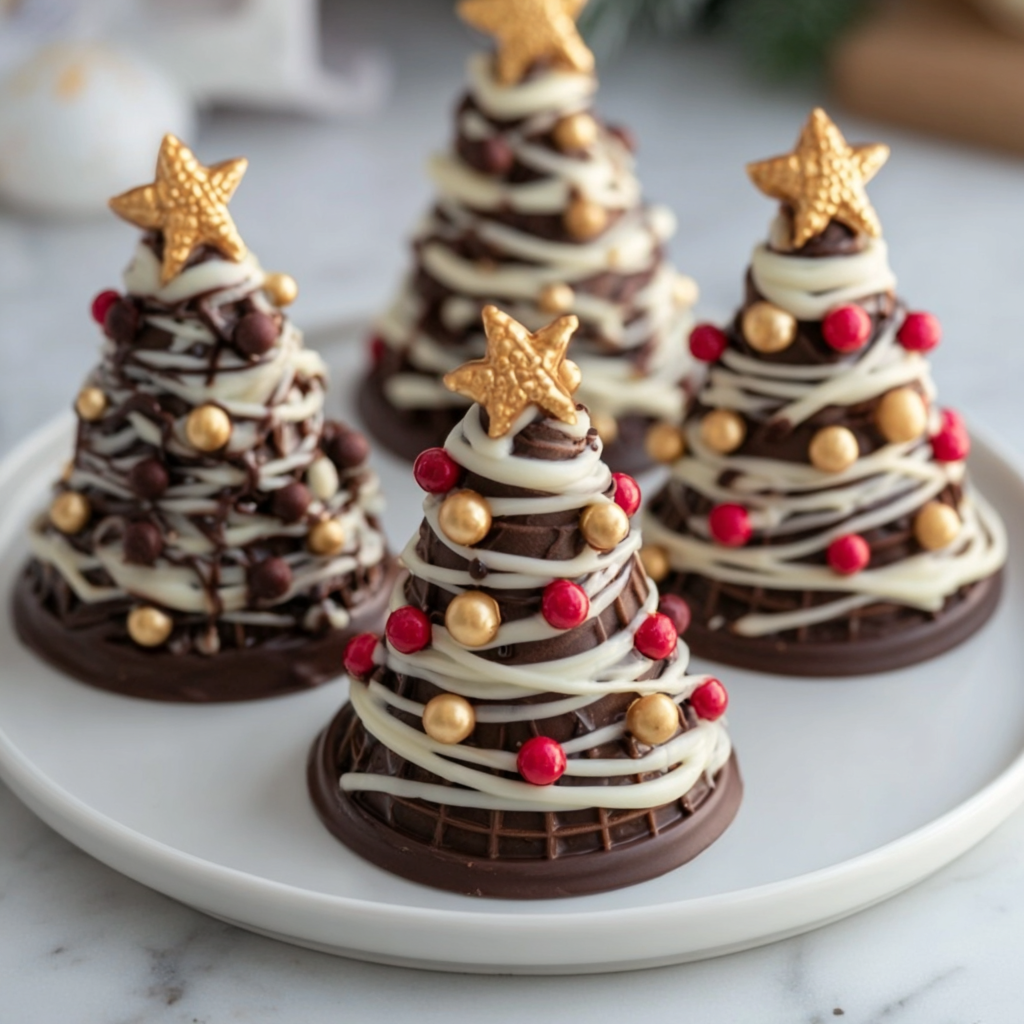
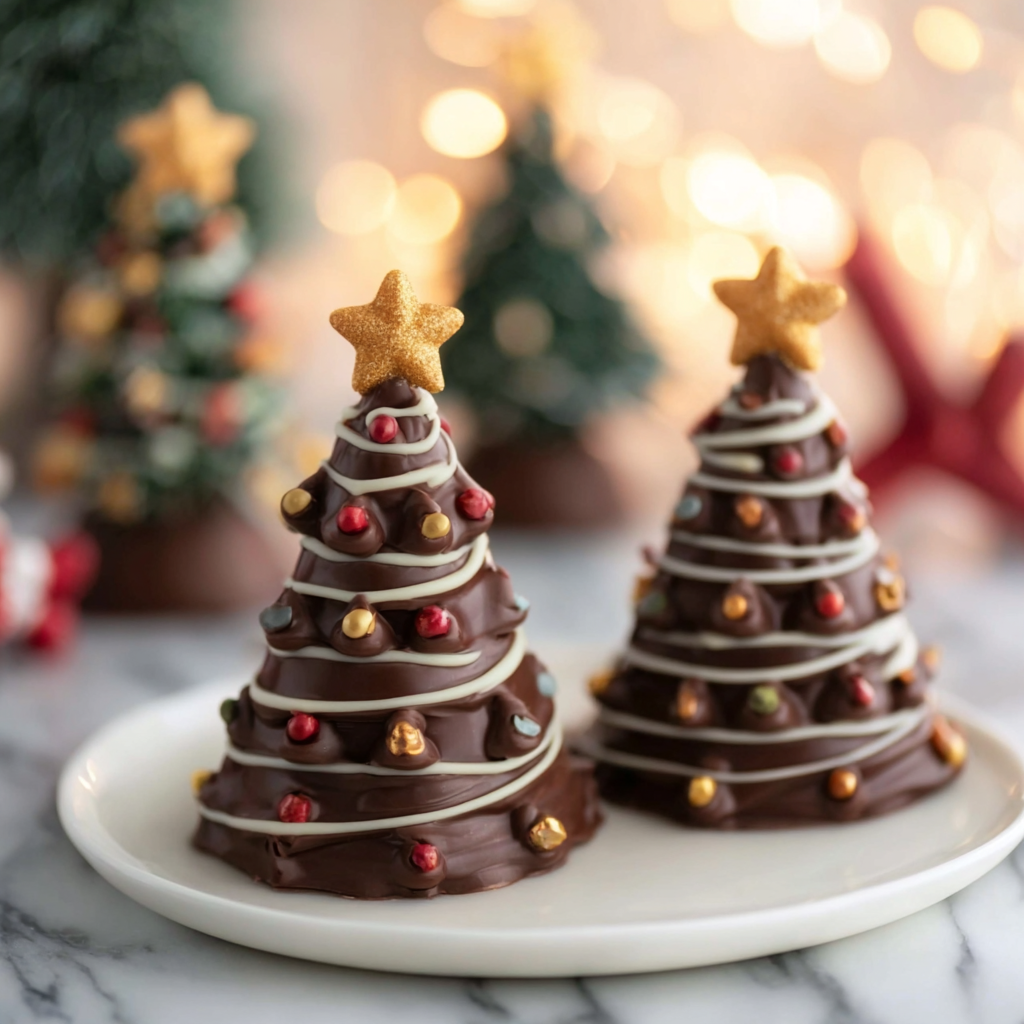
If you’re searching for a holiday recipe that is easy, impressive, and guaranteed to create a magical reaction from everyone who sees it, these Easy Christmas Chocolate Trees are your new go-to Christmas treat. With their glossy chocolate coating, delicate white chocolate drizzle, metallic gold accents, and adorable edible star toppers, these edible Christmas trees look beautifully elaborate — yet the technique is surprisingly simple.
This no-bake recipe uses waffle cones dipped in chocolate to create the perfect Christmas tree shape. Once coated, you can decorate them in endless ways: peppermint snow, gold beads, red ornaments, sparkling sugar, white chocolate garlands, or sprinkles. The result is a fun, festive, and highly versatile treat ideal for holiday dessert tables, classroom parties, gifts, cookie exchanges, or Christmas Eve snacking.
In this detailed guide, you’ll learn everything from the ingredients and steps to pro decorating tips, storage tricks, variations, and serving ideas. Whether you’re a seasoned holiday baker or someone jumping into holiday treats for the first time, this recipe will make you feel like a Christmas dessert pro.
Why This Recipe Is So Popular
1. Completely No-Bake
No oven. No baking. Just melt, dip, and decorate.
2. Beginner-Friendly and Kid-Friendly
Kids love decorating these Christmas trees! It’s like edible arts and crafts.
3. Fast to Make
You can make a dozen trees in under 30 minutes.
4. Perfect for Holiday Parties
They are gorgeous, eye-catching, and festive.
5. Customizable
Choose your chocolate, your decorations, your color palette.
6. Long Shelf Life
They stay fresh and crisp for days when stored properly.
Ingredients
For the Chocolate Trees
- 12 waffle cones
- 2 cups dark chocolate or semisweet chocolate chips (melted)
- 1 cup white chocolate chips (melted, for drizzling)
- 2 tbsp coconut oil (optional, for thinning chocolate)
- 12 chocolate wafers or Oreos (used as the bottom base)
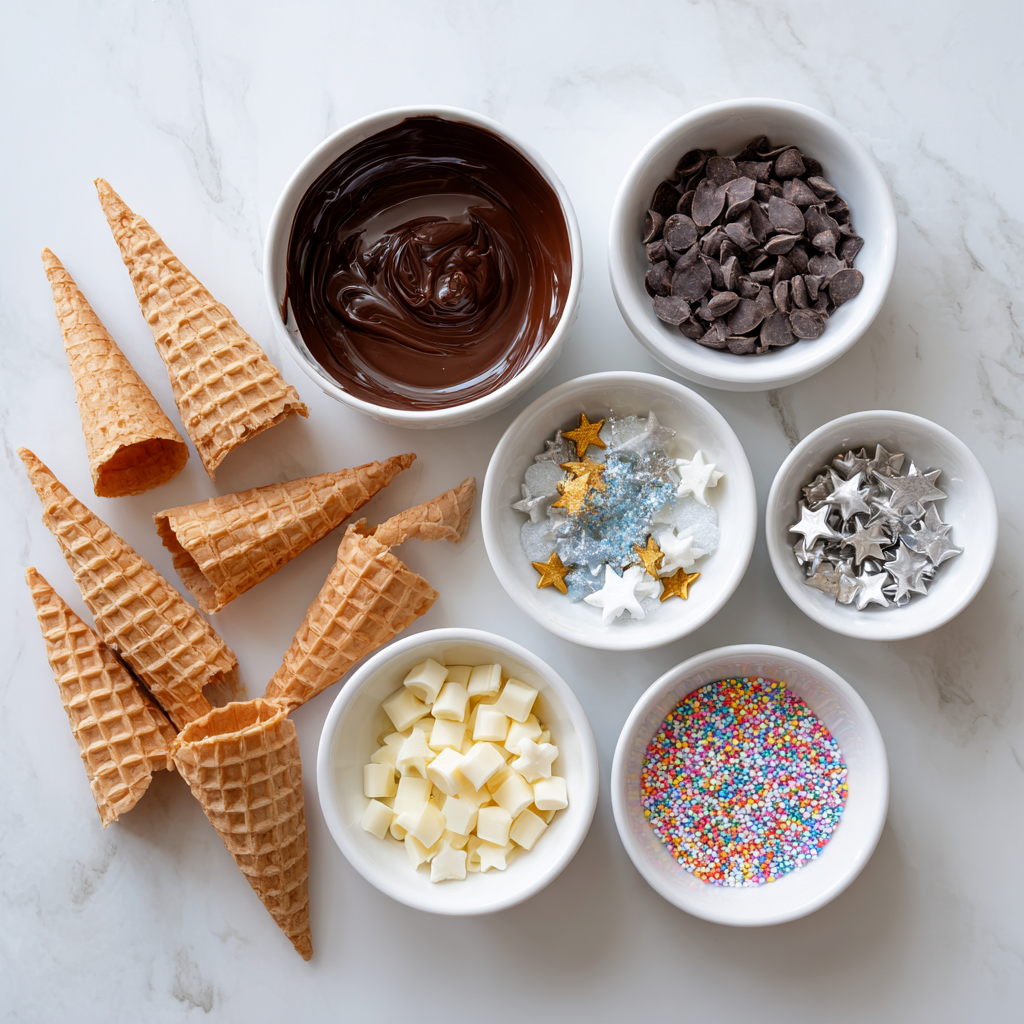
Decorations (choose any)
- Red or gold candy pearls
- Mini edible stars
- Gold sprinkles
- Holiday nonpareils
- Snowflake sprinkles
- Edible glitter
- Crushed peppermint
- Small edible star toppers for the top
Instructions
1. Prepare Your Workstation
Line a baking sheet with parchment paper.
Place all sprinkles and decorations in small bowls.
2. Melt the Chocolate
In a microwave-safe bowl, melt dark or semisweet chocolate in 20-second intervals until smooth.
Stir in coconut oil if you want a thinner consistency.
3. Dip the Waffle Cones
Hold each waffle cone by the tip and dip it into the melted chocolate, spooning chocolate over any uncovered areas.
Shake gently to remove excess.
4. Attach the Base
Place each coated cone onto a chocolate wafer or Oreo cookie.
This forms the tree “stand.”
5. Let the Trees Set
Chill the dipped cones for 10–15 minutes, or until the chocolate hardens completely.
6. Decorate Your Christmas Trees
Transfer melted white chocolate to a piping bag or zip-top bag.
Snip off a tiny corner and drizzle white chocolate around each tree in swirled garlands.
While the drizzle is still wet, add:
- Red candy balls for ornaments
- Gold pearls
- Snowflake sprinkles
- Edible glitter
Top each tree with a gold candy star.
7. Let Them Harden
Refrigerate for another 10 minutes or allow them to set at room temperature.
Then serve and enjoy your edible winter wonderland!
Easy Christmas Chocolate Trees
Festive chocolate-covered waffle cone Christmas trees decorated with white chocolate drizzle and holiday sprinkles.
Ingredients
Equipment
Method
- Line a baking sheet with parchment paper and prepare decorations in small bowls.
- Melt dark chocolate and stir until smooth.
- Dip waffle cones in melted chocolate, coating fully.
- Place each coated cone onto a chocolate wafer or Oreo base.
- Chill for 10–15 minutes until the chocolate sets.
- Melt white chocolate and transfer to a piping bag to drizzle swirls onto each tree.
- Decorate with candy pearls, sprinkles, and star toppers while the drizzle is wet.
- Let the trees fully set before serving.
Notes
For extra shine, add a teaspoon of vegetable oil to melted chocolate.
Expert Tips for Perfect Chocolate Trees
1. Use Good-Quality Chocolate
High-quality chocolate melts smoothly and gives the trees a professional glossy finish.
2. Use Gel Food Coloring Only
If you tint any drizzle, avoid liquid coloring — it seizes chocolate.
3. Keep Decorations Ready
Chocolate sets quickly, so sprinkle immediately after drizzling.
4. Stand the Cones on Wafers
This trick makes the trees sturdy and easy to move.
5. Don’t Skip Chilling
Cold chocolate gives you the cleanest, crispest finish.
Fun Decorating Variations
1. Snow-Dusted Trees
Sprinkle with powdered sugar or white sanding sugar.
2. Peppermint Forest Trees
Use crushed candy canes on top of white chocolate drizzle.
3. Gold Luxury Trees
Gold pearls + edible glitter = Christmas glam.
4. Grinch-Inspired Trees
Tint white chocolate green and add red heart sprinkle accents.
5. White Chocolate Wonderland
Cover the whole cone in white chocolate for a snowy look.
Holiday Serving Ideas
- Display on a wooden board with cranberries, pine branches, and cookies.
- Use as cupcake toppers on giant Christmas cupcakes.
- Add to a gingerbread house village as edible forest trees.
- Wrap each tree in clear bags with ribbon as holiday gifts.
- Serve on a dessert table with hot cocoa.
Storage Instructions
Room Temperature (Recommended)
Keep in an airtight container for up to 5 days.
Refrigerator
Only if your home is warm. Can last 7 days.
Freezer
Not recommended — cones lose crispness.
Fun Fact
Chocolate-dipped waffle cones were originally a summer ice-cream hack, but they became a winter trend thanks to holiday dessert creators who turned them upside down and decorated them like Christmas trees. Now they’re one of the most shared Christmas treats on Instagram and Pinterest.


