The Best Fluffy Pancakes recipe you will fall in love with. Full of tips and tricks to help you make the best pancakes.
When it comes to Christmas desserts, nothing feels quite as magical as a plate of Festive Mini Pavlova Christmas Trees. Light as air, delicately crisp on the outside, marshmallow-soft in the center, and stacked into whimsical tree shapes, these mini pavlovas are the ultimate holiday showstopper. They look elegant enough for a Christmas dinner centerpiece yet are surprisingly simple to make, even for home bakers.
Pavlova has long been a beloved dessert thanks to its beautiful contrast of textures—crisp meringue, pillowy interior, and clouds of whipped cream topped with fresh fruit. By shaping the pavlovas into tiered “trees,” this classic dessert becomes a festive masterpiece that instantly elevates any holiday table. Whether you’re hosting Christmas Eve, planning a winter party, or searching for a light dessert after a rich holiday meal, these pavlova trees strike the perfect balance between indulgent and refreshing.
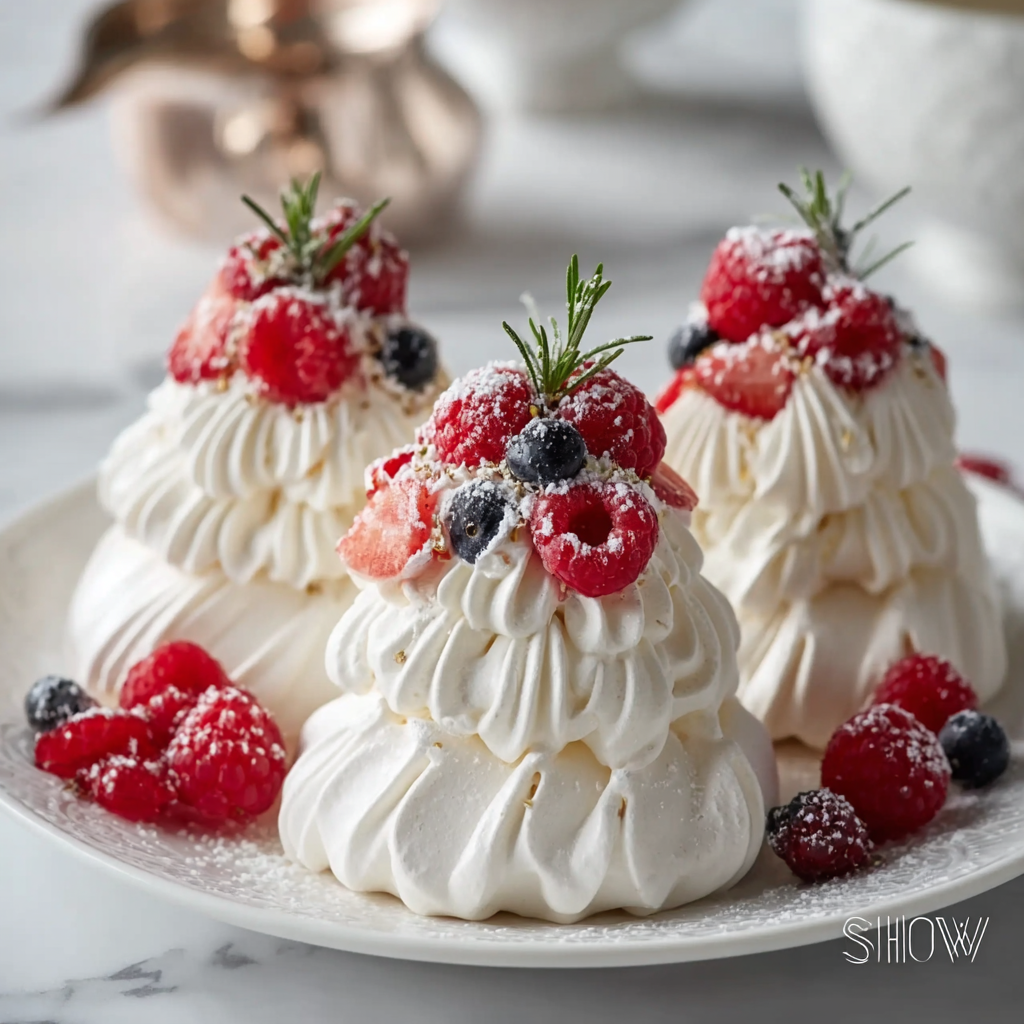
Unlike heavy cakes or dense cookies, pavlova feels light and celebratory, making it ideal for festive gatherings. Each mini tree is individually portioned, easy to serve, and endlessly customizable. You can decorate them with berries, pomegranate arils, sugared rosemary, edible gold dust, or even tiny candy stars for a whimsical finish.
In this guide, you’ll learn exactly how to make Festive Mini Pavlova Christmas Trees from scratch, with expert tips for perfect meringue every time, creative variations, storage advice, and festive presentation ideas that will wow your guests.
What Makes Pavlova So Special?
Pavlova is a meringue-based dessert traditionally made with whipped egg whites and sugar, baked low and slow to achieve its signature crisp shell and soft interior. Named after the ballerina Anna Pavlova, this dessert is all about elegance and lightness.
What sets pavlova apart from ordinary meringue cookies is its texture. Instead of baking until completely dry, pavlova retains a marshmallow-like center that pairs beautifully with whipped cream and fruit. For Christmas, the snowy white meringue becomes a blank canvas for festive decorations—perfect for transforming into charming Christmas trees.
Why You’ll Love These Mini Pavlova Christmas Trees
- Visually stunning: They instantly impress guests without requiring advanced baking skills.
- Light and airy: A perfect contrast to rich holiday meals.
- Make-ahead friendly: Meringues can be prepared days in advance.
- Naturally gluten-free: A great option for mixed dietary needs.
- Endlessly customizable: Decorate to match your holiday theme.
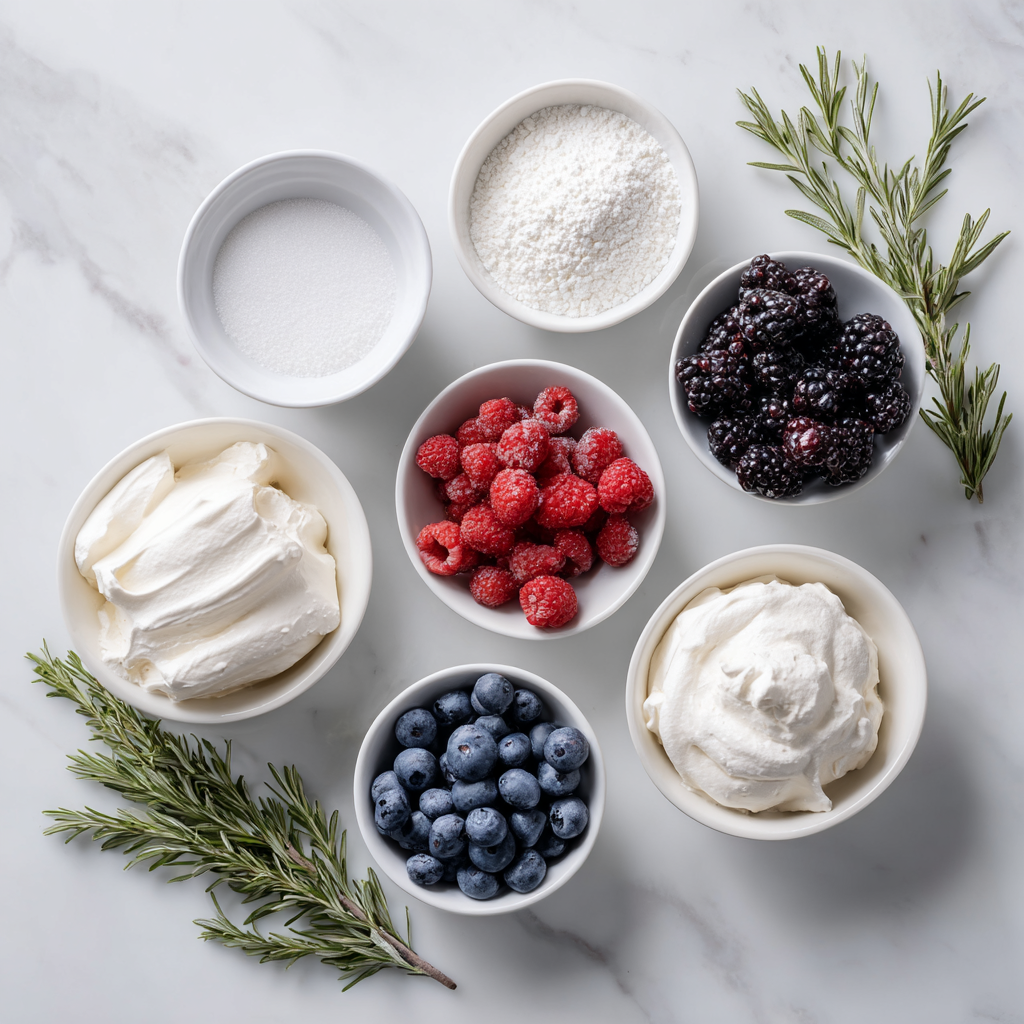
Ingredients for Festive Mini Pavlova Christmas Trees
For the Mini Pavlovas:
- Egg whites, room temperature
- Granulated sugar
- Cornstarch
- White vinegar or lemon juice
- Vanilla extract
For Assembly & Decoration:
- Heavy whipping cream
- Powdered sugar
- Fresh berries (strawberries, raspberries, blueberries)
- Rosemary sprigs
- Powdered sugar (for snow effect)
Instructions
- Prepare the oven: Preheat your oven to 225°F (110°C). Line two baking sheets with parchment paper.
- Whip the egg whites: In a clean, dry bowl, beat egg whites on medium speed until soft peaks form.
- Add sugar gradually: Slowly add sugar, one tablespoon at a time, beating until stiff, glossy peaks form and the sugar is fully dissolved.
- Stabilize the meringue: Gently fold in cornstarch, vinegar (or lemon juice), and vanilla extract.
- Pipe the pavlovas: Transfer the meringue to a piping bag fitted with a round tip. Pipe small, medium, and large rounds onto prepared baking sheets to create different “tree tiers.”
- Bake low and slow: Bake for 90 minutes, then turn off the oven and allow pavlovas to cool completely inside with the door slightly ajar.
- Prepare whipped cream: Beat heavy cream with powdered sugar until soft peaks form.
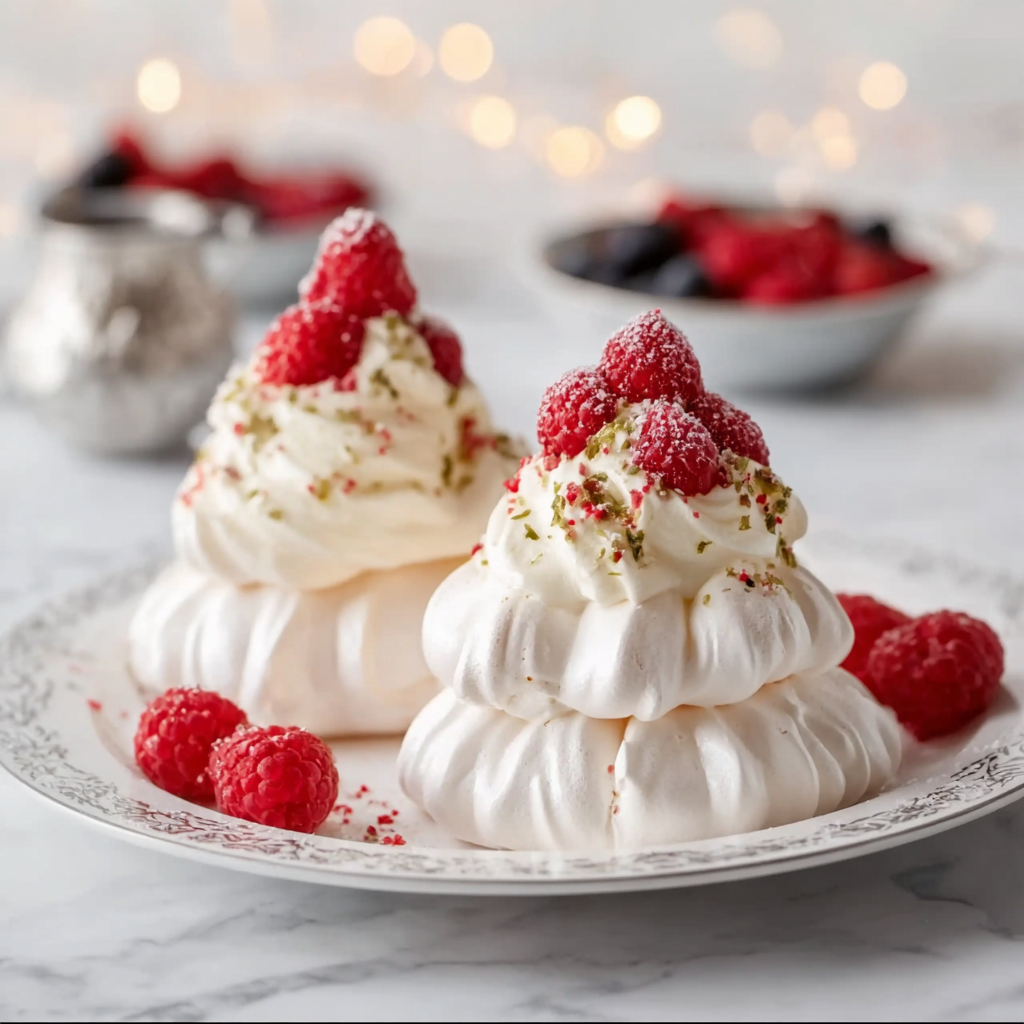
- Assemble the trees: Stack pavlova rounds from largest to smallest, using whipped cream as “glue” between layers.
- Decorate: Add berries, rosemary sprigs, and dust lightly with powdered sugar for a snowy finish.
- Serve immediately: Enjoy fresh for the best texture.
Expert Tips for Perfect Pavlova Every Time
- Use room-temperature egg whites: They whip more easily and create better volume.
- Make sure bowls are grease-free: Even a small amount of fat can prevent egg whites from whipping properly.
- Add sugar slowly: This ensures a smooth, stable meringue.
- Don’t rush baking: Low heat prevents browning and cracking.
- Assemble just before serving: To keep pavlovas crisp.
Festive Variations
- Chocolate Pavlova Trees: Add cocoa powder to the meringue and decorate with chocolate shavings.
- Citrus Winter Trees: Top with orange segments and candied lemon peel.
- Berry Bliss: Use mixed berries and berry coulis drizzled over the top.
- Peppermint Snow Trees: Add crushed peppermint candies for a minty crunch.
Serving Suggestions
Serve Festive Mini Pavlova Christmas Trees on a tiered dessert stand for maximum visual impact. Pair them with hot chocolate, mulled wine, or champagne for an elegant holiday pairing. These also make a beautiful centerpiece for dessert tables at Christmas parties or winter weddings.
Fun Holiday Pavlova Facts
- Pavlova is traditionally served at celebrations due to its light texture.
- The snowy white appearance makes it especially popular during winter holidays.
- Mini pavlovas are easier to bake evenly than one large pavlova.
Storage & Make-Ahead Tips
- Meringues: Store in an airtight container at room temperature for up to 3 days.
- Whipped cream: Prepare fresh for best results.
- Assembled trees: Best enjoyed the same day
Festive Mini Pavlova Christmas Trees
Light and airy mini pavlovas stacked into festive Christmas tree shapes, decorated with whipped cream, berries, and snowy powdered sugar.
Ingredients
Equipment
Method
- Preheat oven to 225°F (110°C) and line baking sheets with parchment paper.
- Beat egg whites until soft peaks form, then gradually add sugar until stiff peaks form.
- Fold in cornstarch, vinegar, and vanilla gently.
- Pipe meringue into small, medium, and large rounds.
- Bake for 90 minutes, then cool completely in oven.
- Whip cream with powdered sugar until soft peaks form.
- Assemble pavlova trees using whipped cream between layers and decorate.
Notes
Assemble just before serving for best texture.


