The Best Fluffy Pancakes recipe you will fall in love with. Full of tips and tricks to help you make the best pancakes.
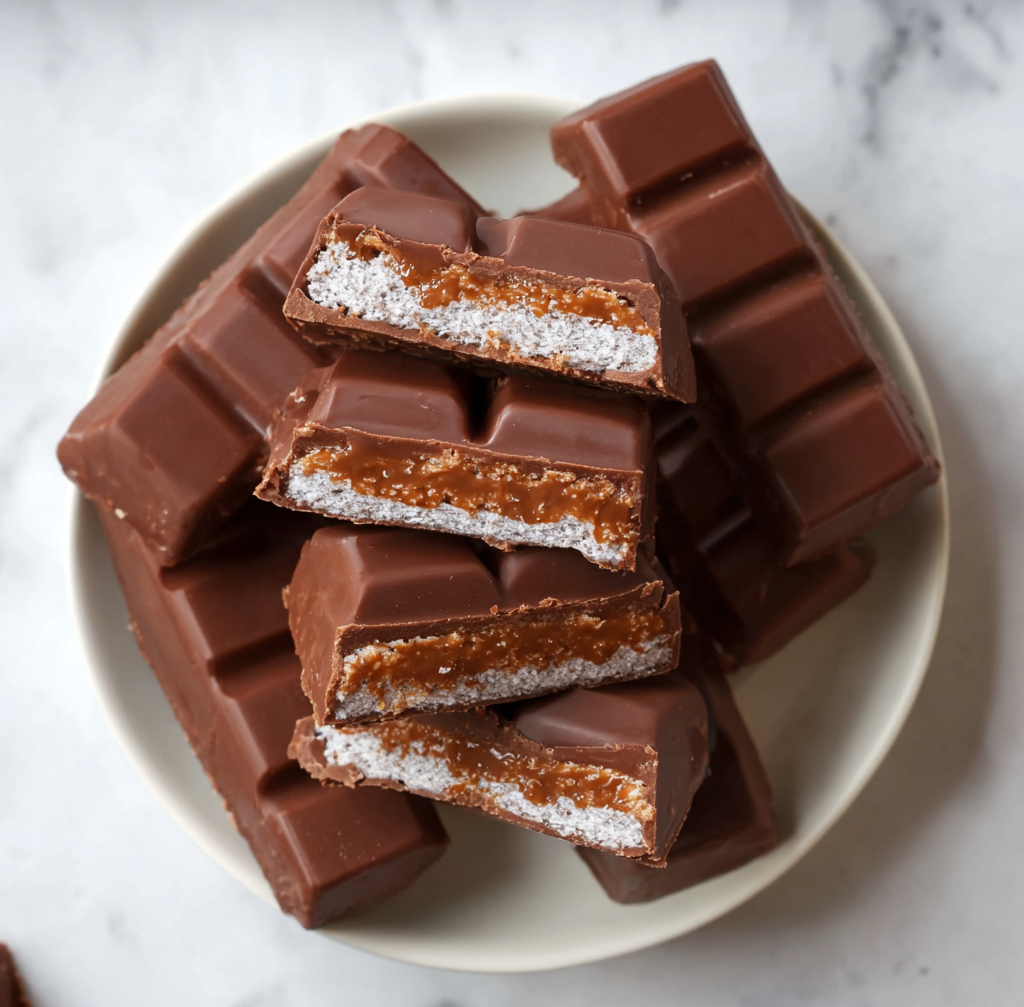
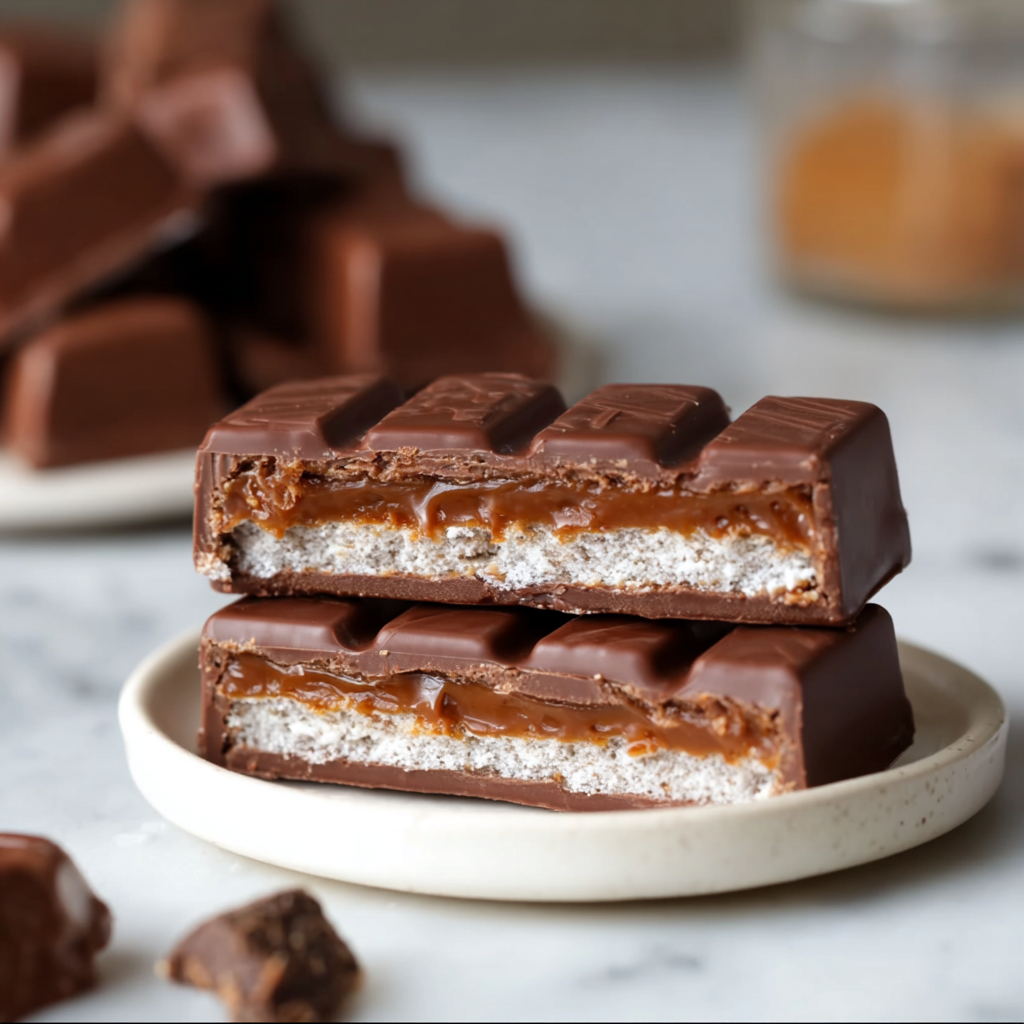
If you’re a chocolate lover craving that iconic crispy wafer crunch wrapped in smooth, velvety chocolate, but you need a gluten-free option, look no further than these Homemade Classic Chocolate Kit Kat Bars. This gluten-free twist on the beloved candy bar is not only easy to make at home but also incredibly satisfying. Whether you’re avoiding gluten for health reasons, dietary preferences, or just experimenting in the kitchen, this recipe delivers the perfect balance of textures and flavors without compromising on taste. Imagine biting into layers of light, crispy gluten-free wafers sandwiched between rich chocolate fillings, all coated in a glossy chocolate exterior – it’s a homemade treat that rivals the store-bought version.
In today’s fast-paced world, more people are turning to homemade alternatives for their favorite snacks. With rising awareness about gluten sensitivities, celiac disease, and the benefits of cleaner eating, recipes like these gluten-free Kit Kat bars are gaining popularity. According to recent studies from the Celiac Disease Foundation, approximately 1 in 100 people worldwide have celiac disease, and many more choose gluten-free lifestyles for better digestion and overall wellness. By making your own homemade Kit Kat bars, you control the ingredients, ensuring they’re free from artificial additives, preservatives, and hidden gluten sources. Plus, it’s a fun project for families, date nights, or even as a thoughtful gift for chocolate enthusiasts.
What makes this recipe stand out? It’s completely original, crafted with simple, accessible gluten-free ingredients that you likely already have in your pantry or can find at any grocery store. We’ll use a blend of gluten-free flours to create those signature wafer layers, melted chocolate for the filling and coating, and a touch of vanilla for depth. The result is a bar that’s crispy, chocolatey, and utterly addictive. These bars are perfect for parties, holidays, or just a midday pick-me-up. And the best part? They’re customizable – add nuts, sea salt, or even peanut butter for variations that suit your taste.
Let’s dive into the history of Kit Kat bars to appreciate why recreating them at home is so rewarding. The original Kit Kat was invented in 1935 by Rowntree’s of York, England, and later acquired by Nestlé. It was marketed as a “chocolate crisp” with the famous slogan “Have a break, have a Kit Kat.” The bar’s unique structure – multiple layers of wafer enrobed in chocolate – quickly made it a global sensation. However, traditional Kit Kats contain wheat-based wafers, making them off-limits for those with gluten intolerances. That’s where this gluten-free version shines. By swapping in rice flour, almond flour, and other gluten-free staples, we maintain the crunch while making it inclusive for everyone.
Beyond the nostalgia, making homemade gluten-free Kit Kat bars has practical benefits. Store-bought gluten-free candies can be expensive and hard to find, often costing 50% more than their gluten-containing counterparts. Homemade versions save money – this recipe yields about 24 bars for under $10 in ingredients. They’re also fresher, with no need for stabilizers or emulsifiers. From an environmental standpoint, DIY recipes reduce packaging waste, aligning with sustainable living trends. If you’re new to gluten-free baking, don’t worry; this recipe is beginner-friendly with step-by-step guidance.
Now, let’s talk about the science behind the perfect crunch. The key to Kit Kat’s appeal is the wafer’s texture, achieved through a combination of starches and fats that create air pockets during baking. In our gluten-free adaptation, we use a mix of rice flour for crispiness and almond flour for nutty undertones and structure. Baking powder helps with lift, ensuring the wafers aren’t dense. The chocolate coating, made from high-quality dark or milk chocolate (your choice), provides a snap when you break the bar – just like the real thing. Tempering the chocolate is optional but recommended for that professional shine.
Preparing these bars involves three main stages: baking the wafers, assembling the layers with chocolate filling, and coating the entire bar. It’s a process that takes about 30 minutes of active prep time, plus chilling, making it ideal for weekend baking. The aroma of baking wafers and melting chocolate will fill your kitchen, creating an irresistible anticipation. Once done, these bars store well in the fridge for up to a week or can be frozen for longer enjoyment.
Why Choose Gluten-Free?
Gluten-free diets aren’t just a fad; they’re essential for millions. Gluten, a protein found in wheat, barley, and rye, can cause inflammation, digestive issues, and fatigue in sensitive individuals. Switching to gluten-free alternatives like these homemade Kit Kat bars can improve energy levels, skin health, and gut function. Even if you’re not gluten-intolerant, reducing gluten intake can lead to lighter, more vibrant meals. This recipe uses certified gluten-free ingredients to avoid cross-contamination, ensuring safety for those with severe allergies.
Moreover, gluten-free baking has evolved tremendously. Early gluten-free products were often gritty or bland, but modern flours like those from Bob’s Red Mill or King Arthur offer excellent results. In this recipe, we’ll specify brands where helpful, but feel free to use your favorites. The end product? Bars that are so delicious, no one will guess they’re gluten-free.
Ingredients
To make these Homemade Classic Chocolate Kit Kat Bars, you’ll need the following ingredients. This recipe serves 24 bars and uses everyday pantry staples.
- 1 cup rice flour (gluten-free)
- 1/2 cup almond flour (gluten-free)
- 1/4 cup tapioca starch
- 1/2 teaspoon baking powder (gluten-free)
- 1/4 teaspoon salt
- 1/4 cup unsalted butter, softened
- 1/4 cup granulated sugar
- 1 large egg
- 1 teaspoon vanilla extract
- 2 tablespoons milk (dairy or plant-based)
- 12 ounces semi-sweet chocolate chips (for filling and coating, divided)
- 1 tablespoon coconut oil (optional, for smoother chocolate)
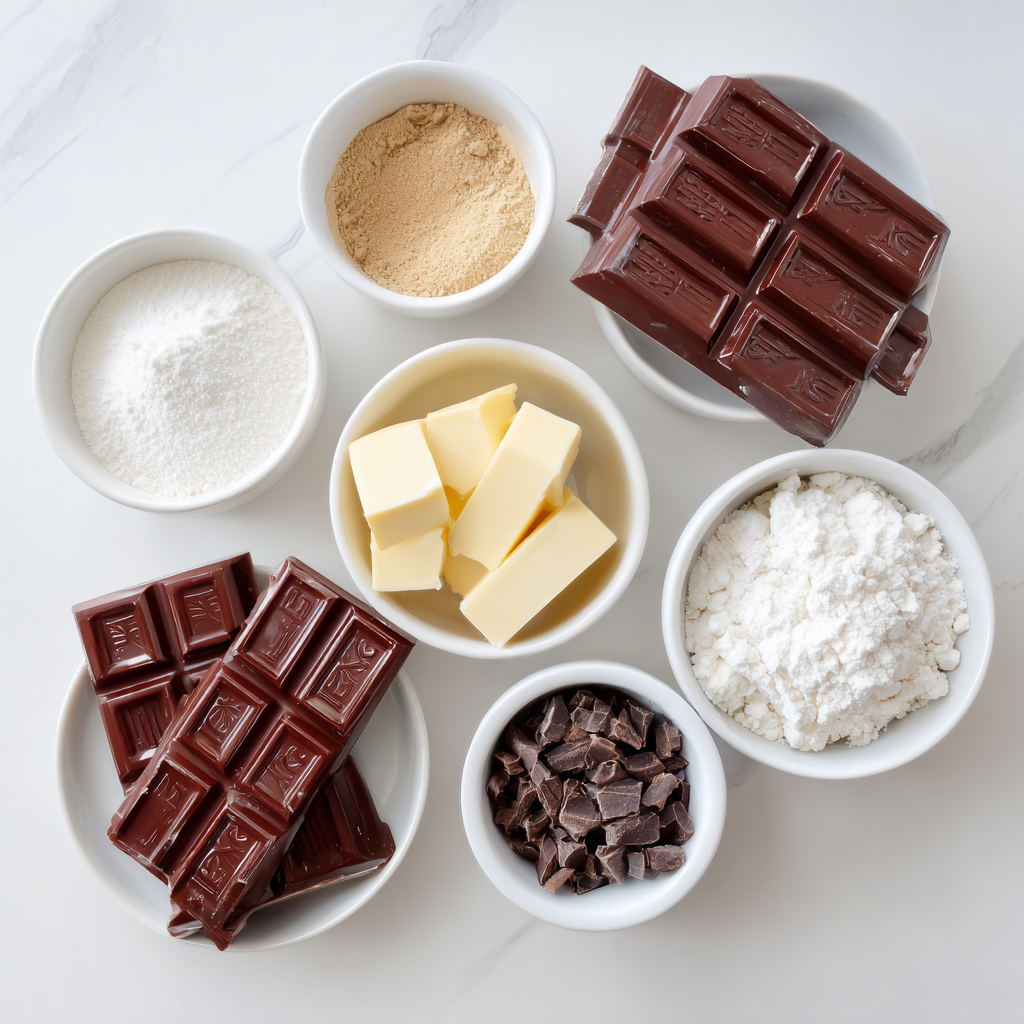
These quantities are precise for the best texture. Rice flour provides crispiness, almond flour adds flavor, and tapioca starch binds everything without gluten.
Instructions
Follow these numbered steps for foolproof results. Preheat your oven to 350°F (175°C) before starting.
- In a medium mixing bowl, whisk together the rice flour, almond flour, tapioca starch, baking powder, and salt. Set aside.
- In a large bowl, cream the softened butter and granulated sugar using a hand mixer or stand mixer until light and fluffy, about 2 minutes.
- Beat in the egg and vanilla extract until fully incorporated.
- Gradually add the dry ingredients to the wet mixture, alternating with the milk, until a soft dough forms. It should be pliable but not sticky. If needed, add a teaspoon more milk.
- Divide the dough into three equal portions. Roll each portion between two sheets of parchment paper into a thin rectangle, about 1/8 inch thick.
- Transfer the rolled dough (still on parchment) to baking sheets. Bake for 8-10 minutes until lightly golden and crisp. Cool completely on a wire rack.
- While the wafers cool, melt 6 ounces of chocolate chips with half the coconut oil (if using) in a microwave-safe bowl in 30-second intervals, stirring until smooth.
- Spread a thin layer of melted chocolate on one wafer sheet. Top with another wafer, pressing gently. Repeat with more chocolate and the third wafer.
- Chill the stacked wafers in the fridge for 15 minutes to set.
- Cut the stacked sheet into thin bars, about 1/2 inch wide and 4 inches long, mimicking Kit Kat shapes.
- Melt the remaining 6 ounces of chocolate with the rest of the coconut oil.
- Dip each bar into the melted chocolate, coating fully. Place on a wire rack over parchment to catch drips.
- Chill until the chocolate sets, about 20 minutes. Enjoy!
These steps ensure even layers and a professional finish. Total time is around 60 minutes, including chilling.
Tips for Success
- Use high-quality chocolate for the best flavor; dark chocolate adds sophistication.
- If the dough is too crumbly, chill it for 10 minutes before rolling.
- For extra crunch, add a pinch of espresso powder to the chocolate.
- Store in an airtight container in the fridge to maintain crispiness.
- Temper the chocolate by seeding with unmelted chips for a shiny coating.
Variations
Get creative with these ideas:
- Peanut Butter Kit Kat: Add a layer of peanut butter between wafers.
- Dark Chocolate Mint: Mix peppermint extract into the chocolate.
- Nutty Crunch: Sprinkle chopped almonds on top before chilling.
- White Chocolate: Swap semi-sweet for white chocolate for a sweeter twist.
- Vegan Version: Use dairy-free chocolate and plant-based butter/milk.
These variations keep the recipe exciting for repeat makes.
Serving Suggestions
Serve these bars as a dessert after dinner, paired with coffee or tea. They’re great for Halloween treats, Christmas cookie exchanges, or birthday parties. Cut into smaller pieces for a charcuterie board with fruits and cheeses. For a fun twist, crumble them over ice cream for a sundae topping.
Fun Facts and Cultural Context
Did you know Kit Kat is Japan’s favorite candy, with over 300 flavors like green tea and wasabi? In the U.S., it’s a staple in vending machines and movie theaters. Making them gluten-free honors the bar’s universal appeal while adapting to modern dietary needs. Culturally, chocolate treats like this evoke childhood memories and comfort, making homemade versions a heartfelt way to share joy.
Nutritional Benefits
Each bar is a moderate indulgence with about 150 calories. Almond flour adds healthy fats and protein, while dark chocolate provides antioxidants. It’s lower in sugar than commercial bars, promoting mindful snacking.
Frequently Asked Questions
Q: Can I make these ahead? A: Yes, they freeze well for up to a month. Q: Are they truly gluten-free? A: Absolutely, if using certified ingredients. Q: How do I fix runny chocolate? A: Add more melted chocolate to thicken.
This recipe embodies the joy of homemade baking. With its crispy wafers and rich chocolate, these gluten-free Kit Kat bars will become a staple in your repertoire. Experiment, enjoy, and share the love!
Homemade Classic Chocolate Kit Kat Bars
Crispy gluten-free wafer layers coated in rich chocolate for a delicious homemade treat.
Ingredients
Equipment
Method
- Preheat oven to 350°F (175°C). Line baking sheets with parchment paper.
- Whisk rice flour, almond flour, tapioca starch, baking powder, and salt in a bowl.
- Cream butter and sugar until fluffy. Add egg and vanilla.
- Mix in dry ingredients alternating with milk to form dough.
- Divide and roll dough thin between parchment.
- Bake 8-10 minutes until golden. Cool on wire rack.
- Melt 6 oz chocolate with half coconut oil.
- Layer wafers with chocolate, chill 15 minutes.
- Cut into bars.
- Melt remaining chocolate, dip bars, chill until set.
Notes
Store in fridge for crispiness.


