The Best Fluffy Pancakes recipe you will fall in love with. Full of tips and tricks to help you make the best pancakes.
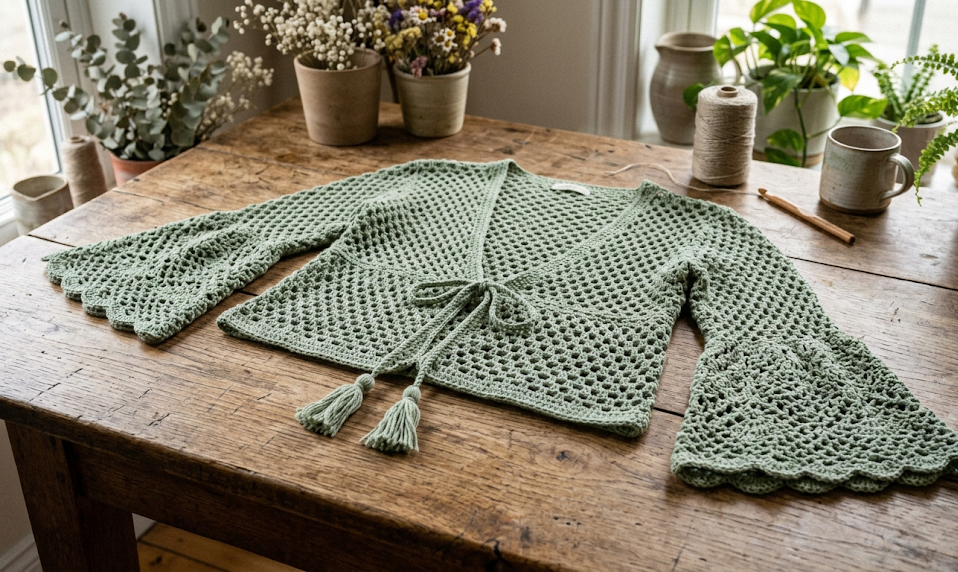
If you’ve been searching for a crochet project that feels magical, wearable, and effortlessly stylish, your search ends here. The Crochet Fairy Cardigan is one of the most enchanting garments you can make with a hook and some yarn — and best of all, this free pattern walks you through every single step. Whether you’re a confident beginner or an intermediate crocheter looking for a rewarding make, this airy, lace-mesh cardigan is going to become your most-loved project of the season.
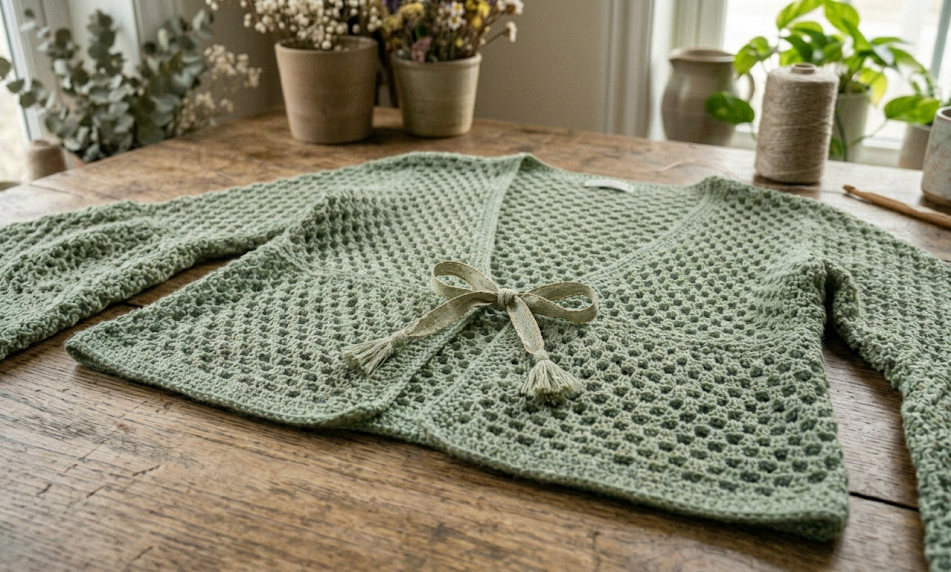
With its open-stitch mesh body, delicate tie-front closure, and dreamy bell sleeves, the Fairy Cardigan channels cottagecore and boho-fairy aesthetics all at once. Wear it over a sundress, layer it above a tank top and skirt, or drape it as a beach cover-up. However you style it, this piece will have people asking, “Did you make that yourself?”
Yes. Yes, you did.
|
Difficulty
Beginner–Intermediate
|
Time
12–18 Hours
|
Hook Size
5.0mm (US H/8)
|
Yarn Weight
DK Weight (#3)
|
Finished Size
One Size (S–L)
|
Why You’ll Love This Crochet Fairy Cardigan Pattern
- Beginner-friendly construction — worked flat in simple rows, no complex shaping
- Quick to stitch up — the open mesh moves fast on your hook
- Endlessly wearable — suits casual and festival looks alike
- Completely free — because beautiful crochet should be accessible to everyone
- Customizable — easy to adjust for size, yarn color, or sleeve length
Materials You’ll Need
Before you begin, gather your supplies:
- Yarn: Approximately 400–600g of DK weight yarn (sage green shown; any color works beautifully)
- Hook Size: 5.0mm (US H/8) crochet hook
- Scissors
- Yarn needle for weaving in ends
- Stitch markers (optional but helpful)
- Measuring tape
Yarn Recommendations: Look for a plant-based or plant-blend DK yarn for the best drape — cotton, bamboo, or linen blends create that gorgeous airy fall. Pure acrylic DK also works well for a more affordable option.
Finished Size
This pattern is written for a one-size-fits-most design, approximately fitting sizes S–L.
- Width (flat): Approximately 60–65 cm (24–26 inches)
- Length: Approximately 55–60 cm (22–24 inches)
- Sleeve Length: Approximately 45 cm (18 inches) with bell flare
To adjust sizing, simply add or subtract foundation chains in multiples of 3.
Gauge
18 stitches × 10 rows = 10 cm (4 inches) in the mesh pattern using a 5.0mm hook.
Gauge is approximate for this garment — a slightly looser or tighter tension will mainly affect drape and sizing rather than structural integrity.
Abbreviations
| Abbreviation | Meaning |
|---|---|
| ch | chain |
| sl st | slip stitch |
| sc | single crochet |
| dc | double crochet |
| ch-sp | chain space |
| sk | skip |
| rep | repeat |
| RS | right side |
| WS | wrong side |
| st(s) | stitch(es) |
| sp | space |
Pattern Instructions
Part 1: The Back Panel
The back panel is worked flat from bottom to top.
Foundation: Ch 110 (or adjust in multiples of 3 for sizing).
Row 1 (RS): Dc in 4th ch from hook, ch 1, sk 1 ch, dc in next ch; rep from * to end. Turn. (~36 ch-sps)
Row 2 (WS): Ch 3, dc in ch-sp, ch 1; rep from * across, ending dc in top of turning ch. Turn.
Rows 3–40: Rep Row 2 until piece measures approximately 55 cm from foundation, or desired length.
Fasten off. Weave in ends.
Part 2: The Front Panels (Make 2)
Each front panel is half the width of the back.
Foundation: Ch 56 (or half your back foundation chain plus 1).
Row 1 (RS): Dc in 4th ch from hook, ch 1, sk 1, dc in next ch; rep across. Turn. (~18 ch-sps)
Rows 2–40: Work exactly as Back Panel rows.
At the top inner edge of each front panel, leave approximately 15 cm (6 inches) unwrapped — this creates the V-neckline when assembled.
Fasten off. Weave in ends.
Part 3: The Bell Sleeves (Make 2)
The sleeves are worked from the cuff upward, increasing gradually for the bell shape.
Cuff Foundation: Ch 35.
Row 1: Dc in 4th ch from hook, ch 1, sk 1, dc in next; rep across. Turn. (~11 ch-sps)
Rows 2–5: Work even in mesh pattern (no increases). Turn after each row.
Increase Rows 6–20: At the beginning AND end of each row, work (dc, ch 1, dc) into the first and last ch-sp to create a gentle bell flare. (2 sts increased per row)
Rows 21–30: Work even in mesh pattern on all stitches. This creates the wide bell portion.
You should now have approximately 41+ ch-sps across the top edge of the sleeve.
Fasten off. Weave in ends.
Part 4: Tie-Front Closure
Ch 80 (or desired length for bow tie).
Row 1: Sc in 2nd ch from hook, sc across. Fasten off.
Make 2 ties total. These will be attached at the center-top of each front panel.
Assembly Instructions
Lay your pieces flat on a clean surface before sewing anything together.
Step 1 — Join Shoulder Seams: Align the top edges of the front panels to the top corners of the back panel. Using a yarn needle and mattress stitch (or slip stitch seam), join approximately 15 cm (6 inches) on each side, leaving the center open for the neckline.
Step 2 — Set In Sleeves: Fold each sleeve in half lengthwise. The top folded edge is your sleeve cap. Pin the center of the sleeve cap to the shoulder seam, then sew the sleeve into the armhole opening. Repeat for the second sleeve.
Step 3 — Sew Side and Sleeve Seams: Starting at the cuff, sew the underarm seam closed, continuing down the body side seam. Leave the bottom 8–10 cm open at the hem for a relaxed fit.
Step 4 — Attach Ties: Sew one tie to the RS of each front panel at the center neckline point. Tie into a bow to wear.
Step 5 — Border (Optional): Work 1 round of sc evenly around the entire outer edge of the cardigan for a clean finish. This is optional but gives a polished look.
Beginner Tips
On tension: The mesh stitch is very forgiving. If your tension varies slightly row to row, it will still look beautiful once blocked. Don’t stress about perfection.
On blocking: This cardigan benefits enormously from wet blocking after assembly. Soak in cool water, gently press out excess moisture in a towel, then lay flat to dry in your desired shape. The drape will improve dramatically.
On yarn substitution: If you want a warmer cardigan, swap DK yarn for worsted weight and go up to a 5.5–6mm hook. The stitch structure remains the same.
On counting stitches: Place a stitch marker in the first and last dc of every row until you’re confident in the pattern. It’s easy to accidentally skip the turning chain.
On assembly: If hand-sewing intimidates you, use a slip-stitch seam with your crochet hook instead — it’s faster and looks beautiful on the inside.
Pattern Variations
Color Options: This pattern shines in earthy, muted tones — sage green, dusty rose, terracotta, cream, or slate blue all give a beautiful cottagecore feel. For a bold statement, try a jewel tone like emerald or deep burgundy.
Cropped Version: Stop the back and front panels at 35–40 cm for a cropped fairy cardigan that’s perfect for festival season.
Long Cardigan: Continue the back and front panels to 80 cm for a sweeping maxi-length version.
No-Sleeve Version: Skip the sleeves entirely and finish the armhole edges with a round of sc for a breezy open-side vest.
Thicker Yarn: Use bulky weight yarn and a 6–7mm hook for a chunkier, cozier version perfect for autumn.
Frequently Asked Questions
Is this pattern suitable for beginners? Yes! If you can chain, double crochet, and sew simple seams, you can make this cardigan. The mesh stitch is repetitive in the best possible way.
How long will it take to make? Most crocheters finish this cardigan in 12–18 hours of stitching time. Spread across a few weekends, it’s very achievable.
Can I sell items made from this pattern? Yes — you’re welcome to sell finished items made from this free pattern. Please credit FoodieRipple as the pattern source.
Save This Pattern for Later!
If you loved this Crochet Fairy Cardigan free pattern, please save it to your Pinterest boards so you can find it again — and share it with a fellow crocheter who would love it!
📌 Pin this pattern using #FoodieRippleCrochet and tag us when you share your finished make. We absolutely love seeing your creations. Every color, every variation, every beautiful handmade cardigan — we want to see them all.
Happy crocheting! 🧶✨


