The Best Fluffy Pancakes recipe you will fall in love with. Full of tips and tricks to help you make the best pancakes.
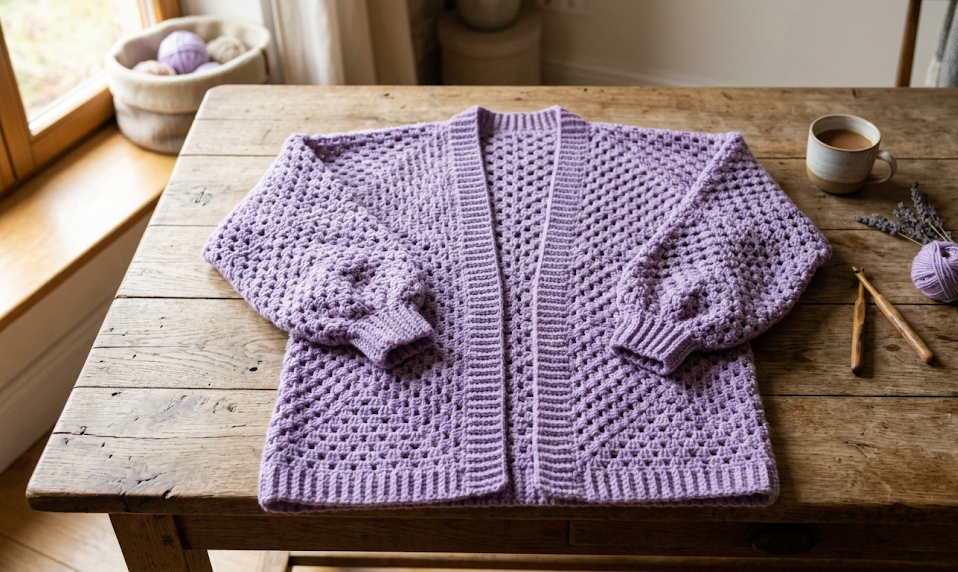
If you’ve been searching for the perfect summer cardigan crochet pattern, look no further. This Light Weight Granny Stitch Cardigan is everything you want in a warm-weather layer — airy, stylish, and surprisingly quick to make. With its open granny stitch mesh and relaxed silhouette, this cardigan works beautifully over a sundress, breezy blouse, or casual jeans-and-tee outfit. Best of all? It’s a free crochet pattern that works up fast, making it one of the most satisfying projects for intermediate crocheters.
Whether you’re new to garment making or you’ve been crocheting for years, this step-by-step granny stitch cardigan tutorial will walk you through every section of the project — from the back panel to the sleeves, assembly, and finishing. Let’s dive in!
|
Difficulty
Intermediate
|
Time
15–20 Hours
|
Hook Size
5.0mm (H/8)
|
Yarn Weight
DK / #3
|
Finished Size
One Size S–XL
|
Why You’ll Love This Granny Stitch Cardigan Pattern
The granny stitch — also known as the granny cluster stitch — creates a beautiful open mesh fabric that’s lightweight and breathable. That makes this cardigan perfect for spring, summer, and even layering into fall. The lavender colorway shown here is especially popular, but this pattern works in any color you choose.
This is a top-down, panel-based construction cardigan. You’ll crochet the back, two front panels, and two sleeves separately, then seam them together. It’s a beginner-friendly approach to garment construction that lets you check your gauge as you go and make size adjustments easily.
Materials List
- Yarn: DK weight / Light Worsted (#3), approximately 900–1100 yards total (shown in lavender/light purple)
- Hook: 5.0mm (US H/8)
- Scissors
- Yarn needle (for weaving in ends and seaming)
- Stitch markers (optional, helpful for marking panel edges)
- Measuring tape
Yarn Recommendation: Look for a smooth cotton-blend or acrylic DK yarn with good stitch definition. A yarn with a slight sheen adds beautiful dimension to the granny stitch clusters.
Gauge
- 3 granny clusters x 4 rows = 4 inches in granny stitch pattern
- Always check your gauge before starting and adjust hook size if needed.
Finished Size
- One Size Fits Most: Designed to fit sizes S–XL with a relaxed, oversized fit
- Back Panel Width: approx. 22 inches
- Cardigan Length: approx. 32–34 inches (adjustable)
- Sleeve Length: approx. 20–22 inches
Abbreviations
| Abbreviation | Meaning |
|---|---|
| ch | chain |
| sl st | slip stitch |
| sc | single crochet |
| dc | double crochet |
| sk | skip |
| sp | space |
| rep | repeat |
| RS | right side |
| WS | wrong side |
| GC | granny cluster (3 dc worked into same space) |
Understanding the Granny Stitch
The granny stitch used in this pattern is a row-by-row granny cluster stitch, not traditional granny squares. Each “cluster” is made of 3 double crochets worked into the same chain space, separated by a chain-2 space. This creates a uniform open mesh fabric that gives the cardigan its signature lacy look.
Granny Stitch Pattern (worked flat):
- Foundation chain: Multiple of 3 + 4
- Row 1: 3 dc in 4th ch from hook, ch 2, sk 2 ch, 3 dc in next ch, rep from * to * to end, turn.
- Row 2: Ch 3, 3 dc in next ch-2 sp, ch 2, rep from * to * across, 1 dc in last st, turn.
- Rep Row 2 for pattern throughout.
Full Pattern Instructions
Part 1: Back Panel
Foundation: Ch 67 (or adjust for your gauge — aim for approx. 22 inches wide).
Row 1: 3 dc in 4th ch from hook, ch 2, sk 2 ch, 3 dc in next ch, rep across. Turn. — Approximately 21 clusters.
Rows 2–60: Rep Row 2 of granny stitch pattern. Continue until back panel measures approximately 32–34 inches in length.
Fasten off and weave in ends. Block lightly.
Part 2: Front Panels (Make 2)
Foundation: Ch 34 (approximately 11 inches wide for each front panel).
Row 1: 3 dc in 4th ch from hook, ch 2, sk 2 ch, 3 dc in next ch, rep across. Turn. — Approximately 10 clusters.
Rows 2–60: Rep Row 2 of granny stitch pattern. Continue until panel matches length of back panel (approx. 32–34 inches).
Fasten off and weave in ends.
Tip: Make both front panels at the same time if possible, alternating rows between them — this ensures they stay perfectly even in length.
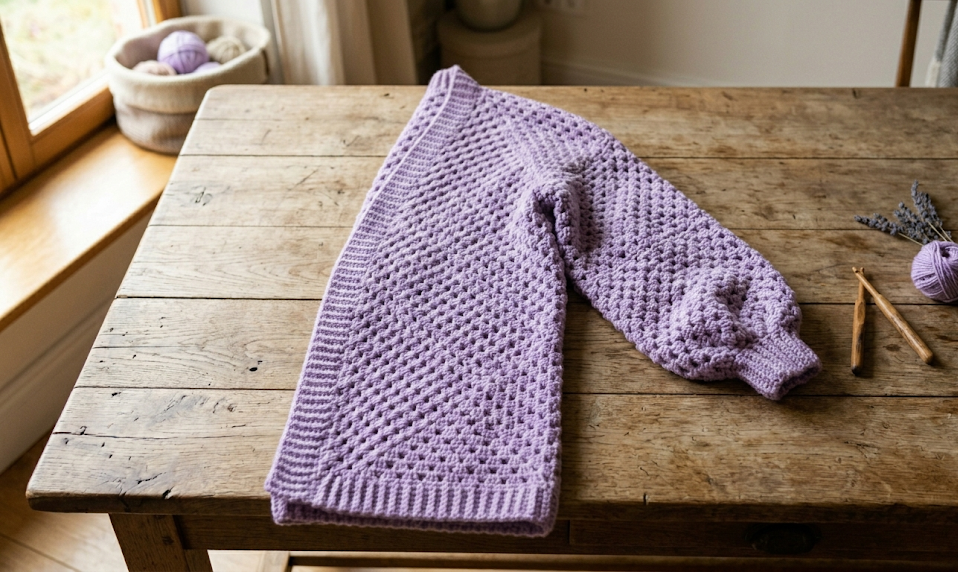
Part 3: Sleeves (Make 2)
Foundation: Ch 43 (approximately 14 inches wide, which will gather slightly at the shoulder seam for the blouson effect).
Row 1: 3 dc in 4th ch from hook, ch 2, sk 2 ch, 3 dc in next ch, rep across. Turn. — Approximately 13 clusters.
Rows 2–45: Rep Row 2 of granny stitch pattern. Continue until sleeve measures approximately 18–20 inches.
Sleeve Cuff (optional): Work 2 rows of sc across the bottom edge for a clean finish.
Fasten off and weave in ends.
Part 4: Assembly
Step 1 – Shoulder Seams: Lay the back panel flat. Place the right front panel on top with RS together, aligning the top 8 inches of the side edges. Using a yarn needle and whip stitch or sl st seam, join the shoulder seam. Repeat for the left front panel.
Step 2 – Sleeve Attachment: With RS together, center the top edge of each sleeve along the armhole opening (the unsewn portion between shoulder seam and underarm). Use a yarn needle to whip stitch or sl st each sleeve in place. Leave approx. 14–16 inches open for the armhole depth.
Step 3 – Side and Sleeve Seams: Fold the cardigan so front and back are RS together. Beginning at the cuff, seam up the sleeve, then continue down the side body seam to the hem. Repeat on the other side.
Turn right side out.
Part 5: Finishing
Bottom Hem Edge (optional): Work 1 round of sc around the entire bottom hem for a polished look.
Front Bands: Work 1–2 rows of sc up each front opening edge to add structure and prevent curling.
Neckline: Work 1 row of sc around the neckline, joining at the shoulder points.
Weave in all ends. Block the finished cardigan by lightly misting with water and laying flat to dry, pinning to measurements if desired.
Beginner Tips for Crochet Garments
- Always swatch first. Gauge matters much more in garments than in accessories. Even a small gauge difference adds up significantly over 30+ inches.
- Count your clusters at the end of every row. It’s easy to accidentally add or drop a cluster in the mesh. Stitch markers on each side help keep count.
- Block before assembling. Blocking each panel flat before seaming makes assembly cleaner and easier.
- Take breaks between rows. Repetitive stitch patterns can cause hand fatigue — especially over long rows. Stretch your hands regularly.
- Use a contrasting yarn for seaming during practice runs so you can easily spot and remove seams if needed.
Pattern Variations
- Color-Block Version: Use two or three complementary colors, switching at the waist or sleeve for a bold, modern look.
- Cropped Cardigan: Work only 40 rows on the body panels for a trendy cropped silhouette that hits at the waist.
- V-Neck Variation: Angle the front panels by decreasing 1 cluster per row for the top 6 inches to create an open V-neckline.
- Pockets: Add simple patch pockets by crocheting two 5×5 inch rectangles in the same granny stitch and sewing them to the front panels at hip height.
- Striped Sleeves: Work the sleeves in alternating rows of white and lavender for a playful boho detail.
Frequently Asked Questions
Can a beginner make this cardigan? This pattern is rated intermediate because of the garment assembly, but if you’re comfortable with double crochet and seaming, you can absolutely tackle it! Take it one panel at a time.
How much yarn do I need for a larger size? For sizes XL–2X, we recommend purchasing an extra 200 yards (approximately 2 extra skeins of DK weight yarn).
Can I use worsted weight yarn instead? Yes! If you use worsted (#4) yarn, go up to a 6.0mm (J/10) hook, but be aware the cardigan will be slightly heavier and less airy than shown.
Save This Pattern for Later!
Love this Light Weight Granny Stitch Cardigan pattern? Save it to your crochet boards on Pinterest so you can find it again — and share it with your crochet friends! Tag your finished makes with #FoodieRippleCrochet so we can see your gorgeous creations. We’d love to feature your version on our page!
Happy hooking! 🧶


