The Best Fluffy Pancakes recipe you will fall in love with. Full of tips and tricks to help you make the best pancakes.
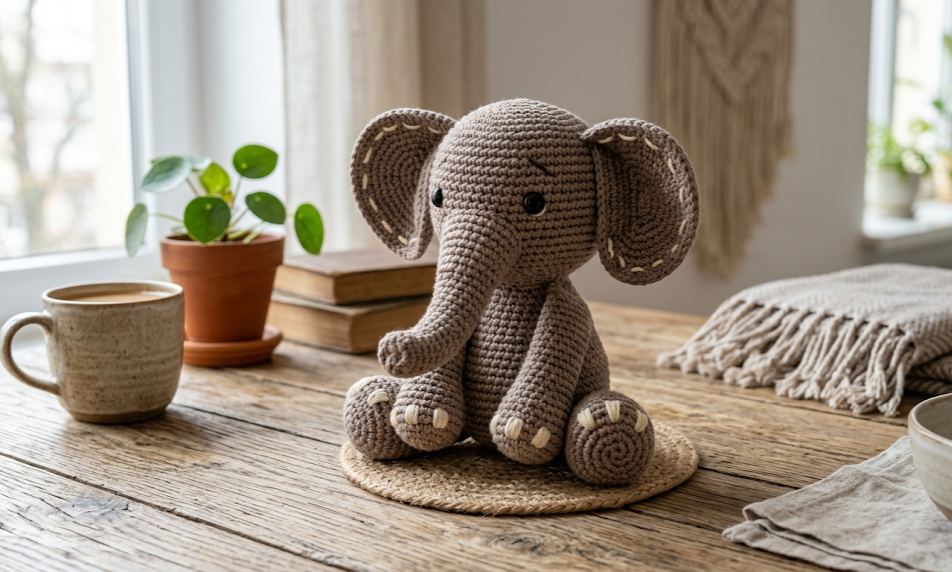
Welcome to your next favorite crafting adventure! There is something unconditionally magical about creating a handmade plush toy, and today we are diving into the delightful world of safari-inspired crafts. Meet Bubba the Elephant, a charmingly sweet amigurumi companion designed to bring warmth, comfort, and a touch of whimsical wonder to anyone who holds him. With his oversized, expressive floppy ears, a perfectly curved trunk, and endearing embroidered details, Bubba is the ultimate keepsake gift. Whether you are looking to crochet a stunning piece of nursery decor for an upcoming baby shower, build a durable heirloom toy for a toddler, or simply add a cozy, boho-inspired accent to your living space, this comprehensive pattern delivers everything you need.
Crafting amigurumi can sometimes feel intimidating, but this project strikes the ideal balance between simplicity and engaging structural design. By utilizing tight, clean single crochet stitches and intentional shaping techniques, you will watch this adorable character come to life right before your eyes. The taupe tones give him a modern, minimalist aesthetic that fits flawlessly into any contemporary home, while his soft construction makes him perfectly huggable. Grab your hooks, settle into your favorite crafting chair, and let’s walk through every single stitch together to create your very own Bubba the Elephant!
|
Difficulty
Intermediate
|
Time
4–6 Hours
|
Hook Size
3.5 mm (E)
|
Yarn Weight
Worsted (#4)
|
Finished Size
22 cm Tall
|
Gauge Swatch Specification
Achieving an exact gauge is not strictly vital for this plush toy, but it is highly recommended to ensure your stitches are tight enough so that the polyester fiberfill stuffing does not peek through the gaps.
To test your gauge, crochet a solid square using single crochet stitches with your designated hook and yarn.
- Gauge: 20 stitches and 22 rows = 10cm by 10cm (4 inches square) over single crochet.
- Hook Size Used: 3.5 mm (US E-4)
- Yarn Weight Used: Worsted weight (Medium / Category 4)
Materials List
- Yarn: Worsted weight yarn (100% Acrylic or Cotton blend)
- Main Color (MC): Taupe/Muted Brown — Approx. 180 yards (165 meters)
- Accent Color (AC): Cream/Off-white — Approx. 10 yards (9 meters) for toenails
- Crochet Hook: 3.5 mm (US E-4) crochet hook
- Safety Eyes: One pair of 10mm black plastic safety eyes with secure backings
- Embroidery Floss: Small amount of black or dark brown embroidery thread for the eyebrows
- Stuffing: Premium polyester fiberfill stuffing (approx. 6–8 ounces)
- Notions:
- Tapestry needle (yarn needle) for assembling pieces and weaving in ends
- Fine embroidery needle for facial details
- Stitch markers (essential for tracking continuous rounds)
- Straight pins to hold pieces in place before final sewing
- Scissors
Abbreviations Table
| Abbreviation | Stitch Name / Instruction |
| ch | Chain stitch |
| st(s) | Stitch(es) |
| sc | Single crochet |
| inc | Single crochet increase (2 single crochets worked into the same stitch) |
| dec | Invisible single crochet decrease (combining 2 stitches into 1) |
| BLO | Back Loop Only |
| MR | Magic Ring |
| rem | Remaining |
| Rnd(s) | Round(s) |
| Row(s) | Row(s) |
Pattern Instructions
Head and Trunk (Worked as one continuous piece from Trunk up to Head)
Note: The trunk begins at the tip and gradually expands into the main structure of the head. Work in continuous rounds without joining. Use a stitch marker to track the first stitch of each round.
- Rnd 1: Start by making a Magic Ring (MR). A magic ring is a technique used to create a tightly closed center loop by wrapping yarn around your fingers, working stitches over the loop, and pulling the tail tight. Work 6 sc into the MR. (6 sts)
- Rnd 2: Working in the Back Loop Only (BLO) for this round to create a distinct flat edge for the bottom of the trunk. To work in BLO, insert your hook only under the rear strand of the stitch loop furthest away from you. Sc in each st around. (6 sts)
- Rnd 3–8: Sc in each st around. (6 sts)
- Rnd 9: [Sc in next 2 sts, inc in next st] repeat 2 times. (8 sts)
- Rnd 10–14: Sc in each st around. (8 sts)
- Rnd 15: [Sc in next 3 sts, inc in next st] repeat 2 times. (10 sts)
- Rnd 16–20: Sc in each st around. (10 sts)
- Rnd 21: [Sc in next 4 sts, inc in next st] repeat 2 times. (12 sts)
- Rnd 22–24: Sc in each st around. (12 sts)
- Rnd 25: [Sc in next 3 sts, inc in next st] repeat 3 times. (15 sts)
- Rnd 26: Sc in each st around. (15 sts)
- Rnd 27: [Sc in next 4 sts, inc in next st] repeat 3 times. (18 sts)
- Rnd 28: [Sc in next 2 sts, inc in next st] repeat 6 times. (24 sts)
- Rnd 29: [Sc in next 3 sts, inc in next st] repeat 6 times. (30 sts)
- Rnd 30: [Sc in next 4 sts, inc in next st] repeat 6 times. (36 sts)
- Rnd 31: [Sc in next 5 sts, inc in next st] repeat 6 times. (42 sts)
- Rnd 32: [Sc in next 6 sts, inc in next st] repeat 6 times. (48 sts)
- Rnd 33–42: Sc in each st around. (48 sts)
- Note: Insert 10mm safety eyes between Rnds 31 and 32, ensuring they sit symmetrically on either side of the trunk extension. Space them roughly 10 stitches apart. Snap the washers firmly onto the back.
- Rnd 43: [Sc in next 6 sts, dec in next st] repeat 6 times. An invisible decrease (dec) is worked by inserting the hook into the front loops only of the next two stitches, yarning over, pulling through both front loops, yarning over again, and pulling through the remaining two loops. (42 sts)
- Rnd 44: [Sc in next 5 sts, dec in next st] repeat 6 times. (36 sts)
- Rnd 45: [Sc in next 4 sts, dec in next st] repeat 6 times. (30 sts)
- Stuff the trunk firmly and begin stuffing the main head cavity with polyester fiberfill.
- Rnd 46: [Sc in next 3 sts, dec in next st] repeat 6 times. (24 sts)
- Rnd 47: [Sc in next 2 sts, dec in next st] repeat 6 times. (18 sts)
- Finish stuffing the head firmly, shaping it into a smooth, even sphere.
- Rnd 48: [Sc in next st, dec in next st] repeat 6 times. (12 sts)
- Rnd 49: Dec around 6 times. (6 sts)
- Fasten off, leaving a 15cm tail. Thread the tail through the front loops of the final 6 stitches, pull tight to seal the opening completely, and weave in your end.
Main Body
- Rnd 1: Work 6 sc into a MR. (6 sts)
- Rnd 2: Inc in every st around. (12 sts)
- Rnd 3: [Sc in next st, inc in next st] repeat 6 times. (18 sts)
- Rnd 4: [Sc in next 2 sts, inc in next st] repeat 6 times. (24 sts)
- Rnd 5: [Sc in next 3 sts, inc in next st] repeat 6 times. (30 sts)
- Rnd 6: [Sc in next 4 sts, inc in next st] repeat 6 times. (36 sts)
- Rnd 7: [Sc in next 5 sts, inc in next st] repeat 6 times. (42 sts)
- Rnd 8: [Sc in next 6 sts, inc in next st] repeat 6 times. (48 sts)
- Rnd 9–18: Sc in each st around. (48 sts)
- Rnd 19: [Sc in next 6 sts, dec in next st] repeat 6 times. (42 sts)
- Rnd 20–21: Sc in each st around. (42 sts)
- Rnd 22: [Sc in next 5 sts, dec in next st] repeat 6 times. (36 sts)
- Rnd 23–24: Sc in each st around. (36 sts)
- Rnd 25: [Sc in next 4 sts, dec in next st] repeat 6 times. (30 sts)
- Rnd 26–27: Sc in each st around. (30 sts)
- Rnd 28: [Sc in next 3 sts, dec in next st] repeat 6 times. (24 sts)
- Rnd 29–30: Sc in each st around. (24 sts)
- Fasten off, leaving an extra-long 40cm yarn tail for sewing the body securely to the finished head. Stuff the body firmly with fiberfill.
Ears (Make 2)
Ears are worked in flat rows to give them a wide, flat profile, then outlined with a single crochet border.
- Row 1: Ch 2, work 2 sc into the second ch from hook, ch 1, turn. (2 sts)
- Row 2: Inc in each of the 2 sts, ch 1, turn. (4 sts)
- Row 3: Inc in first st, sc in next 2 sts, inc in last st, ch 1, turn. (6 sts)
- Row 4: Inc in first st, sc in next 4 sts, inc in last st, ch 1, turn. (8 sts)
- Row 5: Inc in first st, sc in next 6 sts, inc in last st, ch 1, turn. (10 sts)
- Row 6: Inc in first st, sc in next 8 sts, inc in last st, ch 1, turn. (12 sts)
- Row 7: Inc in first st, sc in next 10 sts, inc in last st, ch 1, turn. (14 sts)
- Row 8: Inc in first st, sc in next 12 sts, inc in last st, ch 1, turn. (16 sts)
- Row 9–16: Sc across all 16 sts, ch 1, turn. (16 sts)
- Row 17: Dec over first 2 sts, sc across to last 2 sts, dec over last 2 sts, ch 1, turn. (14 sts)
- Row 18: Dec over first 2 sts, sc across to last 2 sts, dec over last 2 sts, ch 1, turn. (12 sts)
- Row 19: Dec over first 2 sts, sc across to last 2 sts, dec over last 2 sts, ch 1, turn. (10 sts)
- Row 20: Dec over first 2 sts, sc across to last 2 sts, dec over last 2 sts, ch 1, turn. (8 sts)
- Border: Do not turn your work. Ch 1, work a neat round of single crochet stitches evenly all the way around the raw perimeter edges of the ear to create a smooth, rounded finish. Join with a slip stitch to the first border sc.
- Fasten off, leaving a 35cm long tail for attaching the ears to the sides of Bubba’s head.
Legs (Make 4)
All four legs are made identically to ensure a balanced, sitting posture for your completed elephant.
- Rnd 1: Work 6 sc into a MR. (6 sts)
- Rnd 2: Inc in every st around. (12 sts)
- Rnd 3: [Sc in next st, inc in next st] repeat 6 times. (18 sts)
- Rnd 4: [Sc in next 2 sts, inc in next st] repeat 6 times. (24 sts)
- Rnd 5: Working in the Back Loop Only (BLO) for this entire round to create a crisp, flat sole edge for the elephant’s feet. Sc in each st around. (24 sts)
- Rnd 6–10: Sc in each st around. (24 sts)
- Rnd 11: Sc in next 6 sts, dec 6 times consecutively, sc in next 6 sts. (18 sts)
- Rnd 12–18: Sc in each st around. (18 sts)
- Rnd 19: [Sc in next 4 sts, dec in next st] repeat 3 times. (15 sts)
- Rnd 20–22: Sc in each st around. (15 sts)
- Stuff the lower half of the leg firmly with fiberfill. Leave the upper quarter lightly stuffed so it can press flat against the body.
- Rnd 23: Flatten the opening of the leg and work 7 single crochets directly through both layers simultaneously to close the top edge cleanly.
- Fasten off, leaving a 30cm tail for assembly.
Assembly Steps
- Attaching Head to Body: Position the stuffed body underneath the completed head. Ensure the front center of the body aligns perfectly with the straight line of the trunk. Using your tapestry needle and the long yarn tail left from the body, sew through both loops of Rnd 30 on the body and corresponding stitches on the base of the head. Stitch around twice to ensure a completely rigid neck joint.
- Placing the Ears: Position the ears on either side of the head. The top edge of each ear should line up horizontally with Rnd 38 of the head, roughly 5-6 stitches away from the safety eyes. Pin them down securely with straight pins. Sew the flat foundation row of each ear to the head using a strong running stitch, ensuring they sit perfectly symmetrical.
- Attaching the Back Legs: Place the elephant in a sitting position. Pin two of the closed leg tabs flat against the lower left and right rear curves of the body (around Rnds 6 to 9 from the bottom). Sew securely across the flattened edge to ensure the legs can rotate slightly but support the bottom weight.
- Attaching the Front Legs: Pin the remaining two legs to the front chest area of the body, just 2cm below the neck seam line. Space them about 1cm apart from one another so they extend forward framing the long trunk. Sew the top edge firmly to the body chest wall.
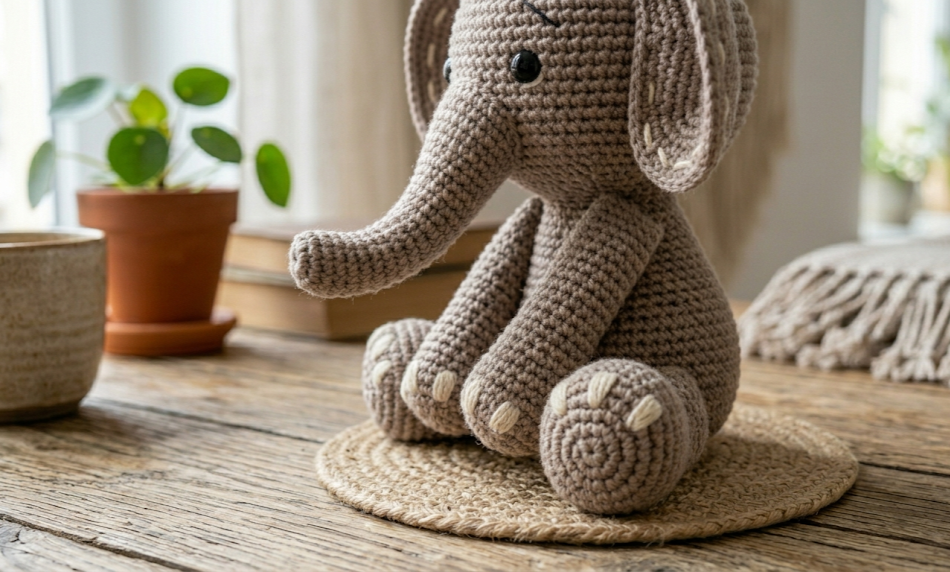
- Embroidering Toenails: Using your tapestry needle and the Cream/Off-white accent yarn (AC), stitch 3 small vertical lines onto the front edge of each of the four feet. Each toenail should span across Rnds 6 to 8 and be spaced roughly 1 stitch apart from one another.
- Facial Details: Thread your fine embroidery needle with black embroidery floss. Create two short, tilted downward strokes right above the safety eyes to form worried, endearing eyebrows, adding that classic classic Bubba expression.
Beginner/Intermediate Tips
- Stitch Snugness: When working amigurumi, always maintain a slightly tighter tension than you would for a blanket or scarf. If your stitches feel loose, drop down a half-millimeter hook size to keep everything tightly bound.
- Flawless Decreases: Always employ the Invisible Decrease method on the rounds where the shape tapers down. Standard decreases tend to leave bulky knots or noticeable gaps that let the white polyester stuffing leak through.
- Perfect Pinning: Never sew your limbs on without pinning them first! Use long quilting pins to anchor all four legs and ears in place. Set the elephant down on a flat surface to check that it sits level and balanced without tipping over before doing your final sewing.
Variations
- The Soft Velvet Nursery Edition: Swap your worsted weight acrylic yarn for a plush, super bulky velvet or chenille yarn and step up to a 5.0 mm hook. This instantly increases Bubba’s finished footprint to double the size, yielding an incredibly velvety, jumbo-sized nursery pillow companion.
- The Colorful Circus Aesthetic: Step away from muted earth tones and build a whimsical, bright pink or soft pastel mint elephant. You can use metallic silver yarn for the toenails and add a tiny red crocheted circus hat between the ears.
- Playful Rattle Insertion: Drop a plastic rattle disc or a small bell encased in a plastic container into the very center of the polyester body cavity while stuffing it. This transforms Bubba into an interactive sensory rattle toy perfect for newborn development.
- The Textured Tweed Modernist: Utilize a multi-tonal grey tweed yarn that features tiny flecks of black, white, and tan. This alternative gives the finished toy a high-end boutique look that complements minimalist boho home decor.


