The Best Fluffy Pancakes recipe you will fall in love with. Full of tips and tricks to help you make the best pancakes.
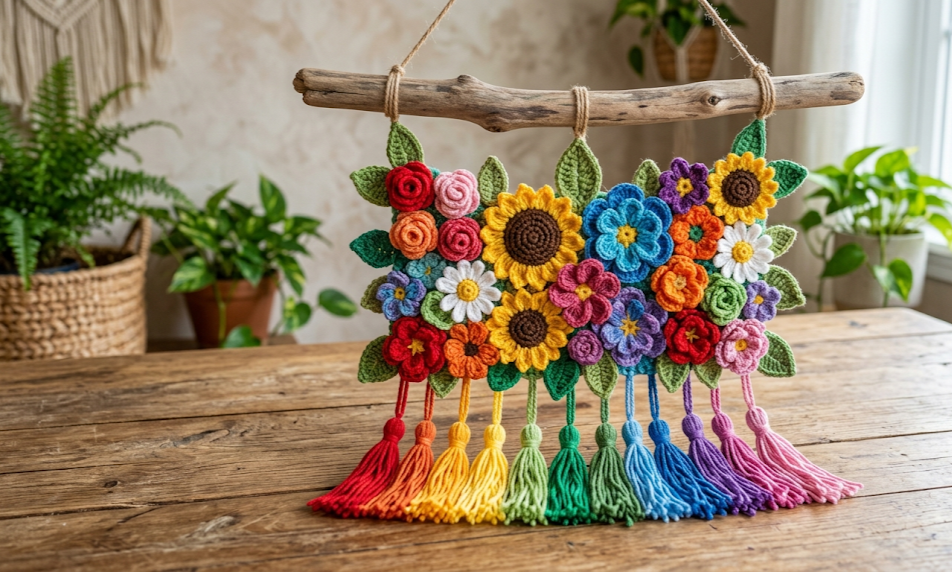
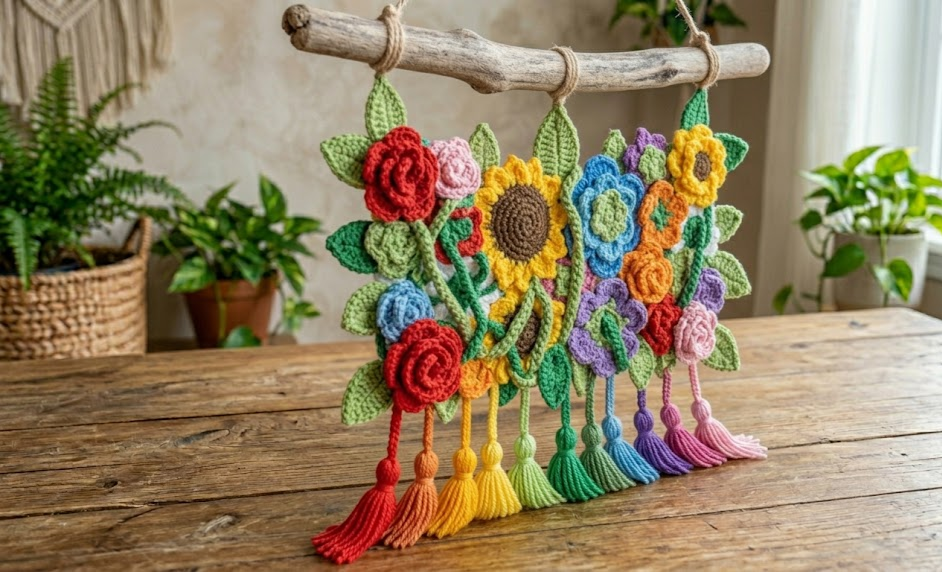
If you’ve been searching for a crochet wall hanging that truly stops people in their tracks, this Colorful Blooms Crochet Wall Hanging is it. Bursting with a full rainbow of handmade flowers — roses, sunflowers, daisies, and more — this showstopping piece transforms any blank wall into a garden of texture and color. Dozens of individual crochet blooms in every shade of the rainbow are layered and assembled onto cascading green stems, all suspended from a rustic driftwood branch with delicate yarn tassels swaying at the bottom.
This project is perfect for the crocheter who’s ready to level up from basic stitches and explore sculptural, dimensional work. You don’t need to be an expert — you simply need patience, a love of color, and the willingness to enjoy the process one flower at a time. The result is a wall accent that looks every bit as intricate as it feels to make, and it makes an extraordinary gift for birthdays, housewarmings, nurseries, or boho-style living rooms.
The beauty of this pattern is its modularity. Each flower and leaf is made separately, so you can work in manageable sessions and gradually build your garden. You’ll end up with a finished piece approximately 45cm wide and 75cm long (including tassels) that feels genuinely handcrafted — because every petal of it is.
|
Difficulty
Intermediate
|
Time
15–20 Hours
|
Hook Size
3.5mm
|
Yarn Weight
DK / Light Worsted
|
Finished Size
45cm × 75cm
|
Gauge
20 sc × 22 rows = 10cm square
Hook: 3.5mm
Yarn Weight: DK / Light Worsted
Gauge is especially important for the leaf and stem pieces in this pattern, as consistent sizing helps the finished composition look intentional and balanced. Use the 10cm swatch above as your reference. If your swatch runs larger, size down your hook; if it runs smaller, size up.
Materials
Yarn (DK weight / Light Worsted — approximately 50g skeins):
- Red — 1 skein
- Orange — 1 skein
- Yellow — 1 skein
- Bright Green (leaves and stems) — 2 skeins
- Blue — 1 skein
- Purple — 1 skein
- Pink — 1 skein
- White or Cream (daisy petals) — 1 skein
- Gold or Mustard (sunflower centers and petal accents) — 1 skein
Notions:
- 3.5mm crochet hook
- Stitch markers
- Tapestry needle (for weaving in ends)
- Scissors
- One driftwood branch or wooden dowel, approximately 50cm wide
- Natural jute twine or macramé cord (for hanging)
- Floral wire or craft wire (optional, for shaping stems and leaves)
- Pins or small sewing clips (for arranging before final attachment)
Abbreviations
| Abbreviation | Meaning |
|---|---|
| ch | chain |
| sl st | slip stitch |
| sc | single crochet |
| hdc | half double crochet |
| dc | double crochet |
| tr | treble crochet |
| MR | magic ring (adjustable loop — pull tight to close center hole) |
| BLO | back loop only (insert hook into the back loop of the stitch only) |
| FLO | front loop only (insert hook into the front loop of the stitch only) |
| inc | increase (2 sc in the same stitch) |
| dec | invisible decrease (insert hook through front loops of next 2 stitches simultaneously) |
| sk | skip |
| sp | space |
| rnd | round |
| rep | repeat |
| pm | place stitch marker |
| RS | right side |
Magic Ring (MR): Make a loop with the yarn, insert your hook through the loop, draw up a working loop, and ch 1 to begin. After completing the first round, pull the yarn tail to close the center hole completely.
Invisible Decrease (dec): Insert hook through the front loop only of the next stitch, then through the front loop only of the stitch after that, yarn over and pull through both loops, yarn over and complete as a normal single crochet. This creates a smoother decrease without the visible bump of a standard sc2tog.
Pattern Instructions
FLOWER A — Classic Crochet Rose (Make 6: 2 red, 2 purple, 2 pink)
Rnd 1: MR, ch 3, work 15 dc into MR, sl st to top of beginning ch-3 to join. Pull tail to close MR. (16 dc)
Rnd 2: Ch 1, *sc 1, ch 3, sk 1 st, rep from * around, sl st to first sc to join. (8 ch-3 spaces)
Rnd 3: Into each ch-3 space: work (sc, hdc, 3 dc, hdc, sc) — this creates 8 petals. Sl st to join at base of first petal. (8 petals, 56 sts total)
Rnd 4: Working behind Rnd 3 petals in BLO of Rnd 1 sts: *sl st in BLO of next st, ch 4, sk 1 st, rep from * around, sl st to join. (BLO — insert hook only into the back loop of the Rnd 1 stitches, visible behind the petals from Rnd 3.) (8 ch-4 spaces)
Rnd 5: Into each ch-4 space: work (sc, hdc, 5 dc, hdc, sc). Sl st to join. (8 petals, 72 sts total)
Rnd 6: Working behind Rnd 5 petals in BLO of Rnd 2 slip sts: *sl st in BLO, ch 5, sk 1 st, rep from * around, sl st to join. (8 ch-5 spaces)
Rnd 7: Into each ch-5 space: work (sc, hdc, 3 dc, tr, 3 dc, hdc, sc). Sl st to join. (8 large outer petals)
Fasten off leaving a 25cm tail for sewing. The rose naturally curls into a dimensional shape when you coax the petal layers forward gently.
FLOWER B — Sunflower (Make 4: in gold center + yellow petals)
Center (in gold or mustard yarn):
Rnd 1: MR, 6 sc into MR, sl st to join. Pull tail to close. (6 sc)
Rnd 2: Ch 1, inc in each st around, sl st to join. (12 sc)
Rnd 3: Ch 1, *sc 1, inc 1, rep from * around, sl st to join. (18 sc)
Rnd 4: Ch 1, *sc 2, inc 1, rep from * around, sl st to join. (24 sc)
Rnd 5: Ch 1, sc in each st around, sl st to join. (24 sc)
Fasten off gold. Join yellow yarn to any stitch.
Petal Round:
Rnd 6: In each st: ch 10, sl st back down the ch starting in 2nd ch from hook — sc 8, sl st in next st of Rnd 5. Continue around until all 24 sts have a petal chain. (24 petals)
Fasten off leaving 25cm tail.
FLOWER C — Simple Daisy (Make 8: white petals, yellow center)
Center (yellow):
Rnd 1: MR, 6 sc into MR, pull tail to close. (6 sc)
Rnd 2: Ch 1, inc in each st around, sl st to join. (12 sc)
Fasten off yellow. Join white.
Petal Round:
Rnd 3: *Ch 8, sl st back down ch starting in 2nd ch from hook — sc 7, sl st in same base st, sl st in next st, rep from * 11 times. (12 petals)
Fasten off leaving 25cm tail.
FLOWER D — Small Accent Flower (Make 10: variety of colors)
Rnd 1: MR, 5 sc into MR, sl st to join. (5 sc)
Rnd 2: Ch 3, dc in same st, 2 dc in each remaining st, sl st to top of ch-3. (10 dc)
Rnd 3: *Ch 4, sc into 2nd ch from hook, hdc in next ch, dc in last ch, sl st in same dc of Rnd 2, sl st in next dc, rep from * to end. (5 petals)
Fasten off leaving 20cm tail.
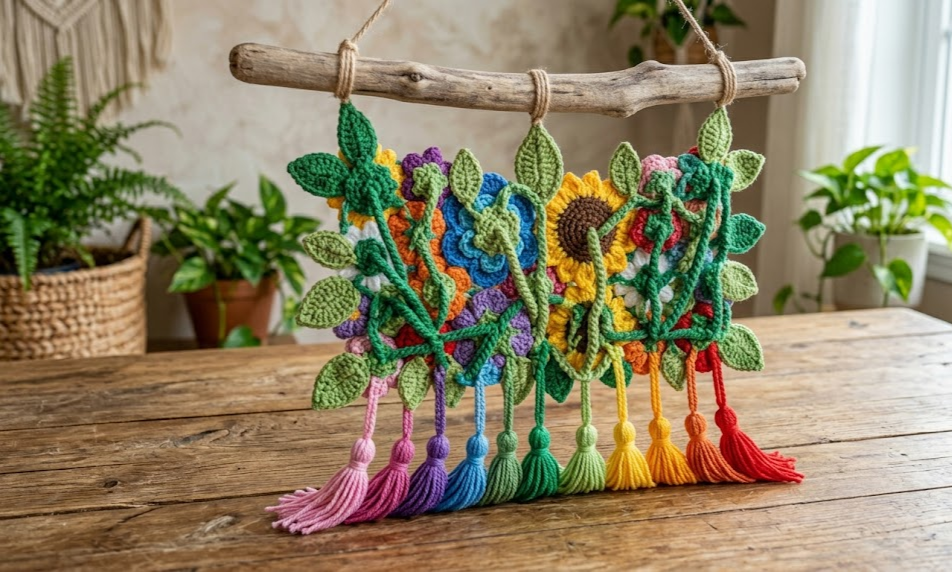
LEAF (Make 20–24)
Row 1: Ch 12, sc in 2nd ch from hook and in next 4 ch, hdc in next 3 ch, sc in next 2 ch, 3 sc in last ch (tip of leaf). (Working along second side of chain — rotate work and continue back along the other side of the foundation chain, inserting hook into the unused loops of the original chain.) Continue: sc in next 2 ch, hdc in next 3 ch, sc in next 4 ch, sl st in first ch to join. (24 sts + 3-sc tip)
Rnd 2: Ch 1, sc in each st around, working 3 sc into the center tip st, sl st to join. (26 sts)
Rnd 3: *BLO sc in each st to 1 st before tip, 3 sc in tip st, continue in BLO to end, sl st to join. (28 sts)
Fasten off leaving 20cm tail. If you want the leaves to hold their shape, cut a piece of floral wire 2cm shorter than the leaf’s length. Fold one end into a small hook, slip it inside the leaf along the center, and fold the other end under before weaving in the tail to secure.
STEM (Make 8–10)
Foundation: Ch 30 (or desired length — stems range from 15cm to 35cm for visual variation).
Row 1: Sc in 2nd ch from hook and in each ch across. (29 sc)
Row 2: Ch 1, turn. Sc in each sc across. (29 sc)
Fasten off. Fold lengthwise and sl st the two edges together along the length to form a narrow tube. To insert wire for a poseable stem: cut a length of floral wire 3cm shorter than the stem tube. Insert wire fully into the tube, leaving 1.5cm of empty tube at each end. Fold the empty ends inward and sew closed with yarn tail. This prevents wire ends from poking through.
TASSEL (Make 10–12 in assorted rainbow colors)
Cut 12 strands of yarn, each 30cm long. Fold in half. Use your hook to pull the folded midpoint through the base of a stem end, then pull the yarn tails through the loop and tighten. Trim ends evenly to approximately 12cm.
Assembly Steps
Step 1 — Arrange flowers on a flat surface. Before attaching anything, lay your driftwood branch on a table. Arrange all flowers, leaves, and stems below it in your intended composition. The piece in this pattern has longer, fuller clusters toward the upper-left and gradually lighter, smaller clusters cascading toward the lower-right. Take a photo for reference before beginning to sew.
Step 2 — Attach stems to the branch. Cut 12–15 lengths of green yarn (approximately 25cm each). Use these to lash the top of each stem to the driftwood branch, spacing stems approximately 3–5cm apart across the 45cm width. Tie each stem twice and weave the yarn tail through the stem tube to secure. Stems should hang from the branch at varying lengths — aim for a cascade from approximately 20cm to 60cm below the branch.
Step 3 — Sew flowers to stems. Using the long tails on each flower, sew each bloom to the upper portion of a stem or directly to the hanging body. Position flower centers approximately 2–4cm from where two stems intersect or branch. Use at least 4–6 passes of the yarn tail through both the flower base and the stem fabric before fastening off. Pull firmly — flowers are the heaviest elements and need secure attachment.
Step 4 — Attach leaves. Sew leaves in pairs or trios along the length of stems, pointing outward at gentle angles. Space leaves approximately 4–6cm apart along each stem. Leaves near the top of the hanging should be smaller or fewer; leaves toward the middle and lower sections can be more densely clustered.
Step 5 — Add tassels. Attach one tassel to the very end of each stem, approximately 1–2cm above the cut tip. Vary tassel colors — match or contrast with the nearest flower for visual cohesion.
Step 6 — Hang. Cut a length of jute twine approximately 80cm. Tie one end securely around the left end of the driftwood branch and the other end around the right end, creating a triangular hanger at even height on both sides. Adjust so the branch hangs level. The finished hanging should display with the branch at approximately 160–170cm from floor height for comfortable viewing.
Tips for Intermediate Crocheters
Weaving in ends as you go: With this many small motifs, ending-tail management is crucial. After fastening off each flower or leaf, immediately weave the tail in at least 4–5 different directions through the stitches (not just straight through) before trimming. This prevents unraveling from the movement a wall hanging experiences.
Tension on roses: The layered rose (Flower A) only looks dimensional if your tension is consistent across all seven rounds. If your petals are lying flat rather than curling forward, try increasing your hook size by half a size for the outer two petal rounds.
Sunflower petals standing out: The ch-10 petal chains on the sunflower work best when you sl st back snugly. If your petals are floppy, try working into the third ch from hook instead of the second — this adds a small anchor point that stiffens each petal.
Blocking individual motifs: Spray-blocking individual flowers before assembly makes the final arrangement much more polished. Lay each motif flat on a foam board, pin into shape, mist with water, and leave to dry for at least 2 hours before unpinning.
Color placement strategy: Arrange warm tones (red, orange, yellow) in one region and cool tones (blue, purple) in another with transitional hues (pink, green) bridging them. This mirrors the natural rainbow gradient visible in the inspiration piece and prevents a chaotic, scattered look.
Variations
1. Neutral Earth Tone Version: Swap the rainbow palette for cream, terracotta, dusty rose, sage green, and ochre. This creates a more muted, Southwestern-inspired piece that coordinates with natural linen interiors and minimalist home décor.
2. Mini Wreath Alternative: Instead of a vertical hanging, use a wire wreath base (25cm diameter) and attach 15–20 small blooms and leaves around the ring. Omit stems and tassels entirely and finish with a jute bow at the top for a front-door or seasonal accent.
3. Baby Nursery Pastel Version: Make all flowers in soft baby pink, mint, lavender, peach, and white using fingering weight yarn on a 2.5mm hook. The reduced yarn weight creates a more delicate, airy look appropriate for a nursery or toddler’s room.
4. Monochrome Statement Piece: Choose a single color family — for example, all shades of blue from pale sky to deep navy — and make all flowers using only that spectrum. The visual interest comes entirely from texture differences between flower types rather than color contrast, creating a sophisticated, gallery-worthy piece.
5. Seasonal Autumn Version: Use burnt orange, deep red, golden yellow, and burgundy yarn with larger individual flowers (upsize your hook to 4.5mm and use worsted weight). Add crocheted mushroom or acorn accents between the flower clusters for an autumn harvest theme.
Pinterest CTA
Love how this rainbow wall hanging turned out? Save this pin to your crochet home décor board and come back whenever you’re ready to make your own blooming wall garden! Share your finished pieces with the hashtag #FoodieRippleCrochet — we’d love to see your color choices!


