The Best Fluffy Pancakes recipe you will fall in love with. Full of tips and tricks to help you make the best pancakes.
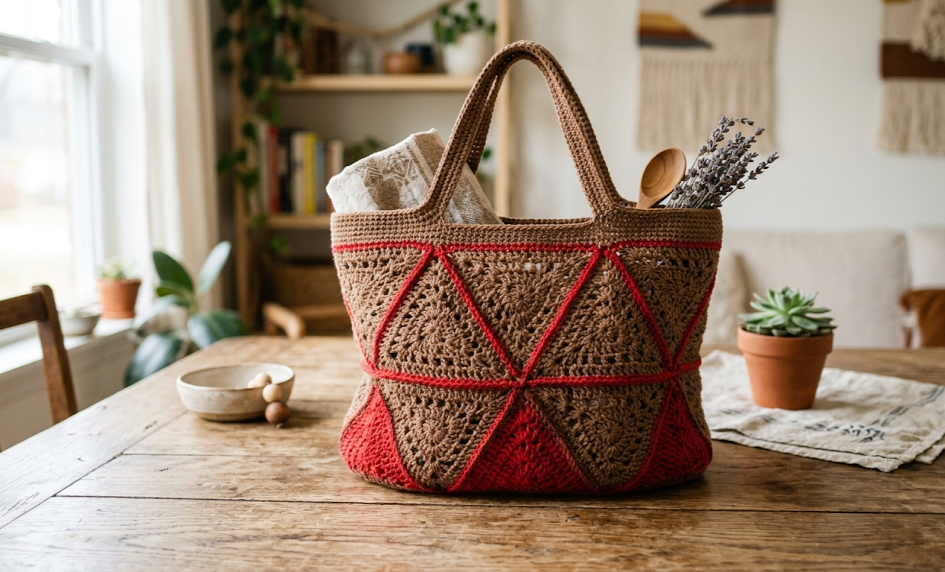
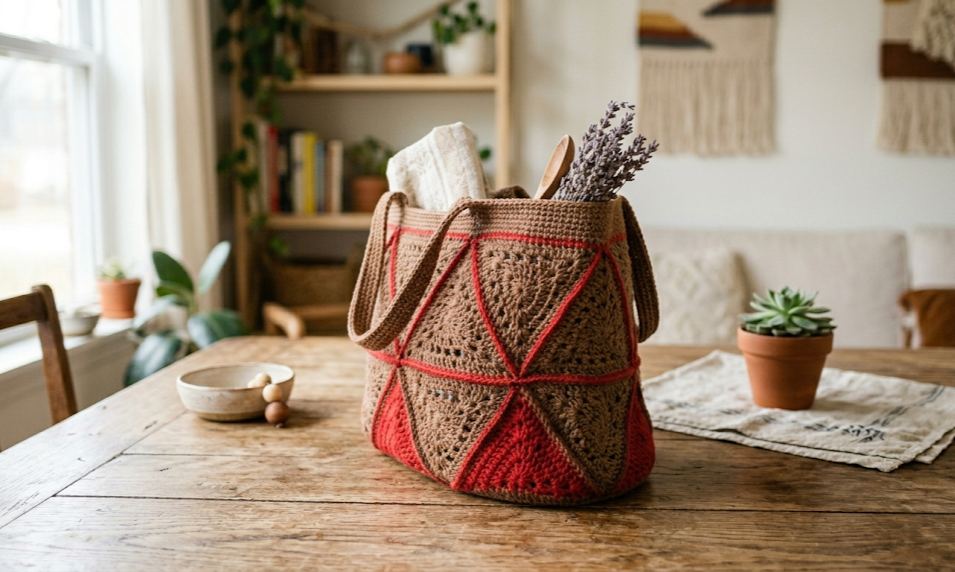
There is something deeply satisfying about carrying a bag that people stop to ask about. The crochet triangle mesh market bag — sometimes called a mash bag — is exactly that kind of project. Its lacy triangle panels cascade down the body of the tote in neat, geometric rows, creating an open lattice that looks intricate but is built entirely from basic stitches repeated in a clever sequence. Worked in a rich warm brown with punchy red accent triangles at the base, this bag is equal parts practical and eye-catching. It holds its shape beautifully, stretches to accommodate a haul of produce or yarn, and collapses flat when empty. Whether you are heading to a farmers’ market, a beach, or a craft fair, this bag works as hard as it looks good. The pattern is written for intermediate crocheters — someone who is comfortable with chains, single crochet, and double crochet and is ready to follow a repeating lace motif without much hand-holding.
|
Difficulty
Intermediate
|
Time
6–8 Hours
|
Hook Size
5.0 mm
|
Yarn Weight
DK / #3
|
Finished Size
35 × 30 cm
|
Gauge
Working in the triangle mesh stitch pattern with DK weight yarn and a 5.0 mm hook:
14 stitches × 8 rows = 10 cm × 10 cm (measured over the triangle mesh body pattern after blocking)
Always work a gauge swatch before beginning. The open triangle panels will pull slightly narrower than single crochet fabric, so measuring over the actual stitch pattern gives the most accurate result. Adjust hook size up or down if your gauge does not match.
Materials
- Color A (Brown): DK weight cotton or cotton-blend yarn — approximately 250 g / 550 m
- Color B (Red): DK weight cotton or cotton-blend yarn — approximately 50 g / 110 m
- Crochet hook: 5.0 mm
- Scissors
- Yarn needle / tapestry needle for weaving in ends
- Stitch markers: 4
- Measuring tape
Cotton yarn is strongly recommended for market bags — it does not stretch out under weight the way acrylic does, and it washes easily.
Abbreviations
| Abbreviation | Meaning |
|---|---|
| ch | chain |
| sl st | slip stitch |
| sc | single crochet |
| dc | double crochet |
| ch-sp | chain space |
| sk | skip |
| rep | repeat |
| st(s) | stitch(es) |
| RS | right side |
| WS | wrong side |
| pm | place marker |
| BLO | back loop only |
| sp | space |
| [ ] × | repeat bracket contents indicated number of times |
Pattern Instructions
PART 1: BASE STRIP (Color B — Red)
The bag is worked in the round from the bottom up. The base is a flat oval foundation worked in Color B, giving the signature red accent row visible at the lower edge of the triangle panels.
Foundation chain: Ch 31.
Round 1 (RS): Starting in the 2nd ch from hook, sc in each ch across to the last ch (29 sc), work 3 sc in the last ch (turning the corner), continue along the opposite side of the foundation chain with 1 sc in each ch across (29 sc), work 3 sc in the first ch to close the oval. Join with sl st to the first sc. (64 sc)
Working the second side of the chain means inserting your hook into the unused bottom loops of the starting chain — these are the loops on the underside of your foundation. Turn the work slightly and work into each loop just as you would a normal stitch.
Round 2: Ch 1, sc in each st around, working 3 sc in each of the 4 corner stitches. Join with sl st. (72 sc)
Round 3: Ch 1, sc in each st around, working 3 sc in each corner stitch again. Join with sl st. (80 sc)
Fasten off Color B. Join Color A (Brown) in any stitch.
PART 2: BODY — TRIANGLE MESH PANELS (Color A — Brown)
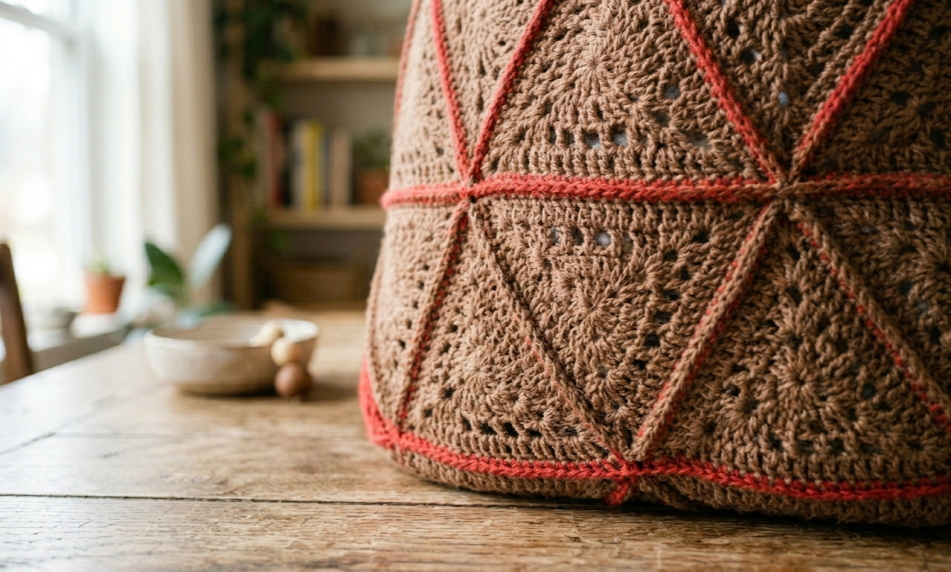
The triangle lace is built by working chains and double crochets in a specific skip pattern. Each “triangle” is formed by a cluster of dc worked into the same ch-sp, separated by ch-2 spaces. Read each round carefully before beginning.
Round 4 (Transition row): Ch 1, sc in BLO of each st around. Join with sl st. (80 sc)
BLO (back loop only): Insert your hook into only the back loop of each stitch — the loop furthest away from you. This creates a neat ridge line that frames the base neatly.
Round 5 (Set-up round): Ch 3 (counts as first dc), skip 1 st, [dc in next st, ch 2, sk 2 sts] repeat around, ending with ch 2, sl st to top of ch-3 to join. (approximately 26 ch-2 spaces)
Adjust the final repeat slightly if needed to end evenly — you want a consistent number of ch-2 spaces divisible by 2.
Round 6 (Triangle Round 1): Sl st into first ch-2 sp, ch 3, 2 dc in same sp (first half-triangle made), ch 2, [3 dc in next ch-2 sp, ch 2] rep around. Join with sl st to top of ch-3. (13 triangle clusters)
Round 7 (Triangle Round 2): Sl st to ch-2 sp between clusters, ch 3, 2 dc in same sp, ch 2, [3 dc in next ch-2 sp, ch 2] rep around. Join with sl st. (13 clusters)
Rounds 8–9: Repeat Round 7 twice more. (13 clusters each round)
Round 10 (Increase round): Sl st to ch-2 sp, ch 3, 2 dc in same sp, ch 2, 3 dc in same sp again (double cluster = 2 triangles in one sp — increases the circumference), ch 2, [3 dc in next ch-2 sp, ch 2] rep to next sp, work double cluster, ch 2; continue alternating single and double clusters evenly around. Join with sl st. (approximately 20 clusters)
Rounds 11–16: Repeat Round 7. (20 clusters each round)
Round 17 (Increase round): Repeat Round 10 increase logic, placing double clusters evenly spaced every 4th sp around. (approximately 26 clusters)
Rounds 18–22: Repeat Round 7. (26 clusters each round)
Round 23 (Top edge): Ch 1, work 3 sc into each ch-2 sp and 1 sc into each dc around. Join with sl st. Count stitches — aim for 100–108 sc. (approx 104 sc)
Round 24: Ch 1, sc in each st around. Join with sl st. (104 sc)
Round 25: Ch 1, sc in BLO of each st around. Join with sl st. (104 sc)
Do not fasten off.
PART 3: HANDLES (make 2, Color A)
Mark two handle positions: With stitch markers, mark a 10-stitch span centered at the front of the bag (stitches 22–32 approximately) and a matching 10-stitch span at the back (stitches 72–82 approximately). The remaining stitches on each side form the sides of the bag opening.
Handle 1:
- Join Color A with sl st at the right edge of the first marked 10-st span.
- Ch 1, sc in each of the 10 marked stitches. Turn.
- Row 1: Ch 1, sc in each sc across. Turn. (10 sc)
- Rows 2–40: Repeat Row 1. (10 sc each row — creates a handle strip approx 25 cm / 10 inches long)
- Do not fasten off. Fold the strip and align the working end with the second set of 10 marked stitches on the opposite side of the bag. Sl st the handle end to those 10 stitches. Fasten off.
Handle 2: Join Color A at the remaining 10-stitch marked span on the back of the bag opening. Repeat Handle 1 exactly.
Assembly Steps
- Block the bag: Wet-block the finished bag by submerging in cool water, pressing out excess water gently, and shaping the bag over a bowl or inflated balloon to hold the oval base flat and the body open. Allow to dry fully (approximately 12–24 hours). This step opens the triangle panels and evens the stitches significantly.
- Reinforce handle joins: Thread the yarn tail at each handle join through a tapestry needle and work several whip stitches through both layers at the join point. Pull firmly but not so tight as to distort the fabric. Each join should feel secure when the handle is tugged with light weight.
- Weave in all ends: Weave each tail through at least 5 stitches in two directions and trim. On open lace fabric, securing ends in two directions prevents unraveling through the gaps.
- Final measurement check: The finished bag (excluding handles) should measure approximately 35 cm wide × 30 cm tall. Handles should measure 25 cm from opening edge to top of loop. If handles seem short, add additional rows before joining.
Beginner/Intermediate Tips
Tension in triangle rounds: The most common issue with the triangle mesh pattern is inconsistent tension in the ch-2 spaces. Try to keep all chain stitches the same size — some crocheters find it helpful to work chains slightly looser than their normal tension so the finished fabric lies flat.
Counting clusters: After each triangle round, count your dc clusters before moving on. If the number increases unintentionally you have accidentally worked two clusters into one ch-2 sp. If it decreases, you skipped a sp. The stitch counts in parentheses at the end of each round will catch errors early.
Cotton yarn behavior: Cotton has very little elasticity compared to acrylic. Your hands may fatigue faster — take breaks and stretch fingers. Cotton also shows stitch definition beautifully, which is why this pattern looks so clean in the final product.
Handle length: The 40-row handle given here produces a shoulder-length strap. For a shorter hand-carry handle, reduce to 25–28 rows. For a longer tote-style shoulder strap, extend to 55 rows.
Joining in the round: This pattern uses slip stitch joins at the end of each round. Always join to the top of the turning chain (ch-3), not to the first actual dc, or the join point will shift visually.
Variations
- Rainbow Stripe Edition: Work each set of 3–4 triangle rounds in a different yarn color — coral, mustard, sage, cream — for a maximalist summer market bag.
- Natural Jute Version: Substitute cotton yarn for fine jute or raffia twine for a stiffer, more structured bag with a raw natural texture. Use a 5.5 mm hook to compensate for jute’s lower elasticity.
- Mini Wristlet: Work only 12 triangle rounds on a smaller base (Ch 15 foundation) and substitute handle strips with a simple 8-ch wrist loop for a tiny pouch version.
- Autumn Colorblock: Work the base in burnt orange (Color B), the lower body in terracotta, the mid-body in rust, and the upper body and handles in deep brown — ombre colorblock with no color changes required mid-row.
- Lined Market Bag: Cut a fabric lining from cotton canvas in a complementary print, fold the edges under by 1.5 cm, and hand-stitch it to the inside of the bag along the top edge. This prevents small items from slipping through the triangle openings while preserving the lace aesthetic on the outside.
If you love this triangle mesh market bag pattern, save it to your crochet boards so you can find it again! Share your finished bags with the hashtag #FoodieRippleCrochet — we’d love to see your color combinations and yarn choices.


