The Best Fluffy Pancakes recipe you will fall in love with. Full of tips and tricks to help you make the best pancakes.
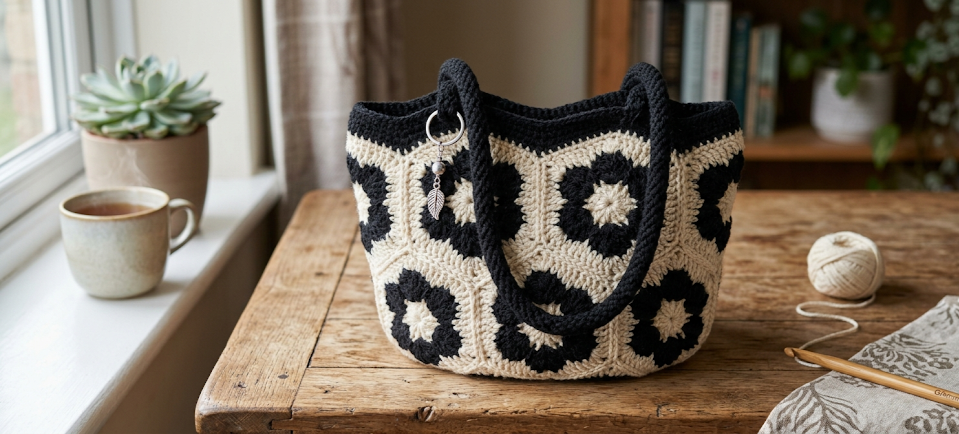
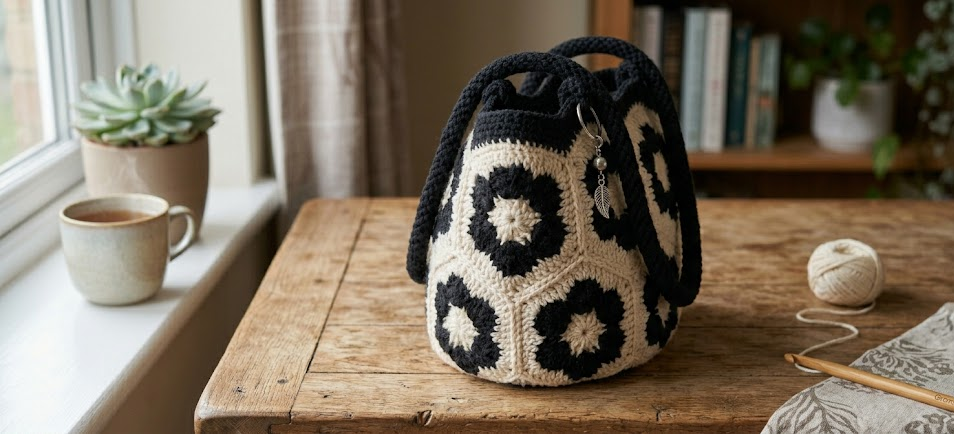
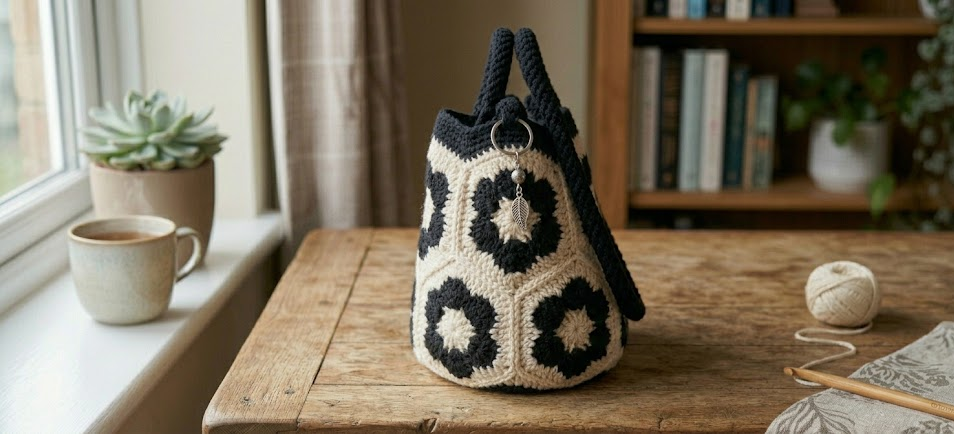
There is something undeniably timeless about a bag that looks like it came from a Parisian boutique but was made entirely by hand with a crochet hook and yarn. This African Flower Crochet Bag is exactly that kind of project — bold, structured, and utterly gorgeous. Built from a mosaic of black and cream African flower hexagon motifs sewn together into a rounded handbag shape, it strikes the perfect balance between intricate and wearable. The finished bag sits comfortably in hand or on the forearm, has a sturdy base, and features two crocheted rope handles in deep black that give it a polished, boutique-quality finish.
This pattern is ideal for intermediate crocheters who are comfortable working in the round and joining motifs. If you have made granny squares before, you already understand the building block concept here — the African flower motif just takes that a beautiful step further, creating a layered hexagonal bloom with a raised petal center. Each motif is completed individually, then joined using a flat slip-stitch join to build the bag panels. The result is a structured tote with visible texture on every surface, making it a showstopper no matter where you carry it.
Whether you are making this as a statement accessory for yourself or as a gift for someone who appreciates handmade craftsmanship, this African flower crochet bag pattern will walk you through every step — from the first magic ring to the final handle seam.
|
Difficulty
Intermediate
|
Time
10–14 Hours
|
Hook Size
4.0 mm
|
Yarn Weight
DK / Light Worsted
|
Finished Size
30 cm × 22 cm
|
Gauge
Before beginning, work a sample African flower motif and measure it. Your gauge will determine the final size of the bag, so this step is important.
Gauge: 1 completed African flower hexagon motif = approximately 9 cm point to point (flat lay, unblocked)
Alternative gauge check: 18 single crochet × 20 rows = 10 cm square, using 4.0 mm hook and DK weight yarn
Hook size: 4.0 mm (G/6)
Yarn weight: DK / Light Worsted (Weight 3–4)
If your motif measures larger than 9 cm, try a 3.75 mm hook. If it measures smaller, switch to a 4.5 mm hook.
Materials
Yarn:
- Color A — Cream / Off-White: approximately 200 g of DK or light worsted weight yarn
- Color B — Black: approximately 250 g of DK or light worsted weight yarn (extra used for handles and edging)
Notions:
- 4.0 mm (G/6) crochet hook
- Tapestry/yarn needle for weaving in ends and joining motifs
- Scissors
- Stitch markers (at least 6)
- Lining fabric (optional but recommended): 35 cm × 50 cm piece of cotton canvas or lining fabric in black or cream
- Sewing needle and thread (if lining)
- 1 magnetic snap closure or zipper (25 cm), optional
- 1 metal D-ring or keychain ring (25 mm), for decorative charm attachment
- Cardboard or plastic base insert (approx. 28 cm × 8 cm) for structure
Abbreviations
| Abbreviation | Meaning |
|---|---|
| ch | chain |
| sl st | slip stitch |
| sc | single crochet |
| hdc | half double crochet |
| dc | double crochet |
| tr | treble (triple) crochet |
| MR | magic ring |
| sp | space |
| st(s) | stitch(es) |
| rep | repeat |
| BLO | back loop only |
| RS | right side |
| WS | wrong side |
| sk | skip |
| pm | place marker |
| [ ] × | repeat bracketed instructions the number of times indicated |
Technique Notes (first use):
- Magic Ring (MR): Make a loop with your yarn, insert hook, pull up a loop and chain — this creates an adjustable center ring that can be pulled tight to close the hole completely.
- BLO (Back Loop Only): Insert hook through only the back loop of the stitch (the loop farthest from you), leaving the front loop unworked — this creates a ridge effect.
- Slip stitch join: Insert hook through both loops of the designated stitch, pull yarn through stitch AND loop on hook in one motion — used here to join motifs flat without adding visible bulk.
Pattern Instructions
PART 1: African Flower Hexagon Motif
Make 20 motifs total (approximately 14 for the front and back panels combined, 6 for the base and gusset panels — adjust as needed based on your gauge).
Each motif uses Color A (cream) for the center and petals, and Color B (black) for the outline and border.
Round 1 (Color A): MR, ch 2, [2 dc into MR] × 5, sl st to top of ch-2 to join. Pull MR closed. (12 dc + ch-2 = 12 sts in ring)
(6 petal bases established)
Round 2 (Color A): Ch 1, sc in same st, *ch 3, sk 1, sc in next st; rep from * 5 times, ch 3, sl st to first sc. (6 sc, 6 ch-3 spaces)
Round 3 (Color A — petals): Sl st into first ch-3 sp, ch 3, [dc, ch 1, 2 dc] in same sp, *[2 dc, ch 1, 2 dc] in next ch-3 sp; rep from * 4 more times, sl st to top of ch-3. (6 petals formed, 12 dc groups, 6 ch-1 sp) (24 dc, 6 ch-1 sp)
Round 4 (Color B — outline): Join Color B with sl st to any ch-1 sp at tip of petal. Ch 1, sc in same sp, *ch 4, sc in next ch-1 sp; rep from * 5 times, ch 4, sl st to first sc. Fasten off Color A ends if desired. (6 sc, 6 ch-4 sp)
Round 5 (Color B — hexagon border): Sl st into first ch-4 sp, ch 3, [dc, ch 2, 2 dc] in same sp (corner made), *ch 1, sk petal, [2 dc, ch 2, 2 dc] in next ch-4 sp; rep from * 4 more times, ch 1, sl st to top of ch-3. (6 corners with ch-2 sp, 6 ch-1 side spaces, 24 dc total)
Round 6 (Color B — final border): Sl st to first ch-2 corner sp, ch 1, [sc, ch 2, sc] in same sp (corner), *sc in each dc and ch-1 sp across to next corner, [sc, ch 2, sc] in corner ch-2 sp; rep from * 5 times, sc across remaining sts, sl st to first sc. Fasten off. (6 corner ch-2 sp, sc in each st between)
Expected motif size: approximately 9 cm point to point. Block lightly if needed.
PART 2: Bag Base
Work the base as a flat oval.
Round 1 (Color B): Ch 18, sc in 2nd ch from hook and in each ch across (17 sc), then working into the other side of the foundation chain: sc in each ch across (17 sc), sl st to first sc. (34 sc)
Round 2: Ch 1, 2 sc in first st, sc in next 15 sts, 2 sc in next st, sc in next st, 2 sc in next st, sc in next 15 sts, 2 sc in next st, sl st to first sc. (38 sc)
Round 3: Ch 1, [2 sc in next st, sc in next st] × 2, sc in next 13 sts, [sc in next st, 2 sc in next st] × 2, sc in next 13 sts, sl st to first sc. (42 sc)
Rounds 4–6: Ch 1, sc in each st around, sl st to close. (42 sc each round)
Fasten off. Insert cardboard base piece (28 cm × 8 cm, trimmed to oval shape) inside the base before assembly if desired for structure.
PART 3: Joining Motifs into Panels
Front/Back panels: Arrange 5 motifs in a cluster — 1 center, 4 surrounding. Using Color B and a tapestry needle, join motifs using a flat whip stitch through the corner and side sc stitches of each motif where they meet. Pull snug but not tight enough to pucker. Repeat for the back panel.
Gusset strips: Join 3 motifs in a straight strip (or work rows of sc in Color B to create a gusset band approximately 8 cm wide). This connects front and back panels around the sides and bottom.
Joining panels to base: Align the flat base oval with the bottom edge of the joined motif panel and sc join Color B through both layers (one loop from the base edge, one from the motif border), working all the way around. (42 sc join round)
PART 4: Handles (make 2)
The handles are crocheted rope tubes worked in Color B, then stuffed lightly with yarn tail or scrap yarn for firmness.
Foundation: Ch 6, sl st to first ch to form a ring.
Rounds 1–70: Ch 1, sc in each st around (6 sc per round), sl st to close. Do not turn. (6 sc × 70 rounds = handle tube approximately 28 cm long)
Lightly stuff the tube by threading a folded length of scrap yarn or yarn tail through the center before seaming. Flatten the tube and sl st the opening closed.
Repeat for second handle.
PART 5: Top Edging
With RS facing, join Color B to any top edge stitch of the assembled bag.
Round 1: Ch 1, sc evenly around the entire top opening — work approximately 1 sc per visible st or join point. Sl st to first sc. (approx. 80–90 sc — adjust to your bag’s actual opening)
Round 2: Ch 1, BLO sc in each st around. Sl st to first sc. (same count)
Round 3: Ch 1, sl st in each st around. Fasten off. Weave in all ends.
Assembly Steps
- Block all motifs lightly by spraying with water, pinning to shape, and allowing to dry flat. This evens out petal definition and makes joining much easier.
- Join front panel motifs into a 5-motif cluster. Lay them on a flat surface to confirm arrangement before stitching. Front panel should measure approximately 27 cm × 22 cm.
- Join back panel motifs the same way (5 motifs), confirming it matches the front panel in size before proceeding.
- Attach gusset strip to the front panel first (right sides facing out), using Color B and sl st join, working up one side, across the bottom edge, and down the other side. Leave the top 6–7 cm of each side open for ease of assembly.
- Attach back panel to the other side of the gusset strip in the same manner.
- Join the assembled side/bottom panels to the base oval, sc joining through both layers with Color B. The base oval should sit flush against the bottom interior of the joined panels.
- Insert the cardboard base piece (or plastic canvas cut to 28 cm × 8 cm oval) through the top opening and position it flat at the base of the bag interior.
- Attach handles: Position each handle 7 cm from each side edge of the bag opening, centered on the top edge. Insert handle ends approximately 4 cm down into the inside of the bag top edge and stitch firmly in place with Color B through multiple layers, working a secure box stitch (sew a rectangle then stitch the diagonals). Handles should sit approximately 16 cm apart from outer edge to outer edge.
- Attach D-ring or keychain ring: Thread a short loop of Color B yarn (approx. 5 cm, doubled) through the D-ring, and sew the loop securely to the front panel, approximately 4 cm below the center of the top edge.
- Attach lining (optional): Cut lining fabric to match the bag’s interior dimensions (approx. 30 cm wide × 22 cm tall × 8 cm deep gusset). Fold raw edges inward 1.5 cm, press, and hand-stitch to the inside of the bag just below the top edging using a slip stitch.
- Install snap or zipper (optional): Attach magnetic snap hardware to the lining fabric at the center top edge, 2 cm from the folded edge, on both front and back lining panels, before final lining attachment.
Beginner/Intermediate Tips
- Tension is everything with African flower motifs. The petal rounds require slightly looser tension than the border rounds. If your petals are pulling inward, try going up half a hook size for Round 3 only.
- Count your stitches at the end of every round, especially in the petal rounds. One missed dc will cause an asymmetrical petal and the motif will not lie flat.
- Weave in ends as you go. With two colors per motif and 20+ motifs, end management becomes overwhelming quickly if left until the end. Use your tapestry needle to secure ends through at least 5 stitches in two directions before trimming.
- For consistent motif size, use the same tension and hook size for every single motif. Even slight variation in tension can make joining uneven.
- When joining motifs, always hold them with right sides facing the same direction. A common mistake is accidentally flipping one motif, which makes the join look mismatched.
- The handle tubes work up quickly, but the key to professional-looking handles is even, consistent sc rounds. Count 6 stitches per round every few rounds to catch any accidental increases.
- Test your base cardboard piece before final assembly — trim it slightly smaller than the base crochet oval so it slides in smoothly without distorting the bag shape.
Variations
- Pastel Rainbow Edition: Use a different soft pastel color for each motif’s petal round — blush, sage, lavender, sky blue, mauve — keeping the black border consistent throughout for a stained-glass effect.
- Mini Clutch Version: Make only 6 motifs (3 front, 3 back) and skip the gusset entirely, joining front and back panels directly with a sc border. Add a wrist strap loop instead of full handles for a chic evening clutch.
- Natural Boho Colorway: Swap black for a deep terracotta or warm brown and use undyed natural cream yarn. This version has an earthy, organic feel that pairs beautifully with linen clothing.
- Lined Tote with Interior Pocket: Scale up to 9 motifs per panel (3 × 3 arrangement), widen the gusset strip to 14 cm, and add a full fabric lining with a sewn interior pocket — creating a fully functional everyday tote bag.
- Monochromatic Drama: Use two shades of the same color — for example, deep burgundy and blush pink — instead of black and cream. The motif detail becomes more subtle and sophisticated, giving the bag a refined, tonal look.
If you make this African Flower Crochet Bag, save this post to your crochet boards on Pinterest so you can come back to it anytime! Share your finished bag and tag your photos with #FoodieRippleCrochet — we would love to see every version you create.


