The Best Fluffy Pancakes recipe you will fall in love with. Full of tips and tricks to help you make the best pancakes.
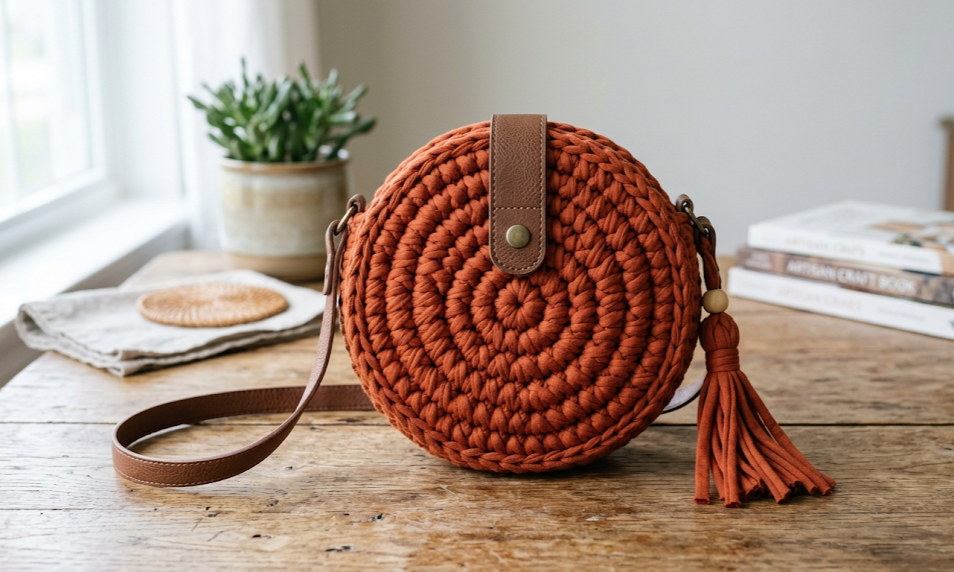
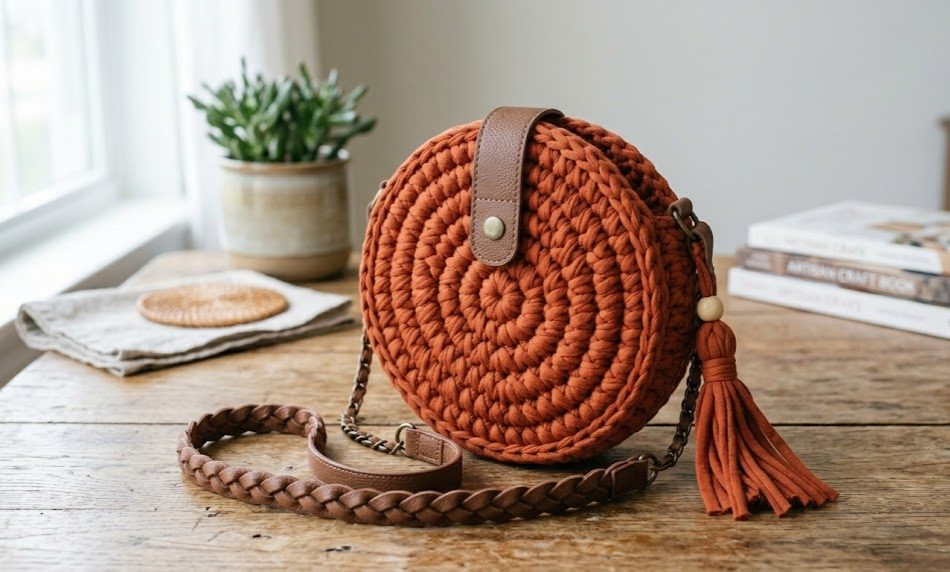
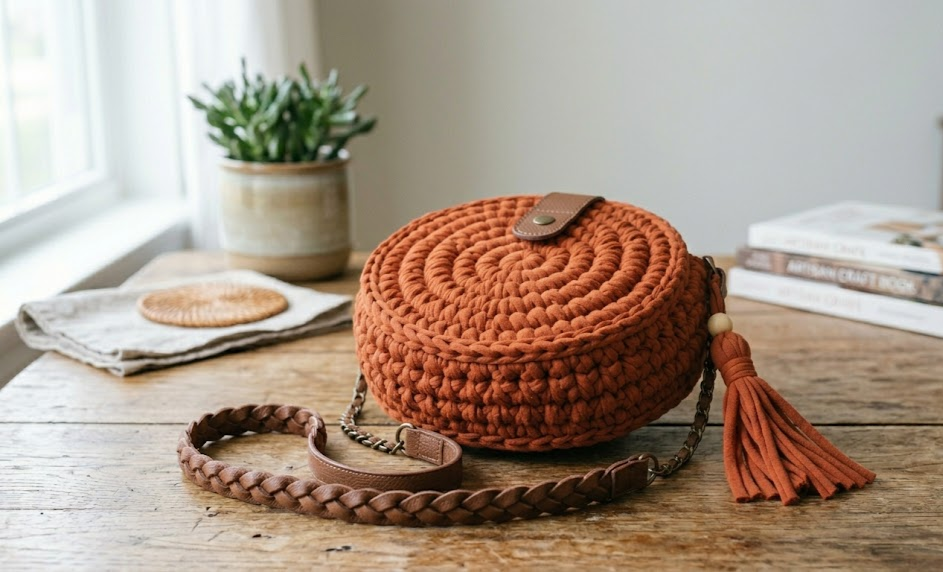
There is something undeniably satisfying about crocheting a bag that looks like it came straight from a boutique shelf. This crochet round bag made with t-shirt yarn is exactly that — a chunky, structured, beautifully textured crossbody purse that holds its shape without any stiffening and works up surprisingly fast. The finished bag is a flat circle silhouette in a rich burnt terracotta tone, finished with a leather-look tab closure with a snap button, a knotted tassel accent, and a braided chain strap that gives it a luxe handbag feel.
This pattern is perfect for intermediate crocheters who want to level up from small accessories and make something genuinely useful. The t-shirt yarn makes it beginner-friendly in terms of stitch visibility — you can see every loop clearly — but because this pattern involves working in a flat magic ring spiral and then joining two circles together, it rewards those who already know their basic stitches. The result is a structured round bag approximately 20cm (8 inches) in diameter, large enough for your phone, cards, keys, and a lip balm. It is the kind of everyday bag that gets compliments every single time you carry it.
Whether you are making this for yourself or as a handmade gift, this free crochet round bag pattern gives you everything you need from start to finish.
|
Difficulty
Intermediate
|
Time
4–6 Hours
|
Hook Size
6mm
|
Yarn Weight
Super Bulky (6)
|
Finished Size
20cm / 8in
|
Gauge
Working in half double crochet (hdc) in continuous spiral rounds using a 6mm crochet hook and t-shirt yarn (super bulky weight 6):
10 stitches x 8 rows = 10cm x 10cm (4 inches x 4 inches)
Before beginning, crochet a gauge swatch of at least 15 stitches and 10 rows in hdc, working in rows. Block lightly if needed. Gauge accuracy determines the finished diameter of your bag. If your swatch is too large, go down one hook size. If too small, go up one hook size.
Materials
- T-shirt yarn (super bulky, weight 6): approximately 300–350g in burnt terracotta / rust orange
- Crochet hook: 6mm
- Stitch marker: 1 (to mark beginning of each round)
- Yarn needle: large eye, for weaving in ends
- Leather-look tab closure: 1 piece (approx. 3cm x 10cm), pre-punched with 2 holes at each end, with a snap button installed
- D-rings or swivel clips: 2 (to attach the strap)
- Braided chain crossbody strap (or bag chain): adjustable, approximately 100–120cm
- Sewing needle and strong thread or craft glue (to attach hardware)
- Scissors
Abbreviations
| Abbreviation | Meaning |
|---|---|
| ch | chain |
| sl st | slip stitch |
| sc | single crochet |
| hdc | half double crochet |
| MR | magic ring |
| BLO | back loop only |
| st(s) | stitch(es) |
| rnd | round |
| rep | repeat |
| pm | place marker |
| ( ) | stitch count at end of round |
Pattern Instructions
This bag is made of two identical circle panels worked flat in continuous spiral rounds. The two panels are then joined together around the edges, with hardware attached before final seaming.
PANEL (make 2)
Magic Ring: To begin, make a magic ring by wrapping the yarn around your index and middle fingers twice, inserting your hook through the center loop, and pulling up a loop to work into. This creates an adjustable starting ring that closes completely when pulled tight, leaving no hole at the center.
Round 1: Work 6 hdc into magic ring. Pull tail to close ring. Do not join — work in continuous spiral. Place stitch marker in first st of rnd to track beginning of each round. (6)
Round 2: 2 hdc in each st around. (12)
Round 3: *2 hdc in next st, hdc in next st; rep from * around. (18)
Round 4: *2 hdc in next st, hdc in next 2 sts; rep from * around. (24)
Round 5: *2 hdc in next st, hdc in next 3 sts; rep from * around. (30)
Round 6: *2 hdc in next st, hdc in next 4 sts; rep from * around. (36)
Round 7: *2 hdc in next st, hdc in next 5 sts; rep from * around. (42)
Round 8: *2 hdc in next st, hdc in next 6 sts; rep from * around. (48)
Round 9: *2 hdc in next st, hdc in next 7 sts; rep from * around. (54)
Round 10: *2 hdc in next st, hdc in next 8 sts; rep from * around. (60)
Note: At this point your circle should measure approximately 18–20cm (7–8 inches) across. If it is smaller, work one more increase round following the same pattern: 2 hdc in first st, then one more hdc before each increase point.
Round 11 (Edge Round): Hdc in BLO in each st around. (60)
Back Loop Only (BLO): Insert your hook into only the back loop of the stitch (the loop farthest from you) rather than through both loops. This creates a visible ridge around the outer edge of the circle and gives the bag a defined rim.
Fasten off and leave a 30cm tail on the first panel only (for seaming). Fasten off and weave in ends on the second panel.
Assembly Steps
Step 1 — Install the D-rings and strap hardware (before seaming)
Before joining the two panels, attach your D-rings to the top edge of one panel (this will be the front panel). Position one D-ring on the left side and one on the right side, approximately 3cm down from the top center of the circle. Use strong thread to sew each D-ring through 3–4 edge stitches on the wrong side of the panel. Alternatively, cut a 5cm strip of faux leather and fold it through the ring, then stitch or glue the folded tab securely to the inside edge.
Step 2 — Position the leather tab closure
On the front panel, mark the top center point of the circle. Position the leather tab so it sits centered at 12 o’clock, with the snap button facing outward. The bottom edge of the tab should overlap the fabric by at least 1.5cm. Using a sewing needle and strong thread, stitch through the pre-punched holes at the bottom of the tab, securing it to the outer fabric of the front panel. Stitch through 3–4 stitches for security. The snap ball half should be on the tab itself; the socket half will be added to the back panel in Step 5.
Step 3 — Hold panels together (wrong sides facing)
Place the front panel and back panel together with wrong sides facing each other and the BLO ridge edges aligned. The front panel (with D-rings and tab) faces outward.
Step 4 — Join panels with sc seam
Using the 30cm tail from the first panel and your 6mm hook, insert hook through the back loop of the front panel edge stitch and the front loop of the back panel edge stitch simultaneously. This joins through the remaining loops of both BLO round edges, creating a neat ridge on the outside. Work sc through both layers around approximately 85% of the circumference (leave a 15% opening at the top for a final structure check and to confirm alignment). (51 approx.)
Step 5 — Install snap socket on back panel
Before closing the final gap, mark the back panel at 12 o’clock. The snap socket should align with the snap ball on the front tab. Install the socket through the fabric using your snap pliers or hand-stitching, approximately 1–2cm down from the top edge.
Step 6 — Close the seam
Continue sc seam through the remaining stitches to close the bag completely. Sl st to first sc to join. Fasten off and weave in all ends securely on the inside using your yarn needle.
Step 7 — Add the tassel
Cut 8 strands of t-shirt yarn, each approximately 20cm long. Fold in half and attach through the bottom D-ring or directly through a stitch at the side of the bag using a lark’s head knot. Wrap an extra strand tightly around the top of the tassel bundle, approximately 1.5cm from the fold, and tie securely. Trim all ends to an even length of approximately 8cm below the wrap point.
Step 8 — Attach the crossbody strap
Clip the swivel clasps or carabiner hooks of the chain strap to each D-ring on either side of the bag. Adjust strap length as desired.
Beginner and Intermediate Tips
Moving your stitch marker every round is essential. Because this pattern works in a continuous spiral without joining rounds, it is easy to lose track of where each round begins. Move your marker at the start of every round without fail, or you will accidentally work one round too many and your circle will start to ruffle.
T-shirt yarn tangles easily if pulled from the outside of the ball. Work from the center pull of the yarn cake instead, or rewind it into a ball that feeds smoothly. Tension inconsistencies with t-shirt yarn usually come from the yarn twisting on itself, so every few rounds let your work hang and untwist freely.
The BLO ridge round is what gives the bag its clean finished edge. Do not skip it or replace it with a regular round — this detail is what makes the two panels sit flush against each other for seaming.
Test your snap placement before you attach it permanently. Hold the two panels together, mark where the ball and socket align, and confirm the tab sits centered before stitching anything. A misaligned snap is very difficult to remove from t-shirt yarn without leaving visible holes.
When seaming the two panels, maintain an even tension. T-shirt yarn is stretchy and it is easy to pull the seam too tight, which will cause the edge to pucker. Use a gentle, consistent tension throughout and hold the panels flat as you work.
Variations
1. Sage Green Boho Bag
Swap the terracotta for a dusty sage green t-shirt yarn and add a wooden bead tassel instead of a yarn one. Pair with a natural hemp crossbody strap for a full earthy, neutral aesthetic that works with linen and cotton outfits.
2. Oversized Market Tote Version
Continue increasing rounds past Round 10 until your circle measures 30cm (12 inches). Work two panels and seam three-quarters of the way around, leaving the top quarter open as an unstructured tote opening. Add two large fabric handles instead of D-rings and a chain.
3. Mini Coin Purse
Stop increasing at Round 6 (36 stitches) for a 10cm circle. Make two panels, seam together, and close with a zipper sewn along the top edge instead of a snap tab. Perfect for a small purse insert or a child’s accessory.
4. Two-Tone Color Block
Work the first 5 rounds in cream t-shirt yarn and switch to terracotta for Rounds 6 onward. The color change ring near the center creates a bullseye effect that is very visually striking and gives the bag a graphic, modern feel.
Save This Pattern to Your Pinterest Boards!
If you loved making this crochet round bag with t-shirt yarn, save this pin so you can come back to it anytime. This pattern is completely free and works up fast — perfect for a weekend project or a handmade gift. Tag your finished bags with #FoodieRippleCrochet so we can see your beautiful makes!


