The Best Fluffy Pancakes recipe you will fall in love with. Full of tips and tricks to help you make the best pancakes.
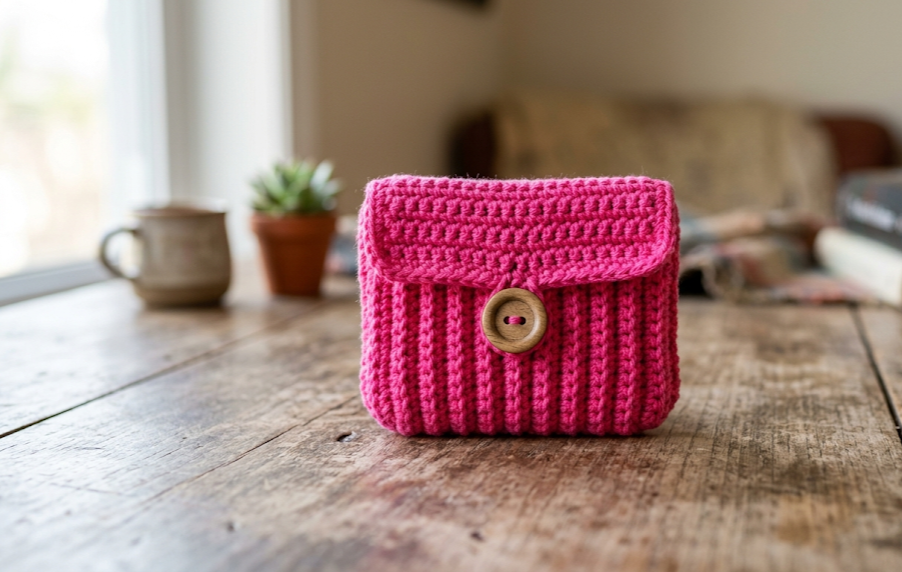
There is something undeniably satisfying about a small, perfectly formed crochet project that looks polished, works beautifully, and takes only an hour or two from start to finish. This crochet mini coin pouch is exactly that kind of project. Compact, textured, and finished with a charming wooden button closure, it is the kind of handmade accessory that gets noticed and then immediately requested by everyone who sees it.
The pouch features a beautifully ridged body worked in back loops only for a subtle ribbed texture that gives it structure and a satisfying squish. A neat flat flap folds over the front and fastens with a single decorative button, keeping all your tiny essentials safely tucked inside. Think coins, lip balm, earbuds, folded cash, or just a little daily card — this pouch handles all of it with style.
This pattern is ideal for beginners who have mastered the basic stitches and are ready to level up to a finished, functional accessory. It works up in a single evening, makes a wonderful handmade gift, and is endlessly customizable in any yarn color. Whether you make one for yourself or a dozen to give away, this mini pouch will quickly become one of your most-reached-for patterns.
|
Difficulty
Beginner
|
Time
1–2 Hours
|
Hook Size
5.0 mm
|
Yarn Weight
Worsted #4
|
Finished Size
10 cm × 8 cm
|
Gauge
14 hdc × 10 rows = 10 cm (4 inches) square
Hook: 5.0 mm
Yarn Weight: Worsted Weight (#4)
Gauge is especially important for this project because the finished size determines whether your button aligns correctly with the buttonhole. Work a gauge swatch before beginning and adjust your hook size up or down as needed.
Materials
- Worsted weight yarn (#4) — approximately 60–80 meters / 65–87 yards in main color (hot pink shown)
- 5.0 mm crochet hook
- One decorative wooden button, approximately 2–2.5 cm (¾–1 inch) diameter
- Yarn needle for weaving in ends and sewing button
- Scissors
- Stitch marker (optional, helpful for tracking rounds if worked in the round)
Abbreviations
| Abbreviation | Meaning |
|---|---|
| ch | chain |
| sl st | slip stitch |
| sc | single crochet |
| hdc | half double crochet |
| BLO | back loop only — insert hook into the back loop of the stitch only, leaving the front loop unworked; this creates a raised ridge on the fabric |
| st(s) | stitch(es) |
| rep | repeat |
| RS | right side |
| WS | wrong side |
| yo | yarn over |
| sp | space |
| turn | turn your work to begin the next row in the opposite direction |
Pattern Instructions
PART A: Pouch Body
The body is worked flat in rows from the bottom up, then seamed along the sides.
Foundation Chain
Ch 16.
Row 1 (RS): Hdc in 3rd ch from hook and in each ch across. Turn. (14 hdc)
Row 2: Ch 2 (does not count as a stitch throughout), hdc BLO in each st across. Turn. (14 hdc)
BLO note: Working through the back loop only means inserting your hook under only the back loop of each stitch — the loop farthest from you as you look down at your work. This creates a horizontal ridge on each row, giving the body its textured ribbed appearance.
Rows 3–16: Rep Row 2. Turn after each row. (14 hdc each row)
You will have 16 rows total, creating a fabric panel approximately 10 cm wide × 11 cm tall. Do not fasten off after Row 16.
PART B: Flap
The flap is worked directly from the top edge of the body, continuing from Row 16.
Row 17 (Flap Row 1): Ch 2, hdc in each st across. Turn. (14 hdc)
Row 18 (Flap Row 2): Ch 2, hdc in each st across. Turn. (14 hdc)
Row 19 (Buttonhole Row): Ch 2, hdc in first 5 sts, ch 2, skip 2 sts (this creates the buttonhole opening), hdc in remaining 7 sts. Turn. (12 hdc + ch-2 sp)
Row 20 (Flap Row 4): Ch 2, hdc in first 7 sts, 2 hdc in ch-2 sp (working into the chain space), hdc in remaining 5 sts. Turn. (14 hdc)
Row 21 (Flap Row 5 — Final): Ch 1, sc in each st across. Fasten off and leave a 30 cm tail for seaming.
The final sc row creates a slightly firmer, neater edge along the flap lip.
PART C: Border (Optional but Recommended)
With RS facing and working along the outer edges of the entire piece, join yarn at any corner with a sl st.
Round 1: Ch 1, sc evenly around all edges, working 3 sc into each corner to keep corners flat. Join with sl st to first sc. Fasten off and weave in ends.
This border tidies the side edges and gives the pouch a clean, professional finish.
Assembly Steps
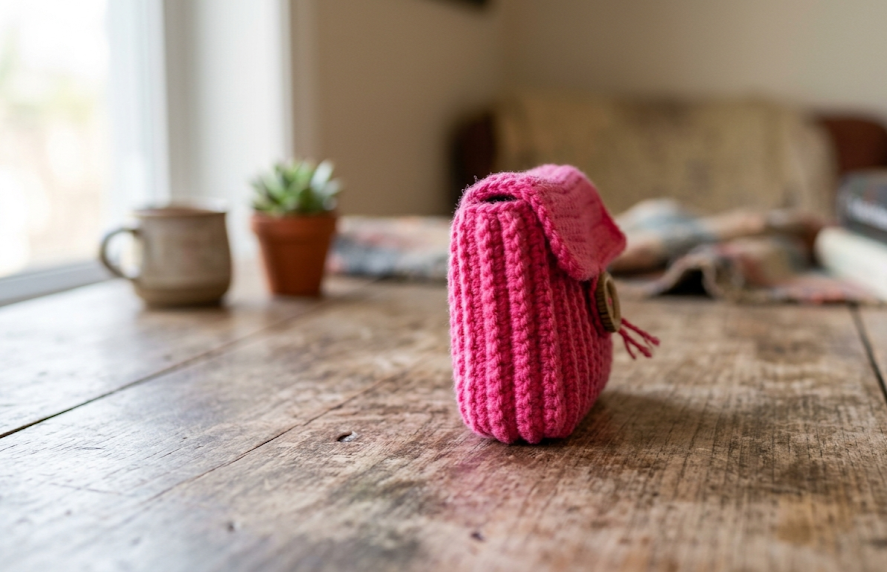
Step 1 — Fold the body.
Fold the body panel so the bottom edge (foundation chain) meets approximately the start of Row 14. This creates the pouch pocket with the flap extending above. The folded pocket section should measure approximately 7–8 cm tall. Pin in place.
Step 2 — Seam the sides.
Using your yarn needle and a length of matching yarn, whipstitch or mattress stitch along both side edges, joining the front and back layers of the pocket together. Seam from the bottom fold up to the point where the flap begins (approx. Row 14). Do not seam the flap — it remains free to open and close. Weave in all ends securely.
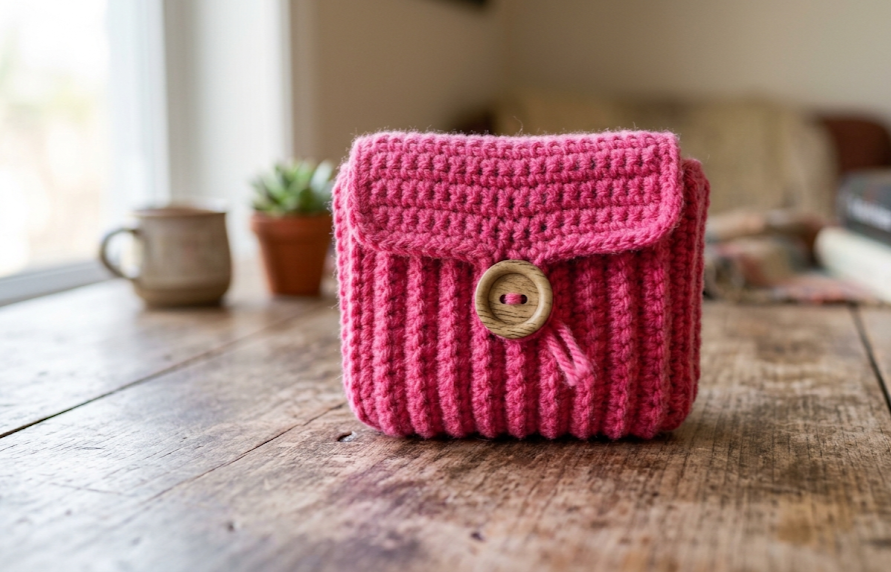
Step 3 — Attach the button.
Close the flap over the front of the pouch and use the buttonhole as a guide to mark where the button should sit on the front of the pouch body. The button center should align with the center of the ch-2 buttonhole space. Using a doubled strand of yarn or strong thread, sew the button firmly in place through all layers. Knot and weave in securely on the inside.
Step 4 — Block (optional).
Lightly steam block the finished pouch to even out stitches and encourage the flap to lie flat. Pin the flap in the closed position while blocking if desired.
Finished dimensions: Approximately 9–10 cm wide × 7–8 cm tall (body), with a 3–4 cm flap.
Beginner & Intermediate Tips
Consistent BLO tension: The BLO rows are the key to this pouch’s texture. Keep your tension even and not too tight — it is easy to tighten up when working through a single loop. If your fabric is pulling or curling, try going up half a hook size.
Counting the buttonhole: The buttonhole in Row 19 skips exactly 2 stitches and replaces them with a ch-2. When you come back across in Row 20, work 2 hdc directly into that ch-2 space, not into the chains individually. This keeps your stitch count correct.
Matching button size to buttonhole: A button between 2 cm and 2.5 cm fits the ch-2 buttonhole comfortably. If your button is smaller, you can reduce to a ch-1 skip 1 buttonhole instead. If it is larger, try ch-3 skip 3.
Seaming tip: Use mattress stitch along the side edges for the most invisible seam. Work with the right sides facing you and catch the edge stitches on alternating sides, pulling snug every 3–4 stitches.
Flap alignment: Before seaming the sides, fold your piece and slip your button through the buttonhole once to check that the flap reaches correctly. Adjust the fold depth by 1–2 rows if needed before committing to the seam.
Variations
1. Beige or Natural Linen Tone
Work the pouch in a warm cream or sand-colored cotton yarn for a minimalist, neutral aesthetic. Pair with a vintage brass button for a heritage cottage-core feel. Cotton yarn will give a stiffer, more structured result.
2. Nano Size
Cast on only 10 stitches and work 12 rows for the body to create a truly tiny pouch, perfect for earrings, a single folded bill, or a tiny keepsake. Reduce the buttonhole to ch-1, skip 1.
3. Striped Color Block
Work the body in alternating 2-row stripes in two or three coordinating colors. Since you are working flat in rows, color changes are simple — just switch yarn at the end of each 2-row set. Carry the unused color loosely up the side edge.
4. Textured Waffle Stitch Body
Instead of BLO hdc rows, work the body in a simple waffle stitch by alternating a row of regular hdc with a row of hdc-BLO. This creates a deeper, more pronounced grid texture that looks especially striking in solid dark colors.
5. Add a Wrist Loop
Before seaming, attach a short 15 cm length of chain or twisted cord to one side seam and tie a knot to create a wrist loop. Instant mini wristlet wallet.
Love this pattern? Save it to your Pinterest boards so you can find it again and share the crochet love! Tag your finished pouches with #FoodieRippleCrochet — we would love to see every colorful version you make.


