The Best Fluffy Pancakes recipe you will fall in love with. Full of tips and tricks to help you make the best pancakes.
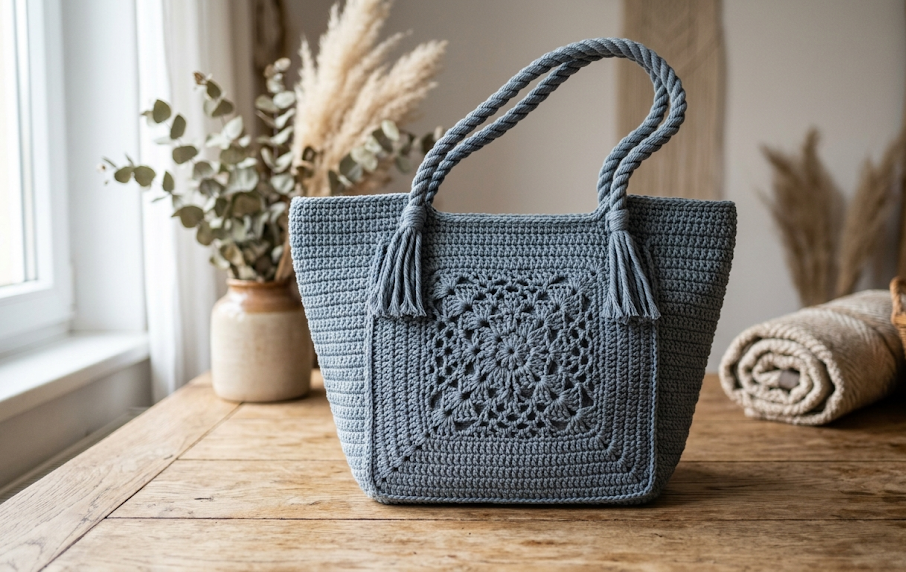
There is something irresistibly elegant about a bag that does two things at once — holds everything you need and looks stunning doing it. The crochet trapeze bag does exactly that. With its distinctive trapezoidal silhouette, a beautifully textured lace panel centered on the front, and long twisted rope handles, this tote is as functional as it is eye-catching. Whether you carry it to a farmers’ market, a beach day, or a weekend brunch, it earns compliments every time.
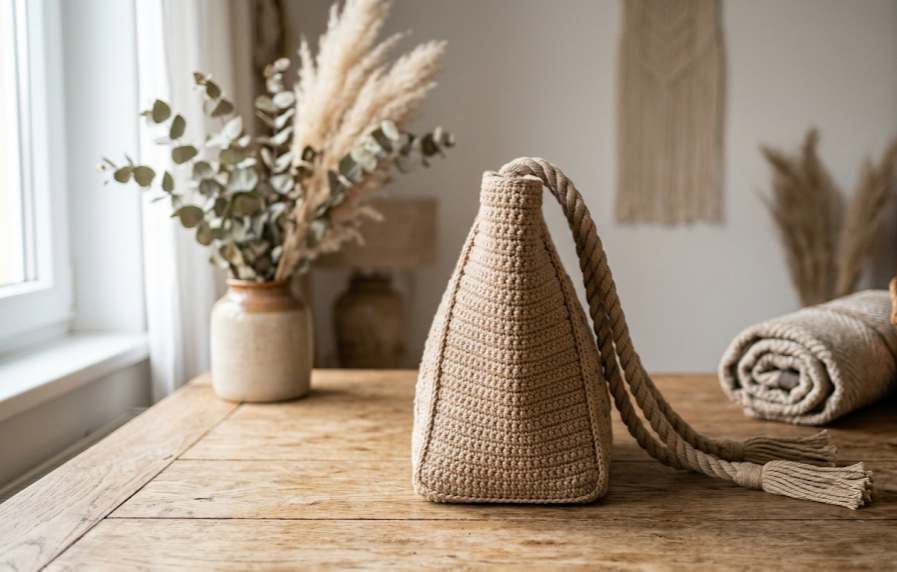
This pattern is written for intermediate crocheters who are comfortable working in the round, joining panels, and constructing a structured base. The trapeze shape — wider at the bottom, narrowing toward the open top — gives the bag its name and its quietly architectural look. Two colorways are equally stunning: a dusty blue-gray for a cool, modern feel or a warm natural tan reminiscent of woven jute. Both are made with the same pattern, only the yarn color changes.
The finished bag is roughly 30cm wide at the base, 22cm wide at the top opening, and 25cm tall at the body. The twisted handles add another 40cm of reach, making the bag easy to carry by hand or loop over a wrist. The interior is open and spacious — perfect for a farmers’ market haul, a crochet project bag, or an everyday tote for a book, wallet, and sunscreen.
|
Difficulty
Intermediate
|
Time
6–9 Hours
|
Hook Size
4.0 mm
|
Yarn Weight
DK / #3
|
Finished Size
30 × 25 cm
|
Gauge
18 single crochet × 20 rows = 10cm × 10cm square
Hook: 4.0mm
Yarn Weight: DK / Light Worsted (#3)
Gauge matters for this project. The structured trapeze shape depends on consistent stitch density — too loose and the bag will sag and lose its silhouette; too tight and the base will cup or buckle. Work a gauge swatch before starting and adjust hook size if needed.
Materials
- Yarn: DK weight / Light Worsted (#3), approx. 400g total
- Color A: Dusty blue-gray (or color of choice for main body) — approx. 300g
- Color B: Natural tan/beige (or contrasting color for handles and trim) — approx. 100g
- Hook: 4.0mm crochet hook
- Notions:
- Stitch markers (at least 4)
- Yarn needle for weaving in ends
- Scissors
- Row counter (optional but helpful)
- Optional: stiff interfacing or bag base insert (25cm × 10cm) for extra structure
Abbreviations
| Abbreviation | Meaning |
|---|---|
| ch | chain |
| sl st | slip stitch |
| sc | single crochet |
| hdc | half double crochet |
| dc | double crochet |
| ch-sp | chain space |
| sk | skip |
| st(s) | stitch(es) |
| rep | repeat |
| BLO | back loop only — insert hook into the back loop of the stitch only (creates a ridge on the right side) |
| pm | place marker |
| MR | magic ring — an adjustable loop used to start working in the round with a closeable center hole |
| [ ] × n | repeat the instructions in brackets n times |
Pattern Instructions
PART A: BAG BASE
The base is worked flat in rows to create a firm rectangular foundation for the trapeze shape.
Ch 55.
Row 1 (RS): Sc in 2nd ch from hook and in each ch across. (54 sc)
Row 2: Ch 1, turn. Sc in BLO of each st across. (54 sc)
Rows 3–12: Rep Row 2. (54 sc each row)
At the end of Row 12, do not turn. You will now pick up stitches around all four sides of the rectangle to begin the body.
PART B: BAG BODY (worked in joined rounds)
The body is worked in the round, building upward from the base. The trapeze shape is created by decreasing stitches gradually on both side panels every few rounds.
Set-Up Round: Ch 1. Work 54 sc along the top edge (already worked), pm at corner; work 12 sc along the short side; pm at corner; work 54 sc along the bottom chain edge (picking up one sc per chain); pm at corner; work 12 sc along the remaining short side; pm at corner; sl st to first sc to join. (132 sc)
Rounds 1–5: Ch 1. Sc in each st around. Sl st to join. (132 sc)
Round 6 (Decrease Round): Ch 1. Sc to 1 st before side marker, sc2tog, sc across long side, sc2tog, sc to 1 st before next side marker, sc2tog, sc across remaining long side, sc2tog. Sl st to join. (128 sc)
Rounds 7–11: Ch 1. Sc in each st around. Sl st to join. (128 sc)
Round 12 (Decrease Round): Rep Round 6 decrease. (124 sc)
Rounds 13–17: Ch 1. Sc in each st around. Sl st to join. (124 sc)
Round 18 (Decrease Round): Rep Round 6 decrease. (120 sc)
Rounds 19–22: Ch 1. Sc in each st around. Sl st to join. (120 sc)
Round 23 (Decrease Round): Rep Round 6 decrease. (116 sc)
Rounds 24–28: Ch 1. Sc in each st around. Sl st to join. (116 sc)
Continue in this pattern — one decrease round every 5 rounds — until the bag measures approximately 20cm from the base. At this point you should have approximately 104–108 sc around. Adjust as needed; stitch count at the top opening does not need to be exact.
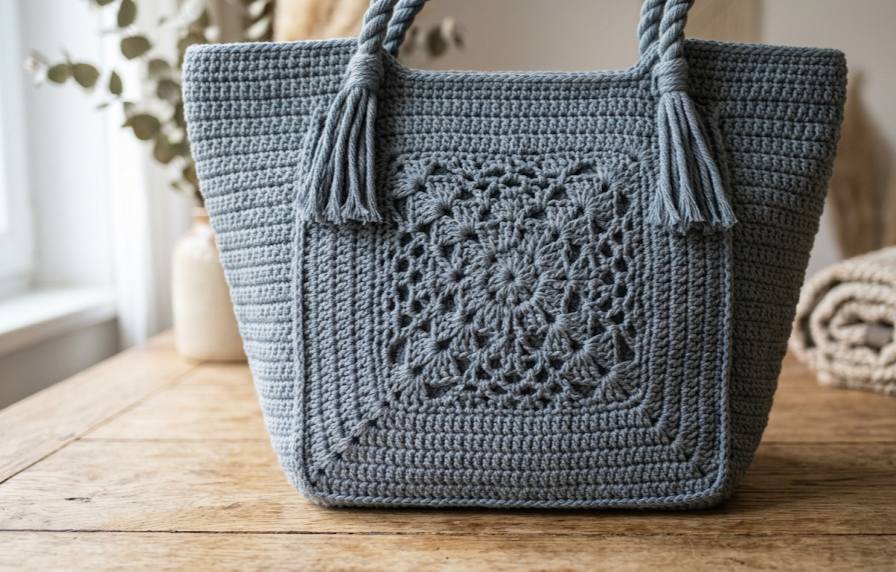
PART C: LACE FRONT PANEL
The lace panel is worked separately as a flat rectangle and sewn onto the front of the bag body once the body is complete. It uses a simple granny-cluster and chain-space stitch to create an open lace effect.
Ch 31.
Row 1 (RS): Dc in 4th ch from hook (counts as first dc). [Ch 1, sk 2 ch, 3 dc in next ch] × 7. Ch 1, sk 2 ch, dc in last ch. Turn. (8 clusters + 2 edge dc)
Row 2: Ch 3 (counts as dc). [3 dc in ch-1 sp, ch 1] × 8. Dc in top of turning ch. Turn.
Row 3: Ch 3. [Ch 1, 3 dc in ch-1 sp] × 8. Ch 1, dc in top of turning ch. Turn.
Rows 4–11: Rep Rows 2–3 alternately.
Row 12: Rep Row 2.
Fasten off. Weave in ends. Panel should measure approximately 14cm wide × 13cm tall.
PART D: TOP EDGE FINISHING
Round 1: Join yarn at any point along the top opening. Ch 1. Work 1 sc in each st around. Sl st to join. (104–108 sc depending on final body count)
Round 2: Ch 1. Work 1 hdc in each st around. Sl st to join. (same count)
Round 3: Ch 1. Work 1 sc in each st around. Sl st to join. (same count)
Fasten off. This triple-row edge stabilizes the bag opening and gives it a clean, firm rim.
PART E: HANDLES (make 2)
Handles are twisted rope-style and attached at the front and back panels, approximately 8cm in from each side edge.
Foundation: Ch 121. Sc in 2nd ch from hook and in each ch across. (120 sc)
Do not fasten off. Fold the strip in half lengthwise. Sl st through both layers along the entire length to close the tube into a firm cord. (60 sl st through doubled layers)
Twisting: Hold one end firmly and twist the cord 20–25 times clockwise until it begins to coil back on itself naturally. Fold the twisted cord in half, holding both ends together; the cord will twist back on itself automatically to form the characteristic rope handle. Secure both ends with a sl st to lock the twist.
Each finished handle should measure approximately 40cm in length.
Assembly
- Block the lace front panel lightly with a damp cloth or spray. Pin it to the front center of the bag body, positioned approximately 4cm up from the base. The panel should sit centered horizontally, with roughly 8cm of plain sc on each side of it.
- Using a yarn needle and matching yarn, whipstitch around all four edges of the lace panel to attach it firmly. Take small, even stitches through both layers.
- Position the first handle on the front of the bag: place the left end of the handle approximately 8cm in from the left side seam, and the right end approximately 8cm in from the right side seam, both at the same height along the top edge (approximately 2cm below the top rim). Pin in place.
- Using a yarn needle, sew each handle end down securely with at least 8–10 passes through the layers in a rectangular or X-pattern stitch for strength.
- Repeat on the back panel for the second handle, making sure handle heights match front to back so the bag hangs evenly.
- Optional: Cut a piece of stiff interfacing or thin plastic canvas to 25cm × 10cm and insert it into the base of the bag for structure. The bag base will hold it in place without stitching.
- Weave in all remaining ends.
Beginner/Intermediate Tips
Maintaining the trapeze shape: The key to the trapeze silhouette is placing your decrease stitches consistently at the same two side points every decrease round. Use stitch markers at the side “seams” from Round 1 and move them up every round.
Lace panel tension: Work the lace panel with slightly looser tension than the body — a half-size larger hook (e.g., 4.5mm) for just the panel can help the open chain spaces drape naturally without pulling.
Twisted handle durability: The more twists you work into the handle cord before folding, the tighter and firmer the rope handle will be. Aim for 20–25 twists minimum. A handle that is under-twisted will unravel with use.
Joining the base edge: When picking up stitches along the foundation chain in the Set-Up Round, insert the hook under both loops of each original chain stitch for the cleanest and most even base line.
Variations
- Jute-look version: Use a natural cotton or cotton-blend DK yarn in an undyed tan or ecru to mimic the look of a woven jute bag with the soft feel of yarn.
- Mini trapeze clutch: Work the pattern at half scale using fingering weight yarn and a 2.5mm hook for a small evening clutch. Omit the handles and add a magnetic snap closure instead.
- Colorblock trapeze: Work the bottom 10 rounds in one color, the middle in a contrasting color, and the top edge and handles in a third accent color for a bold, graphic look.
- Market bag version: After completing the body, replace solid rounds 1–5 with a mesh stitch pattern (ch 1, sk 1, sc) for a lighter, stretchy market bag that compresses into a pocket when empty.
- Lined tote: Sew a simple cotton fabric liner to fit the interior, slip-stitched around the top opening, for a cleaner look and added structure that protects knit stitches from stretching under heavy loads.
If you love this free crochet trapeze bag pattern, save it to your Pinterest boards so you can find it again later! Share your finished make with #FoodieRippleCrochet — we love seeing your colorways.


