
The Best Fluffy Pancakes recipe you will fall in love with. Full of tips and tricks to help you make the best pancakes.

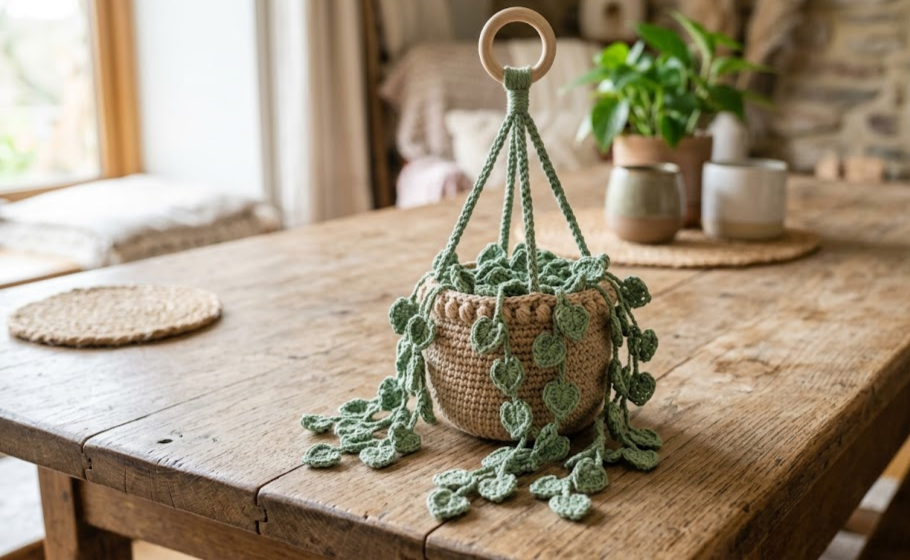
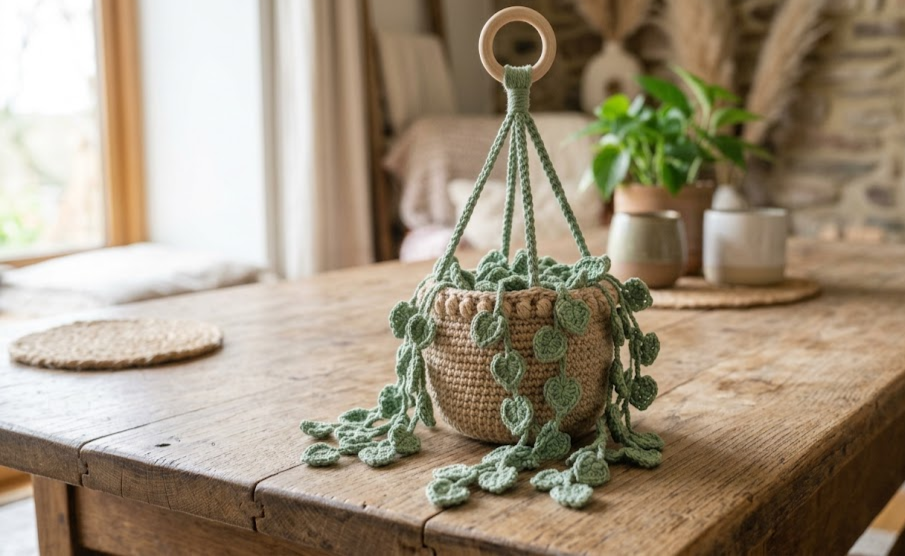
There is something undeniably charming about a tiny crochet plant hanging in a sunny window or above a bookshelf — and this mini crochet hanging planter with drooping heart-shaped leaves is one of those projects you will want to make over and over again. Worked in fingering weight yarn with a delicate 2.5mm hook, this little planter features a structured round pot in warm tan, twisted hanging cords in sage green, and a cascade of open-stitch heart leaves that droop beautifully at varying lengths. The finished piece measures approximately 8cm tall at the pot with the full hanging length reaching about 15cm — small enough to sit in the palm of your hand, but detailed enough to look absolutely stunning as home décor, a gift topper, a bag charm, or a plant lover’s ornament.
This pattern is written for intermediate crocheters who are comfortable working in the round, managing fine yarn, and assembling small crocheted components. If you have made amigurumi before, you already have most of the skills you need. The leaf shape uses a combination of chains, single crochets, and half double crochets to create that recognizable heart silhouette with a lacy, open quality — no complicated lace stitches required. Every section is written out in full so you can work through it start to finish without hunting down any external references.
Whether you are decorating a small apartment with cozy handmade touches, crafting a heartfelt handmade gift, or simply looking for a satisfying weekend project that uses up your fingering weight scraps, this mini hanging planter is exactly what you need.
|
Difficulty
Intermediate
|
Time
3–4 Hours
|
Hook Size
2.5mm
|
Yarn Weight
Fingering / Size 1
|
Finished Size
8cm pot / 15cm total
|
Gauge
28 sc × 30 rows = 10cm × 10cm worked in single crochet using a 2.5mm hook and fingering weight (Size 1) yarn.
Gauge is important for this pattern because the pot needs to maintain a firm, structured shape. Work a small gauge swatch before beginning. If your swatch comes out larger than 10cm, go down a hook size. If it comes out smaller, go up a hook size.
Materials
- Yarn A (Tan/Beige): Fingering weight / Size 1 yarn, approximately 20–25m
- Yarn B (Sage Green): Fingering weight / Size 1 yarn, approximately 35–40m
- Hook: 2.5mm crochet hook
- Yarn needle for weaving in ends and assembly
- Scissors
- Stitch marker (locking preferred) to mark round beginnings
- Small piece of cardboard or plastic canvas (optional, for pot base stiffening)
- Craft glue or fabric stiffener (optional, for stiffening leaves)
Abbreviations
| Abbreviation | Meaning |
|---|---|
| ch | chain |
| sl st | slip stitch |
| sc | single crochet |
| hdc | half double crochet |
| dc | double crochet |
| inc | increase (2 sc in same stitch) |
| MR | magic ring |
| pm | place marker |
| rm | remove marker |
| st(s) | stitch(es) |
| sp | space |
| rep | repeat |
| sk | skip |
| BLO | back loop only |
| RS | right side |
| WS | wrong side |
Magic Ring (MR): Make a loop with your yarn, insert the hook through the loop, pull up a loop of working yarn, and chain as instructed. After completing the round, pull the yarn tail to close the center hole before slip stitching to join.
Pattern Instructions
PART 1: THE POT
The pot is worked from the bottom up in continuous spiral rounds. Use a stitch marker to mark the first stitch of each round and move it up as you go.
Using Yarn A (Tan/Beige):
Round 1: MR, 6 sc into ring. Pull tail to close. (6)
Round 2: Inc in each st around. (12)
Round 3: [Sc 1, inc] × 6. (18)
Round 4: [Sc 2, inc] × 6. (24)
Round 5: Working in BLO (back loop only — insert hook through only the back loop of each stitch to create a ridge line that defines the base edge of the pot), sc in each st around. (24)
Rounds 6–11: Sc in each st around. (24) — 6 rounds total, creating the body of the pot.
Round 12 (Rim): Working in BLO, sc in each st around. (24)
Round 13: [Sc 2, inc] × 6. (30)
Round 14: Sc in each st around. (30)
Round 15: Sl st in each st around. (30) — Fasten off and weave in end. This slip stitch round creates the finished rolled rim look.
PART 2: POT BASE INSERT (Optional but Recommended)
Cut a small circle from cardboard or plastic canvas to fit snugly inside the flat base of the pot. This prevents the bottom from caving inward when the plant hangs. Insert before assembly.
PART 3: THE HANGING CORD
Using Yarn B (Sage Green):
Cut 3 strands of Yarn B, each approximately 50cm long.
Hold all 3 strands together. Fold the bundle in half. At the fold, create a loop — this becomes your hanging loop at the top.
Divide the 6 strands into 2 groups of 3. Twist each group of 3 tightly in one direction (clockwise), then twist the two groups around each other in the opposite direction (counter-clockwise). This creates the natural twisted rope look visible in the original.
Secure the bottom end with a knot, leaving approximately 5–6cm of cord below the knot as the tails that will attach to the pot rim.
The finished cord from loop to knot should measure approximately 10–12cm. Adjust length to preference before knotting.
PART 4: THE HEART-SHAPED LEAVES
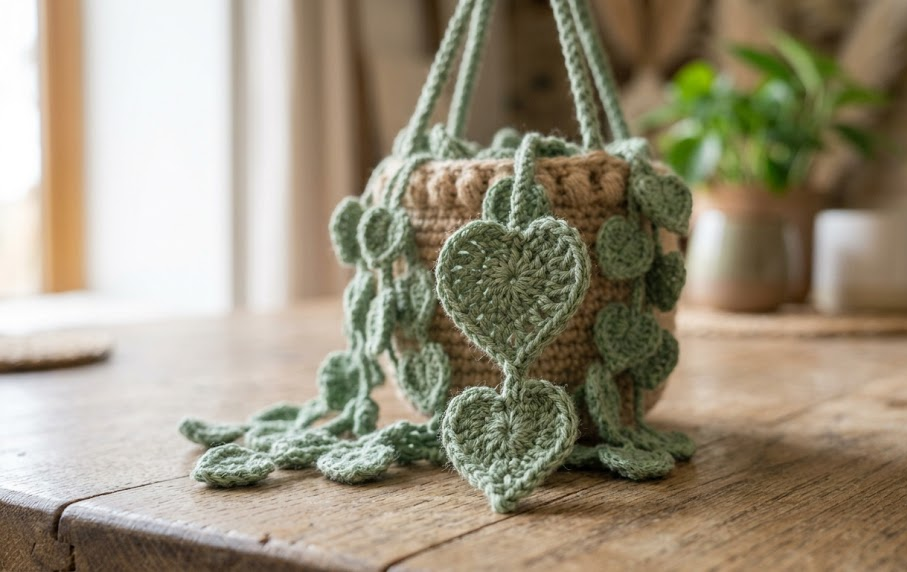
Each leaf is worked individually. Make 8 leaves total — 4 longer drooping leaves and 4 shorter leaves for variation. Each leaf includes its own short stem chain.
Using Yarn B (Sage Green):
Leaf Stem: Ch 8. This forms the individual hanging stem for each leaf. (8 ch)
Now work the leaf body beginning at the base of the chain:
Round 1 (First Side of Leaf):
Starting in the 2nd ch from hook: sc 1, hdc 1, dc 2, hdc 1, sc 1, sl st 1 in last ch (this is the tip of the heart). (7 sts worked down one side)
Working the second side of the chain: Rotate your work 180 degrees. You will now work back up the other side of the same foundation chain, inserting your hook into the unused loops on the underside of each chain stitch. This creates the mirror image second half of the leaf.
Round 1 continued (Second Side of Leaf):
Still working into the underside of the foundation chain: sc 1, hdc 1, dc 2, hdc 1, sc 1. (7 sts worked up second side)
Round 2 (Edge definition): Ch 1, sl st into each st around the entire leaf perimeter to neaten the edge and give the leaf a defined shape. When you reach the tip of the heart (the sl st at the bottom point), work ch 2, sl st back into the same point to create the pointed tip. Sl st to join at base of leaf stem. (28 sl sts + ch-2 tip)
Fasten off leaving a 10cm tail for attaching to the pot.
For longer drooping leaves: Ch 12 for the stem instead of Ch 8, then work the leaf body the same way.
Assembly
Step 1 – Attach the hanging cord to the pot.
Thread the 2 groups of 3 cord tails (from the bottom knot of the hanging cord) through the rim of the pot at the 12 o’clock and 6 o’clock positions, spacing them approximately 12 stitches apart on opposite sides of the rim (Round 14 of the pot). Pull each group of tails through to the inside of the pot using your yarn needle. Pull snugly so the pot hangs level. Tie the tails together inside the pot in a double knot and trim to 1cm. Apply a small drop of craft glue to the knots inside the pot for security.
Step 2 – Attach the leaves.
Using the yarn needle and the 10cm tails left on each leaf, attach leaves around the rim of the pot (Rounds 13–14). Space the 8 leaves evenly around the rim — approximately every 3–4 stitches. Alternate between shorter leaves (positioned higher, near the rim) and longer leaves (positioned slightly lower, with their stems draped over the edge so they hang freely). Pull each tail through to the inside of the pot and knot securely. Trim tails to 1cm.
Leaf hanging depth: Short leaves should droop approximately 4–5cm below the pot rim. Long leaves should droop approximately 7–8cm below the pot rim.
Step 3 – Stiffening (optional).
Mix fabric stiffener with water (1:1 ratio) or use undiluted. Pin each leaf flat on a foam board in the heart shape. Brush the stiffener mixture onto the leaves. Allow to dry completely (approximately 2–3 hours) before removing pins. This holds the heart shape beautifully.
Step 4 – Final shaping.
Gently stuff the inside of the pot with a small wad of matching yarn or polyfill to help it hold its round shape from the inside. This is optional but recommended if displaying as a hanging ornament.
Beginner and Intermediate Tips
Tension matters most on the pot. Because the pot needs to hold its shape and support the hanging leaves, keep your tension firm and consistent throughout the pot rounds. Loose tension will make the pot floppy.
Mark your rounds from the very first stitch. Working in a continuous spiral without a slip stitch join can be disorienting with fine yarn. Use a locking stitch marker at the start of every round — move it up each time you complete a round.
The second side of the chain is easier with a slightly loose foundation chain. If your leaf foundation chain is too tight, working back into the underside loops becomes very difficult. Work your chain stitches slightly loosely before beginning the leaf body.
Twisted cord technique tip. The key to a neat twisted cord is keeping consistent tension while twisting each group. Twist each group as tightly as you can before wrapping the two groups around each other — the tighter the individual twist, the neater the finished rope.
Fine yarn splits easily. Use a sharp-tipped hook (tapered tip rather than inline) to navigate the small loops of fingering weight yarn. Work in good lighting to distinguish individual stitch loops.
Variations
- Autumn Colorway: Work the pot in warm rust or terracotta yarn and the leaves in deep burgundy or mustard gold for a fall seasonal version perfect for October décor.
- Macramé-Style Hanger: Instead of a twisted yarn cord, create a simple macramé-style hanger by knotting 6 strands of cotton twine into a diamond pattern before attaching the pot. This elevates the boho aesthetic considerably.
- Jumbo Version: Scale the entire pattern up using DK or worsted weight yarn and a 4mm–5mm hook. The pot will measure approximately 12–15cm tall and the leaves will be noticeably more structured and dimensional — perfect as a Christmas tree ornament or party décor piece.
- Trailing Ivy Version: Instead of individual heart leaves, work longer trailing stems (ch 40–50) with leaves attached every 8–10 chains along the length, creating the look of trailing ivy or string-of-hearts plant rather than loose draping leaves.
- Multiple Pots Mobile: Make 3 mini hanging planters in graduating sizes and suspend them from a single piece of driftwood or a wooden dowel at different heights using coordinating twisted cords. Space them approximately 10–15cm apart along the dowel for a stunning wall installation.
If you loved making this mini crochet hanging planter, save this pattern to your Pinterest boards so you can come back to it anytime — and share your finished makes using #FoodieRippleCrochet so the whole community can see your beautiful work!



