
The Best Fluffy Pancakes recipe you will fall in love with. Full of tips and tricks to help you make the best pancakes.

Intro
Step into a world of witchcraft and wizardry with this stunning, intricately designed blanket square inspired by everyone’s favorite magical universe. Whether you are building a full commemorative sampler blanket or creating a standalone wall hanging to display your house pride, this project brings cozy nostalgia straight to your crochet hook. Featuring a bold black backdrop that makes the vibrant house colors pop, this piece showcases a beautifully framed central crest surrounded by iconic magical motifs like a flying golden ball, a sorting hat, a loyal snowy owl, and beloved student characters.
Designed for intermediate crocheters or ambitious beginners looking to master colorwork, this pattern utilizes clean tapestry crochet lines to render pixel-perfect imagery. It makes a magnificent gift for a dedicated fan, a whimsical addition to a nursery, or a stunning focal piece for your own living room sofa. Grab your favorite house colors, settle into a cozy chair, and let’s cast a stitching spell to bring this magical masterpiece to life!
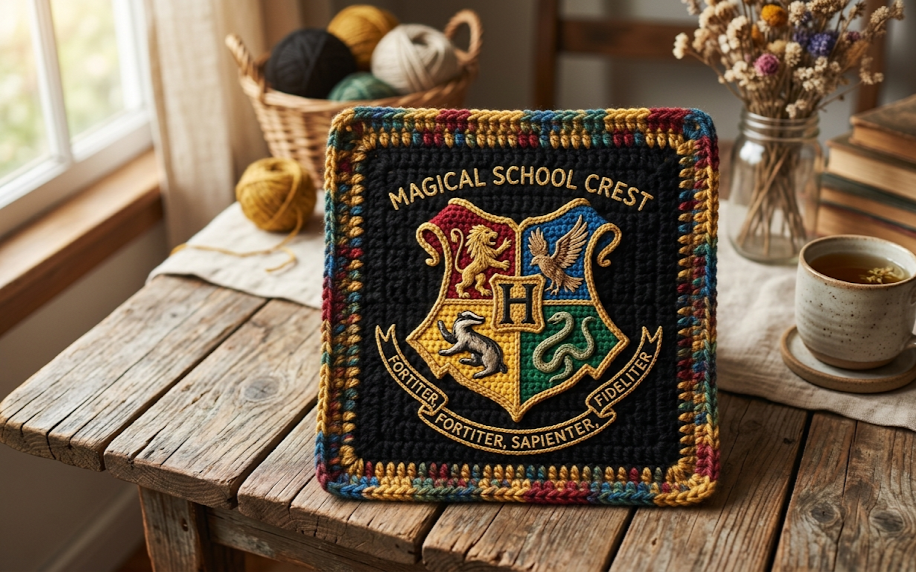
| Difficulty Intermediate | Time 8-10 Hours | Hook Size 2.5 mm | Yarn Weight Sport (#2) | Finished Size 25×25 cm |
Gauge
To ensure your finished block matches the intended dimensions, it is highly recommended to complete a gauge swatch before diving into the full panel.
- Gauge Swatch Spec: 26 stitches and 28 rows in single crochet = 10 cm x 10 cm (4″ x 4″) using a 2.5 mm crochet hook.
- Hook Size Used: 2.5 mm (US B-1 or C-2 depending on manufacturer)
- Yarn Weight Used: Sport Weight (Fine #2)
If your swatch is too small, try switching to a larger hook size. If your swatch is too large, drop down a hook size to achieve the correct tension.
Materials List
- Sport Weight Yarn (100% Acrylic or Cotton blend, approx. 125m per 50g):
- Main Color (MC): Jet Black – 100g
- Accent Color 1 (AC1): Crimson Red – 30g
- Accent Color 2 (AC2): Bright Gold – 30g
- Accent Color 3 (AC3): Emerald Green – 20g
- Accent Color 4 (AC4): Sapphire Blue – 20g
- Accent Color 5 (AC5): Soft Grey – 20g
- Accent Color 6 (AC6): Pure White – 20g
- Accent Color 7 (AC7): Chestnut Brown – 20g
- Accent Color 8 (AC8): Pale Peach/Flesh Tone – 15g
- Crochet Hook: 2.5 mm
- Notions:
- Yarn needle for weaving in ends and duplicate stitch embroidery
- Sharp embroidery scissors
- Stitch markers (to mark row repeats or edges)
- Blocking boards and T-pins
Abbreviations Table
| Abbreviation | Description |
| ch | Chain stitch |
| st(s) | Stitch(es) |
| sc | Single crochet |
| sl st | Slip stitch |
| MC | Main Color (Jet Black) |
| AC | Accent Color (followed by number) |
| RS | Right Side of work |
| WS | Wrong Side of work |
| BLO | Back Loop Only |
Pattern Instructions
Technique Notes To Remember
- Tapestry Crochet Color Changes: To change colors seamlessly, work the last single crochet of the old color until two loops remain on your hook, then drop the old yarn, pick up the new color, and pull it through the two loops to complete the stitch.
- Carrying Yarn: Carry the unused colors along the top of the previous row, working your single crochet stitches over them to hide them within the fabric. Ensure you keep your tension even so the carried yarn doesn’t bunch or pull the square out of shape.
Central Crest Base Panel
The square is worked from the bottom up in rows. Always turn at the end of each row. The turning chain-1 does not count as a stitch.
Row 1 (RS): Using MC, ch 66. Starting in the second ch from hook, sc in each ch across to the end. Turn. (65 sts)
Row 2 (WS): Ch 1, sc in each st across. Turn. (65 sts)
Row 3 – Row 5: Repeat Row 2 using MC exclusively. (65 sts)
Introducing the Lower Crest Frame (Gold and Blue/Grey elements start here):
Row 6: Ch 1, sc 25 in MC, change to AC2, sc 15, change to MC, sc 25. Turn. (65 sts)
Row 7: Ch 1, sc 24 in MC, change to AC2, sc 2, change to AC4, sc 13, change to AC2, sc 2, change to MC, sc 24. Turn. (65 sts)
Row 8: Ch 1, sc 23 in MC, change to AC2, sc 2, change to AC4, sc 15, change to AC2, sc 2, change to MC, sc 23. Turn. (65 sts)
Row 9: Ch 1, sc 22 in MC, change to AC2, sc 2, change to AC4, sc 7, change to MC (central divider), sc 3, change to AC5, sc 7, change to AC2, sc 2, change to MC, sc 22. Turn. (65 sts)
Row 10: Ch 1, sc 21 in MC, change to AC2, sc 2, change to AC4, sc 7, change to MC, sc 5, change to AC5, sc 7, change to AC2, sc 2, change to MC, sc 21. Turn. (65 sts)
Expanding into the Mid-Section (Red and Green elements introduce):
Row 11 – Row 25: Continue following the tapestry colorwork chart layout: maintaining a 2-stitch border of AC2 (Gold) for the outer shield perimeter, keep the lower-left quadrant in AC4 (Blue), the lower-right quadrant in AC5 (Grey), and separate them with a thin 3-stitch vertical line of MC. Drop and turn at each row end. (65 sts)
Transitioning to Upper Quadrants:
Row 26: Ch 1, sc 18 in MC, change to AC2, sc 3, change to AC1 (Red), sc 11, change to MC, sc 1, change to AC3 (Green), sc 11, change to AC2, sc 3, change to MC, sc 18. Turn. (65 sts)
Row 27 – Row 45: Follow color mapping to construct the upper-left quadrant in AC1 (Red) and the upper-right quadrant in AC3 (Green), framing everything beautifully with the AC2 (Gold) border outline. Turn. (65 sts)
Closing the Crest Top:
Row 46: Ch 1, sc 20 in MC, change to AC2, sc 25 over the crest peak, change to MC, sc 20. Turn. (65 sts)
Row 47 – Row 60: Work completely in MC sc to finish the background block. Turn. (65 sts)
Fasten off and weave in all loose background ends securely.
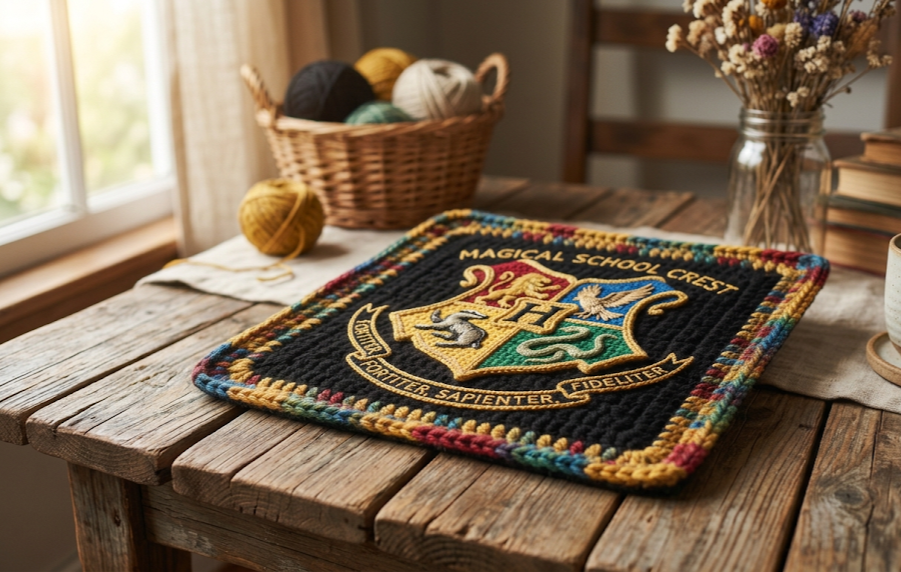
Embroidered Detail Accents
To achieve the striking detail seen in image_cabf68.jpg for the inner house mascots (Lion, Snake, Badger, Eagle) and the surrounding character borders, follow these steps using a tapestry needle and your contrasting accent colors.
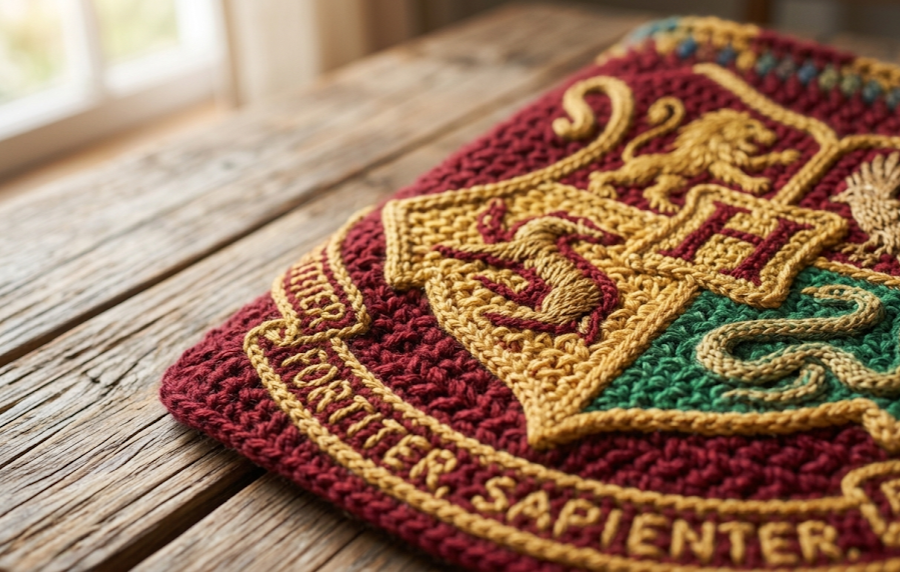
- Duplicate Stitch Embroidery: Thread your needle with AC2 (Gold). Follow the grid lines on your completed colorwork blocks to duplicate stitch the silhouette of the central mascot shapes directly over the background sc stitches.
- Fine Outline Bordering: Use a simple surface slip stitch or a backstitch directly into the fabric to crisp up the edges of the crest. Surface slip stitch is performed by keeping your working yarn on the wrong side (WS) of your fabric, inserting your hook from the right side (RS), pulling up a loop, and pulling it directly through the loop on your hook. Move to the adjacent stitch space and repeat around the entire shield boundary line.
Assembly Steps
1. Blocking the Square
Before combining elements or adding external trims, you must block your finished piece to ensure a perfect square shape measuring exactly 25 cm by 25 cm.
- Submerge the finished panel in lukewarm water with a drop of no-rinse wool wash for 15 minutes.
- Gently squeeze out the excess water by rolling it inside a clean, dry towel. Do not wring or twist.
- Pin the square onto your foam blocking boards using rustproof T-pins. Space your pins roughly 1.5 cm apart along all four edges to create perfectly straight lines and sharp corners.
- Allow to air-dry completely away from direct sunlight.
2. Side Frame Alignment
If you choose to sew individual framing panels around the central crest (as shown in the surrounding multi-grid square layout in image_cabf68.jpg):
- Line up your outer feature blocks side by side against the edges of the main crest panel.
- Use stitch markers to clip the corners together, ensuring the edges line up symmetrically. Each small border element should align perfectly with the stitch count of the central base panel.
- Using a yarn needle threaded with MC, join the edges using the mattress stitch for an invisible, flat seam.
Beginner/Intermediate Tips
- Manage the Tangled Yarn: With up to 5 colors active at once in a single row, yarn management can become a chaotic puzzle. Try using yarn bobbins for smaller sections (like the gold shield lines) instead of carrying full skeins across long spans. This keeps your fabric lightweight and prevents bleeding colors.
- Watch Your Tension: Carrying yarn inside your stitches naturally thickens the fabric. If you notice your row width shrinking or warping, consciously relax your hands or tug gently horizontally across your active row to give the carried strands a little slack.
- Count, Count, Count: Missing a single stitch early in a colorwork pattern will shift the entire image diagonally. Mark your central stitch (Stitch 33) with a bright stitch marker so you always know exactly where your center line lies.
Variations
- The Monochrome Shadow Box: Crochet the entire design using only shades of grey, charcoal, and cream for a vintage, sophisticated look that blends seamlessly into minimalist home decor.
- Cushion Cover Conversion: Instead of making a giant blanket, make two identical central crest panels. Place them right sides facing out and join them along three sides with single crochet, insert a 25 cm x 25 cm pillow form, and seal the final side for a gorgeous accent pillow.
- House Pride Specialized: Instead of splitting the crest into four distinct house colors, make the entire inner shield field match your personal favorite house (e.g., solid Emerald Green for Slytherin or solid Crimson for Gryffindor) to customize your blanket layout.
- Sparkle Magic Edition: Run a thin strand of metallic gold embroidery thread alongside your AC2 yarn when completing the borders and central details to give the final design a shimmering, enchanted look.



