
The Best Fluffy Pancakes recipe you will fall in love with. Full of tips and tricks to help you make the best pancakes.

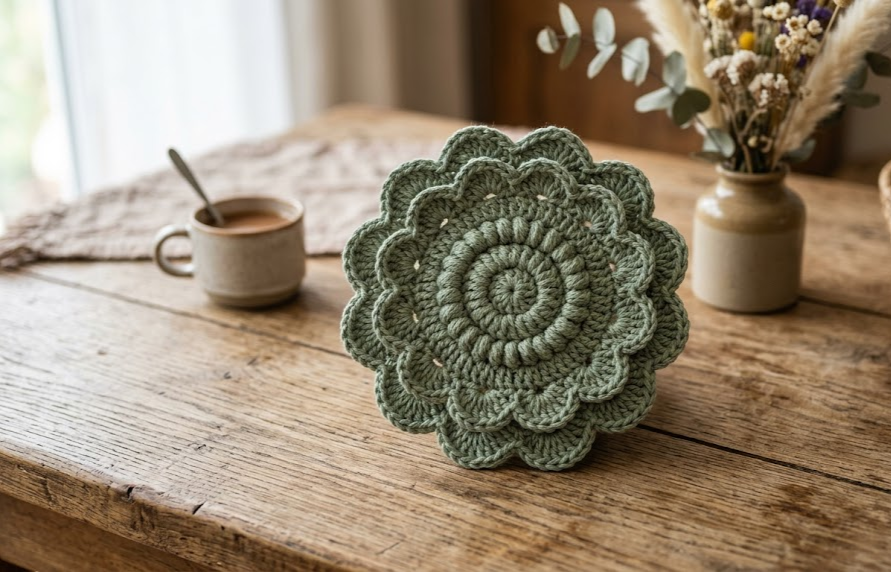
There’s something quietly satisfying about setting a handmade coaster under a warm mug of tea. These crochet flower coasters bring a soft, garden-inspired touch to any tabletop, with a gently scalloped petal edge that catches the light and a spiral textured center that adds just the right amount of visual interest without complicating the stitching. Worked up in a soft sage green cotton yarn, they have an organic, boho feel that fits right in on a wooden table, a windowsill shelf, or stacked in a basket by the kitchen counter.
This pattern is ideal for beginners who already know the basics of single crochet and are ready to try their first scalloped edge, but it’s just as enjoyable for more experienced crocheters looking for a quick, satisfying weekend project. Each coaster works up in under an hour, making this a perfect pattern for using up leftover cotton yarn or for crocheting a full matching set as a housewarming gift. The finished coasters are sturdy enough for everyday use, with cotton yarn that holds its shape and stands up to spills and regular washing.
Below you’ll find everything needed to make your own set: gauge, materials, a full abbreviations table, and complete row-by-row instructions with stitch counts so you always know exactly where you are in the pattern.
|
Difficulty
Beginner
|
Time
45–60 min
|
Hook Size
4mm (G/6)
|
Yarn Weight
Worsted (#4)
|
Finished Size
11cm (4.3″)
|
Gauge
4 rounds = 7cm (2.75″) in single crochet, worked in continuous spiral rounds, using a 4mm (US G/6) hook and worsted weight cotton yarn. Gauge is not critical for this project, but checking it will help you predict how large your finished coaster will be. If your circle is coming out noticeably larger or smaller than expected, adjust hook size up or down accordingly.
Materials List
- Worsted weight (#4) cotton yarn in sage green, approximately 25–30 grams per coaster
- 4mm (US G/6) crochet hook
- Yarn needle, for weaving in ends
- Stitch marker, to track the start of each round
- Scissors
Abbreviations
| Abbreviation | Meaning |
|---|---|
| MR | Magic ring |
| ch | Chain |
| sc | Single crochet |
| hdc | Half double crochet |
| dc | Double crochet |
| tr | Treble crochet |
| sl st | Slip stitch |
| st(s) | Stitch(es) |
| rnd | Round |
| inc | Increase (2 stitches in same stitch) |
| BLO | Back loop only |
| ( ) | Stitch count at end of round |
Pattern Instructions
Part 1: Center Spiral
Note on magic ring: A magic ring creates an adjustable loop that lets you close the center hole tightly once your first round of stitches is complete.
Rnd 1: Make a MR, ch 1 (does not count as a st throughout pattern), 6 sc into ring. Pull tail to close ring. Place marker in last st. (6 sts)
Rnd 2: Inc in each st around. (12 sts)
Rnd 3: *Sc in next st, inc in next st; repeat from * around. (18 sts)
Rnd 4: *Sc in next 2 sts, inc in next st; repeat from * around. (24 sts)
Rnd 5: *Sc in next 3 sts, inc in next st; repeat from * around. (30 sts)
Rnd 6: *Sc in next 4 sts, inc in next st; repeat from * around. (36 sts)
Continue working in continuous spiral (no joining slip stitches between rounds) — this is what gives the center its smooth, swirled texture rather than visible round seams. Fasten off at the end of Rnd 6, leaving a 15cm tail for seaming if desired, or continue directly into Part 2 if working the edge in the same color.
Part 2: Scalloped Petal Edge
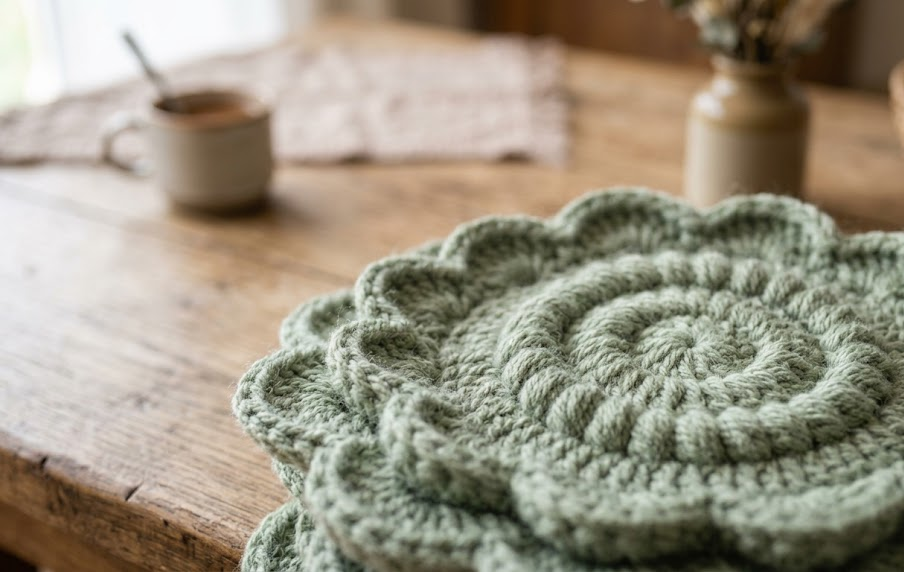
Note on BLO: Working in the back loop only leaves the front loop free, which creates a subtle ridge that helps the petals stand slightly proud of the base.
Rnd 7 (petal foundation): Join yarn in any st if fastened off. Working in BLO around, *ch 2, skip next st, sl st in next st; repeat from * around, ending with ch 2, skip last st, sl st to join to first sl st. You should have 18 ch-2 spaces.
Rnd 8 (petals): *In next ch-2 space work (sc, hdc, dc, hdc, sc) — this forms one petal; repeat from * around in each ch-2 space. (18 petals)
Fasten off, leaving a 15cm tail for weaving in.
Assembly Steps
- Weave in all loose ends securely using a yarn needle, running the tail through several stitches on the wrong side for about 5cm to prevent unraveling.
- Lightly steam-block each coaster by hovering a steam iron 2–3cm above the surface (do not touch the iron directly to the yarn) to help the petals lie flat and even.
- Lay the coaster on a flat surface and gently shape the scalloped edge with your fingers, spacing the petals evenly, then allow to air dry fully for at least 1 hour before stacking.
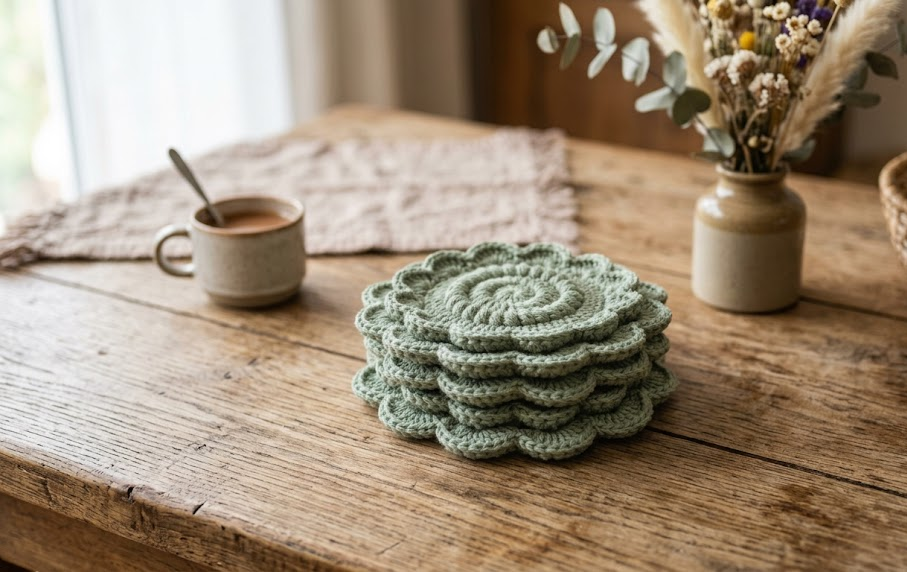
- If making a matching set, repeat the pattern 3–4 more times to create a full coaster set of 4.
Tips
- Keep your stitches consistent in tension through Rounds 1–6, since any tight or loose stitches will show clearly in the smooth spiral center.
- Use a stitch marker every round, not just the first — it’s easy to lose track of where a round starts once you’re working continuously.
- When working into the magic ring, pull the tail snug but check that the ring still moves before tightening it all the way, so you don’t accidentally trap the working yarn.
- Block your coasters even if you’re in a hurry; it makes a noticeable difference in how flat and polished the scalloped edge looks.
Variations
- Color block edge: Work the center spiral in one color and the petal round in a contrasting color, such as cream or terracotta, for a two-tone look.
- Mini size: Stop after Rnd 4 before working the petal edge for a smaller coaster, perfect for espresso cups.
- Trivet size: Add two extra increase rounds (Rnd 7 and 8 of the spiral) before starting the petal edge to make a larger version suitable as a hot pad or trivet.
- Layered flower display: Make two coasters in different sizes and stack them together with a few stitches at the center to create a layered flower-shaped wall hanging or table centerpiece.
If you make this set, save this pattern to your favorite crochet board so you can find it again, and tag your finished coasters with #FoodieRippleCrochet — I’d love to see your version!



