
The Best Fluffy Pancakes recipe you will fall in love with. Full of tips and tricks to help you make the best pancakes.

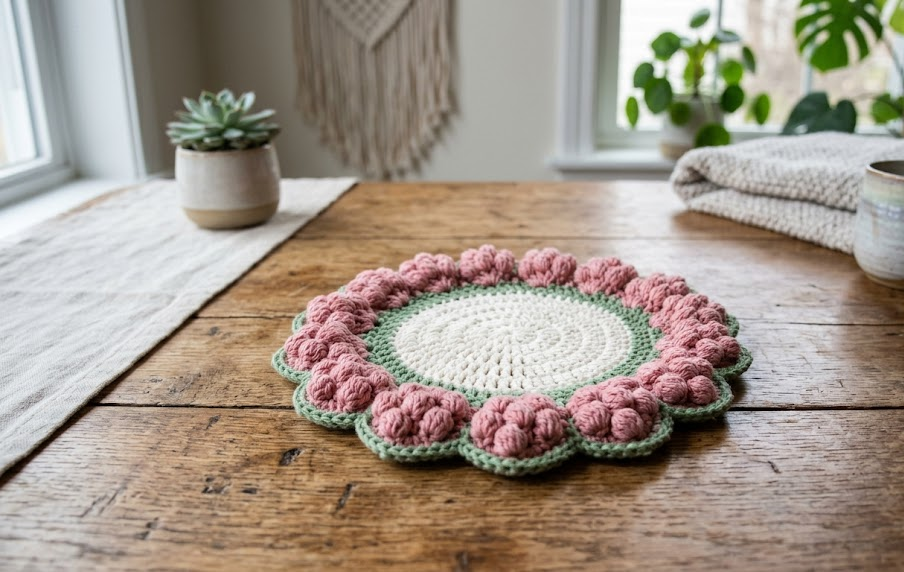
If you’ve been searching for a coaster pattern that feels special enough to gift but simple enough to whip up in an afternoon, this dusty pink bobble flower coaster is exactly what your hook has been waiting for. With a soft white center, a delicate sage green trim, and a ring of plush bobble stitch petals around the edge, this coaster looks like a tiny blooming flower resting on your table. It’s the kind of project that turns a plain cup of coffee or tea into a styled little moment.
This pattern is perfect for crocheters who already know the basics of single crochet and chain stitches and are ready to try something a little more textured. The bobble stitch border might look intricate, but once you get the rhythm down, it becomes almost meditative to work. Whether you’re making one for your own kitchen table or a whole set as a housewarming gift, this coaster comes together quickly and uses just a small amount of yarn in three colors.
The finished piece works wonderfully as a mug coaster, a trivet for small dishes, or even tucked under a candle for a cozy, handmade touch to your home decor. Let’s get into the details so you can start stitching your own.
|
Difficulty
Intermediate
|
Time
2–3 Hours
|
Hook Size
4.0mm (G/6)
|
Yarn Weight
DK (#3)
|
Finished Size
12cm (4.7in)
|
Gauge
18 stitches x 20 rows = 10cm x 10cm (4in x 4in) in single crochet, using a 4.0mm (G/6 US) hook with light worsted/DK weight yarn. Gauge is not critical for this project since it’s worked in the round and finished size can vary slightly, but matching gauge closely will help you get a coaster close to 12cm (4.7in) in diameter.
Materials List
- DK weight yarn (light worsted, #3) in white — approximately 15g / 30m
- DK weight yarn in sage green — approximately 5g / 10m
- DK weight yarn in dusty pink — approximately 10g / 20m
- 4.0mm (G/6 US) crochet hook
- Yarn needle for weaving in ends
- Scissors
- Stitch marker (optional, helpful for marking the start of rounds)
Abbreviations Table
| Abbreviation | Meaning |
|---|---|
| ch | chain |
| sl st | slip stitch |
| sc | single crochet |
| hdc | half double crochet |
| dc | double crochet |
| bobble | bobble stitch (made of 4 dc worked into same stitch, then joined at the top) |
| st(s) | stitch(es) |
| rnd(s) | round(s) |
| MR | magic ring |
| sp | space |
| ( ) | stitch count at end of round |
Pattern Instructions
Part 1: White Center
Magic Ring (MR): This is a technique where you form a loop with your yarn and crochet your first round of stitches into it, then pull the tail to close the center hole tightly, leaving no gap.
Rnd 1: Using white yarn, make a MR, ch 1 (does not count as st), 8 sc into ring. Pull tail to close ring. Join with sl st to first sc. (8)
Rnd 2: Ch 1, 2 sc in each st around. Join with sl st. (16)
Rnd 3: Ch 1, *sc in next st, 2 sc in next st; repeat from * around. Join with sl st. (24)
Rnd 4: Ch 1, *sc in next 2 sts, 2 sc in next st; repeat from * around. Join with sl st. (32)
Rnd 5: Ch 1, *sc in next 3 sts, 2 sc in next st; repeat from * around. Join with sl st. (40)
Rnd 6: Ch 1, *sc in next 4 sts, 2 sc in next st; repeat from * around. Join with sl st. Fasten off white yarn, weave in starting tail. (48)
Part 2: Sage Green Trim
Rnd 7: Join sage green yarn with a sl st in any st. Ch 1, sc in each st around. Join with sl st. Fasten off, leave a short tail to weave in later. (48)
Part 3: Dusty Pink Bobble Petals
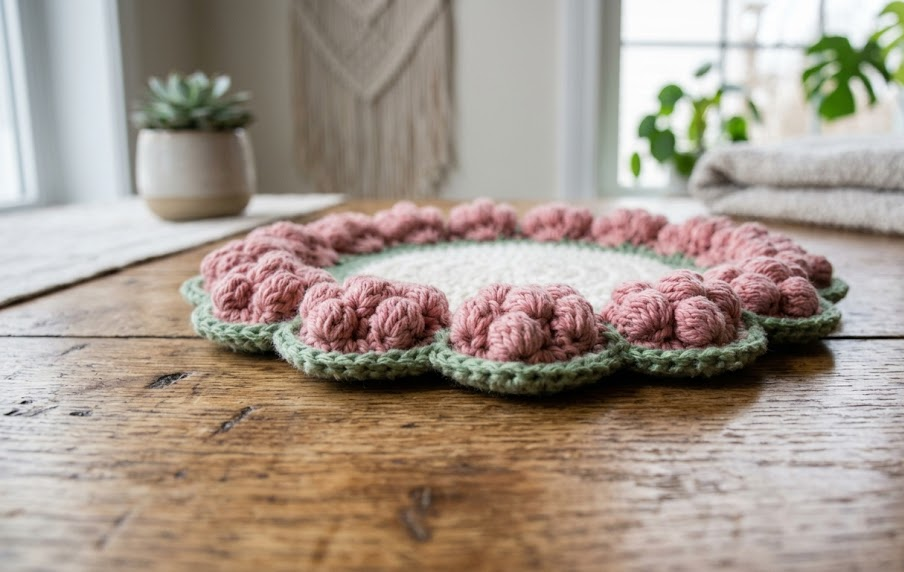
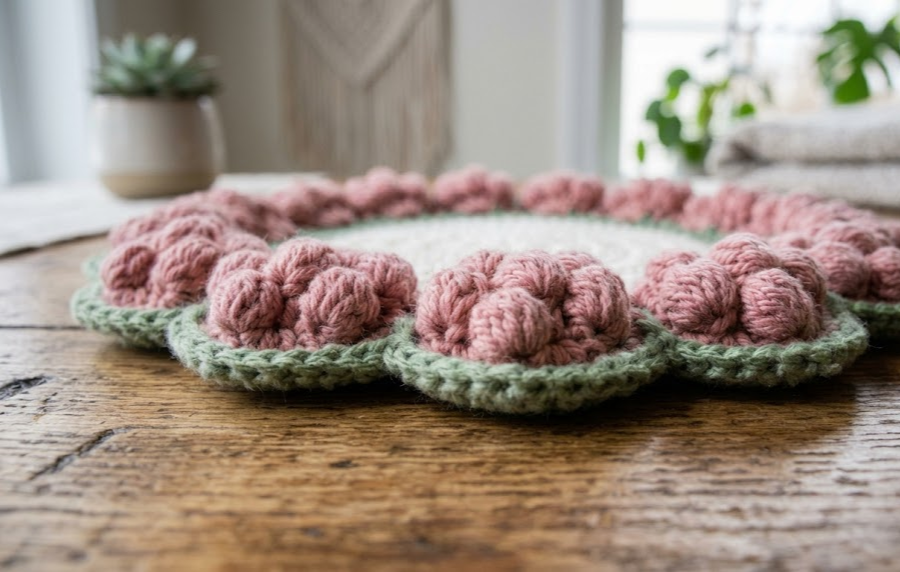
Bobble Stitch Note: To make one bobble, yarn over and insert hook into the stitch, pull up a loop (3 loops on hook), repeat this 3 more times into the same stitch (5 loops on hook total), then yarn over and pull through all 5 loops at once.
Rnd 8: Join dusty pink yarn with a sl st in any st. Ch 1. *Skip 1 st, work 1 bobble in next st, ch 2, skip 1 st, sl st in next st; repeat from * around, ending with sl st to join to first bobble base. You will have 16 bobble petals total. (16 bobbles)
Fasten off and weave in all ends securely using a yarn needle, working the tail through several stitches on the wrong side to keep the coaster lying flat.
Assembly Steps
- Lay your finished coaster face down on a flat surface and gently steam or block it if the edges are curling slightly — this helps the bobble petals sit flat and even.
- Check that all yarn tails are woven in on the back side only, so the front stays smooth and tail-free.
- If making a matching set, repeat the entire pattern 4–6 times for a full coffee table set, keeping tension consistent between pieces so finished sizes match within 0.5cm of each other.
- No stuffing or wire is required for this flat pattern — simply trim any stray fuzz from the yarn ends with small scissors for a clean finish.
Beginner/Intermediate Tips
- Keep your bobble stitches loose rather than tight — pulling too tight when closing the bobble will make the petals look small and flat instead of plush and rounded.
- Count your stitches at the end of every round before moving on. With this pattern, an early miscount in the white center rounds will throw off your petal spacing in round 8.
- When switching yarn colors between rounds, always join the new color with a slip stitch rather than starting mid-round, so your color changes stay crisp and even.
- If your petals look uneven in size, check that you’re skipping exactly 1 stitch before each bobble and not accidentally skipping 2.
Variations
- Seasonal Palette: Swap dusty pink for deep red and sage green for forest green to make a cozy holiday-themed coaster set.
- Mini Size: Use a 3.5mm hook and fingering weight yarn to make a smaller ornament-sized version, perfect for tree decorations.
- Monochrome Look: Work the entire coaster in a single cream or oatmeal color for a minimalist, neutral home decor piece.
- Trivet Upsize: Add two extra rounds before the trim (working increases as established) to make a larger trivet sized for serving bowls or teapots.
Pinterest CTA
Loved this pattern? Save it now so you can come back to it anytime you’re ready to crochet your own set! Don’t forget to share your finished coasters and tag your makes — #FoodieRippleCrochet



