
The Best Fluffy Pancakes recipe you will fall in love with. Full of tips and tricks to help you make the best pancakes.

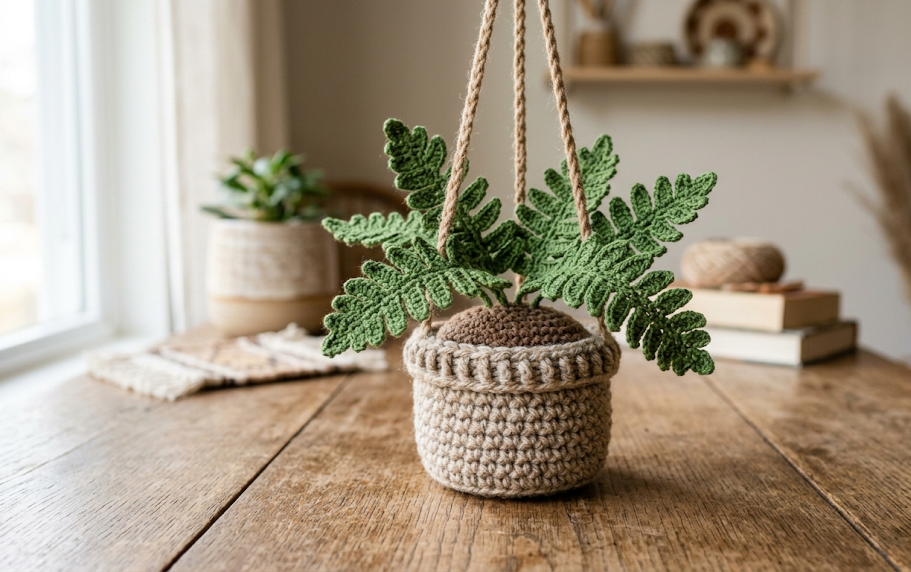
There’s something quietly satisfying about a tiny plant that never needs watering. This mini hanging fern pot captures all the charm of a real trailing houseplant — the feathery fronds, the woven basket, the rich dark soil — without a single drop of water or any worry about sunlight. It’s the kind of project that looks like it took all weekend but actually comes together in just a few cozy evenings.
This little hanging pot is perfect for crocheters who want to practice texture and shaping in a small, low-commitment project. It makes a sweet addition to a plant shelf, a bookshelf corner, a car mirror charm, or a bag of handmade gifts for plant lovers who don’t have a green thumb. The combination of a sturdy basket, layered fern leaves, and a braided hanging cord gives this pattern variety in technique while staying compact enough to finish in an afternoon.
Whether you’re an intermediate crocheter looking for a quick, satisfying make or someone wanting to build a whole shelf of mini faux plants, this pattern walks you through every stitch, every leaf, and every step of assembly so the finished piece looks polished and ready to display or gift.
|
Difficulty
Intermediate
|
Time
4-5 Hours
|
Hook Size
2.5mm
|
Yarn Weight
Sport/Fingering
|
Finished Size
6cm x 12cm
|
Gauge
18 stitches x 20 rows = 10cm x 10cm in single crochet, using a 2.5mm hook and sport weight yarn. Gauge is not critical for this project since it is amigurumi-style and worked in the round, but matching gauge will keep your finished pot close to the size described above. If your basket comes out looser or tighter than expected, simply adjust hook size up or down slightly.
Materials List
- Sport weight yarn in tan or oatmeal (basket) — approx 15g
- Fingering weight yarn in dark brown (soil) — approx 5g
- Fingering weight yarn in two shades of green, light and dark (fern leaves) — approx 10g combined
- 2.5mm crochet hook
- 2.0mm crochet hook (for fine leaf detail)
- Tapestry needle for weaving in ends
- Small amount of polyester fiberfill (for basket shaping, optional)
- Stitch marker
- Scissors
- Thin floral wire, 22-gauge, approx 20cm per leaf stem (optional, for leaf structure)
Abbreviations Table
| Abbreviation | Meaning |
|---|---|
| ch | chain |
| sc | single crochet |
| sc2tog | single crochet two together (invisible decrease) |
| sl st | slip stitch |
| MR | magic ring |
| st(s) | stitch(es) |
| rnd | round |
| BLO | back loop only |
| inc | increase (2 sc in same stitch) |
| dc | double crochet |
Pattern Instructions
Part 1: Basket Base
Using tan yarn and 2.5mm hook, start with a magic ring — this creates an adjustable loop that closes tightly at the center, leaving no hole.
- Rnd 1: 6 sc into MR (6)
- Rnd 2: inc in each st around (12)
- Rnd 3: sc 1, inc repeat around (18)
- Rnd 4: sc 2, inc repeat around (24)
- Rnd 5: sc 3, inc repeat around (30)
- Rnd 6: sc in each st around, working in BLO only — this creates a visible ridge that marks the transition from flat base to upright sides (30)
Part 2: Basket Sides
- Rnd 7–13: sc in each st around (30) — work all 7 rounds even, through both loops as normal
- Rnd 14: sc in each st around, switching to a slightly tighter tension to curve the rim inward slightly (30)
- Fasten off, leaving a 15cm tail for seaming.
Part 3: Soil Top
Using dark brown yarn and 2.0mm hook:
- Rnd 1: MR, 6 sc into ring (6)
- Rnd 2: inc in each st around (12)
- Rnd 3: sc 1, inc repeat around (18)
- Rnd 4: sc 2, inc repeat around (24)
- Rnd 5: sc in each st around (24)
- Fasten off, leaving a 10cm tail. This circle sits inside the rim of the basket as the visible soil layer.
Part 4: Fern Leaves (make 7–9)
Using fingering weight green yarn and 2.0mm hook:
- Ch 16.
- Row 1: starting in 2nd ch from hook, sc in each ch across — this works along the bottom side of the chain first (15 sc)
- Continue working into the opposite side of the foundation chain (the “second side of chain”) to form the other edge of the leaf — this gives the leaf two clean, symmetrical sides instead of one finished edge and one raw loopy edge (15 sc)
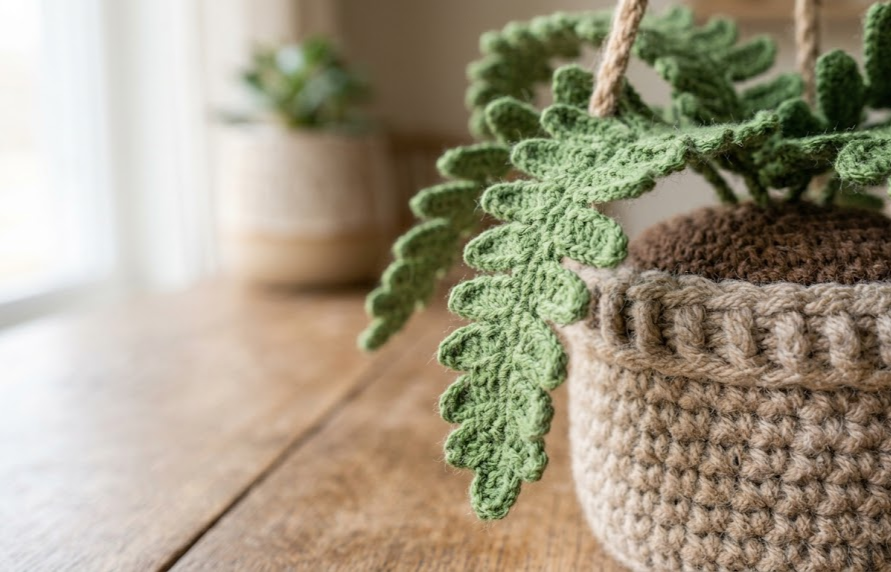
- Now work picot leaf edges along both long sides: sl st in next st, ch 2, sl st back into same st repeat along entire edge on both sides, skipping the very tip and base stitches, to form the feathery fern texture
- Fasten off, leaving a 8cm tail for attaching to stem.
For a sturdier fern, cut a 12cm piece of floral wire and lay it along the center of the leaf before working the picot edge, catching the wire loosely with your stitches as you go. This lets you bend the fronds into a natural curved or arching shape after assembly.
Assembly Steps
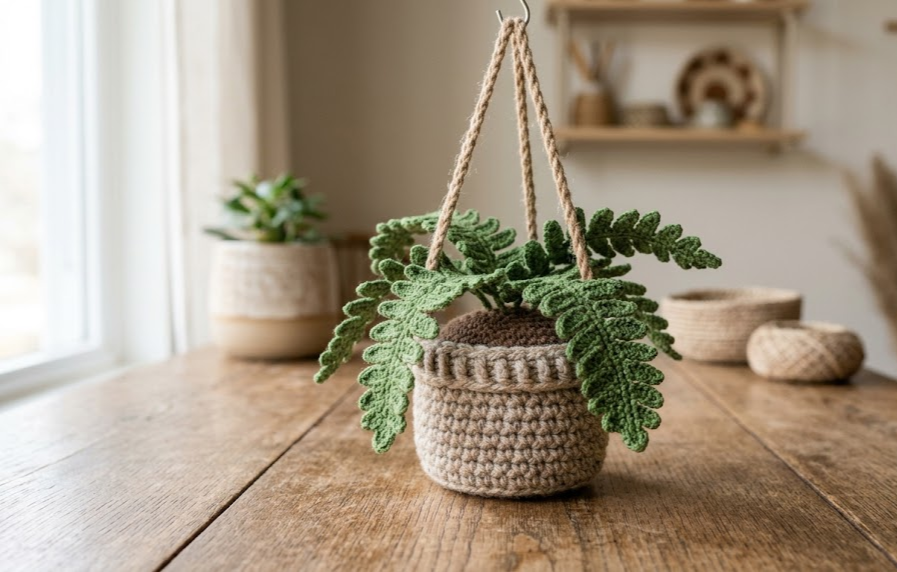
- Insert the dark brown soil circle into the open top of the tan basket, positioning it about 0.5cm below the rim, and whip stitch it in place around the entire edge using the tan tail.
- If using wire-stemmed leaves, gather all 7–9 leaf stems together at their base tails and twist them together for about 1cm to form a single bundle.
- Push the gathered stem base through the center of the soil circle, inserting it about 1.5cm deep into the basket interior, and secure from the underside with a few small stitches through the soil layer and basket lining.
- Fan the leaves outward and slightly upward once secured, bending wire stems gently to create a natural, layered fern silhouette — taller leaves toward the back, shorter ones draping over the front rim.
- For the hanging cord, cut three 40cm lengths of tan yarn, fold in half, and braid them together to a finished length of about 12cm, leaving 3cm of loose tail on each end for tying.
- Attach the two ends of the braid to opposite sides of the basket rim, about 1cm below the top edge, by threading the tail through a stitch and knotting securely on the inside.
- Weave in all remaining loose ends with a tapestry needle and trim closely.
Tips for Beginner and Intermediate Crocheters
Work the magic ring snugly and double-check your stitch count after rnd 1 — a loose ring at the very start throws off every following round. When working into the back loop only on Rnd 6 of the basket, go slowly and watch for the visible horizontal ridge forming; this is your cue that the base-to-side transition is shaping correctly. If your leaves curl too tightly after the picot edge, block them lightly with a damp cloth and let them dry flat or slightly curved over a pencil for a natural arch.
Variations
- Swap green for dusty sage or eucalyptus-toned yarn for a different botanical look.
- Make the basket in two-tone stripes for a woven market-basket effect.
- Skip the hanging cord and add a flat felt circle to the base instead, turning it into a tiny tabletop succulent pot.
- Scale up the chain length and stitch counts by 50% to make a larger version for a keychain or bag charm cluster of three.
If you make this mini hanging fern pot, save this pattern to your favorite crochet board so you can find it again, and share your version using #FoodieRippleCrochet.



