
The Best Fluffy Pancakes recipe you will fall in love with. Full of tips and tricks to help you make the best pancakes.

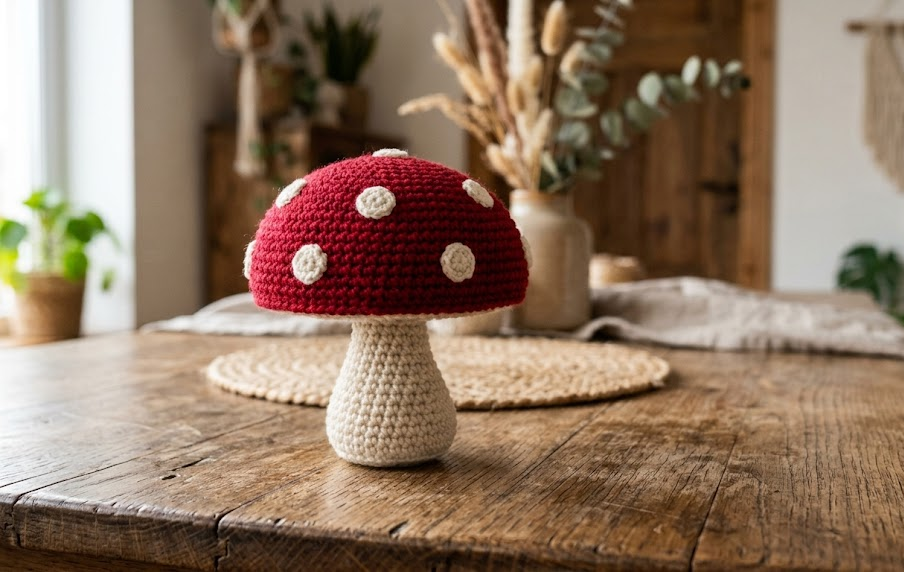
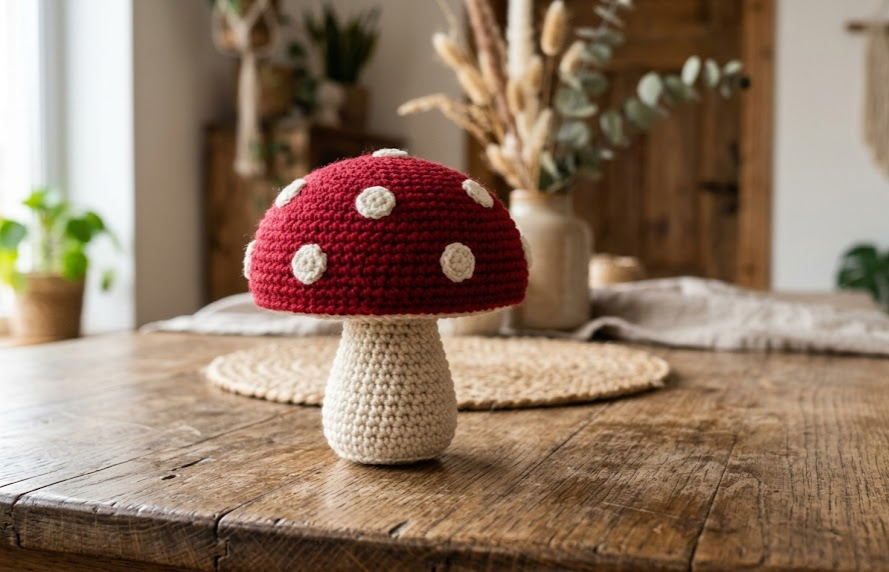
There’s something instantly cheerful about a little red-and-white toadstool mushroom sitting on a shelf, in a plant pot, or tucked into a kid’s play basket. This amigurumi toadstool mushroom pattern captures that classic storybook look — a rounded crimson cap dotted with white polka dots, perched on a soft, tapered cream stem. It’s the kind of project that looks far more complicated than it actually is, which makes it a satisfying make for anyone who has a little amigurumi experience under their belt.
This pattern is perfect for crocheters who’ve already made a handful of amigurumi projects and are comfortable with basic shaping, color changes, and simple embroidery. It works up in just a few hours, uses minimal yarn, and makes an adorable standalone decoration, a fairy garden accent, a plant pot topper, or part of a woodland-themed nursery display. Because the finished piece is small and sturdy, it also makes a lovely handmade gift.
Below you’ll find the complete pattern — gauge, materials, abbreviations, full row-by-row instructions, and assembly — so you can make this toadstool mushroom from start to finish with nothing else needed.
|
Difficulty
Intermediate
|
Time
4–5 Hours
|
Hook Size
3.5mm
|
Yarn Weight
Worsted (Medium #4)
|
Finished Size
10cm tall
|
Gauge
Gauge is not critical for amigurumi, but working at the following tension will keep your stitches tight enough that stuffing won’t peek through:
18 stitches x 20 rows = 10cm x 10cm (4in x 4in) square in single crochet
- Hook used: 3.5mm
- Yarn used: worsted weight (Medium, US #4)
Tip: If your gauge swatch looks loose or gappy, drop down to a 3.25mm hook.
Materials List
- Worsted weight yarn in crimson red – approx. 15g (for the cap)
- Worsted weight yarn in cream/ivory – approx. 20g (for the stem and cap underside)
- Small amount of worsted weight yarn in white – for polka dots (less than 5g)
- 3.5mm crochet hook
- Polyester fiberfill stuffing
- Yarn needle (for weaving in ends and sewing pieces together)
- Stitch marker (to track the start of rounds)
- Scissors
- Optional: small pom of cardboard or felt circle, cut to fit the base of the stem for extra stability
Abbreviations Table
| Abbreviation | Meaning |
|---|---|
| MR | Magic ring |
| ch | Chain |
| st(s) | Stitch(es) |
| sc | Single crochet |
| inc | Increase (2 sc in same stitch) |
| dec | Invisible decrease (worked through front loops only of next 2 sts to reduce bulk) |
| sl st | Slip stitch |
| BLO | Back loop only |
| rnd(s) | Round(s) |
| ( ) | Stitch count at end of round |
Technique notes:
- Magic ring: An adjustable loop that lets you start a round without a hole in the center — pull the tail to close it after the first round is worked.
- Invisible decrease: Insert your hook into the front loop only of the next two stitches, then complete as a normal single crochet. This keeps decreases smooth and nearly invisible on the surface.
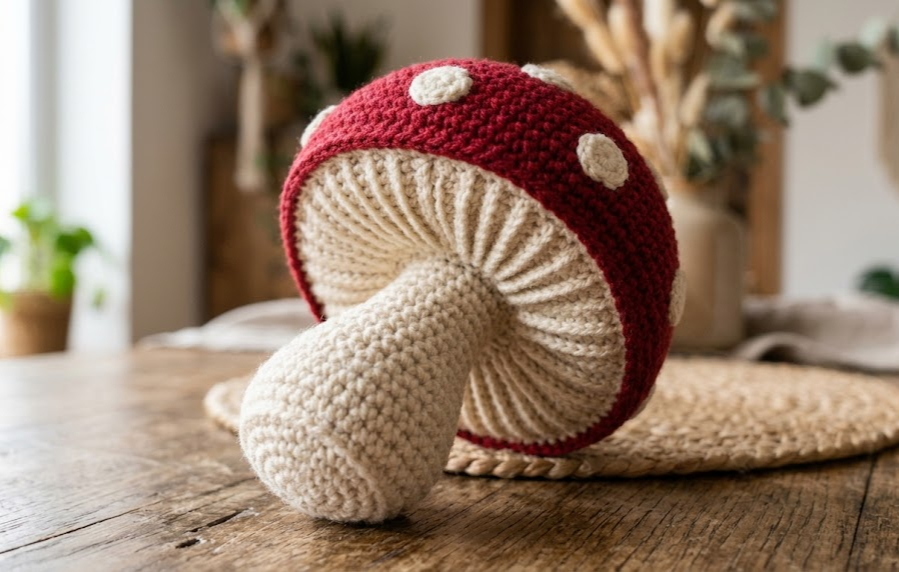
- BLO (back loop only): Work only into the back loop of each stitch, leaving the front loop free. This creates a visible ridge line, useful for defining the rim where the cap meets the underside gill piece.
Pattern Instructions
Part 1: Mushroom Cap (worked in red, top-down)
Rnd 1: MR, 6 sc into ring (6)
Rnd 2: inc in each st around (12)
Rnd 3: sc, inc repeat around (18)
Rnd 4: sc 2, inc repeat around (24)
Rnd 5: sc 3, inc repeat around (30)
Rnd 6: sc 4, inc repeat around (36)
Rnd 7: sc around, BLO (36) — this back-loop round creates the rim ridge where the cap will meet the underside piece
Rnd 8: sc around (36)
Rnd 9: sc around (36)
Fasten off, leaving a long tail for sewing. Do not stuff yet — stuffing happens during assembly once the underside gill piece is attached.
Part 2: Cap Underside / Gill Piece (worked in cream, flat disc)
Rnd 1: MR, 6 sc into ring (6)
Rnd 2: inc in each st around (12)
Rnd 3: sc, inc repeat around (18)
Rnd 4: sc 2, inc repeat around (24)
Rnd 5: sc 3, inc repeat around (30)
Rnd 6: sc around, working in BLO only to create the ridged “gill” texture (30)
Rnd 7: sc around in BLO again for a second ridge line (30)
Fasten off, leaving a long tail. Leave a center opening of about 2cm unworked (do not close it) — this is where the stem will insert during assembly.
Part 3: Stem (worked in cream, bottom-up, tapered vase shape)
Rnd 1: MR, 6 sc into ring (6)
Rnd 2: inc in each st around (12)
Rnd 3: sc, inc repeat around (18)
Rnd 4–6: sc around, no increases (18) — repeat this round 3 times to form the wider base
Rnd 7: sc 4, dec repeat around (15) — begin tapering inward
Rnd 8–11: sc around, no increases (15) — repeat 4 times to form the straight middle section
Rnd 12: sc 3, dec repeat around (12) — taper toward the neck
Rnd 13–15: sc around, no increases (12) — repeat 3 times
Stuff the stem firmly as you go, adding fiberfill in small amounts every 3–4 rounds so it stays evenly packed and doesn’t bulge.
Rnd 16: sc around (12) — do not decrease further; leave the top open at this width so it can be sewn directly to the underside gill piece opening
Fasten off, leaving a long tail for sewing.
Part 4: Polka Dots (worked in white)
Make 6–8 small dots using either method:
- Embroidered method: Using a yarn needle threaded with white yarn, work small satin-stitch circles (5–6 stitches radiating from a center point) directly onto the finished red cap, spacing them evenly around the dome.
- Crocheted method: MR, 5 sc into ring, sl st to close (5). Fasten off leaving a tail, then sew each small circle flat onto the cap.
Space the dots roughly 2–2.5cm apart, staggering them so no two sit in a straight vertical line — this mimics the natural random pattern of a toadstool cap.
Assembly Steps
- Attach the gill piece to the cap: With both pieces facing right-side-out, align the ridge (BLO row) of the cap’s rim with the outer edge of the cream gill disc. Using the long tail from the gill piece, whip-stitch the two pieces together around the entire rim, leaving the small 2cm center opening free.
- Stuff the cap: Before closing completely, stuff the cap firmly through the small center opening so the dome holds its rounded shape.
- Insert the stem: Push the stuffed stem’s open top (rnd 16, 12 sts) up into the 2cm opening in the gill piece, so the neck of the stem sits flush against the underside of the cap. The stem should insert approximately 1cm deep into the cap for a secure hold.
- Sew the stem in place: Using the stem’s remaining tail, whip-stitch the top edge of the stem to the inner edge of the gill opening, going all the way around so no gap remains. Add a few extra stuffing pinches through the seam if needed before closing fully.
- Attach the polka dots (if not already embroidered/sewn on) evenly around the red cap, about 2–2.5cm apart.
- Weave in all remaining ends with a yarn needle and trim.
- Check balance: Set the mushroom on a flat surface. If it wobbles, add a flattened piece of stuffing or a small cardboard disc inside the base of the stem before fully closing the last round for extra stability.
Beginner/Intermediate Tips
- Keep your tension tight throughout — amigurumi worked too loosely will show stuffing through the gaps, especially on the pale cream stem.
- Stuff in small amounts continuously as you work the stem rather than all at once at the end; this prevents lumps and keeps the taper smooth.
- When sewing the gill piece to the cap, pin or stitch-mark four points evenly around the circle first (like a clock face) so the seam distributes evenly and doesn’t pucker on one side.
- If your polka dots look flat, add one extra stitch of white yarn through the center of each embroidered dot to give it slight dimension.
Variations
- Classic Fly Agaric: Keep the red-and-white color combo shown here for the traditional storybook toadstool look.
- Woodland Brown: Swap red for a warm terracotta or chocolate brown cap for a more forest-forager aesthetic.
- Mini Mushroom Set: Make three sizes (small, medium, large) using the same pattern with fewer/more increase rounds, and cluster them together in a small planter.
- Pastel Fairy Garden: Use soft pink or lavender for the cap with cream dots for a whimsical, pastel fairy-garden version.
If you make this little toadstool, be sure to save this pin so you can find it again later — and share your finished mushroom with the hashtag #FoodieRippleCrochet!



