
The Best Fluffy Pancakes recipe you will fall in love with. Full of tips and tricks to help you make the best pancakes.

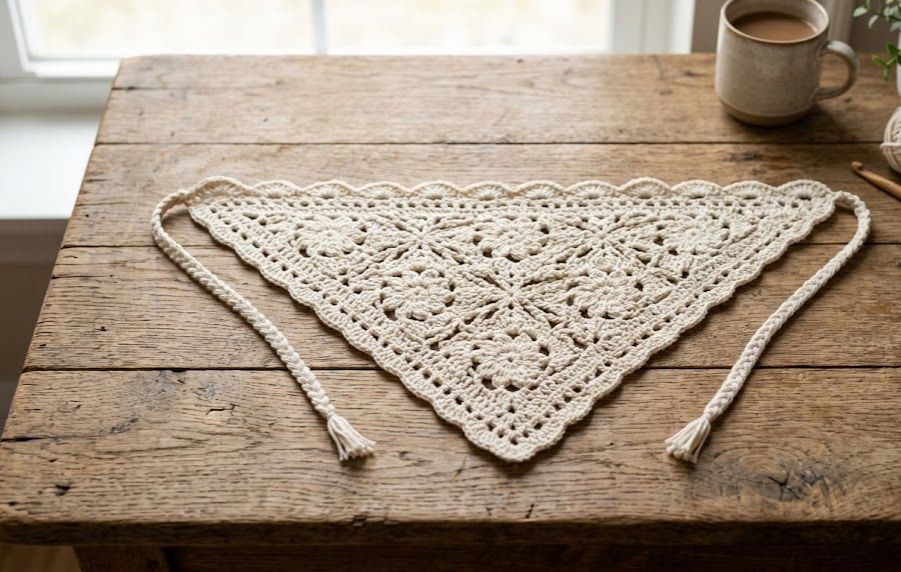
If you love the look of vintage lace but want something you can actually wear, this boho lace flower bandana is the perfect project. Worked in a soft cream cotton yarn, this triangular bandana combines a delicate floral granny motif body with a pretty scalloped shell-stitch edge, finished off with two long ties that knot comfortably at the nape of the neck or under your hair. It’s an ideal piece for festival season, beach days, or simply adding a handmade touch to your everyday look. The open, airy stitch pattern makes it lightweight and breathable, while the scalloped border gives it that romantic, boho-chic finish. This pattern is written for intermediate crocheters who are comfortable with basic granny motifs and joining rounds, but the techniques are broken down clearly enough that a confident beginner willing to take their time can complete it too.
By the end of this pattern, you’ll have a one-of-a-kind accessory that looks like it came from a boutique shelf, but was made entirely by your own two hands.
|
Difficulty
Intermediate
|
Time
6-8 Hours
|
Hook Size
3.5mm (E/4)
|
Yarn Weight
DK / Light Worsted
|
Finished Size
~55cm x 30cm
|
Gauge
- One flower motif = approximately 4cm x 4cm before joining
- 16 sts x 8 rows = 10cm x 10cm in double crochet (dc), using a 3.5mm hook
- Always make a small gauge swatch first — bandana fit is forgiving, but a swatch ensures your fabric has the right amount of drape
Materials List
- Cream/ecru DK (light worsted) weight cotton yarn — approximately 200-250g depending on finished size
- 3.5mm (E/4) crochet hook
- Yarn needle for weaving in ends
- Scissors
- Stitch markers (optional but recommended for tracking rounds)
Abbreviations Table
| Abbreviation | Meaning |
|---|---|
| ch | chain |
| sl st | slip stitch |
| sc | single crochet |
| dc | double crochet |
| tr | treble crochet |
| ch-sp | chain space |
| sk | skip |
| rep | repeat |
| st(s) | stitch(es) |
| MR | magic ring |
| picot | small decorative loop, worked as ch 3, sl st into first ch of the 3 |
| ( ) | stitch count at end of round/row |
Pattern Instructions
Part 1: The Flower Motif (make 24-30, depending on desired size)
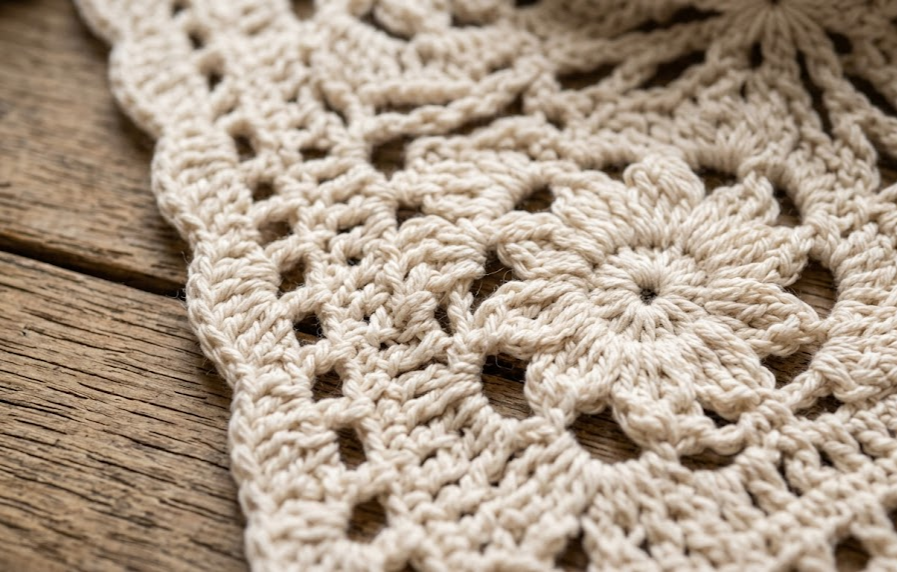
Round 1: Using cream yarn, make a magic ring (MR — a loop of yarn that lets you crochet stitches into it and then pull it tight, closing the center hole neatly). Ch 3 (counts as first dc), work 11 dc into the ring, sl st to top of first ch-3 to join. Pull tail to close ring. (12 dc)
Round 2: Ch 1, sc in same st, *ch 3, sk next dc, sc in next dc; rep from * around, ch 3, sl st to first sc to join. (6 ch-3 sps)
Round 3: Sl st into first ch-sp, ch 1, in same ch-sp work (sc, ch 3, sc, ch 3, sc) — this creates the first petal. Rep (sc, ch 3, sc, ch 3, sc) in each remaining ch-sp around. Sl st to first sc to join. Fasten off, leaving a 15cm tail for joining. (6 petals)
Technique note: When joining motifs, hold two petal points with right sides facing and sl st together at the ch-3 tip on both sides, or join-as-you-go on the last round using a flat single crochet join.
Part 2: Joining Motifs into the Triangle Shape
Lay your motifs out in a triangle grid: one row of 1 motif at the top, increasing by one motif per row until you reach your desired base width (typically 7-8 motifs across the bottom row for an adult bandana).
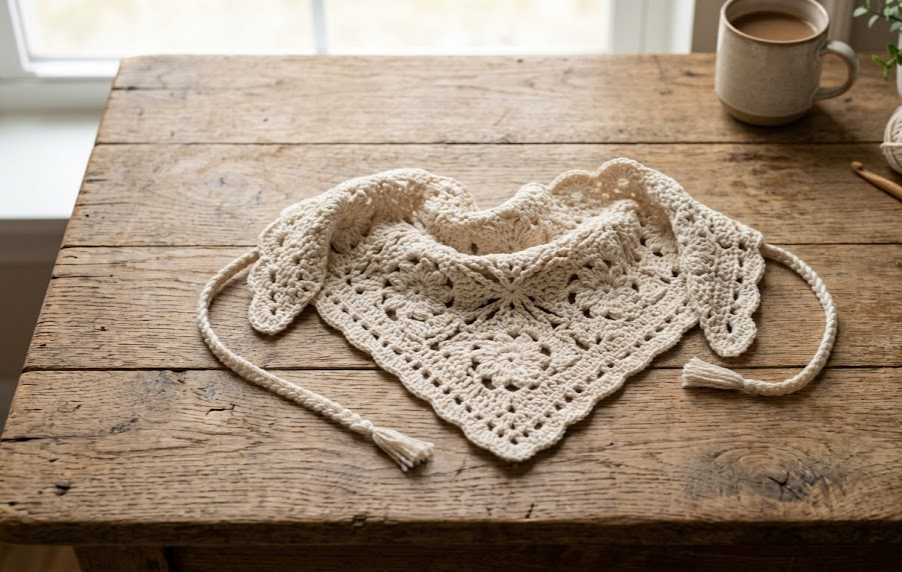
Joining Round: With right sides facing up, join yarn to a petal tip on the first motif, ch 1, sl st to the corresponding petal tip on the neighboring motif to connect. Continue joining all motifs at their touching petal tips, working in rows from top point down to the base, until the full triangle is assembled.
Part 3: Filler Mesh (fills gaps between motifs)
Row 1: Join yarn in a ch-sp between two joined motifs. Ch 3 (counts as dc), work 2 dc, ch 2, 3 dc into the same ch-sp. Rep across each open gap between motifs to fill the triangle shape evenly. (Stitch count will vary by gap size — check that each filled gap has 6 dc + 1 ch-sp)
Work Row 1 across all gaps in the triangle until no open holes remain between motifs.
Part 4: Scalloped Border
Round 1 (Foundation): Join yarn at the top point of the triangle. Sc evenly around the entire outer edge, working 3 sc into each outer corner point to keep the fabric flat. Sl st to first sc to join. (Count will vary by size — just ensure edge lies flat with no puckering or waving)
Round 2 (Scallops): Ch 1, *sk 1 sc, 5 dc in next sc, sk 1 sc, sl st in next sc; rep from * evenly around the entire edge, working (5 dc, picot, 5 dc) into each outer corner point for a decorative flourish. Sl st to join, fasten off. (Scallop count will vary by triangle size)
Part 5: The Ties
Tie 1 (top-left corner): Join yarn at the top-left corner of the triangle. Ch 90 (this makes an 80cm tie — adjust chain length longer or shorter for your preferred tie length). Sc back down the chain into the second ch from hook (working into the second ch from hook, rather than the first, keeps your foundation edge from being too tight) and each ch across. Sl st into the corner to secure. Fasten off, weave in end. (89 sc)
Tie 2 (top-right corner): Repeat the same steps at the top-right corner of the triangle.
Assembly Steps
- Lay the joined motif triangle flat and steam-block lightly to open up the lace pattern and flatten curling edges — pin corners out to their final measurements while damp and let dry fully.
- Attach the scalloped border evenly around all three edges as described above, keeping tension consistent so the fabric doesn’t ruffle or pull tight.
- Attach both ties at the two top corners of the triangle (the two points that will sit near your ears when worn), each measuring approximately 80cm long so they can wrap and tie comfortably at the back of the head or under hair.
- Weave in all yarn ends securely using a yarn needle, running each tail through at least 5cm of stitches to prevent unraveling.
- Give the finished bandana a final light steam block to set the shape before wearing.
Beginner/Intermediate Tips
- Keep a stitch marker in the first stitch of each round on your flower motifs — with all the ch-3 spaces, it’s easy to lose track of where a round begins.
- When joining motifs, lay out your full triangle grid on a flat surface before joining anything. This prevents accidentally twisting a motif or joining it in the wrong orientation.
- Cotton yarn has very little stretch compared to wool blends, so avoid pulling your stitches too tight — a slightly looser tension will keep the lace pattern open and drapey.
- If your scalloped border is rippling or wavy after Round 2, you likely worked too many stitches into the edge — frog back and reduce your stitch count slightly for a flatter finish.
Variations
- Color-block version: Alternate two contrasting colors between motif rows for a bold, graphic look instead of a single cream tone.
- Mini size: Reduce the base row to 5 motifs across instead of 7-8 for a child-sized bandana or a smaller neck scarf.
- Chunky yarn version: Rework using a worsted or aran weight cotton with a 4.5mm-5mm hook for a faster, cozier fall/winter version.
- No-tie headband style: Skip the two long ties and instead attach a single short elastic loop at each top corner for a pull-on headband version of the same lace pattern.
Save this pattern to your Pinterest board so you always have it on hand for your next boho crochet project! Tag your finished bandana with #FoodieRippleCrochet — we’d love to see your version.



