
The Best Fluffy Pancakes recipe you will fall in love with. Full of tips and tricks to help you make the best pancakes.

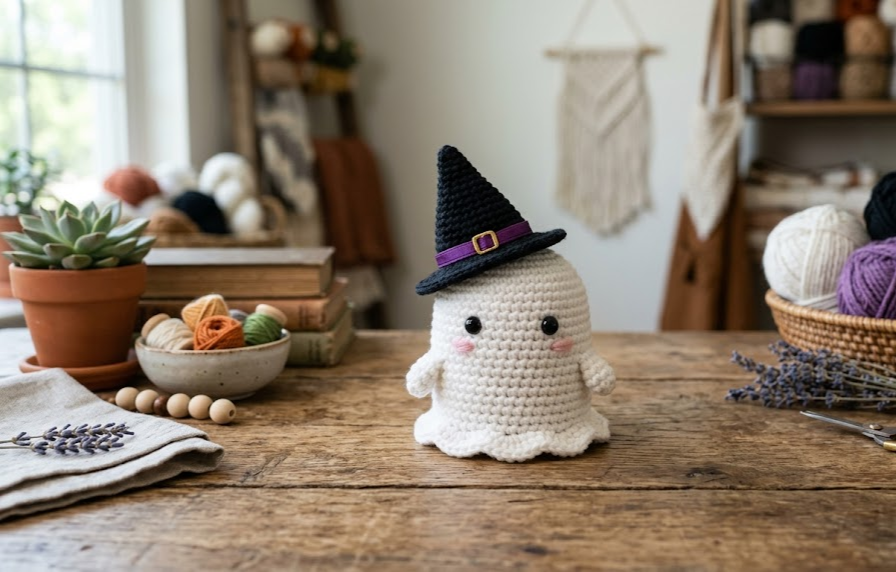
There’s something irresistible about a ghost that isn’t scary at all — and this little crochet ghost, topped with its very own witch hat, is proof of that. With a soft round body, a sweet stitched-on face, and a tiny curled-point hat trimmed in shimmery purple ribbon, this amigurumi captures all the fun of Halloween without a single scare in sight. It’s the kind of project that looks complicated on a shelf but is completely achievable once you break it down piece by piece.
This pattern is perfect for anyone who wants to dip their toes into Halloween-themed amigurumi. If you’ve made a basic amigurumi ball or two before and are comfortable with single crochet, magic rings, and simple shaping, you’re ready for this one. The ghost body is a beginner-friendly shape, while the witch hat introduces a little more fun with its cone crown and flared brim — a great next step up in your amigurumi skills.
Once finished, this little duo makes an adorable addition to a fall mantel, a desk, a trick-or-treat bowl, or even a Halloween-themed keychain if you skip the stuffing on the hat. It also makes a wonderful handmade gift for anyone who loves “cute Halloween” over “scary Halloween.” Grab your yarn and hook, and let’s get stitching.
|
Difficulty
Intermediate
|
Time
3–4 Hours
|
Hook Size
3.5mm
|
Yarn Weight
Worsted (#4)
|
Finished Size
9cm Ghost / 7cm Hat
|
Gauge
18 sts x 20 rows = 10cm x 10cm in single crochet (worked in continuous rounds, unstuffed, relaxed tension)
Hook used: 3.5mm
Yarn weight used: Medium (Worsted/Aran, #4)
Gauge is not critical for amigurumi shape, but matching it will help you achieve tight stitches that prevent stuffing from showing through, and will keep your finished size close to the pattern’s dimensions.
Materials List
- Worsted weight (#4) yarn in white — approx. 15g, for the ghost body
- Worsted weight (#4) yarn in black — approx. 12g, for the witch hat
- A short length of sparkly purple worsted or DK weight yarn (or purple ribbon) — approx. 20cm, for the hat trim
- Small amount of black yarn or 2 small black safety eyes (6mm) — for the eyes
- Small amount of pink yarn or fabric marker — for cheek blush (optional)
- 3.5mm crochet hook
- Polyester fiberfill stuffing
- Yarn needle
- Stitch marker
- Scissors
Abbreviations Table
| Abbreviation | Meaning |
|---|---|
| ch | chain |
| sc | single crochet |
| sl st | slip stitch |
| st(s) | stitch(es) |
| inc | increase (2 sc in same stitch) |
| dec | invisible decrease (see note below) |
| MR | magic ring |
| BLO | back loop only |
| rnd | round |
| ( ) | stitch count at end of round |
Technique Note — Magic Ring (MR): Instead of chaining and joining into a circle (which leaves a small hole), wrap yarn around your fingers to form a loop, work your first round of stitches into the loop, then pull the tail to close the center tightly.
Technique Note — Invisible Decrease (dec): Insert hook into the front loop only of the next two stitches, yarn over, pull through both front loops, yarn over, pull through both loops on hook. This creates a smoother, less bulky decrease than a standard sc2tog.
Pattern Instructions
Part 1: Ghost Body (worked in continuous rounds, do not join unless stated)
Rnd 1: MR, 6 sc into ring (6)
Rnd 2: Inc in each st around (12)
Rnd 3: Sc 1, inc repeat around (18)
Rnd 4: Sc 2, inc repeat around (24)
Rnd 5: Sc 3, inc repeat around (30)
Rnd 6: Sc 4, inc repeat around (36)
Rnds 7–13: Sc around, no increases (36) — work 7 rounds even
Rnd 14: Sc 4, dec repeat around (30)
Rnd 15: Sc around (30)
Note: Insert safety eyes now (if using) between rounds 9–10, spaced about 5 stitches apart. Begin lightly stuffing the body from this point, adding more as you close the bottom.
Rnd 16 (Wavy Bottom Edge): Do NOT continue shaping. Instead, working in the same direction, sc around one more full round (30), then fasten off leaving a long tail.
Creating the wavy hem: Turn the piece so the open bottom edge faces you. Using a separate strand of white yarn, join with a sl st into any stitch of Rnd 16. Work the wavy edge as follows: sc 1, sc 1, hdc 1, dc 1, hdc 1, sc 1, sl st 1 repeat around the entire bottom edge, skipping no stitches, until you return to the start. Fasten off and weave in ends. This scalloped edge creates the classic “floating ghost tail” look. Stuff the body firmly before completing this final edge round so it holds its shape.
Part 2: Face Details
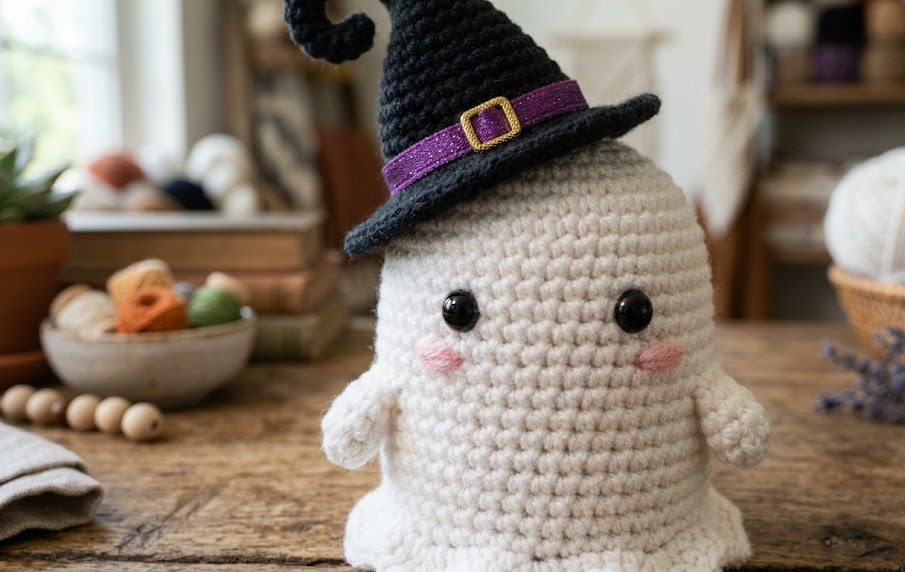
Using a small length of pink yarn (or a fabric-safe marker), add two small blush marks by making 3–4 tiny straight stitches on either cheek, about 1cm below and to the sides of the eyes. If not using safety eyes, embroider two small black French knots or satin-stitch circles in their place, spaced evenly on the upper-middle portion of the face.
Part 3: Witch Hat Brim
Rnd 1: MR, 6 sc into ring (6)
Rnd 2: Inc in each st around (12)
Rnd 3: Sc 1, inc repeat around (18)
Rnd 4: Sc 2, inc repeat around (24)
Rnd 5: Sc 3, inc repeat around (30)
Rnd 6: Sc 4, inc repeat around (36)
Rnd 7: Sc 5, inc repeat around (42)
Rnd 8: BLO sc around (42) — working in the back loop only here creates a defined ridge where the crown will later attach, and lets the brim lie flat.
Fasten off, leaving a long tail for seaming. Set aside.
Part 4: Witch Hat Crown (Cone)
Rnd 1: MR, 6 sc into ring (6)
Rnd 2: Inc in each st around (12)
Rnd 3: Sc 1, inc repeat around (18)
Rnd 4: Sc around (18)
Rnds 5–6: Sc around (18) — 2 rounds even
Rnd 7: Sc 1, dec repeat around (12)
Rnd 8: Sc around (12)
Rnd 9: Sc 2, dec repeat around (9)
Rnds 10–13: Sc around (9) — 4 rounds even, forming the cone’s straight length
Rnd 14: Sc 1, dec repeat around (6)
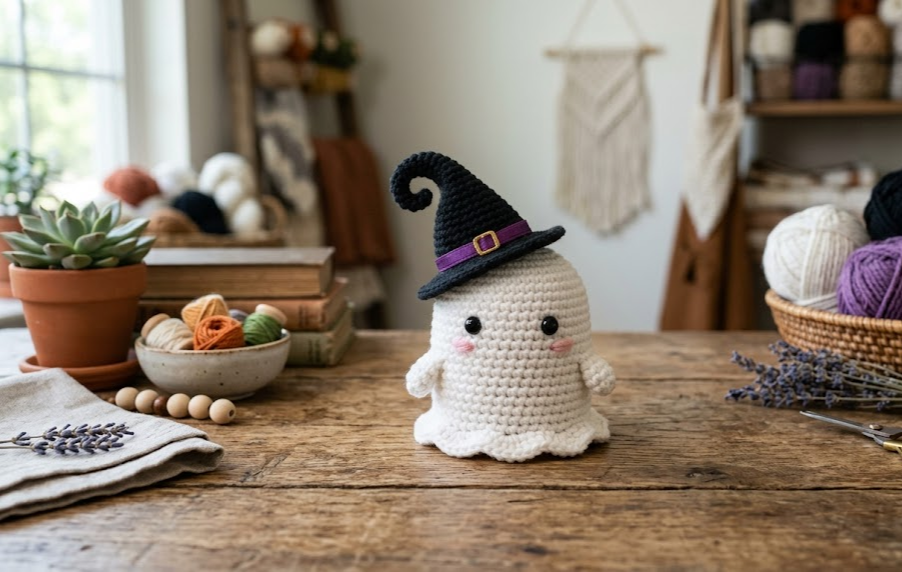
Curled Point Shaping: Do not close the top yet. Continue working sc around without decreasing for 4 more rounds (6 sts each round), forming a narrow tube. As you stuff, gently bend this tube to one side while stuffing lightly — this creates the classic curled witch-hat tip. Fasten off, cinch the final opening closed, and weave in the end.
Stuff the crown firmly from the bottom up to about 1cm below the brim attachment point, leaving the very top curled section only lightly stuffed so it stays bendable.
Part 5: Assembling the Hat
- Center the bottom opening of the crown over the front loops left exposed on Rnd 8 of the brim.
- Using the long tail from the crown, whip stitch the crown’s base opening to the brim’s front-loop ridge, working through both layers all the way around. This should sit roughly 1cm in from the outer edge of the brim.
- Weave in all ends securely.
Part 6: Hat Trim
Cut a strand of sparkly purple yarn (or ribbon) approximately 20cm long. Wrap it once around the base of the crown where it meets the brim, overlapping the ends by about 1cm at the back. Tack it in place with 2–3 small stitches using a matching yarn needle so it stays secure but still looks like a tied ribbon.
Assembly Steps
- Stuff the ghost body firmly, saving the wavy-edge round for last so you can adjust stuffing right up until the bottom is finished (see Part 1).
- Attach eyes and blush as described in Part 2, positioning them roughly 2cm from the top of the head and 1.5cm apart.
- Assemble the hat as described in Part 5, making sure the crown sits centered on the brim.
- Add the ribbon trim as described in Part 6.
- The hat is designed to sit on top of the ghost’s head unattached (removable), but if you’d like it permanently fixed, tack the underside of the brim to the top of the ghost’s head with 3–4 small stitches, spaced evenly around a 3cm diameter circle at the center of the head.
Beginner/Intermediate Tips
- When working the wavy bottom edge, keep tension consistent — tight stitches here will pull the scallop shape out of round, so aim for the same tension you used on the body.
- Stuff a little at a time rather than all at once; overstuffing early rounds makes it hard to close the bottom neatly.
- If your curled hat point won’t hold its bend, add a 3–4cm piece of craft wire or pipe cleaner into the tube before the final stuffing — bend it into the curl shape you want, then stuff around it.
- BLO rounds (like Rnd 8 on the brim) naturally curl slightly on their own — use this to your advantage for a brim that flares outward instead of lying completely flat.
- Use a stitch marker on Rnd 1 of every new piece; it’s easy to lose track of where a round starts on small amigurumi pieces.
Variations
- Pastel Ghost: Swap white for a soft lavender or mint yarn for a spring or “friendly ghost” version.
- Witch’s Cat Companion: Make a second, smaller ghost in black yarn with pointed ears added to create a matching “black cat ghost.”
- No-Hat Ghost: Skip the witch hat entirely and instead embroider a simple star or moon on the ghost’s belly for a year-round nursery-friendly design.
- Ornament Version: Reduce all stitch counts by about 20% and attach a small loop of yarn at the top of the hat to hang the finished set as a Halloween tree ornament.
Save this pattern to your Halloween crochet board so you can find it again when it’s time to stitch! Don’t forget to tag your finished ghosts with #FoodieRippleCrochet — I’d love to see your version.



