
The Best Fluffy Pancakes recipe you will fall in love with. Full of tips and tricks to help you make the best pancakes.

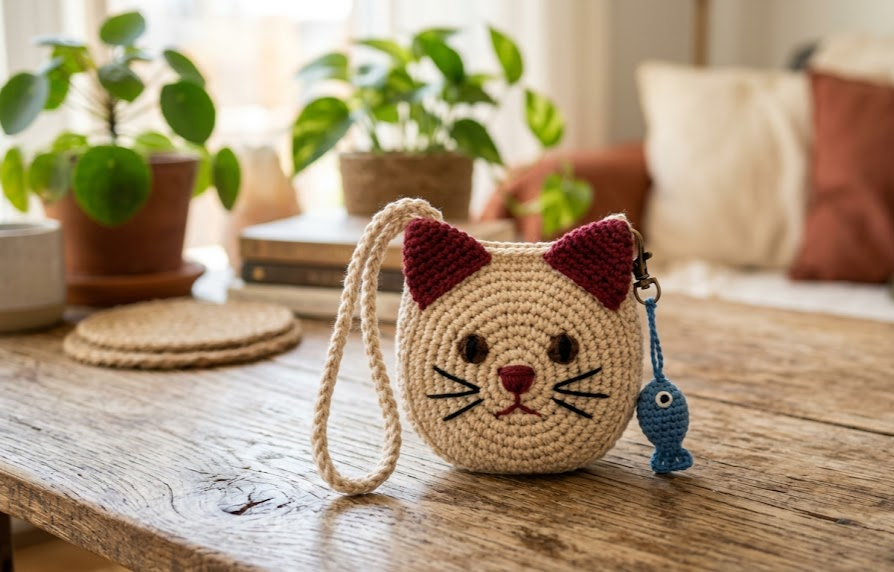
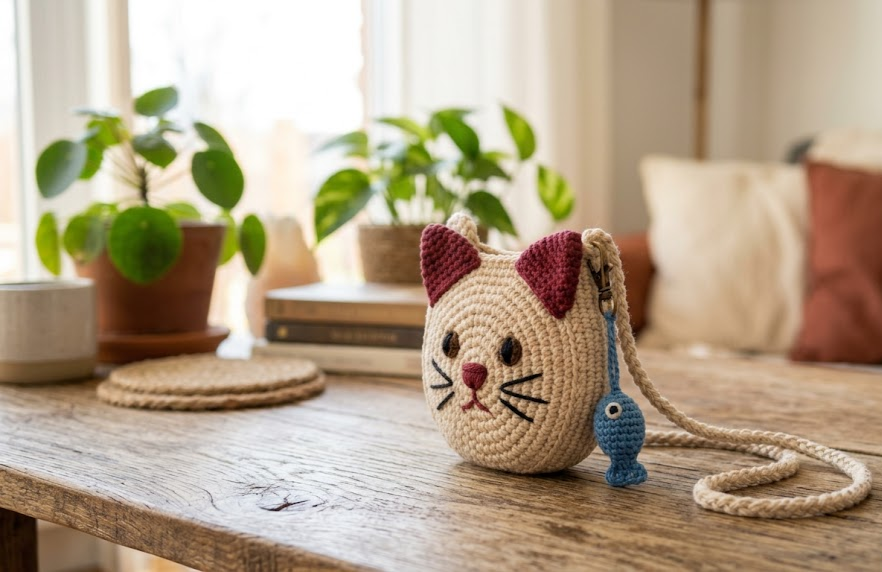
If you’ve been searching for a crochet project that’s equal parts adorable and practical, this reversible cat face pouch is exactly what you need. Shaped like a sleeping kitten with soft rounded ears, a sweet embroidered face, and a tiny dangling fish charm, this little pouch works as a coin purse, a keychain accessory, or a playful bag charm you can clip onto your everyday tote. The reversible design means you get two looks in one project, and the no-sew charm attachment means you can swap the fish out whenever you want a fresh accent.
This pattern is written for intermediate crocheters who are comfortable with basic amigurumi shaping, color changes, and simple embroidery, but every round is spelled out in full detail so even confident beginners can follow along. By the end, you’ll have a soft, huggable little pouch that’s as fun to make as it is to carry.
|
Difficulty
Intermediate
|
Time
3–4 Hours
|
Hook Size
3.5mm
|
Yarn Weight
DK (Light Worsted)
|
Finished Size
10cm Face / 14cm Strap
|
Gauge
18 single crochets x 20 rows = 10cm x 10cm square, worked with a 3.5mm hook and DK weight yarn. Amigurumi gauge should always be worked tightly so stuffing doesn’t show through the stitches — if your squares come out looser than this, go down a hook size.
Materials List
- DK weight yarn (light worsted, #3) in cream/tan — approximately 40g
- DK weight yarn in maroon/dark red — approximately 10g
- DK weight yarn in sky blue — small amount, approximately 5g for the fish charm
- Small amount of black yarn or embroidery thread for facial details
- 3.5mm crochet hook
- Yarn needle for weaving in ends and embroidery
- Stitch marker
- Polyester fiberfill stuffing
- Small lobster clasp or keyring clasp (for the no-sew charm attachment)
- Scissors
Abbreviations Table
| Abbreviation | Meaning |
|---|---|
| ch | chain |
| sc | single crochet |
| inc | increase (2 sc in same stitch) |
| dec | invisible decrease |
| sl st | slip stitch |
| st(s) | stitch(es) |
| rnd | round |
| MR | magic ring |
| BLO | back loop only |
Technique note: A magic ring (MR) is an adjustable loop used to start amigurumi pieces without leaving a hole in the center — you crochet your first round of stitches into the loop, then pull the tail to close it tight. An invisible decrease (dec) is worked by inserting your hook into the front loops only of two consecutive stitches, then pulling yarn through both to combine them smoothly into one stitch, keeping your amigurumi surface neat.
Pattern Instructions
Part 1: Cat Face (Front Panel)
Using cream yarn:
Rnd 1: MR, 6 sc into ring (6)
Rnd 2: inc in each st around (12)
Rnd 3: sc, inc repeat around (18)
Rnd 4: sc 2, inc repeat around (24)
Rnd 5: sc 3, inc repeat around (30)
Rnd 6: sc 4, inc repeat around (36)
Rnd 7: sc 5, inc repeat around (42)
Rnd 8–13: sc around, no increases (42) — repeat this round 6 times total
Rnd 14: sc 5, dec repeat around (36)
Fasten off, leaving a long tail for assembly.
Part 2: Cat Face (Back Panel)
Repeat Part 1 exactly using cream yarn, working through Rnd 14 to create a matching second circle. Do not stuff yet — this panel becomes the reverse side of your pouch opening.
Part 3: Ears (make 4 total — 2 for front, 2 for back)
Using maroon yarn:
Rnd 1: MR, 6 sc into ring (6)
Rnd 2: inc in each st around (12)
Rnd 3: sc, inc repeat around (18)
Rnd 4: sc around (18)
Fasten off, leaving a tail for sewing. Flatten the ear slightly and pinch the base to create the classic pointed cat-ear shape before attaching.
Part 4: Braided Hanging Strap
Cut three 45cm strands of cream yarn. Knot them together at one end, braid tightly to approximately 14cm length, then knot the other end. Trim excess and fluff the knotted ends slightly for a tassel look.
Part 5: Fish Charm
Using blue yarn:
Rnd 1: MR, 6 sc into ring (6)
Rnd 2: inc in each st around (12)
Rnd 3: sc around (12)
Rnd 4: sc around (12)
Rnd 5: sc 2, dec repeat around (9)
Rnd 6: sc around (9)
Stuff lightly, then flatten the last few stitches and sc closed to form the tail fin shape. Fasten off leaving a tail. Embroider two small black French knots for eyes and a short red mouth stitch using a straight stitch technique — simply pass your needle through the fabric in a small curved line to mimic a smile.
Assembly Steps
- With right sides facing out, align the front and back cream panels. Using cream yarn and a whip stitch, join the two panels together around approximately two-thirds of the circumference, leaving the top 6–7cm open to form the pouch mouth.
- Lightly stuff only the bottom curved edge of the pouch (about 2cm deep) to give it a soft rounded base — leave the upper pouch area unstuffed and flat so it functions as an actual opening.
- Pinch the base of each ear to form the point, then sew two ears to the top front panel and two ears to the top back panel, spacing them approximately 4cm apart and 1cm in from the top edge.
- Fold the braided strap in half to form a loop and stitch the folded end securely to the inside top seam of the pouch, centered between the ears.
- Embroider the cat’s face onto the front panel only: two curved closed-eye lines approximately 2cm apart, a small triangular nose beneath them, and three whisker lines extending from each cheek, each about 2cm long.
- Attach the small clasp to the fish charm’s top loop, then clip the charm to the base of the hanging strap so it dangles freely below the pouch, approximately 5cm below the strap loop.
Beginner/Intermediate Tips
- Keep your tension tight throughout the amigurumi rounds — DK yarn on a 3.5mm hook should feel slightly snug, which prevents stuffing from peeking through.
- When whip stitching the front and back panels together, use a mattress-stitch style pass through both loops of each stitch for an edge that’s nearly invisible.
- Block your ears slightly before attaching by pinching and pressing them flat for a few seconds — this helps them hold their pointed shape once sewn on.
- If your braided strap looks uneven, wet it slightly and re-twist before it dries fully; this relaxes the braid into a smoother finish.
Variations
- Color swap: Try a grey and white palette for a more realistic tabby cat look.
- Size up: Add two extra rounds before the straight rounds begin to create a larger pouch that fits small essentials like lip balm or earbuds.
- Different charm: Swap the fish for a tiny crochet heart or star using the same MR-and-increase base technique.
- Bag charm styling: Skip the pouch stuffing and seaming entirely, and use just the front cat face panel with ears as a flat keychain charm instead of a full pouch.
Save this pattern to your Pinterest board so you always have it on hand, and don’t forget to tag your finished piece with #FoodieRippleCrochet — I’d love to see your version!



