
The Best Fluffy Pancakes recipe you will fall in love with. Full of tips and tricks to help you make the best pancakes.

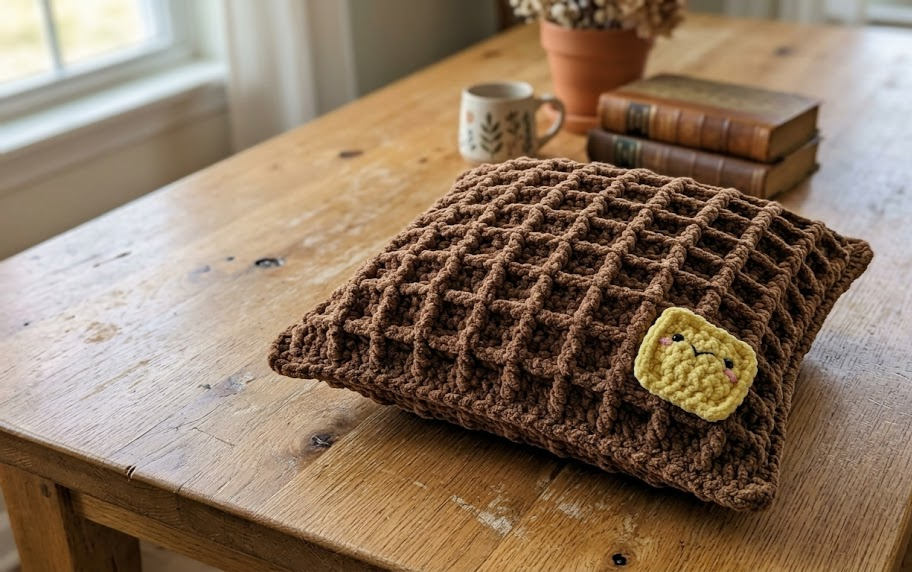
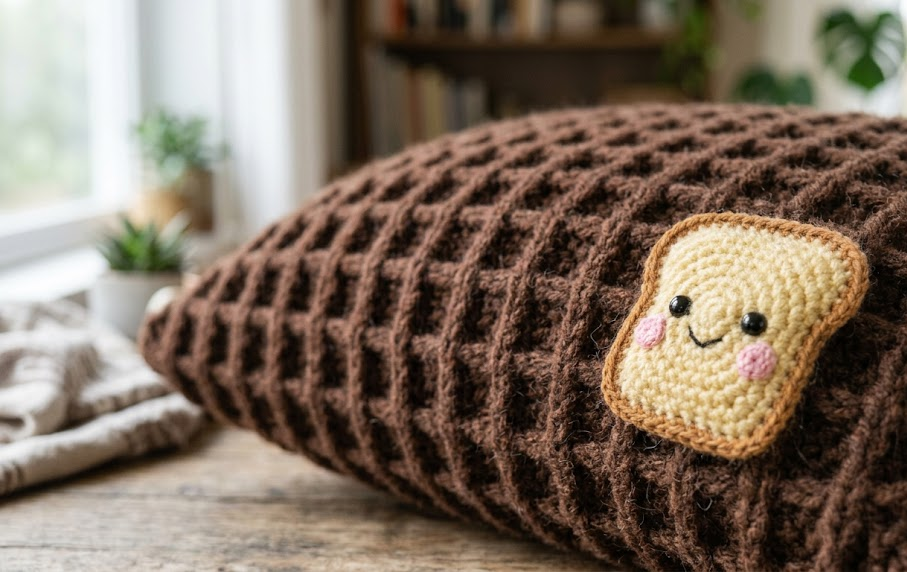
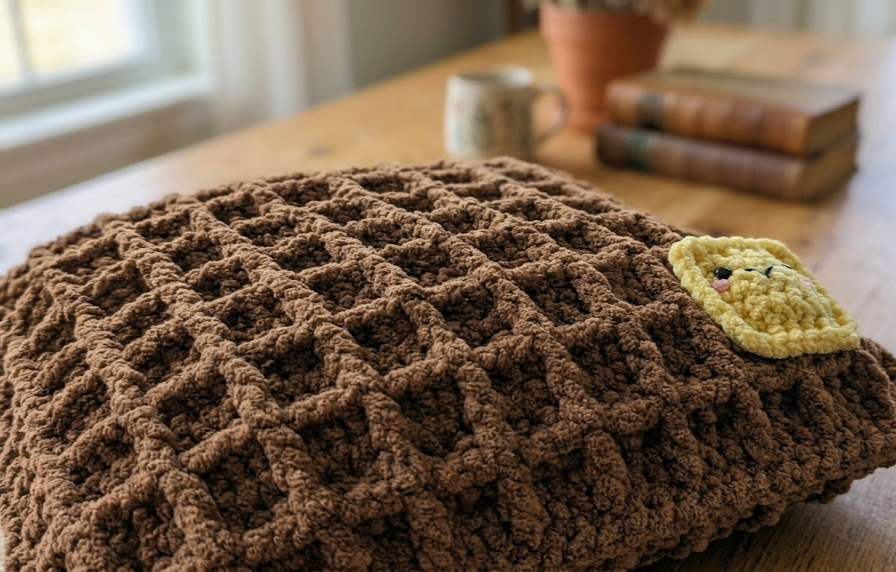
There’s something about a handmade pillow that instantly makes a room feel warmer, and this waffle stitch toast pillow cover does exactly that. With its deep, textured stitch pattern and a sweet smiling toast appliqué tucked into the corner, this cover turns a simple throw pillow into a cozy conversation piece. The rich chocolate brown yarn combined with the soft, dimensional waffle stitch gives it an irresistibly tactile, almost velvety look, while the cheerful toast patch adds a playful, whimsical touch that keeps it from feeling too serious.
This project is perfect for crocheters who already know their basic stitches and are ready to try something with a little more texture. The waffle stitch (sometimes called moss stitch or box stitch depending on the variation) creates a deep, three-dimensional grid pattern that looks far more complicated than it actually is. Once you get the rhythm down, it becomes a relaxing, repetitive stitch that works up quickly, especially in bulky or chenille-style yarn.
Whether you’re making this as a home decor piece, a gift, or a cozy addition to a reading nook, this pattern gives you a full, finished 16-inch square pillow cover with a removable back panel and a fun little appliqué that can be customized endlessly. Grab your hook, a soft plush yarn, and let’s get started.
|
Difficulty
Intermediate
|
Time
6–8 Hours
|
Hook Size
5.5mm (I-9)
|
Yarn Weight
Bulky / Chenille
|
Finished Size
16in x 16in
|
Gauge
12 stitches x 10 rows = 10cm x 10cm (4in x 4in) in waffle stitch pattern, using a 5.5mm (I-9) hook and bulky/chenille weight yarn.
Gauge is not critical for this project since it is a pillow cover, but if your swatch comes out significantly smaller or larger than stated, adjust your hook size up or down to keep your finished cover close to 16in x 16in.
Materials List
- Bulky weight chenille or velvet-style yarn in chocolate brown — approximately 350–400 yards (main color)
- Small amount of pastel yellow bulky yarn — approximately 15 yards (for toast appliqué)
- Tiny scraps of black yarn or embroidery floss (for the face)
- Tiny scraps of pink yarn or floss (for cheeks)
- 5.5mm (I-9) crochet hook
- Yarn needle
- Scissors
- Stitch markers
- 16in x 16in pillow form
- Optional: sew-on buttons or a zipper for the back closure
Abbreviations
| Abbreviation | Meaning |
|---|---|
| ch | chain |
| sc | single crochet |
| dc | single crochet, front post |
| fpdc | front post double crochet |
| dc | double crochet |
| sl st | slip stitch |
| st(s) | stitch(es) |
| rep | repeat |
| sk | skip |
| BLO | back loop only |
| mc | magic circle/magic ring |
| ( ) | stitch count at end of round/row |
Pattern Instructions
Part 1: Front Panel (Waffle Stitch)
The waffle stitch is created by alternating rows of regular double crochet with rows of front post double crochet, which pushes certain stitches forward to create a deep, textured grid.
Technique note — Front Post Double Crochet (fpdc): Instead of inserting your hook under both loops of the stitch below, insert your hook from front to back around the entire post of the stitch, yarn over, and complete a double crochet as normal. This pulls the stitch forward and creates the raised texture.
Using chocolate brown yarn, ch 43.
Row 1: Dc in 4th ch from hook (counts as first dc skip), dc in each ch across. (41 dc)
Row 2: Ch 2 (counts as first dc), turn, dc in each st across. (41 sts)
Row 3: Ch 2 (counts as first dc), turn, *fpdc around next 2 dc, dc in next 2 dc; rep from * across, ending with fpdc around last 2 dc. (41 sts)
Row 4: Ch 2, turn, dc in each st across. (41 sts)
Row 5: Ch 2, turn, *dc in next 2 dc, fpdc around next 2 dc; rep from * across, ending dc in last dc. (41 sts)
Row 6: Ch 2, turn, dc in each st across. (41 sts)
Repeat Rows 3–6, alternating the offset of the fpdc columns, until your piece measures approximately 16in (40cm) from the starting chain. This should take approximately 26–28 total rows depending on your tension.
Fasten off, leaving a 12in tail for seaming.
Part 2: Back Panel (Two Overlapping Rectangles)
The back is made in two overlapping pieces so the pillow form can be inserted without a zipper.
Panel A:
Ch 43.
Row 1: Dc in 4th ch from hook, dc across. (41 dc)
Rows 2–20: Ch 2, turn, dc in each st across. (41 sts each row)
Work in plain dc rows (no waffle texture needed on the back) until piece measures approximately 11in (28cm). Fasten off, leaving a 12in tail.
Panel B:
Repeat Panel A instructions, working until piece measures approximately 11in (28cm). Fasten off, leaving a 12in tail.
These two panels will overlap by about 6in (15cm) in the center of the pillow back when assembled.
Part 3: Toast Appliqué
Toast Slice:
Using pastel yellow yarn, ch 8.
Row 1: Sc in 2nd ch from hook and each ch across. (7 sc)
Row 2: Ch 1, turn, sc in each st across. (7 sc)
Row 3: Ch 1, turn, sc in each st across. (7 sc)
Row 4: Ch 1, turn, sc dec, sc in each st to last 2 sts, sc dec. (5 sc)
Row 5: Ch 1, turn, sc in each st across. (5 sc)
Row 6: Ch 1, turn, sc in each st across. (5 sc)
Row 7: Ch 1, turn, sc in each st across. (5 sc)
Fasten off, leaving a long tail for sewing. Rounded corners can be shaped with a few strategic sc decreases at each corner as you crochet the border, or you can single crochet evenly around the entire rectangle to soften the edges into a rounded toast-slice shape.
Border (optional, for rounded toast shape):
With right side facing, sc evenly around all edges of the toast slice, working 3 sc in each corner to allow it to curve. Fasten off, weave in ends.
Face:
Using black yarn or embroidery floss, embroider two small curved lines for closed, happy eyes and a small curved smile using backstitch. Using pink yarn or floss, add two small satin-stitch circles for the cheeks, positioned just below each eye.
Assembly Steps
- Weave in all loose ends on the front panel, both back panels, and the toast appliqué before assembling.
- Lay the front panel right side up on a flat surface.
- Position the toast appliqué approximately 3in (7.5cm) from the top edge and 3in (7.5cm) from the right edge of the front panel (or your preferred corner placement).
- Pin the appliqué in place, then sew it down using a whip stitch around the entire outer edge, using the long yarn tail left from the appliqué border.
- Place the front panel and both back panels together, with the front panel right side up and both back panels right side down on top, overlapping in the center by about 6in (15cm) to create the envelope-style opening.
- Line up all outer edges so the layers form a neat 16in x 16in square.
- Using a yarn needle and matching brown yarn, whip stitch or slip stitch around all four outer edges through all layers, being careful to keep the overlap section on the back free so the pillow form can slide in.
- Turn the finished cover right side out through the overlap opening.
- Insert your 16in x 16in pillow form through the overlap and adjust until it fills the cover evenly.
Beginner/Intermediate Tips
- If you find the fpdc stitches tight to insert your hook around, try loosening your tension slightly on the row before, or size up your hook by 0.5mm just for this pattern.
- Keep a stitch marker in your first stitch of each row so you don’t accidentally skip the turning chain when counting.
- Chenille and velvet yarns split easily, so use a hook with a slightly rounded tip rather than a sharp inline hook to reduce snagging.
- Block your front panel lightly before assembly if the waffle texture is pulling the piece narrower than expected; this stitch pattern tends to draw fabric in slightly.
- When sewing the appliqué on, use small, even stitches close together so the edges lie flat rather than puckering.
Variations
- Color swap: Make the pillow in cream or oatmeal yarn with a strawberry jam appliqué instead of toast for a different breakfast theme.
- Mini size: Scale the pattern down to a 12in x 12in accent pillow using the same stitch counts reduced proportionally, perfect for a reading chair.
- No appliqué: Skip the toast entirely and let the waffle stitch texture stand alone for a minimalist, modern farmhouse look.
- Double appliqué: Add a second small appliqué, like a pat of butter or a fried egg, to turn the pillow into a full “breakfast plate” display piece.
Pinterest CTA
Save this pattern now so you always have it on hand for your next cozy crochet project! Share your finished waffle stitch toast pillow with #FoodieRippleCrochet — we’d love to see your version come to life.



