
The Best Fluffy Pancakes recipe you will fall in love with. Full of tips and tricks to help you make the best pancakes.

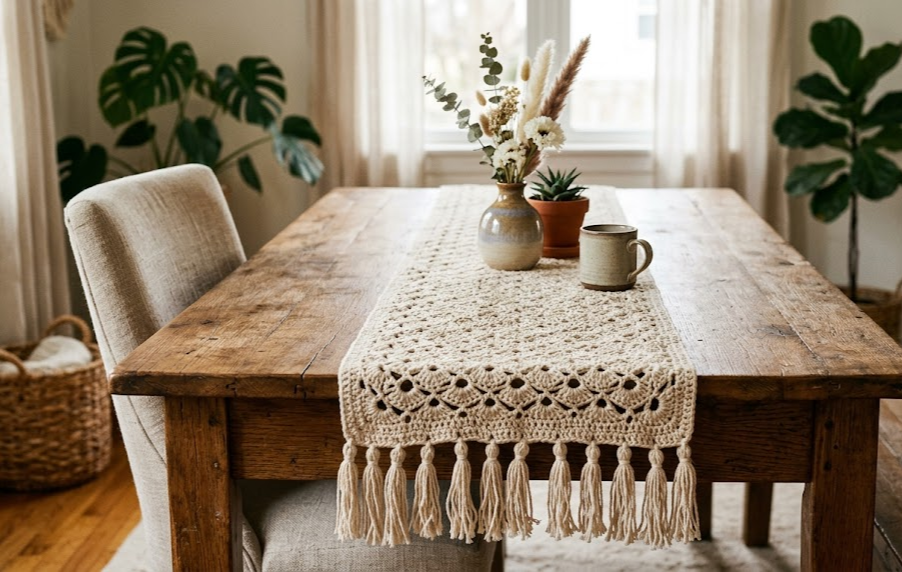
If you’ve been searching for a way to bring a little handmade warmth to your dining table, this boho lace table runner is exactly the project you didn’t know you needed. With its airy shell stitch pattern and soft, swingy tassel fringe on both ends, this runner strikes the perfect balance between texture and openness — elegant enough for a dinner party, relaxed enough for a Sunday morning breakfast table. Made in a natural cream cotton yarn, it has that effortless, sun-bleached linen look that fits right into farmhouse, coastal, or boho-styled homes.
This piece is worked in a repeating shell and chain lace pattern, so once you get the first few rows under your belt, the rest becomes a soothing, rhythmic make. It’s a great “next step” project for confident beginners ready to try something a little more textural, and a satisfying, meditative make for intermediate crocheters. The generous tassel fringe at each end is the real showstopper — it takes the piece from “nice” to “where did you buy this?”
Whether you’re crocheting it for your own table or as a thoughtful handmade housewarming gift, this pattern gives you a timeless piece that only gets better with wear.
|
Difficulty
Intermediate
|
Time
9–11 Hours
|
Hook Size
4mm (G/6)
|
Yarn Weight
DK Cotton
|
Finished Size
35cm x 150cm
|
Gauge
18 stitches x 8 rows = 10cm x 10cm (4in x 4in) in shell pattern, using a 4mm (US G/6) hook and DK weight cotton yarn.
Always crochet a gauge swatch before starting. If your swatch is smaller than stated, go up a hook size; if larger, go down a hook size. Table runner length can vary slightly and is easily adjusted by adding or removing pattern repeats.
Materials List
- Yarn: DK weight (light worsted) 100% cotton yarn in Natural Cream — approximately 350–400g (5–6 balls of 50g each), depending on final length
- Hook: 4mm (US G/6) crochet hook
- Notions:
- Tapestry needle for weaving in ends
- Scissors
- A piece of cardboard or a book (approx. 15cm tall) for wrapping tassels
- Measuring tape
- Stitch markers (optional, helpful for tracking rows)
Abbreviations Table
| Abbreviation | Meaning |
|---|---|
| ch | chain |
| sc | single crochet |
| dc | double crochet |
| sl st | slip stitch |
| sk | skip |
| sp | space |
| st(s) | stitch(es) |
| rep | repeat |
| V-st | V-stitch (dc, ch 1, dc worked into same stitch) |
| shell | (2 dc, ch 1, 2 dc) worked into same stitch or space |
| RS | right side |
| WS | wrong side |
| yo | yarn over |
Pattern Instructions
Part 1: Foundation Chain and Setup Row
Foundation: Ch 63 (or any multiple of 6, plus 3 for turning).
Technique note: Working into the foundation chain can be tricky if it’s too tight — use a hook one size larger for your foundation chain only if your chains tend to curl or pull.
Row 1 (RS): Sc in 2nd ch from hook, sc in each ch across. (62 sts)
Row 2: Ch 3 (counts as first dc throughout), turn, sk first sc, dc in next sc, *ch 1, sk 1 sc, dc in next sc; rep from * across to last sc, dc in last sc. (62 sts total, including ch-3)
Part 2: Shell Lace Body
Row 3: Ch 3, turn, sk first dc, dc in next dc, *ch 1, sk ch-1 sp, shell (2dc, ch1, 2dc) in next dc, ch 1, sk ch-1 sp, dc in next dc; rep from * across, dc in top of turning ch. (Stitch count varies by shell repeats; count shells to confirm pattern alignment — you should have shells spaced evenly with 1 dc between each)
Row 4: Ch 3, turn, sk first dc, dc in next dc, *ch 1, shell in ch-1 sp of shell below, ch 1, sk next dc, dc in next dc; rep from * across, dc in top of turning ch.
Row 5: Repeat Row 4.
Row 6: Repeat Row 4.
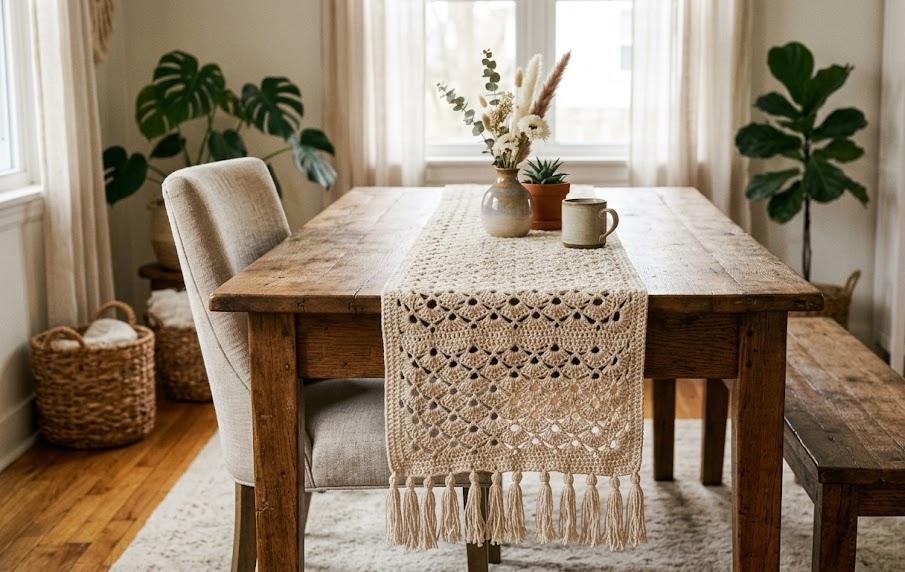
Repeat Rows 4–6 until runner measures approximately 130cm (or desired length before fringe), ending after a Row 4.
Technique note: Each shell should stack directly on top of the shell below it, creating the “block” pattern visible in the stitch diagram. Count your shells at the start of each row to make sure you haven’t drifted off pattern — this is the easiest place to lose count, so use a stitch marker in the first shell of each row if needed.
Part 3: Border Row
Final Row: Ch 1, turn, sc evenly across the top edge, working 1 sc in each dc and 1 sc in each ch-1 sp. Fasten off, leaving a 15cm tail for weaving in.
Assembly Steps
- Weave in all loose ends from the foundation chain and fasten-off tail using a tapestry needle, running each end through at least 5cm of stitching on the wrong side.
- Lightly steam block the runner: pin it flat to your finished dimensions on a towel, spray lightly with water, and let it air dry completely before removing pins. This opens up the lace pattern and squares off the edges.
- Making the tassels: Wrap yarn around a 15cm piece of cardboard approximately 25 times per tassel. Slide a 20cm strand of yarn under the wraps at the top and tie tightly to gather. Cut the wraps at the bottom edge of the cardboard.
- Wrap a separate 15cm strand around the tassel about 1.5cm down from the top and tie firmly to form the tassel “head,” then thread the ends through the tassel with a tapestry needle to hide them.
- Trim the tassel ends evenly to about 10cm long.
- Attach one tassel to every other stitch along each short edge of the runner (approximately 7–8 tassels per end), using the top tie strand to knot each tassel directly through the edge stitches.
- Trim all tassels to a uniform length once attached, checking they hang evenly when the runner lies flat.
Beginner/Intermediate Tips
- If you’re new to shell stitches, practice the shell (2dc, ch1, 2dc) motif on a small swatch first — getting all 4 dc snug together without gaps is the key to a crisp look.
- Use a stitch marker in the first stitch of every row; it’s easy to accidentally skip the turning chain or add an extra dc when the lace pattern gets repetitive.
- Cotton yarn has very little stretch, so block your work — it makes a bigger visual difference on this pattern than on most.
- When making tassels, keep your wraps consistent in number and tension for every tassel so they all end up the same thickness.
Variations
- Color block runner: Work the body in cream and switch to a terracotta or sage green for the last 4 rows and tassels for a two-tone look.
- Mini version: Make a shorter 45cm version as a table centerpiece mat or dresser scarf instead of a full runner.
- Chunky version: Use a worsted or aran weight cotton with a 5mm hook for a bolder, more substantial texture — great for a farmhouse-style table.
- Beaded fringe: Thread wooden or ceramic beads onto the tassel strands before tying them off for a more elevated, boutique-style finish.
- Placemat set: Crochet 4–6 shorter rectangular pieces using the same pattern repeat to make a matching placemat set instead of one long runner.
Save This Pattern
Loved this boho lace table runner? Save this pin to your crochet board so you always know where to find it! #FoodieRippleCrochet



