
The Best Fluffy Pancakes recipe you will fall in love with. Full of tips and tricks to help you make the best pancakes.

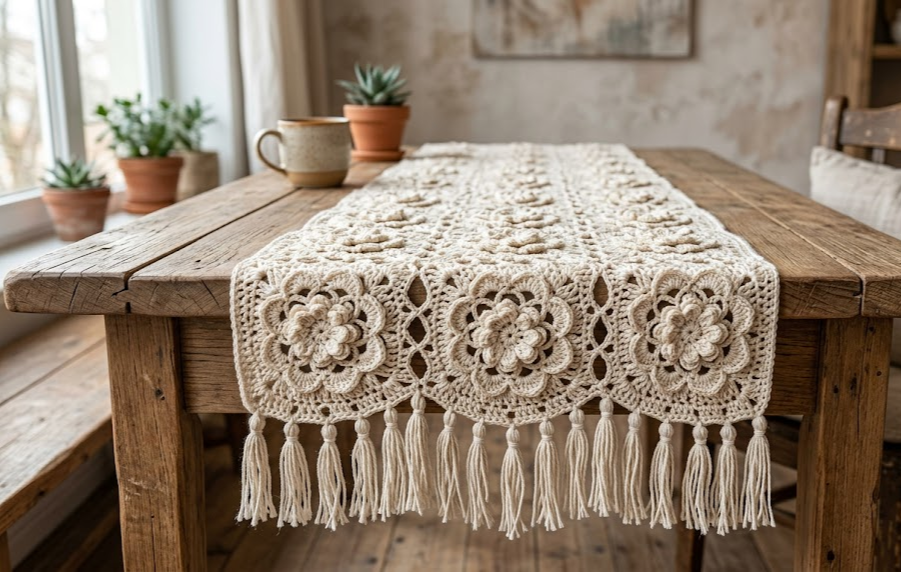
There’s something about a handmade table runner that turns an ordinary weeknight dinner into an occasion. This Floral Lace Table Runner is built from dozens of small, dimensional flower motifs joined into soft, airy strips, finished off with a swingy tassel fringe on each end. It’s the kind of piece that looks like it came from a boutique home goods shop, but it’s entirely within reach if you’re comfortable with basic crochet motifs and simple joining techniques.
This pattern is ideal for anyone who wants a project with visible, satisfying progress. Each flower motif works up in under ten minutes once you get the rhythm down, and watching your table slowly fill with rows of blooms is deeply rewarding. It’s a lovely make for autumn dinner parties, holiday tables, or as a housewarming gift. The natural, undyed cotton look pairs beautifully with wood tones, neutral linens, and stoneware — think farmhouse, cottagecore, or modern boho interiors.
Because the runner is built entirely from repeating motifs, it’s also an excellent “car crochet” or “TV crochet” project. You can complete one flower at a time in short sessions, then join everything together at the end. There’s no shaping to track, no increases or decreases to count across long rows — just steady, meditative motif-making.
By the time you finish, you’ll have a substantial, heirloom-quality piece that can be laid down the center of a dining table, draped over a dresser, or used as a decorative shelf runner. Let’s get into the details.
|
Difficulty
Intermediate
|
Time
12–15 Hours
|
Hook Size
3.5mm (E/4)
|
Yarn Weight
Fingering / Size 10 Cotton
|
Finished Size
14in x 70in
|
Gauge
- One flower motif measures 3in (7.5cm) square once blocked
- 4 stitches and 4 rows = 10cm (4in) in double crochet
- Gauge swatch: chain 16, work 4 rows of dc using a 3.5mm hook; swatch should measure approximately 10cm x 10cm
- Exact gauge is not critical for this project, but motifs should be consistent in size so the runner lies flat. If your motifs are curling, go up a hook size; if they’re too loose or floppy, go down a hook size.
Materials List
- Fingering weight cotton yarn (size 10 crochet cotton or similar), approximately 600–700 yards in Ecru/Natural
- 3.5mm (US E/4) crochet hook
- Tapestry needle for weaving in ends
- Fabric scissors
- Rigid piece of cardboard or a fringe-making tool, approximately 5in wide, for cutting tassel strands
- Straight pins and a blocking mat (for finishing)
- Stitch markers (optional, useful for tracking motif rounds)
Abbreviations
| Abbreviation | Meaning |
|---|---|
| ch | chain |
| sl st | slip stitch |
| sc | single crochet |
| dc | double crochet |
| tr | treble crochet |
| sk | skip |
| st(s) | stitch(es) |
| sp | space |
| rnd | round |
| rep | repeat |
| MR | magic ring |
| picot | small decorative loop made with a short chain closed with a slip stitch |
| BLO | back loop only |
| ( ) | stitch count at end of round/row |
Pattern Instructions
Part 1: Flower Motif (make 48 for a runner 6 motifs wide x 8 motifs long)
Note: A magic ring is an adjustable loop that lets you crochet your first round of stitches into it and then pull the center closed tightly, leaving no hole. This gives motifs a neat, gap-free center.
Round 1: Make a magic ring, ch 3 (counts as first dc), 15 dc into ring, pull ring closed, join with sl st to top of ch-3. (16 dc)
Round 2: Ch 1, sc in same st, *ch 3, sk next st, sc in next st; rep from * around, ending with ch 3, join with sl st to first sc. (8 ch-3 spaces)
Round 3 (petals): Sl st into first ch-3 space, ch 1, in same space work (sc, hdc, 3 dc, hdc, sc) to make one petal, rep this same sequence in every ch-3 space around. (8 petals)
Round 4 (picot edging): Working behind the petals into the sc stitches from Round 2, join yarn with sl st in a sc, ch 4, sl st into 4th ch from hook to form a picot, sl st into next sc; rep around all 8 sc from Round 2, fasten off and weave in ends. (8 picots)
Repeat this motif 48 times, or in multiples of 6 to adjust runner length.
Part 2: Joining Motifs
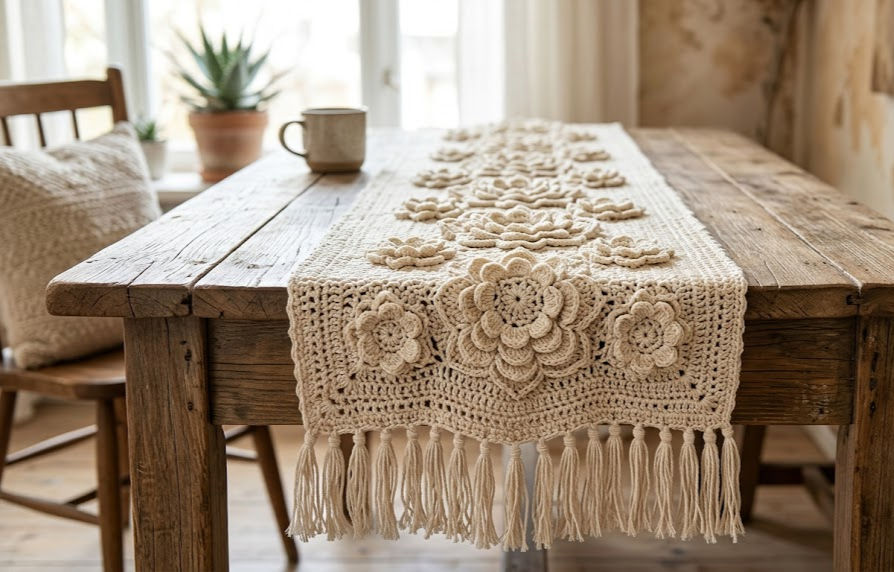
Motifs are joined during the final round instead of being sewn after the fact, which keeps the lace flat and prevents puckering.
- Lay out motifs in your desired grid (6 across, 8 down for the size given).
- When working Round 4 of any motif adjacent to an already-completed motif, replace one picot chain with a joining slip stitch into the corresponding picot loop of the neighboring motif. This locks the two motifs together at that point.
- Each motif should be joined to its neighbors at 2–4 points depending on position (corner motifs need 2 joins, edge motifs need 3, interior motifs need 4).
- Continue until all 48 motifs are joined into one connected rectangle.
Part 3: Top Edge Finishing Row
Round 1: With right side facing, join yarn in any corner picot along one short end, ch 1, sc evenly across the top edge, working 1 sc into each picot and 2 sc into each corner space to keep the edge from cupping. (count will vary based on motif count; work until edge lies flat)
Round 2: Ch 1, sc in each st around, join with sl st to first sc. (same count as Round 1)
Fasten off and weave in ends. Repeat for the opposite short end if you want both ends finished before adding fringe.
Part 4: Tassel Fringe
- Wrap yarn 20 times around a 5in piece of cardboard.
- Cut along one edge of the cardboard to create 10in strands.
- Fold a bundle of 6 strands in half.
- Using a hook, pull the folded loop through a picot or sc stitch along the short edge of the runner.
- Pull the strand ends through the loop and tighten to secure.
- Repeat every 1.5in along both short ends of the runner.
- Once all tassels are attached, trim ends evenly to about 4in long using sharp scissors.
Assembly Steps
- Block all 48 motifs individually before joining if your yarn allows it — pin lightly damp motifs to a blocking mat and let dry fully, about 2–4 hours.
- Arrange motifs in a 6-wide by 8-long grid on a flat surface before joining, so you can see the finished layout in advance.
- Join motifs row by row, left to right, then join rows to each other top to bottom, working the joining slip stitches as described in Part 2.
- Work the top edge finishing row along both short ends only; the long sides can remain scalloped from the motif edges.
- Attach tassels every 1.5in along both short ends, spacing them evenly so the fringe density looks consistent — for a 14in wide runner, this is approximately 9–10 tassels per end.
- Steam block the entire finished runner flat, pinning the long edges gently to encourage the scallops to lie evenly.
- Let the runner dry completely (4–6 hours) before removing pins.
Beginner/Intermediate Tips
- Keep a stitch marker in the first stitch of every round so you always know where to join, since the picot rounds can make the starting point hard to spot.
- If your joins are leaving visible gaps, join at one extra point along each shared edge rather than the minimum.
- Cotton yarn splits easily — use a hook with a slightly rounded tip and go slowly through the 3-dc petal clusters where stitches are close together.
- Wind your fingering weight cotton into a center-pull ball before starting; it resists tangling far better than working straight from a hank.
- If you find tracking 48 motifs overwhelming, make and join them in strips of 6 first, then join the finished strips together — it’s much easier to manage visually.
Variations
- Ombre Runner: Work motifs in a gradient from cream to soft terracotta across the length of the runner for a warm, sunset-inspired look.
- Mini Version: Make a 3×4 motif grid for a table topper or centerpiece mat instead of a full runner.
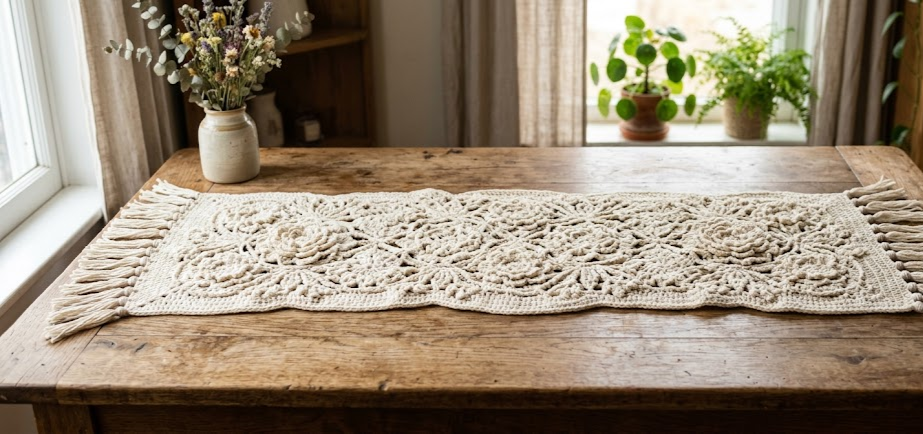
- No-Fringe Style: Skip the tassels and instead finish both short ends with a simple scalloped sc border for a cleaner, more minimalist look.
- Chunky Statement Runner: Rework the pattern with a worsted weight yarn and 5mm hook for a bolder, faster-growing version with larger motifs.
Save this pattern to your Pinterest boards so you can find it again when you’re ready to start! #FoodieRippleCrochet



