
The Best Fluffy Pancakes recipe you will fall in love with. Full of tips and tricks to help you make the best pancakes.

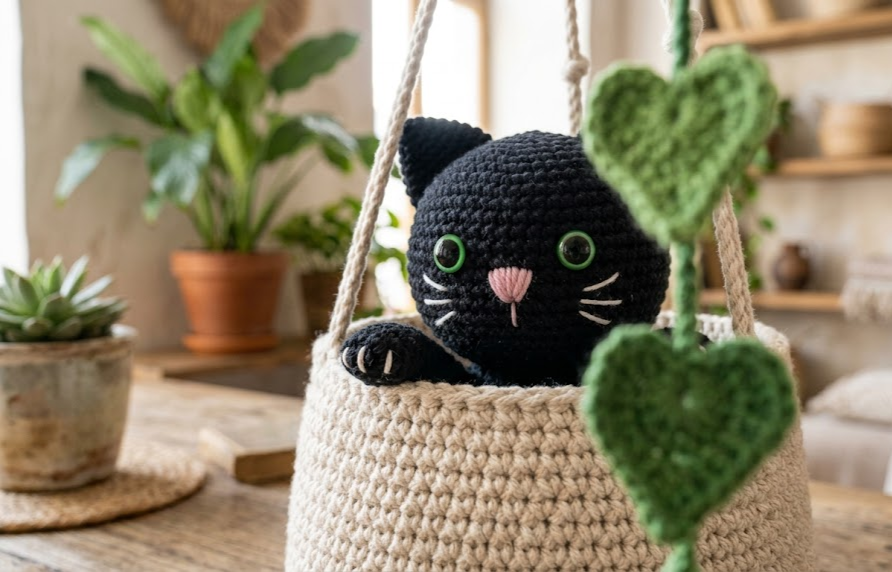
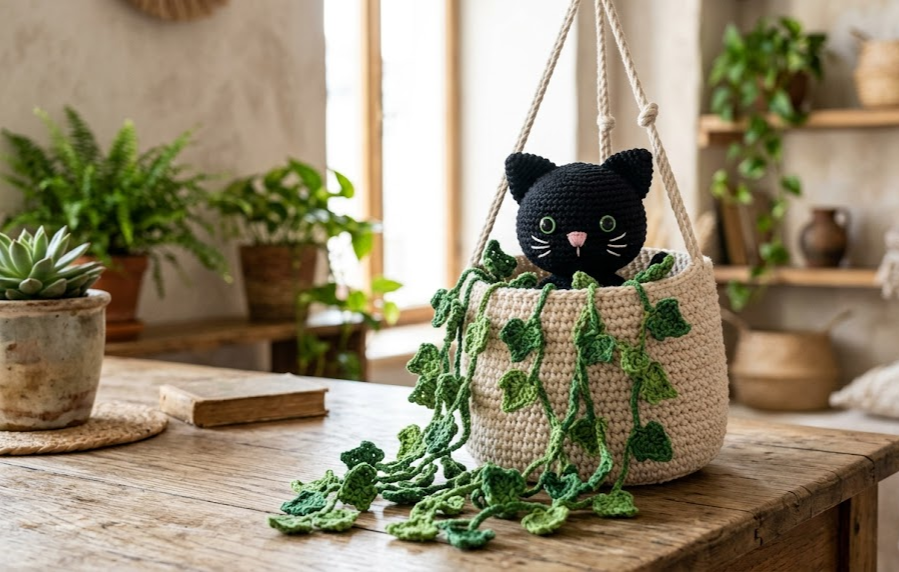
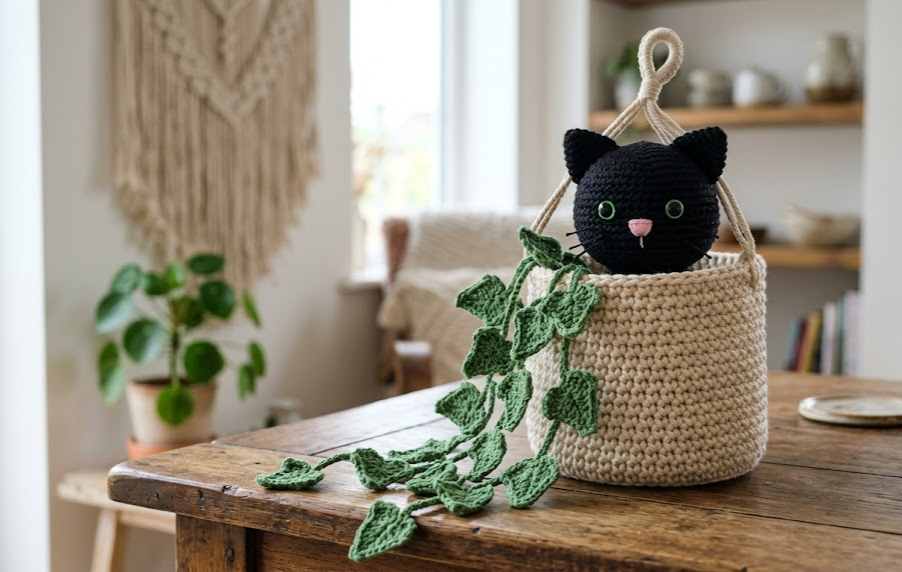
If you’ve ever wished your plant shelf had a little more personality, this crochet black cat ivy planter is exactly the project to make it happen. A sleepy little black kitten peeks out from the top of a cozy woven basket, paws draped lazily over the rim, while trailing crochet ivy leaves spill down the sides like a real potted vine. Hung from a soft cream cord, this piece works beautifully as a wall accent, a bookshelf filler, or a whimsical housewarming gift for any cat lover with a soft spot for handmade décor. It’s an intermediate-level amigurumi project that combines basic stitch shaping, simple wire-armature vines, and a bit of face embroidery — nothing overly technical, but enough variety to keep it interesting from start to finish.
This pattern is written to be fully self-contained. You won’t need to reference any outside tutorials for the techniques used here — every stitch, increase, decrease, and assembly step is spelled out below so you can sit down with your yarn and hook and crochet the entire piece start to finish.
|
Difficulty
Intermediate
|
Time
8–10 hours
|
Hook Size
2.5mm & 3mm
|
Yarn Weight
DK / Sport
|
Finished Size
~10cm basket, 35cm hanging
|
Gauge
18 sts x 20 rows = 10cm x 10cm in single crochet, worked with a 2.5mm hook and DK (light worsted) weight yarn. Gauge is not critical for this project since it’s worked in the round and stuffed, but a tighter gauge than usual is recommended so stuffing doesn’t peek through the stitches. If your amigurumi tends to come out loose, drop down half a hook size.
Materials List
- DK weight yarn in cream/beige — approx. 100g (planter body)
- DK or sport weight yarn in black — approx. 30g (cat head, ears, paws)
- DK weight yarn in green — approx. 40g (ivy leaves and vines)
- Small amount of pink yarn or embroidery floss (nose and mouth)
- 2.5mm crochet hook (amigurumi pieces)
- 3mm crochet hook (planter body, optional if you prefer a looser basket texture)
- Two 8mm safety eyes in green (or black yarn/floss for embroidered eyes)
- Polyester fiberfill stuffing
- 20-gauge floral wire, approx. 1 meter, cut into three 30cm lengths (for ivy vines)
- Cream cord or rope, approx. 1 meter (for hanging loop) — or crochet your own chain cord
- Yarn/tapestry needle
- Stitch marker
- Scissors
Abbreviations Table
| Abbreviation | Meaning |
|---|---|
| ch | chain |
| sc | single crochet |
| hdc | half double crochet |
| dc | double crochet |
| sl st | slip stitch |
| inc | increase (2 sc in same stitch) |
| dec | invisible decrease (insert hook through front loops of next 2 sts, yarn over, pull through both, yarn over, pull through both loops) |
| BLO | back loop only |
| MR | magic ring |
| st(s) | stitch(es) |
| rnd(s) | round(s) |
| rep | repeat |
| ( ) | stitch count at end of round |
Technique note — Magic Ring (MR): Wrap yarn around your finger twice, insert hook through the loop, pull up a stitch, then work your first round of stitches into the loop before pulling the tail to close it tightly. This avoids the small hole a standard chain-ring start leaves behind.
Technique note — BLO: Working into only the back loop of each stitch (leaving the front loop unworked) creates a visible ridge, useful here for shaping the basket’s rim lip.
Pattern Instructions
Part 1: Planter Body
Using cream/beige yarn and 3mm hook.
- Rnd 1: 6 sc in MR (6)
- Rnd 2: inc in each st around (12)
- Rnd 3: (sc 1, inc) x6 (18)
- Rnd 4: (sc 2, inc) x6 (24)
- Rnd 5: (sc 3, inc) x6 (30)
- Rnd 6: (sc 4, inc) x6 (36)
- Rnd 7: (sc 5, inc) x6 (42)
- Rnds 8–14: sc even in each st around, 7 rounds (42)
- Rnd 15: BLO sc around (42)
- Rnd 16: sc around (42)
Fasten off, weave in end. This creates a rounded basket roughly 10cm tall with a subtle rim lip at the top.
Part 2: Cat Head
Using black yarn and 2.5mm hook.
- Rnd 1: 6 sc in MR (6)
- Rnd 2: inc around (12)
- Rnd 3: (sc 1, inc) x6 (18)
- Rnd 4: (sc 2, inc) x6 (24)
- Rnd 5: (sc 3, inc) x6 (30)
- Rnds 6–9: sc even, 4 rounds (30)
- Attach safety eyes now, between rnds 8 and 9, spaced 5 stitches apart.
- Rnd 10: (sc 3, dec) x6 (24)
- Rnd 11: (sc 2, dec) x6 (18) — begin stuffing firmly
- Rnd 12: (sc 1, dec) x6 (12)
- Rnd 13: dec around (6)
Fasten off, cinch closed, weave in end.
Part 3: Ears (make 2)
- Rnd 1: 4 sc in MR (4)
- Rnd 2: inc around (8)
- Rnd 3: sc even (8)
Fasten off leaving a long tail. Flatten the ear and sew to the head with a slight forward point, one on each side above rnd 6-7.
Part 4: Paws (make 2)
- Rnd 1: 4 sc in MR (4)
- Rnd 2: inc around (8)
- Rnds 3–4: sc even, 2 rounds (8)
Fasten off leaving a long tail. Stuff very lightly (paws should be soft and flat-ish, not round).
Part 5: Ivy Leaves (make 12)
Using green yarn and 2.5mm hook.
Ch 6. Row 1: Starting in 2nd ch from hook, sc 1, hdc 1, hdc 1, 3 dc in last chain (this forms the leaf tip). Rotate the piece and work back down the opposite side of the starting chain (the unused loops on the underside): hdc 1, hdc 1, sc 1, sl st into base to close. (12 sts total)
Fasten off leaving a 15cm tail for attaching to the vine.
Part 6: Ivy Vines (make 3)
Take one 30cm length of floral wire and bend a small loop at one end so the yarn won’t slip off.
With green yarn, sc tightly over the entire length of wire (working sc stitches directly over/around the wire, roughly 3 sc per cm) until fully covered. This hides the wire completely inside a firm yarn tube while keeping it bendable.
As you work, pause every 5–6cm to sc-join a leaf’s tail to the vine, alternating leaves left and right down the length. Attach 4 leaves per vine.
Fasten off. Gently bend the finished vine into a soft trailing curve.
Assembly Steps
- Stuff the cat head firmly, then flatten the back slightly so it sits comfortably against the inside of the planter rim.
- Center the head along the back-inside edge of the planter rim, tilted slightly forward, and pin in place.
- Ladder-stitch the head to the rim along a 4cm arc, securing firmly all the way around the contact points.
- Sew both paws to the front-inside rim, spaced 3cm apart, draping the front edge of each paw over the lip of the basket.
- Embroider a small pink triangle nose centered below the eyes, then add two short straight stitches beneath it for the mouth.
- Insert the wired end (non-leaf end) of each vine about 2cm into the crochet stitches near the planter’s rim — one at the front, one on each side — and secure with a few small stitches through the BLO round for a firm hold.
- Arrange the vines to trail 15–20cm below the planter, curving naturally, and tack each one in place at two points along its length so the shape holds.
- Cut two 40cm lengths of cream cord. Fold each in half and thread the folded loop through the basket wall at opposite sides (front-left and back-right), knotting securely on the inside.
- Gather all four loose cord ends at the top and tie in a secure overhand knot approximately 20cm above the rim to form the hanging loop.
Beginner/Intermediate Tips
- Keep your basket rounds tight and consistent — a looser gauge will make the sides sag once stuffed vines are attached.
- When covering the wire for the vines, work your sc stitches close together; gaps will let the wire show through as shiny metal specks.
- Pin the head in place before sewing and step back to check it’s centered — amigurumi faces read as “off” very quickly if crooked.
- If your safety eyes wobble before the backing is on, hold them with a dab of fabric glue while you finish stuffing the head.
- Curve the vine wire gradually rather than in sharp bends — sharp folds can eventually poke through the yarn covering over time.
Variations
- Orange tabby version — swap black yarn for a warm orange and add thin brown stripes with duplicate stitch for a tabby cat planter.
- Terracotta pot colorway — crochet the basket in rust or terracotta yarn for a more classic potted-plant look.
- No-hang tabletop version — skip the cord entirely and leave the basket as a free-standing shelf piece.
- Succulent swap — replace the ivy leaves with rounded crochet succulent “petals” for a desert-plant aesthetic instead of trailing vines.
- Mini keychain size — work the same pattern with fingering weight yarn and a 2mm hook for a tiny bag-charm version.
Save This Pattern
Save this pattern to your Pinterest board so you always have it on hand for your next crochet project! Tag your finished piece with #FoodieRippleCrochet — I’d love to see your version.



