
The Best Fluffy Pancakes recipe you will fall in love with. Full of tips and tricks to help you make the best pancakes.

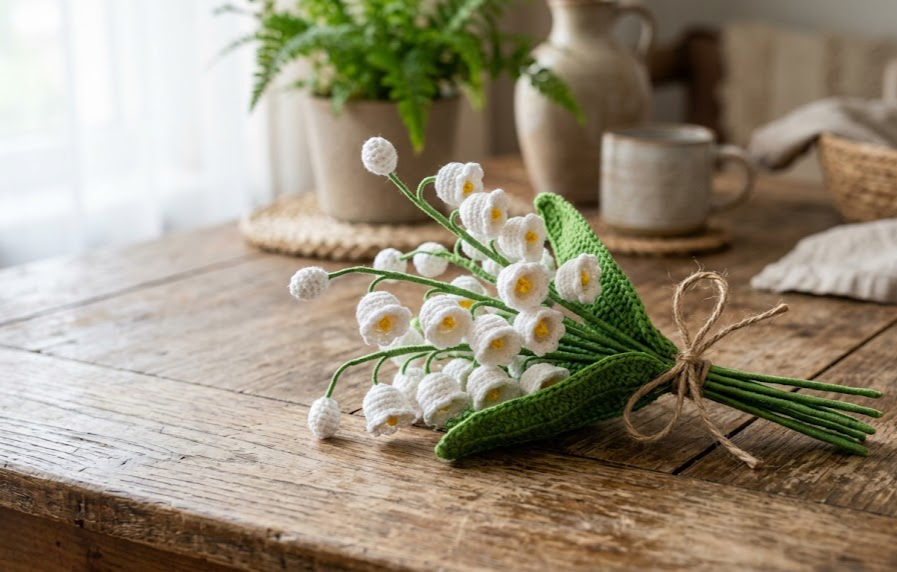
There’s something quietly magical about lily of the valley. Those tiny white bells nodding along an arching stem have symbolized happiness, purity, and new beginnings for centuries, which is exactly why this crochet version makes such a meaningful handmade gift. Unlike the real flower, which blooms for only a couple of weeks each spring, this yarn bouquet stays perfect forever — no wilting, no watering, no waiting for next season.
This pattern is ideal for anyone who wants a project that feels a little more special than a basic amigurumi. It’s small in scale but rich in detail, combining simple crochet shaping with a bit of wirework to get that graceful, drooping stem silhouette real lily of the valley is known for. If you’ve made a few amigurumi pieces before and you’re ready to try floral crochet, this is a lovely next step. It also makes a gorgeous no-fuss centerpiece, a wedding bouquet accent, or a sweet gift for a new baby (lily of the valley is a traditional May birth flower).
Let’s gather your materials and get started.
|
Difficulty
Intermediate
|
Time
4–6 Hours
|
Hook Size
2.5mm
|
Yarn Weight
Sport Weight
|
Finished Size
20cm (8″)
|
Gauge
20 sc x 22 rows = 10cm x 10cm (4in x 4in), worked in single crochet using a 2.5mm hook and sport weight cotton yarn. Gauge is not critical for this project since the flowers are small and shaped rather than fitted, but matching gauge will keep your bells consistent in size if you’re making multiple stems.
Materials List
- Sport weight cotton yarn in white (for the bell flowers) — approx. 15g
- Sport weight cotton yarn in green (for stems and leaves) — approx. 25g
- 2.5mm crochet hook
- Floral stem wire (22–24 gauge) or pipe cleaners, cut into 15cm (6″) lengths
- Yarn needle
- Scissors
- Small amount of polyester stuffing (optional, for fuller bells)
- Green floral tape (optional, for wrapping stems)
- Jute twine or ribbon, for finishing the bouquet
Abbreviations
| Abbreviation | Meaning |
|---|---|
| ch | chain |
| sl st | slip stitch |
| sc | single crochet |
| hdc | half double crochet |
| dc | double crochet |
| inc | increase (2 sc in same stitch) |
| dec | invisible decrease |
| st(s) | stitch(es) |
| rnd | round |
| ( ) | work instructions in parentheses into the same stitch |
Pattern Instructions
Part 1: Bell Flower (make 8–10)
Worked in a spiral. Use a stitch marker to track the start of each round if desired.
Rnd 1: With white, make a magic ring, ch 1, work 5 sc into ring, pull tail to close (5). A magic ring is an adjustable loop that lets you close the center hole tightly, avoiding a gap.
Rnd 2: (inc) around (10)
Rnd 3: sc in each st around (10)
Rnd 4: sc in each st around (10)
Rnd 5: (sc in next st, dec) around (7)
Rnd 6: sc in each st around (7)
Fasten off, leaving a long tail for attaching to the stem. Before closing, add a tiny pinch of stuffing into the bell for shape if you’d like a fuller look — this is optional and the flower will still hold its shape without it.
Optional finishing detail: using the yarn needle and a scrap of white yarn, work 5–6 small straight stitches around the open edge of the bell, evenly spaced, to mimic the scalloped petal edge of a real lily of the valley bloom.
Part 2: Stem (make 3–4)
- Cut a 15cm (6″) length of floral wire.
- With green yarn, ch 20.
- Sl st into the 2nd ch from hook and in each ch across, working back down the chain to encase the wire inside the tube of stitches. Working back down the starting chain means you crochet along the same chain a second time to form a tube — this is what gives the stem its wrapped, wire-core structure.
- Fasten off and weave in ends, leaving the wire exposed by about 1cm (½”) at the base for inserting into the bouquet handle later.
- Gently curve the top 4cm (1½”) of the wired stem into a soft arch — this is what allows the bells to hang naturally along one side, just like the real flower.
Part 3: Leaf (make 2–3)
Worked flat in rows.
Row 1: With green, ch 14. Sc in 2nd ch from hook and in each ch across (13)
Row 2: Ch 1, turn, sc in each st across (13)
Row 3: Ch 1, turn, sc, hdc, dc, hdc, sc across (13)
Row 4: Ch 1, turn, sc in each st across (13)
Row 5: Ch 1, turn, sc, dec, sc, dec, sc, dec, sc, dec, sc (9)
Row 6: Ch 1, turn, dec across (5)
Fasten off, leaving a long tail. Fold the leaf gently in half lengthwise and use the tail to tack the base closed, creating a soft center fold like a real lily of the valley leaf. Weave in ends.
Assembly Steps
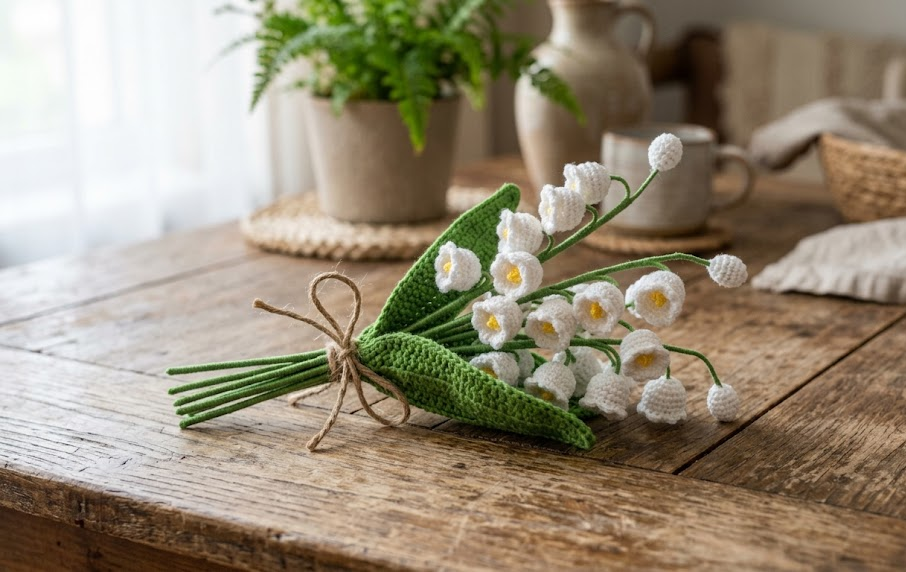
- Attach 3–4 bell flowers to the arched top of each wired stem, spacing them about 1cm (½”) apart, using the long tails left on each bell. Stitch through the top opening of each bell so it hangs downward off the stem.
- Group your 3–4 finished flower stems together, aligning the arched tops so the bells all hang in the same direction.
- Wrap the bundled stems together starting about 3cm (1¼”) from the base, spiraling green floral tape or wrapping green yarn tightly down to the bottom, securing as you go.
- Insert the two folded leaves alongside the wrapped stem bundle at the base, tucking them in before you finish the final wraps, so they sit just below the flowers.
- Trim the base of the bundled stems evenly, leaving about 5cm (2″) below the leaves for a handle.
- Tie a length of jute twine or ribbon around the base in a simple bow to finish the bouquet.
Tips for Beginner and Intermediate Crocheters
- If this is your first time crocheting around wire, practice the tube-stitch technique on a scrap length first — it should feel snug but not so tight that you can’t slide it along the wire while working.
- Keep tension slightly looser than usual on the bell flowers; a tight gauge here makes the bells look flat instead of rounded.
- Use a smaller hook (2mm) if you want daintier, more delicate-looking bells.
- When shaping the stem’s arch, bend the wire gradually in small sections rather than one sharp fold — this prevents kinking and keeps the curve smooth.
- If your leaves curl instead of lying flat, lightly steam them (hover an iron on steam setting a few inches above, never touching) and press flat under a book while cooling.
Variations
- Color swap: Try pale pink or lavender bells for a spring wedding palette instead of traditional white.
- Potted version: Skip the bow finish and instead glue the stem bundle into a small terracotta pot filled with dried moss or floral foam for a permanent desk arrangement.
- Mini boutonniere: Use just one stem with 2 bells and a single leaf for a wearable buttonhole accessory.
- Fuller bouquet: Increase to 6–8 stems bundled together for a bigger, showier arrangement perfect for a vase.
- Ombre bells: Dip-dye or use variegated white-to-green thread for a soft gradient effect on each bell flower.
Save This Pattern
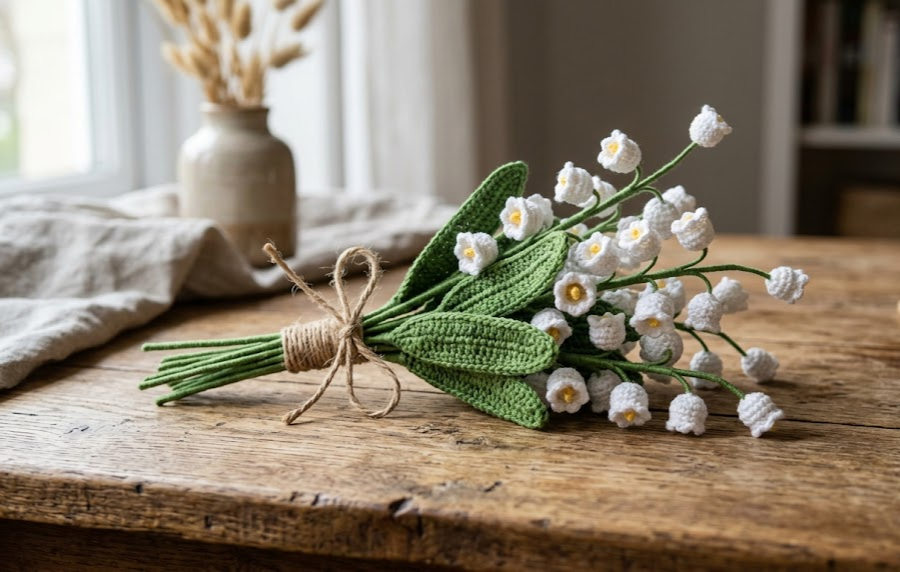
If you love delicate, everlasting florals like this one, save this pattern to come back to it anytime you need a sweet handmade gift or a permanent spring touch for your home. Pin it now and tag your finished bouquets with #FoodieRippleCrochet!



