
The Best Fluffy Pancakes recipe you will fall in love with. Full of tips and tricks to help you make the best pancakes.

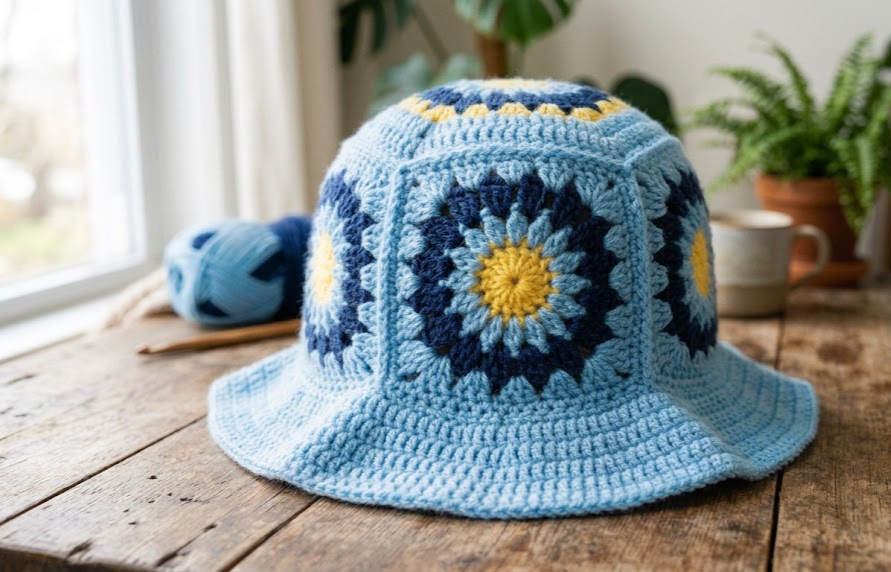
If you love the look of a granny square blanket but want something wearable, this Sunburst Granny Square Bucket Hat is the perfect project. Five sunny, dahlia-inspired granny squares in soft sky blue, deep navy, and warm yellow come together into a structured bucket hat with a relaxed brim. It’s a fantastic way to use up worsted weight scraps while creating a statement piece you’ll actually wear all summer long. The finished hat has a cozy, boho feel that pairs beautifully with denim, sundresses, or a simple tee — and because it’s made from five identical motifs joined into a crown shape, it comes together faster than you’d expect for something this eye-catching.
This pattern is written for the confident beginner who has made a granny square before, or an intermediate crocheter ready to try 3D construction. Every round is fully spelled out with stitch counts, so there’s no guesswork — just pick up your hook and go.
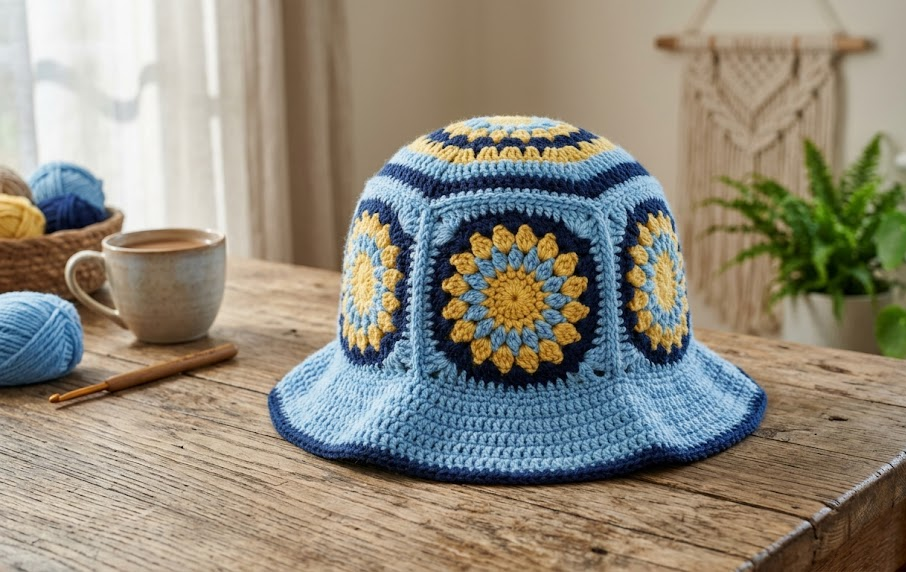
|
Difficulty
Intermediate
|
Time
8–10 hours
|
Hook Size
4.5mm (US 7)
|
Yarn Weight
Worsted (Medium #4)
|
Finished Size
Adult, ~56cm brim
|
Gauge
- One sunburst granny square = approximately 15cm x 15cm (6in x 6in) using a 4.5mm (US 7) hook
- 14 sts x 14 rows = 10cm x 10cm (4in x 4in) in single crochet
- Gauge swatch: chain 16, work 14 rows of sc, measure the center 10cm x 10cm. Adjust hook size up or down until your swatch matches.
Materials List
- Worsted weight yarn (medium, #4), sky blue — approximately 250g
- Worsted weight yarn (medium, #4), navy blue — approximately 40g
- Worsted weight yarn (medium, #4), yellow — approximately 15g
- 4.5mm (US 7) crochet hook
- Yarn needle
- Stitch markers (at least 4)
- Scissors
- Tape measure
Abbreviations
| Abbreviation | Meaning |
|---|---|
| ch | chain |
| sl st | slip stitch |
| sc | single crochet |
| hdc | half double crochet |
| dc | double crochet |
| tr | treble crochet |
| MR | magic ring |
| BLO | back loop only |
| sk | skip |
| st(s) | stitch(es) |
| sp | space |
| rep | repeat |
| RS | right side |
| dec | decrease |
| ( ) | stitch count at end of round/row |
Technique note — Magic Ring (MR): Instead of chaining and joining into a circle, wrap the yarn into a loop, work your first round of stitches into the loop, then pull the tail to close the center completely. This avoids a hole at the center of your motif.
Pattern Instructions
Part 1: Sunburst Granny Square (make 5)
Round 1 (Yellow): MR, ch 2 (counts as first hdc), 15 hdc into ring, sl st to join to top of ch-2. Pull tail to close ring. (16 hdc)
Round 2 (Yellow): Ch 1, *2 sc in next st, sc in next st; rep from * around, sl st to join. (24 sc)
Round 3 (Navy): Join navy in any st with sl st. Ch 3 (counts as first dc), dc in same st, *ch 1, sk 1 st, (dc, dc) in next st; rep from * around ending with ch 1, sk 1 st, sl st to join to top of ch-3. (12 dc pairs, 12 ch-1 sps)
Round 4 (Navy): Ch 1, sc in each dc and each ch-1 sp around, sl st to join. (24 sc)
Round 5 (Sky Blue) — first corner round: Join sky blue in any st. Ch 3 (counts as first dc), 2 dc in same st (corner made), *dc in next 5 sts, 3 dc in next st (corner); rep from * around 3 more times, dc in last 5 sts, sl st to join to top of ch-3. Place a stitch marker in the center st of each 3-dc corner group. (36 dc)
Round 6 (Sky Blue): Ch 3, dc in each st across to marked corner st, (2 dc, ch 1, 2 dc) in marked corner st, rep around all 4 corners, dc to end, sl st to join. (44 dc + 4 corner ch-1 sps)
Round 7 (Sky Blue) — square edge: Ch 3, dc in each st across, working (2 dc, ch 1, 2 dc) in each corner ch-1 sp, sl st to join, fasten off. (52 dc + 4 corner ch-1 sps)
Weave in all ends except the working tail — you’ll use tails for joining.
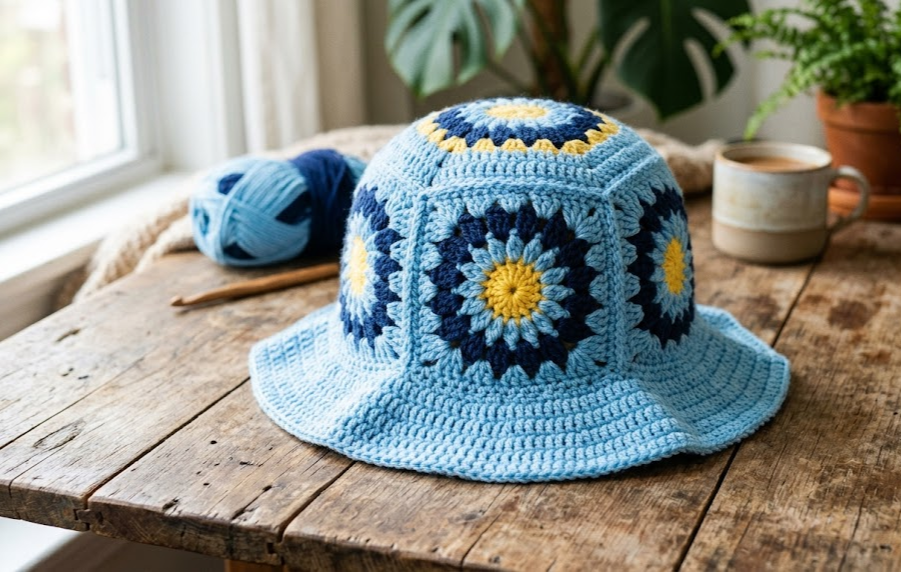
Part 2: Joining Squares into a Cross/Crown Base
Lay your 5 squares in a plus/cross shape: one center square, with one square joined to each side (top, bottom, left, right).
Join method: With RS facing, whipstitch or sl st join squares edge to edge through the back loops only (BLO), matching corner ch-1 spaces so the seams stay flat.
- Join the top square to the top edge of the center square.
- Join the bottom square to the bottom edge of the center square.
- Join the left square to the left edge of the center square.
- Join the right square to the right edge of the center square.
Do NOT join the outer edges of the top/bottom/left/right squares to each other yet — this is what allows the flat cross to fold up into a rounded crown.
Part 3: Shaping the Crown
Round 1: With sky blue and RS facing, join yarn at any outer corner of the cross. Working around the entire outer edge of the cross shape, sc evenly around, and at each of the 4 inner “valley” corners (where two side squares meet the center square but aren’t joined), sc the two corner ch-1 spaces together to close the gap and pull the cross into a rounded crown shape. Sl st to join. (approx. 120 sc — exact count will vary slightly based on tension; consistency matters more than the exact number here)
Round 2: Ch 1, sc in each st around, sl st to join. (same count as Round 1)
Round 3: Ch 1, sc in each st around, sl st to join. (same count as Round 1)
Try the crown on for fit. It should sit at the crown of the head like a beanie top before the brim is added. If it feels loose, dec 4–6 sts evenly in Round 3; if snug, inc 4–6 sts evenly.
Part 4: The Brim
Round 1: Continuing from the crown in sky blue, ch 1, sc in each st around, sl st to join.
Round 2 (increase round): Ch 1, *sc in next 4 sts, 2 sc in next st; rep from * around, sl st to join. (increases total by 20%)
Round 3: Ch 1, sc in each st around (no increase), sl st to join.
Round 4 (increase round): Ch 1, *sc in next 5 sts, 2 sc in next st; rep from * around, sl st to join.
Round 5–6: Ch 1, sc in each st around, sl st to join (no increase).
Round 7 (final increase round): Ch 1, *sc in next 6 sts, 2 sc in next st; rep from * around, sl st to join.
Round 8: Work 1 round of sl st around the brim edge for a clean, non-curling finish. Fasten off, leaving a 15cm tail for weaving in.
The gradual increase rounds are what make the brim flare gently outward rather than curl — don’t skip them even though they add rows.
Assembly Steps
- Lay the flat cross of 5 joined squares right-side up on a table.
- Fold the top, bottom, left, and right squares upward so their outer edges meet — this naturally forms a rounded dome shape.
- Pin or stitch-marker the meeting points of adjacent squares at the 4 “valley” seams before you sc them together, so the crown sits symmetrically.
- Join the crown rounds as instructed in Part 3, closing all 4 valley gaps evenly.
- Measure the open edge of the crown before starting the brim — it should measure approximately 56cm (22in) around for an average adult head. Adjust your crown decrease/increase rounds if it runs more than 2cm off this measurement.
- Work the brim directly onto the open edge in continuous rounds as instructed in Part 4.
- Steam-block the finished hat lightly on a bowl or hat form to help the crown hold its rounded shape and the brim lie flat.
Beginner/Intermediate Tips
- When joining the squares into the cross, use stitch markers to hold pieces in place before whipstitching — granny squares shift easily and markers keep your seams from twisting.
- Joining through the back loops only (BLO) keeps seams flatter on the outside of the hat, which matters since this is a visible, structural project.
- Work your gauge swatch in the same yarn and hook you’ll use for the whole hat — sunburst granny squares can vary in size more than plain granny squares due to the color changes pulling tension differently.
- If your crown feels too shallow or too deep after Part 3, it’s much easier to adjust the plain sc rounds (add or remove a round) than to redo the squares.
- Block your squares to the same size before joining — even a 1cm difference between squares will throw off the symmetry of the crown.
Variations
- Monochrome Sunburst: Use three shades of the same color family (light, medium, dark) instead of blue/navy/yellow for a tonal, minimalist look.
- Mini Version: Make 5 smaller squares (Rounds 1–5 only) for a child-sized bucket hat.
- Wide Brim Sun Hat: Add 2 extra increase rounds to Part 4 for a floppier, wider brim perfect for beach days.
- Solid Crown, Patterned Brim: Skip the sunburst squares and crochet a plain solid-color crown, then add a granny-square trim only around the brim edge for a subtler statement piece.
Save this pattern to your crochet board so you don’t lose it, and tag your finished hat — I’d love to see your color combo! #FoodieRippleCrochet



