
The Best Fluffy Pancakes recipe you will fall in love with. Full of tips and tricks to help you make the best pancakes.

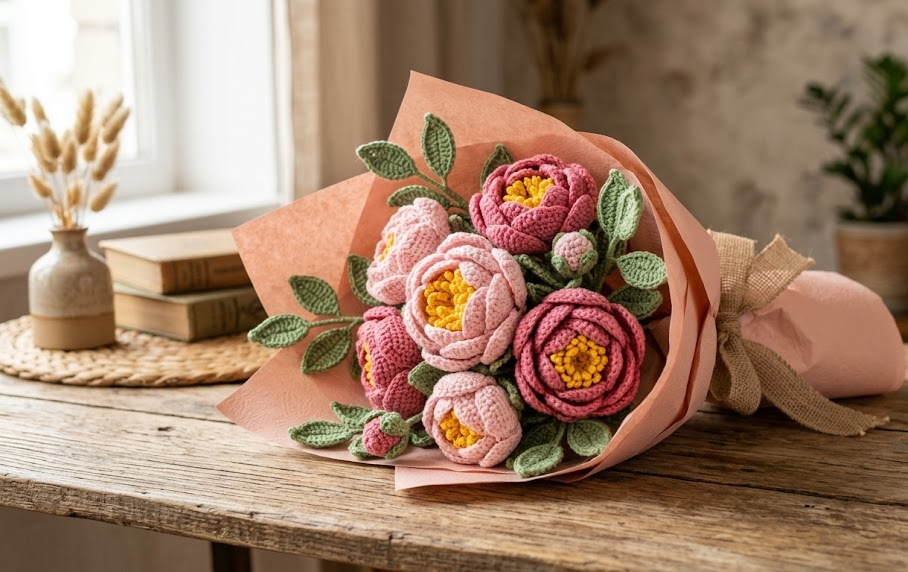
Fresh peonies are stunning but fleeting — a beautiful bloom that lasts barely a week before the petals begin to drop. This crochet peonies bouquet solves that problem entirely. Made from soft cotton thread in shades of peony pink, deep pink, and blush, this handmade arrangement captures every ruffled petal and delicate curve of a real peony, but it will sit on a shelf, nightstand, or gifted table for years without a single leaf wilting. This project is ideal for the intermediate crocheter who has mastered basic stitches and is ready to move into shaping, wiring, and floral assembly. It also makes a gorgeous handmade gift for anniversaries, Mother’s Day, weddings, or “just because” — something a bouquet of fresh flowers simply cannot do.
The finished piece includes three to five open peony blooms in varying pink tones, two to three tightly closed buds, crocheted leaves, and airy filler greenery, all wired together into a single arrangement and wrapped the way a florist would wrap a fresh-cut bouquet. Every petal is worked flat then sewn in layers around a yellow crocheted center, giving the flower real dimension instead of a flat, two-dimensional look. If you’ve never wired a crochet flower before, this pattern walks through every step so you can finish with confidence.
|
Difficulty
Intermediate
|
Time
7–9 Hours
|
Hook Size
2.0mm–2.5mm
|
Yarn Weight
Fingering / Lace
|
Finished Size
32cm x 18cm
|
Gauge
26 sc x 12 rows = 10cm x 10cm square, worked with a 2.5mm hook and fingering/lace weight cotton thread. Gauge is not critical for this project since the flowers are a finished shape rather than a fitted item, but working a quick swatch first helps confirm your tension will produce petals of a similar size to the sample and helps you gauge how much yarn to set aside per flower.
Materials List
- Cotton thread, fingering/lace weight, in: Peony Pink (main petal color), Light Pink (petal accents), Deep Pink (contrast petals), Yellow (flower centers), Green (leaves and stems) — approx. 15g per flower, 5g per leaf/bud
- 2.0mm hook (for tight center rounds) and 2.5mm hook (for petals and leaves)
- Floral wire, 18-gauge, cut into 25–30cm lengths (one per flower/bud/leaf stem)
- Green floral tape
- Polyester stuffing (small amount, for bud centers only)
- Yarn needle for sewing
- Scissors
- Wrapping paper and ribbon for finishing presentation
Abbreviations
| Abbreviation | Meaning |
|---|---|
| ch | chain |
| sl st | slip stitch |
| sc | single crochet |
| hdc | half double crochet |
| dc | double crochet |
| tr | treble crochet |
| inc | increase (2 stitches in 1 stitch) |
| dec | invisible decrease (2 stitches worked together as 1) |
| ( ) | repeat instructions as noted |
| [ ] | total stitch count at end of round/row |
| MR | magic ring |
Pattern Instructions
Note on Magic Ring: A magic ring lets you crochet the first round around an adjustable loop, then pull it closed afterward — this avoids the small hole a standard chain-ring leaves at the center. If you’re not comfortable with a magic ring, you can substitute ch2, then work stitches into the second chain from the hook instead.
PART A: Flower Center (make 1 per flower, Yellow, using 2.0mm hook)
Gauge swatch: work 10 sc in a flat row and measure; should measure approx. 3.5cm wide.
Round 1: MR, 6 sc into ring, pull ring closed, join with sl st. (6)
Round 2: ch1, 2 sc in each st around. (12)
Round 3: ch1, (sc, inc) around. (18)
Fasten off, leaving a 20cm tail for sewing and wiring later.
PART B: Petals (make 12–15 per flower, mix of Peony Pink, Light Pink, and Deep Pink, using 2.5mm hook)
Work petals in three sizes — small, medium, large — to build a layered, realistic bloom.
Small Petal (make 4–5 per flower):
Ch 6.
Row 1: Starting in 2nd ch from hook (this means skip the chain closest to your hook and insert into the next one — this keeps your foundation edge from curling), hdc, dc, tr, dc, hdc, sl st in last ch. (6)
Row 2: ch1, turn, sc, hdc, dc, (tr, dc) in next st, hdc, sc, sl st. (8)
Fasten off, leave a 10cm tail.
Medium Petal (make 4–5 per flower):
Ch 8.
Row 1: starting in 2nd ch from hook, hdc, dc, 2 tr, dc, hdc, sl st in last ch. (8)
Row 2: ch1, turn, sc, hdc, dc, (2 tr, dc) in next st, hdc, dc, sc, sl st. (10)
Fasten off, leave a 10cm tail.
Large Petal (make 4–5 per flower):
Ch 10.
Row 1: starting in 2nd ch from hook, hdc, dc, dc, 3 tr, dc, dc, hdc, sl st in last ch. (10)
Row 2: ch1, turn, sc, hdc, dc, dc, (3 tr, dc) in next st, dc, dc, hdc, sc, sl st. (12)
Fasten off, leave a 10cm tail.
PART C: Bud (make 2–3, Deep Pink or Light Pink)
Round 1: MR, 6 sc into ring, pull closed, join with sl st. (6)
Round 2: ch1, inc around. (12)
Round 3: ch1, (sc, inc) around. (18)
Round 4: ch1, sc in each st around, stuff lightly with a small pinch of stuffing before closing. (18)
Round 5: ch1, (sc, dec) around, invisible decrease combines two stitches into one to shape the top closed smoothly. (12)
Fasten off, leave 20cm tail; insert wire stem before closing final stitches.
PART D: Leaf (make 6–8, Green)
Ch 12.
Row 1: starting in 2nd ch from hook, sc in next 3 ch, hdc in next 3 ch, dc in next 3 ch, 3 sc in last ch (this turns the corner to work back up the other side of the foundation chain — the “second side of the chain” — without cutting yarn), then working into the unused loops on the underside of the chain: dc in next 3, hdc in next 3, sc in next 3, sl st to close. (24)
Fasten off, leave 15cm tail for attaching to wire stem.
Assembly Steps
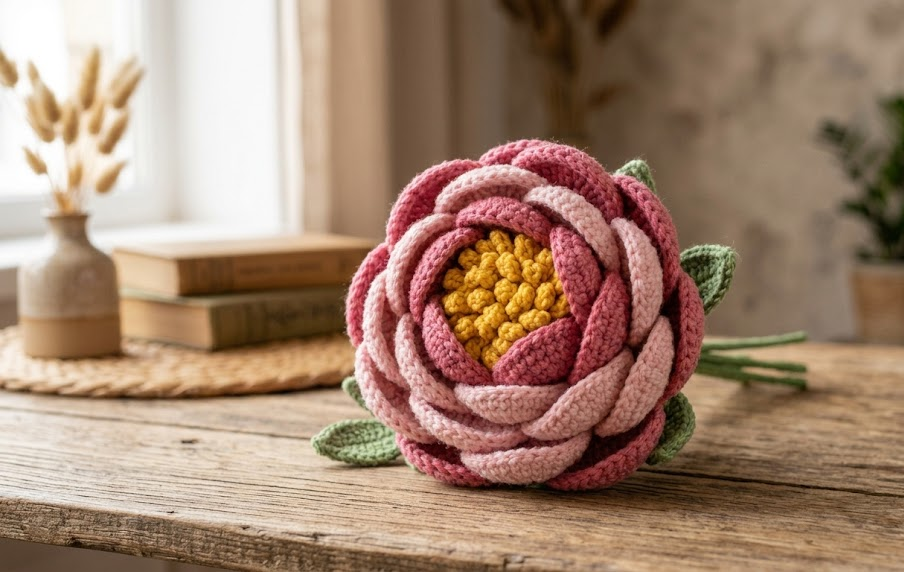
- Assemble each flower: lay 4–5 small petals in the first layer, overlapping each by about a third, and sew around the yellow center using the petal tails. Add the medium petal layer around the outside of the small layer, then the large petal layer as the outer ring, sewing each layer about 3mm below the previous one so the bloom cups outward like a real peony.
- Attach a 25cm length of floral wire to the base of each finished flower, bud, and leaf by wrapping the wire hook around the last round of stitches and securing with a few small stitches through the base.
- Wrap each stem in green floral tape, starting at the flower base and working down the wire in a slight spiral, stretching the tape gently as you go so it seals to itself.
- Attach leaves to flower stems roughly 6–8cm below the bloom by twisting the leaf’s wire stem around the main stem, then continue wrapping tape down and over the join.
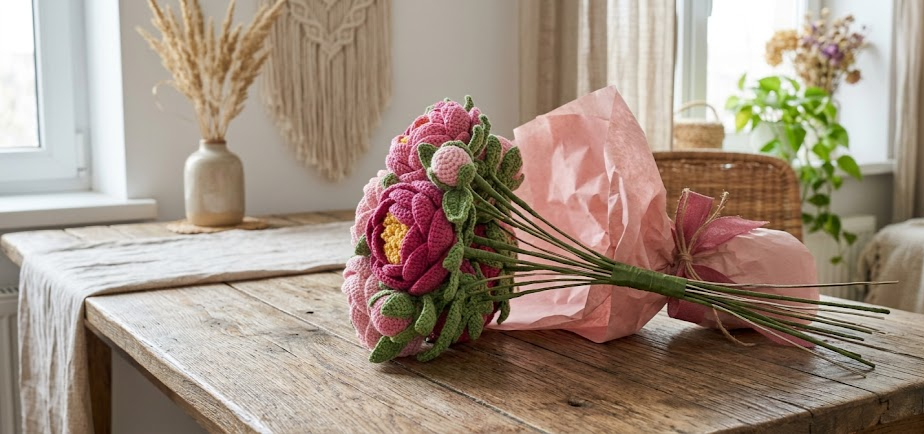
- Gather 3–5 finished flowers, 2–3 buds, and remaining leaves into a bouquet shape, staggering heights by 2–3cm so blooms don’t sit in a flat line. Wrap all stems together with floral tape at a point about 12cm from the base of the flowers.
- Trim stem ends evenly, wrap the gathered stems in wrapping paper, and finish with a ribbon bow at the base of the blooms.
Tips
- Use a smaller hook than you think you need for the petals — a looser gauge makes petals floppy instead of holding their curved shape.
- When sewing petal layers, work from the center outward and keep tension snug; loose sewing is the most common reason finished flowers look flat instead of full.
- Pre-cut all your floral wire before you start crocheting so assembly doesn’t stall the process later.
- If your tr stitches feel bulky, try working them slightly looser than your hdc and dc stitches so the petal edge curves rather than puckers.
Variations
- Single Stem Peony — Make just one flower on a long stem for a minimalist vase display.
- White & Blush Wedding Bouquet — Swap the pink palette for ivory, blush, and sage green for a bridal-style arrangement.
- Mini Potted Peonies — Skip the wire stems and glue finished blooms directly into a small terra cotta pot filled with floral foam.
- Sunflower-Peony Mix — Add 2–3 crocheted sunflowers in yellow and brown to the same bouquet for a wildflower look.
Save This Pattern
Save this pattern now so you don’t lose it, and come back anytime you want to make this bouquet as a gift or keep it for yourself. #FoodieRippleCrochet



