
The Best Fluffy Pancakes recipe you will fall in love with. Full of tips and tricks to help you make the best pancakes.

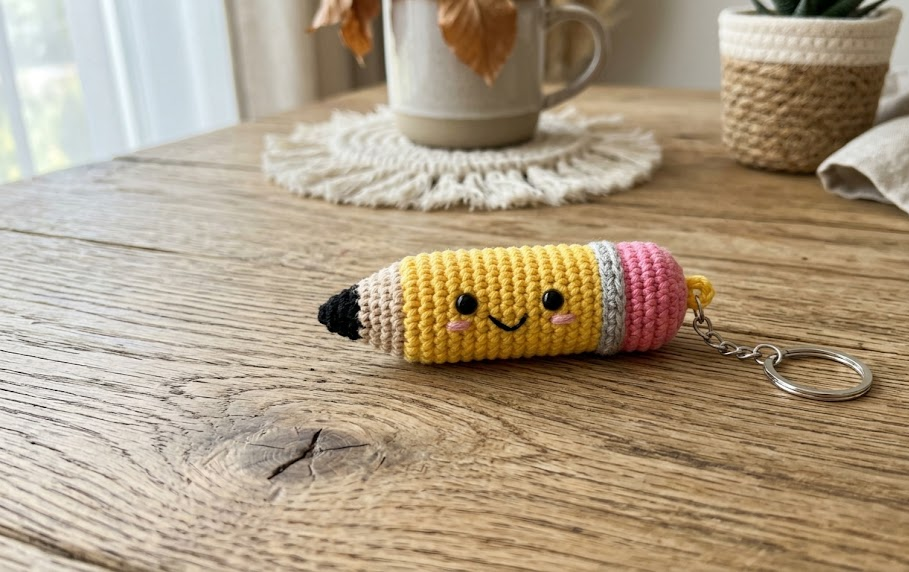
Back-to-school season, teacher gifts, pencil case charms, or just a sweet little desk buddy — this crochet pencil keychain hits every note. With its cheerful yellow body, soft pink eraser, and tiny embroidered smile, it’s the kind of project that looks complicated but works up in a single sitting. It’s small enough to finish in an afternoon, yet detailed enough to feel like a genuine handmade gift.
This pattern is perfect for crocheters who’ve made a few amigurumi basics already — you’ll get comfortable practice with magic rings, color changes, invisible decreases, and simple embroidery, all in one compact project. Clip it to a backpack, a keyring, a planner, or gift it to a teacher, student, or fellow stationery lover. However you use it, this little pencil is guaranteed to bring a smile.
Because it’s worked in continuous rounds with no seams to sew along the body, this is also a great “portable” project — toss your yarn and hook in a bag and stitch a round or two whenever you have a spare few minutes.
|
Difficulty
Beginner-Intermediate
|
Time
2–3 Hours
|
Hook Size
2.5mm
|
Yarn Weight
DK (Light Worsted)
|
Finished Size
4 in / 10cm
|
Gauge
6 single crochet stitches x 7 rows = 1 inch (2.5cm) square, worked in continuous rounds (not turned), using a 2.5mm hook and DK weight yarn. Gauge is not critical for this project since it’s a small toy-style makes — slight variations in tension will only slightly change the finished size. Work a small gauge swatch first if you want your pencil to match the finished size listed above exactly.
Materials List
- DK weight yarn (Light Worsted / #3) in the following colors:
- Yellow – small amount (main body)
- Pink – small amount (eraser)
- Gray – small amount (ferrule/band)
- Black – tiny amount (pencil tip + eyes/mouth embroidery)
- Cream or light tan – small amount (wood-tip section)
- 2.5mm crochet hook
- Pair of 4mm black safety eyes (or black embroidery thread for stitched eyes)
- Polyester fiberfill stuffing
- Stitch marker
- Yarn needle
- Small amount of pink embroidery thread or yarn (for cheek blush, optional)
- Keyring with chain attachment
- Scissors
Abbreviations Table
| Abbreviation | Meaning |
|---|---|
| MR | Magic Ring |
| ch | Chain |
| sc | Single Crochet |
| inc | Increase (2 sc in same stitch) |
| dec | Invisible Decrease |
| st(s) | Stitch(es) |
| rnd | Round |
| BLO | Back Loop Only |
| sl st | Slip Stitch |
Pattern Instructions
Technique note: A Magic Ring (MR) is an adjustable loop that lets you start a round without a hole in the center; pull the tail to close it snugly after your first round of stitches. An invisible decrease (dec) is worked by inserting your hook through the front loops of two consecutive stitches and pulling through both, giving a smoother, less bulky decrease than a standard one.
Part 1: Eraser (Pink)
- Rnd 1: MR, 6 sc into ring (6)
- Rnd 2: inc in each st around (12)
- Rnd 3: (sc, inc) repeat around (18)
- Rnd 4–6: sc around, 3 rounds even (18)
Change to gray for the ferrule band.
Part 2: Ferrule Band (Gray)
- Rnd 7: BLO sc around (working in back loop only creates a visible ridge line that mimics the metal band on a real pencil) (18)
- Rnd 8: sc around (18)
Change to yellow for the pencil body.
Part 3: Pencil Body (Yellow)
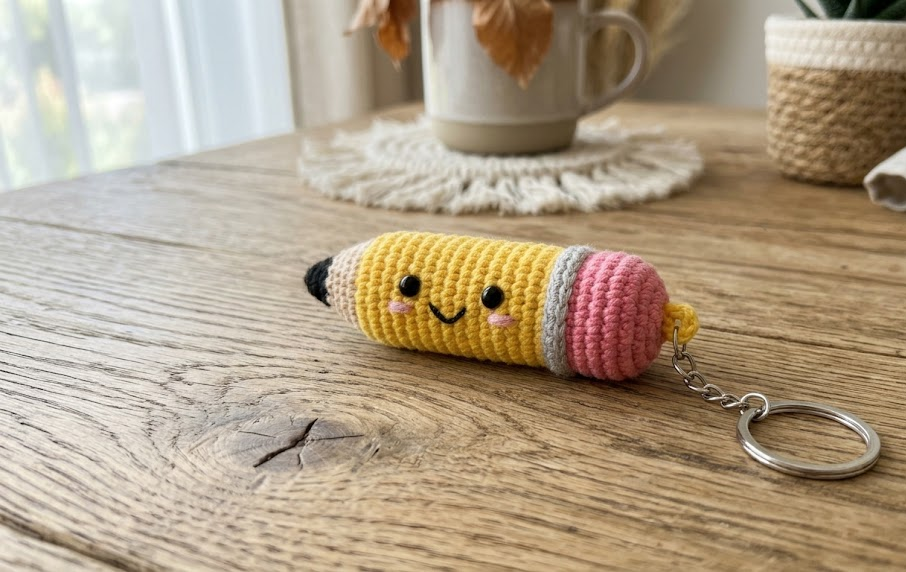
- Rnd 9–20: sc around, 12 rounds even (18)
(Stop here and check length against your target — this is the longest section and determines your overall pencil length. Add or remove rounds here if you’d like a longer or shorter keychain.)
Change to cream for the wood-tip taper.
Part 4: Wood Tip (Cream)
- Rnd 21: (sc4, dec) repeat around (15)
- Rnd 22: sc around (15)
- Rnd 23: (sc3, dec) repeat around (12)
Change to black for the pencil point.
Part 5: Pencil Point (Black)
- Rnd 24: (sc2, dec) repeat around (9)
- Rnd 25: (sc1, dec) repeat around (6)
- Rnd 26: dec around (3)
Fasten off, leaving a long tail. Weave the tail through the front loops of the remaining 3 stitches, pull tight to close the tip, and secure.
Assembly Steps
- Before closing the top of the eraser, insert the loop of your keyring’s jump ring/chain through the center of Round 1, then continue stuffing and stitching around it so it’s anchored at the very top-center of the eraser.
- Stuff the eraser and ferrule sections firmly, using a chopstick or crochet hook handle to push fiberfill into the top.
- Attach safety eyes at Round 12 of the pencil body (yellow section), spacing them about 1cm (0.4in) apart, centered on the front of the piece.
- Continue stuffing firmly as you work down the body — add stuffing in small amounts every few rounds rather than all at once, so it stays evenly distributed and the tube doesn’t look lumpy.
- Embroider a simple curved smile in black thread below the eyes, about 0.5cm (0.2in) below eye level.
- Add two small pink blush marks with embroidery thread or a light dab of blush, just below and outside each eye.
- Stuff the wood-tip and black point sections lightly but evenly — these narrower sections need less fiberfill than the body.
- Weave in all loose ends securely on the inside using a yarn needle.
- Give the finished pencil a gentle shape-check: it should stand slightly tapered from eraser to tip, roughly 10cm (4in) total length.
Beginner/Intermediate Tips
- Work with a stitch marker at the start of every round — it’s easy to lose your place in solid-color sections like the yellow body.
- Stuff a little at a time as you go rather than waiting until the piece is closed; it’s much harder to add stuffing evenly after the fact.
- When changing colors, work the last stitch of the old color until two loops remain, then pull the new color through to finish — this keeps color transitions clean and avoids visible knots on the right side.
- If your safety eyes feel loose after inserting, add a tiny dab of fabric glue to the backing washer for extra security, especially since this piece will be handled often as a keychain.
- Keep tension slightly tighter than usual on amigurumi pieces this small — looser stitches let stuffing show through.
Variations
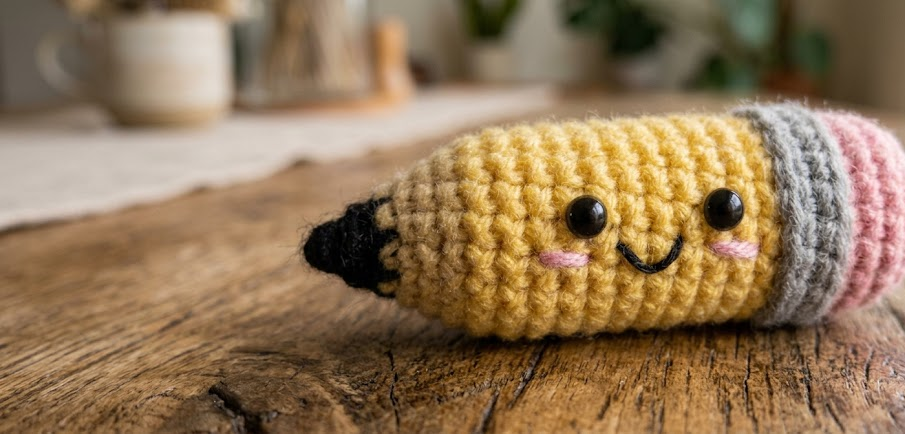
- Colored Pencil Set: Make several in different body colors (blue, green, red, purple) to create a full rainbow pencil keychain collection.
- Mini Size: Use fingering weight yarn and a 2mm hook for a mini 6cm (2.4in) version, great for bag charms.
- No Face Version: Skip the eyes and embroidery for a more minimalist, decor-style pencil ornament instead of a character keychain.
- Glitter Eraser: Use a sparkle or metallic-blend pink yarn for the eraser section to add a bit of sparkle.
- Personalized Initial: Embroider a small initial letter onto the yellow body in contrasting thread for a personalized gift.
Save This Pattern
Loved this pencil keychain? Save this pattern to your crochet board so you can find it again next time you need a quick, adorable handmade gift. Tag your finished pencils with #FoodieRippleCrochet — I’d love to see your version!



