
The Best Fluffy Pancakes recipe you will fall in love with. Full of tips and tricks to help you make the best pancakes.

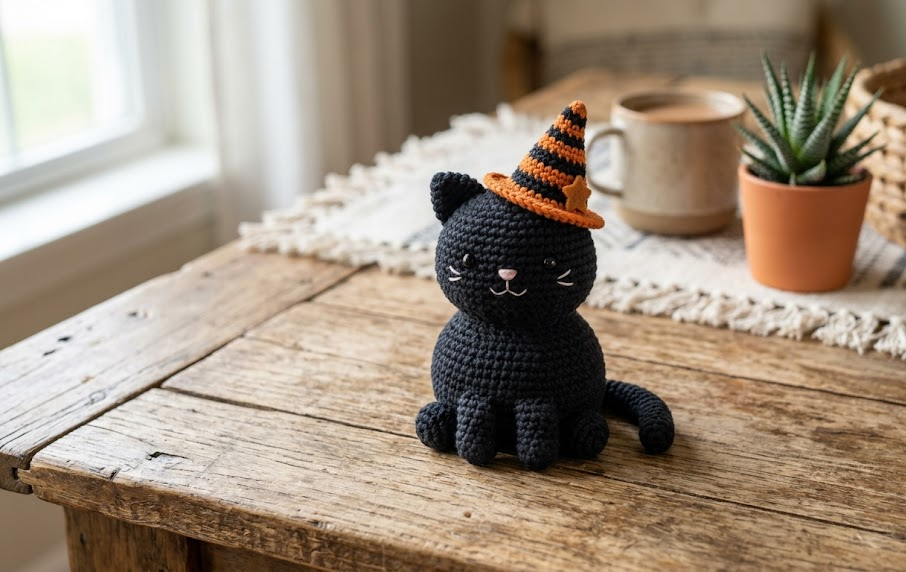
There’s something irresistibly charming about a tiny black cat in a witch hat sitting on your shelf every October. This amigurumi pattern brings that spooky-cute magic to life with a round, huggable body, a sweetly stitched face, and a jaunty striped witch hat that tips just slightly to one side for extra personality. Whether you’re decorating your home for Halloween, building a stash of seasonal gifts, or just looking for a satisfying weekend project, this little cat delivers big charm in a small package.
This pattern is written for intermediate crocheters who are comfortable with basic amigurumi shaping, color changes, and simple embroidery. If you’ve made a round amigurumi head before, you’ll pick this up quickly — and if this is your first amigurumi, the detailed round-by-round stitch counts here will guide you all the way through. The finished cat stands about 11cm (4.3 inches) tall, making it the perfect size for shelf display, a Halloween tree ornament, or a cozy addition to a fall-themed centerpiece.
By the end of this pattern, you’ll have a complete black cat amigurumi with a fully shaped body, embroidered face, tiny ears, a curling tail, and a two-tone witch hat that sits securely on the head. Let’s get started.
|
Difficulty
Intermediate
|
Time
4–5 Hours
|
Hook Size
3.0–3.5mm
|
Yarn Weight
DK / Light Worsted
|
Finished Size
11cm (4.3″)
|
Gauge
18 single crochets x 20 rows = 10cm x 10cm square, worked in single crochet
Hook used: 3.0mm–3.5mm
Yarn weight used: DK/Light Worsted (#3)
Amigurumi gauge doesn’t need to be exact, but working slightly tighter than your usual gauge helps prevent stuffing from showing through the stitches. Always crochet a quick gauge swatch before starting so your finished cat matches the size listed above.
Materials List
- DK weight yarn in black, approximately 25g
- DK weight yarn in orange, approximately 10g
- Small amount of black yarn or embroidery thread for hat stripes and facial details
- 3.0mm–3.5mm crochet hook
- Polyester fiberfill stuffing
- Stitch marker (or scrap yarn) to mark round starts
- Yarn needle for weaving in ends and embroidery
- Small amount of white or light-colored embroidery thread for eye highlights (optional)
- Fabric glue (optional, for securing hat to head)
Abbreviations Table
| Abbreviation | Meaning |
|---|---|
| ch | chain |
| sc | single crochet |
| inc | increase (2 sc in same stitch) |
| dec | invisible decrease |
| st(s) | stitch(es) |
| rnd(s) | round(s) |
| MR | magic ring |
| BLO | back loop only |
| sl st | slip stitch |
| ( ) | stitch count at end of round |
Pattern Instructions
Technique Notes (read before starting)
A magic ring (MR) is an adjustable loop used to start amigurumi pieces, letting you cinch the center closed tightly so there’s no hole. An invisible decrease (dec) is worked by inserting your hook through only the front loops of the next two stitches, then pulling up a loop and completing as a normal single crochet, which creates a smoother, less bulky decrease than a standard one. Working in back loop only (BLO) means inserting your hook under just the back strand of the stitch, leaving the front loop free, which creates a visible ridge line used here to separate the head from the body-color shift.
Part 1: Body (start at bottom, black yarn)
Rnd 1: MR, 6 sc into ring (6)
Rnd 2: inc in each st around (12)
Rnd 3: (sc, inc) around (18)
Rnd 4: (2 sc, inc) around (24)
Rnd 5: (3 sc, inc) around (30)
Rnd 6–10: sc around, no increases (30) — work 5 rounds even
Rnd 11: (3 sc, dec) around (24)
Rnd 12: (2 sc, dec) around (18)
Rnd 13: sc around (18)
Stuff the body firmly, shaping it into a round dome before closing.
Rnd 14: (sc, dec) around (12)
Rnd 15: dec around (6)
Fasten off, leaving a long tail, and cinch the top hole closed.
Part 2: Head (black yarn)
Rnd 1: MR, 6 sc into ring (6)
Rnd 2: inc in each st around (12)
Rnd 3: (sc, inc) around (18)
Rnd 4: (2 sc, inc) around (24)
Rnd 5: (3 sc, inc) around (30)
Rnd 6: (4 sc, inc) around (36)
Rnd 7–12: sc around, no increases (36) — work 6 rounds even
Pause here to embroider the face (see Assembly Steps) before closing the head, as it’s much easier to work on a flat, unstuffed piece.
Rnd 13: (4 sc, dec) around (30)
Rnd 14: (3 sc, dec) around (24)
Stuff the head firmly.
Rnd 15: (2 sc, dec) around (18)
Rnd 16: (sc, dec) around (12)
Rnd 17: dec around (6)
Fasten off, leaving a long tail for sewing the head to the body.
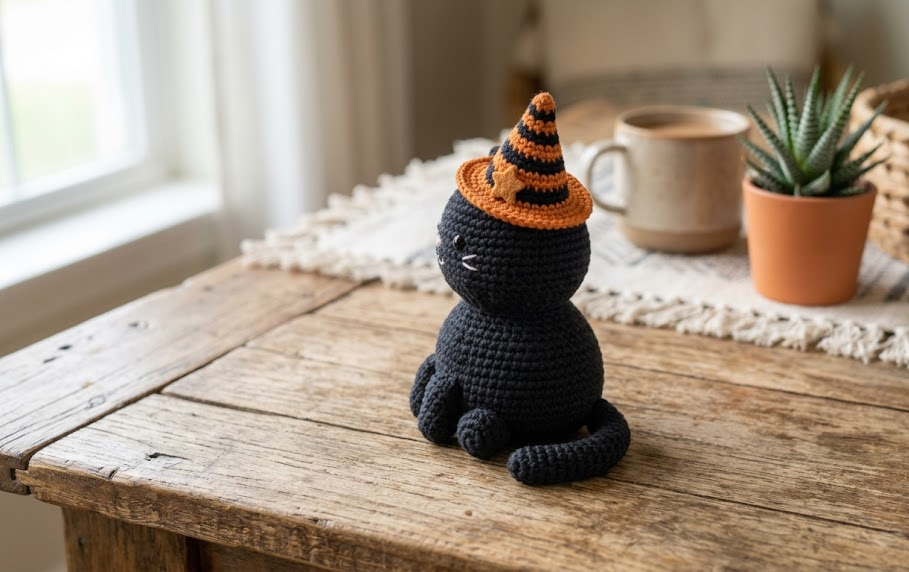
Part 3: Ears (make 2, black yarn)
Rnd 1: MR, 4 sc into ring (4)
Rnd 2: inc in each st around (8)
Rnd 3: sc around (8)
Fasten off, leaving a long tail. Flatten the ear and fold the bottom edge slightly inward to create a natural cupped shape before sewing.
Part 4: Tail (black yarn)
Ch 12, then work back down the chain: sc in 2nd ch from hook and each ch across (11)
This creates a flat starting strip; you’ll now work it into a tube. Note: working into “the second side of the chain” means, after reaching the end of your starting chain, you rotate your work and continue single crocheting along the opposite, unused loops of the same foundation chain, effectively wrapping stitches around both sides to form a tube shape.
Continue: rotate and sc into the unused loops along the other side of the chain (11), then join with a sl st to form a flattened tube (22 total sts around)
Rnd 1–8: sc around in spiral (22) — do not join, work in continuous rounds
Rnd 9: (2 sc, dec) around (16)
Fasten off, leaving a long tail. Lightly stuff the tail only in the lower half to keep it soft and bendable near the tip.
Part 5: Witch Hat Cone (orange yarn)
Rnd 1: MR, 6 sc into ring (6)
Rnd 2: inc in each st around (12)
Rnd 3: (sc, inc) around (18)
Rnd 4: (2 sc, inc) around (24)
Rnd 5: (3 sc, inc) around (30)
Rnd 6: sc around (30)
Rnd 7: (4 sc, inc) around (36)
Rnd 8–9: sc around (36) — work 2 rounds even
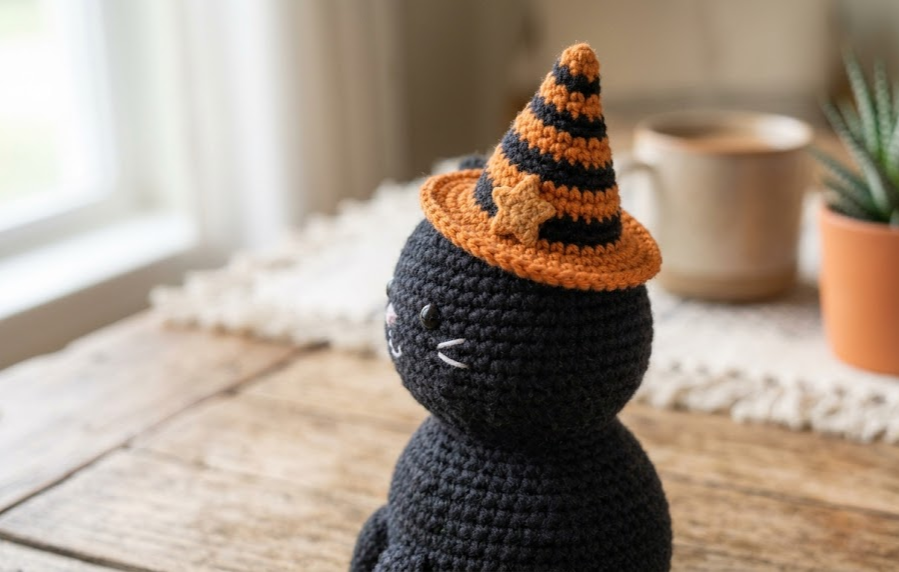
At this point, switch to black yarn for a stripe: work Rnd 10 entirely in black, then rejoin orange for Rnd 11, and repeat one more black stripe at Rnd 13. This creates the signature two-tone witch hat look.
Rnd 10: sc around in black (36)
Rnd 11: sc around in orange (36)
Rnd 12: sc around in orange (36)
Rnd 13: sc around in black (36)
Rnd 14: sc around in orange (36)
Now shape the point of the hat:
Rnd 15: (4 sc, dec) around (30)
Rnd 16: (3 sc, dec) around (24)
Rnd 17: (2 sc, dec) around (18)
Rnd 18: (sc, dec) around (12)
Rnd 19: (sc, dec) around (8)
Rnd 20: dec around (4)
Stuff the very tip lightly just to help it hold its point, then fasten off and cinch closed.
Part 6: Hat Brim (orange yarn)
With the hat cone’s open bottom edge facing you, join orange yarn and work into the same starting edge.
Rnd 1: sc in BLO around the base opening (36)
Rnd 2: inc in each st around (72)
Fasten off, leaving a long tail for sewing.
Assembly Steps
- Position the two ears about 2cm apart on top of the head, angled slightly outward, and sew in place using the yarn tail from each ear.
- Embroider the face before attaching the head to the body: place two small black eyes (or use black embroidery thread in a satin stitch) about 1.5cm apart, roughly one-third of the way down the head. Add a tiny white highlight stitch to each eye for sparkle.
- Embroider a small nose in pink or black just below and between the eyes, then stitch a simple curved smile beneath it using a single strand of embroidery thread.
- Attach the head to the top of the body, centering it and sewing around the entire circumference with the head’s tail, making sure the face points forward and is aligned with the front of the body.
- Sew the tail to the lower back of the body, angling it to curve gently around one side. Position it so about 1cm of the tail overlaps the body for a secure, natural-looking attachment.
- Place the finished witch hat on the head, tilting it slightly to one side (about 15–20 degrees) for a playful, asymmetrical look. Secure with a few small stitches around the brim, or use a dab of fabric glue for a removable option.
- Weave in all remaining loose ends and give the cat a gentle shape-check, adding a pinch more stuffing anywhere it feels soft.
Beginner/Intermediate Tips
- When working the invisible decrease rounds on the head and body, keep your tension slightly tighter than usual so the decreases don’t leave visible gaps once stuffed.
- Stuff a little at a time as you go rather than all at once at the end; it’s much easier to control the shape of the head and body this way.
- If your stripe color changes on the hat look uneven, carry the unused yarn color loosely up the inside of the work rather than cutting and rejoining each round — it saves ends to weave in and keeps the stripes cleaner.
- Use a stitch marker or small loop of scrap yarn in a contrasting color to mark the start of each round; it’s easy to lose track in a small piece like this.
- Block the hat gently by shaping it around a cone (even a rolled piece of cardstock) while damp to help it hold its point.
Variations
- Orange Cat Version: Swap the black body yarn for orange and use black for the hat stripes instead, flipping the color scheme for a pumpkin-toned companion piece.
- Mini Ornament Size: Work the same pattern with a 2.5mm hook and fingering weight yarn to create a smaller version perfect for hanging on a Halloween tree or wreath.
- No-Hat Classic Cat: Skip the witch hat entirely and add a small bow at the neck instead for a year-round black cat that isn’t Halloween-specific.
- Pair Set Display: Make two cats in slightly different sizes (adjust starting rounds by +2 or -2) and pose them sitting side by side for a matching duo display, just like the classic Halloween pairing look.
- Glow Stitch Version: Add a few strands of glow-in-the-dark yarn woven into the eyes or hat tip for a spooky nighttime effect.
Save This Pattern
If you loved making this Halloween black cat amigurumi, save this pin so you can find it again next spooky season! Tag your finished cats and share your makes using #FoodieRippleCrochet — we love seeing your creative color combos and hat tilts.



