
The Best Fluffy Pancakes recipe you will fall in love with. Full of tips and tricks to help you make the best pancakes.

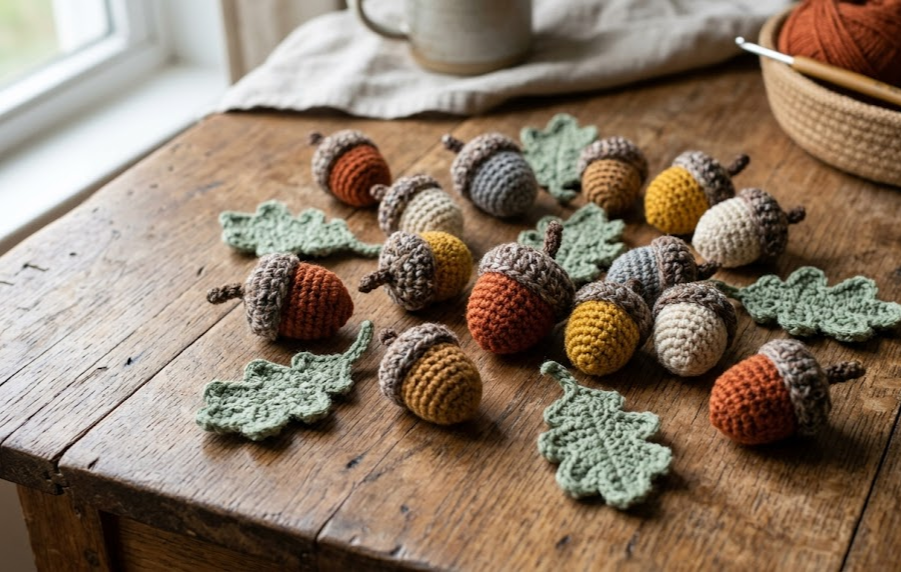
There’s something about a bowl of handmade acorns that instantly makes a room feel like fall. This crochet acorn and oak leaf set is a small-scale, high-reward project — each acorn works up in under an hour, and once you’ve made your first one, you’ll want a whole basketful. The finished pieces are soft, huggable, and completely toddler-safe when stuffed securely, making them perfect for autumn sensory bins, tiered tray decor, garland projects, or simply piled into a linen drawstring bag as a table centerpiece.
This pattern is written for confident beginners and intermediate crocheters. If you’ve made a basic amigurumi ball before, you already have every skill you need — the acorn cap is just a slightly textured variation on a standard crochet dome, and the oak leaf is worked flat in rows. Nothing here requires special equipment beyond a hook, yarn, and a little polyester stuffing.
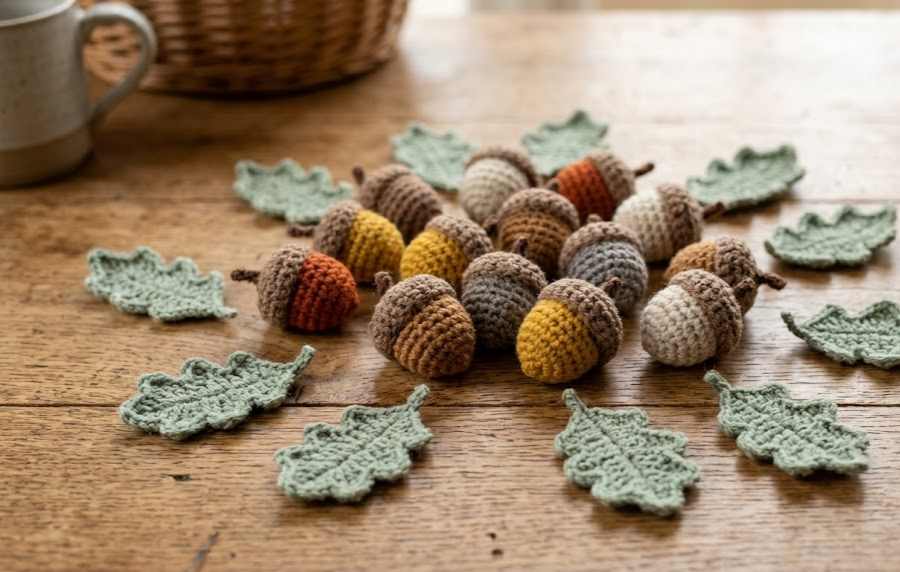
By the end of this pattern you’ll be able to make an entire coordinating set: acorns in five autumn shades and matching sage-green oak leaves, all at a consistent scale so they nest together beautifully in a bowl, jar, or fabric pouch.
|
Difficulty
Beginner–Intermediate
|
Time
40 min per acorn
|
Hook Size
3.5mm (US E/4)
|
Yarn Weight
Worsted (Aran, #4)
|
Finished Size
4.5cm x 5cm each
|
Gauge
18 stitches x 20 rows = 10cm x 10cm (4in x 4in) in single crochet (sc), worked in continuous spiral rounds, using a 3.5mm (US E/4) hook with worsted weight (Aran, weight 4) yarn.
Gauge is not critical for this project since the acorns are stuffed toys rather than fitted garments, but matching gauge keeps your acorns consistent in size if you’re making a matching set. Work a small swatch of 10 sc for 10 rows before starting if you want to check your tension — amigurumi is typically worked tightly (one size smaller hook than the yarn label recommends) so stitches are dense enough to hide stuffing.
Materials List
- Worsted weight (Aran, weight 4) yarn in the following colors (small amounts, roughly 8–10g per acorn body, 5–6g per cap):
- Rust orange
- Mustard yellow
- Warm gray
- Cream/off-white
- Chocolate brown
- Sage green (for oak leaves)
- Extra brown or tan for leaf veins (optional)
- 3.5mm (US E/4) crochet hook
- Polyester fiberfill stuffing
- Stitch marker (a small safety pin or scrap yarn works fine)
- Yarn needle for weaving in ends
- Small amount of craft wire (optional, 24-gauge, for leaf stems only)
- Fabric drawstring pouch or small basket for display (optional, for finished styling)
Abbreviations Table
| Abbreviation | Meaning |
|---|---|
| ch | chain |
| sc | single crochet |
| sc2tog | single crochet 2 stitches together (invisible decrease) |
| inc | increase (2 sc in same stitch) |
| dec | decrease (see sc2tog) |
| sl st | slip stitch |
| st(s) | stitch(es) |
| rnd | round |
| MR | magic ring |
| BLO | back loop only |
| FLO | front loop only |
Magic Ring (MR): A magic ring lets you start a round with a fully closed center hole instead of a gap. Wrap yarn around your finger, insert hook through the loop, pull up a stitch, then work your first round of stitches into the loop before pulling the tail to close it tight.
Invisible decrease (sc2tog): Insert your hook into the front loop only of the next two stitches, yarn over, and pull through all three loops on your hook. This creates a smoother, less bulky decrease than a standard sc2tog and is especially useful on visible rounds like the acorn cap edge.
Pattern Instructions
PART 1: Acorn Body (make 1 per acorn, in your chosen body color)
Rnd 1: MR, 6 sc into ring (6)
Rnd 2: inc in each st around (12)
Rnd 3: [sc, inc] repeat around (18)
Rnd 4: [sc2, inc] repeat around (24)
Rnd 5–8: sc around, no increases (24) — work 4 rounds even
Rnd 9: [sc2, dec] repeat around (18)
Rnd 10: sc around (18)
Stop here — do not close the body yet. Set it aside; the cap will be worked separately and joined in the assembly step.
Technique note: Notice the body is left open at 18 stitches. This is intentional — you’ll stuff it before attaching the cap, and the cap’s final round will be worked directly onto this open edge rather than sewn on afterward, which gives a seamless join.
PART 2: Acorn Cap (make 1 per acorn, in your chosen cap color — typically brown)
Rnd 1: MR, 6 sc into ring (6)
Rnd 2: inc in each st around (12)
Rnd 3: [sc, inc] repeat around (18)
Rnd 4: BLO sc around (18)
Rnd 5: sc around, working in the bumpy texture stitch: sc in next st, then insert hook into the same stitch again and sc once more (this is a “puff” repeat) — repeat around for a bobbled cap texture (18)
Rnd 6: sc around (18)
Fasten off leaving a long tail for sewing. Weave in the starting tail.
Technique note: Working Rnd 4 in the back loop only (BLO) creates a visible ridge line where the cap texture will sit above it, mimicking the natural ring pattern on a real acorn cap.
PART 3: Acorn Stem (optional detail, make 1 per acorn)
Ch 4, sc in 2nd ch from hook and each ch across (3 sts). Fasten off leaving a 10cm tail on each end for attaching to the top of the cap.
Technique note: “2nd chain from hook” means you skip the very first chain stitch (it just holds your working loop) and begin your single crochet in the next one down the chain.
PART 4: Oak Leaf (make 2 per acorn if adding leaf accents, in sage green)
Ch 12.
Row 1: sc in 2nd ch from hook, sc across (11 sts). Turn.
Row 2: ch 1, sc in first 2 sts, [ch 2, sl st in same st to form a point, sc in next 2 sts] repeat 3 times across to create scalloped leaf edges (11 sts, plus 3 point loops)
Technique note: “working the second side of the chain” — since oak leaves in this pattern are worked in one row across the starting chain (not turned and worked back down a second side), you won’t need to flip and re-enter the foundation chain here. If you want a fuller two-sided leaf, ch 12, work Row 1 as above, then rotate your work 180° and single crochet back down the opposite side of the same starting chain to create a symmetrical leaf shape, working 3 sts into the last chain to turn the corner.
Fasten off leaving a 15cm tail for attaching to the acorn top or for use as a hanging loop.
If adding a wire stem: cut a 6cm length of 24-gauge craft wire, fold in half, and lay it along the center of the leaf as you crochet the final row, catching it inside your stitches so it’s fully encased. This lets you bend the leaf into a natural curve for styling.
Assembly Steps
- Stuff the acorn body firmly, filling it about 90% full so it holds its rounded shape but isn’t so tight the stitches show gaps.
- Line up the cap’s final round (18 sts) with the body’s open final round (18 sts), wrong sides facing so both right sides show on the outside.
- Using the cap’s long tail and a yarn needle, sc the two edges together stitch-for-stitch around the full 18-stitch circumference, adding 1–2 extra pinches of stuffing into the cap area before closing the last 3–4 stitches.
- Weave in the join tail through the top center of the cap and trim.
- If using a stem: fold the 3-stitch stem piece in half lengthwise and tack the two tail ends into the very top center of the cap, so it stands up about 1cm tall.
- If adding oak leaves as accents: position 1–2 leaves at the base of the acorn where the cap meets the body, and tack in place with a few small stitches using the leaf’s tail, letting the leaf tips extend outward 2–3cm from the acorn body.
- Repeat the full acorn (Parts 1–3) in each of your five colors to build a set of 5, then make 6–8 standalone oak leaves (Part 4) to scatter loosely among the acorns.
- For display, nest the finished acorns and loose leaves into a small linen drawstring pouch, wooden bowl, or shallow basket, letting a few spill over the edge for a natural, just-gathered look.
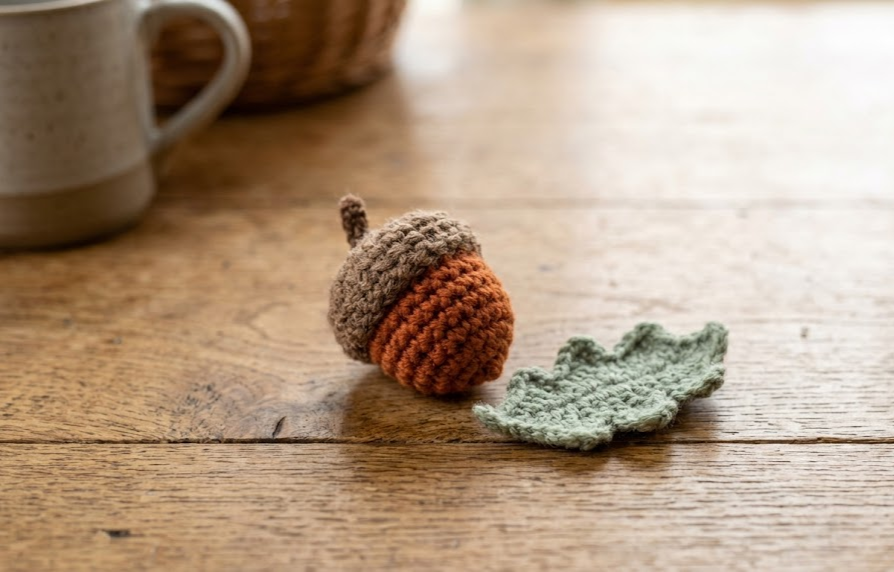
Finished size per acorn: approximately 4.5cm wide x 5cm tall. Finished oak leaf: approximately 6cm long x 3.5cm wide at the widest point.
Beginner/Intermediate Tips
- If your acorn cap looks too loose after Rnd 3, drop to a 3.25mm hook for just the cap piece — caps benefit from being slightly tighter than the body so the bobble texture stays defined.
- When working the puff-repeat texture round on the cap, keep tension even by pulling your working yarn snug after each repeat rather than at the end of the round — this prevents one section of the cap from puffing more than others.
- Use a stitch marker on Rnd 1 of every piece; with such a small stitch count it’s easy to lose track of where your round starts.
- If your stuffing is showing through gaps between stitches, you’re likely using a hook one size too large for your yarn weight — amigurumi should always feel a little tight to crochet.
- Sew the cap on with the working yarn tail rather than a separate strand; it blends invisibly and saves you from weaving in an extra end.
Variations
- Color Story Swap: Make an all-neutral set in cream, taupe, and warm gray for a minimalist neutral-toned autumn display instead of the classic rust-and-mustard palette.
- Mini Garland: Attach a loop of embroidery thread to the top of each stem and string 8–10 acorns together for a mantel garland instead of a loose basket display.
- Giant Statement Acorn: Work the same pattern in bulky weight yarn with a 5mm hook for one oversized 12cm acorn as a standalone shelf decoration.
- Ornament Version: Add a small hanging loop to the stem instead of leaving it standalone, turning each acorn into a Christmas tree ornament for a woodland-themed holiday tree.
- Keychain Set: Make single acorns at half scale (start Rnd 1 the same but stop increases after Rnd 3) and attach a keyring to the stem for a quick handmade gift.
Save this pattern so you can come back to it every autumn — and don’t forget to share your finished acorn baskets! Tag your version and save this post for later using #FoodieRippleCrochet 🍂



