
The Best Fluffy Pancakes recipe you will fall in love with. Full of tips and tricks to help you make the best pancakes.

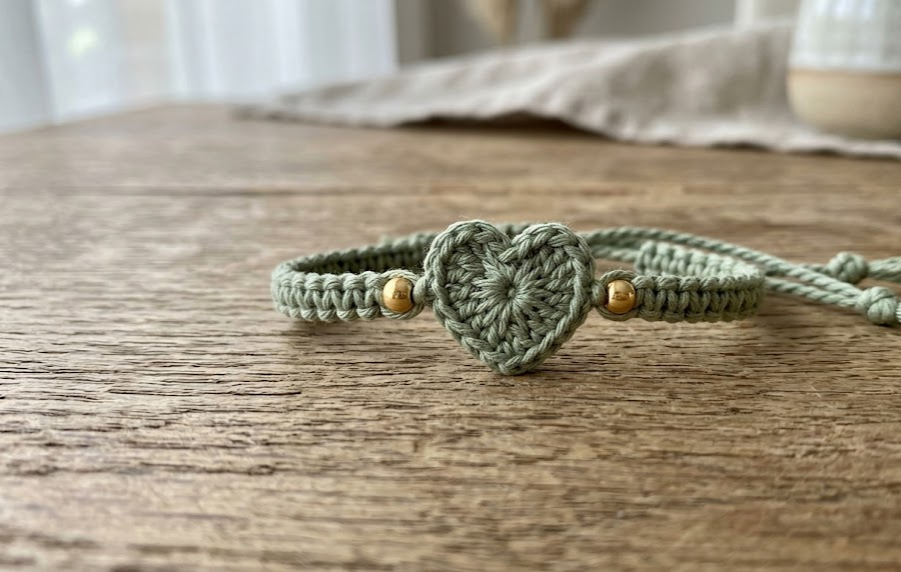
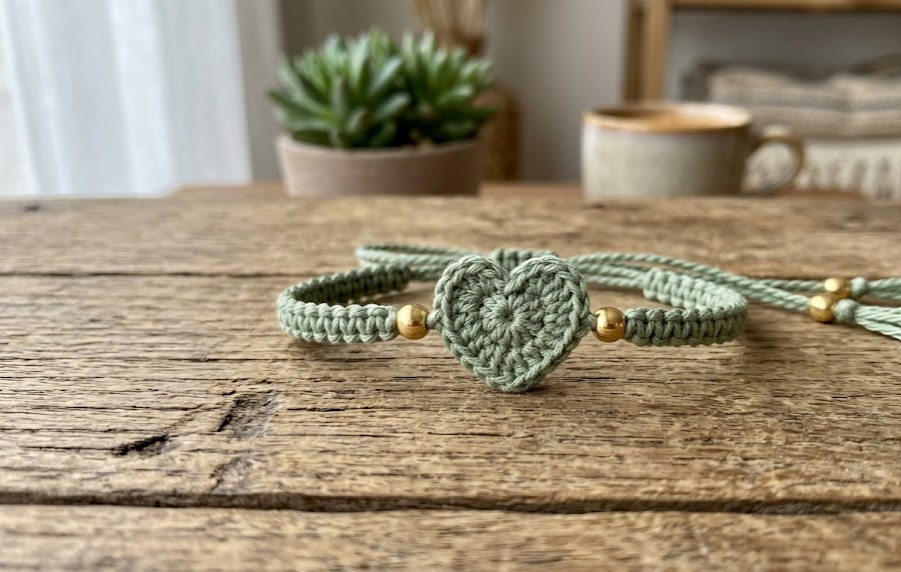
There’s something quietly special about a piece of jewelry you’ve made with your own hands, and this crochet heart macrame bracelet is exactly that kind of project. A tiny crocheted heart, worked in soft sage green cotton thread, sits at the center of a knotted macrame cord band finished with a pair of gold beads and an adjustable sliding closure. It’s delicate without being fussy, boho without trying too hard, and small enough to finish in an afternoon.
This pattern blends two crafts — crochet and macrame — into one project, which makes it a lovely next step for anyone who already knows the basics of single crochet and wants to try something a little more textural. It’s equally at home as a gift for a friend, a addition to your own jewelry box, or a fun weekend make to sell at a craft fair. Because the heart motif is worked with fine cotton thread and a small hook, it does take a bit more patience than a chunky amigurumi project, but the payoff is a piece that looks far more polished than the time invested would suggest.
Whether you’re crocheting your first tiny motif or you’ve made dozens of appliqués before, this pattern walks through every stitch, every knot, and every measurement you need to finish a bracelet that’s genuinely wearable — not just a craft-room experiment.
|
Difficulty
Intermediate
|
Time
2–3 Hours
|
Hook Size
2.5mm
|
Yarn Weight
Lace / Size 3–5 Cotton
|
Finished Size
Adjustable, heart 2.5cm
|
Gauge
- 12 stitches (worked in a mix of sc, hdc, and dc) = approximately 2.5cm, using a 2.5mm hook and lace-weight cotton crochet thread (size 3–5)
- Finished heart motif measures approximately 2.5cm wide x 2.5cm tall
- Gauge is not critical for fit here since the bracelet band is adjustable, but a tighter gauge will give the heart cleaner stitch definition — work a quick swatch first if your tension tends to run loose
Materials List
- Sage green cotton crochet thread (size 3–5), approx. 5g — for the heart motif
- Matching or contrasting cotton macrame cord (1.5–2mm), two strands cut 45cm (17.5in) each — for the bracelet band
- One additional 40cm strand of cord in a matching color — for the sliding knot closure
- 2.5mm crochet hook
- 2 small gold-tone beads with a hole large enough to thread two strands of cord through
- Tapestry needle or bead-threading needle
- Scissors
- A lighter or small flame source (optional, for sealing synthetic cord ends — skip if using 100% cotton cord)
Abbreviations
| Abbreviation | Meaning |
|---|---|
| ch | chain |
| sl st | slip stitch |
| sc | single crochet |
| hdc | half double crochet |
| dc | double crochet |
| st(s) | stitch(es) |
| rnd | round |
| MR | magic ring |
| sp | space |
Pattern Instructions
Part 1: The Crochet Heart
Rnd 1: Make a magic ring (MR: wrap the thread around two fingers to form a loop, insert your hook through the loop and pull up a stitch — this creates a ring with a tail you can pull tight afterward to close any gap in the center). Into the ring, work: ch 2 (counts as first hdc), 2 hdc, 3 dc, ch 2, 3 dc, 2 hdc. Sl st to the top of the beginning ch-2 to join. Pull the yarn tail firmly to close the center of the ring. (10 sts + one ch-2 sp)
Technique note: the ch-2 space you made partway through this round will become the point of the heart’s dip once you fold the two lobes forward — don’t skip it or the heart will look lopsided.
Rnd 2: Ch 1 (does not count as a st). Working around the outer edge of Rnd 1: sc in each of the next 2 hdc, hdc in each of the next 3 dc, work 3 hdc into the ch-2 space at the top point of the V (this builds the little peak between the two lobes), hdc in each of the next 3 dc, sc in each of the next 2 hdc. Sl st to the first sc to join. Fasten off, leaving a 15cm tail. (12 sts)
Weave in the shorter starting tail now. Leave the 15cm ending tail — you’ll use it to attach the heart to the bracelet band in the assembly steps.
Part 2: The Macrame Bracelet Band
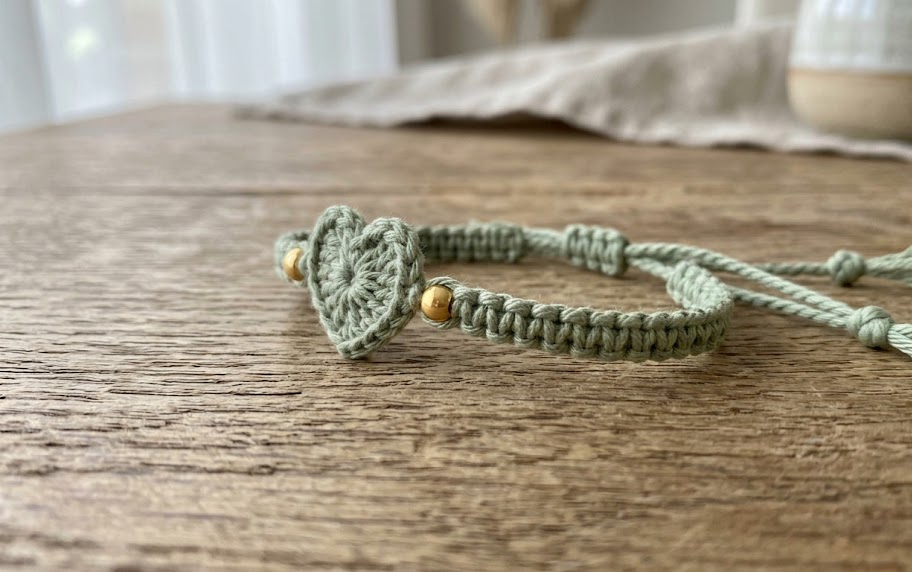
Setting up: Fold your two 45cm cord strands in half. Pass the folded loop up through the ch-2 point at the top of the heart (the little dip between the two lobes), then pass the four loose cord ends back through that folded loop and pull snug — this is a lark’s head knot, and it anchors the heart to the center of your cord.
You now have 4 strands hanging from the heart: 2 outer “working” strands and 2 center “filler” strands.
Square knots: With the 2 outer strands, tie a square knot around the 2 center strands:
- Cross the left strand over the center strands and under the right strand.
- Cross the right strand over the left strand’s tail and under the center strands, then up through the loop on the left.
- Pull both ends to tighten — this completes half the knot.
- Repeat in mirror (right over, then left) to complete a full square knot.
Tie 6–8 square knots on each side of the heart, working outward. Slide a gold bead onto the two center filler strands after your 3rd or 4th knot on each side, then continue knotting to lock it in place.
Part 3: Sliding Closure
Step 1: Once each side reaches roughly 6cm of knotted cord (this length will vary depending on wrist size — measure against your wrist and add 2cm of slack), cross the two ends of the bracelet over each other so the tips overlap by about 4cm.
Step 2: Using your separate 40cm strand of cord, tie a single overhand knot around both overlapping strands to anchor it.
Step 3: Wrap this new strand around both bracelet ends 6–8 times, working the wraps close together, then tuck the tail back through the wraps and pull tight — this creates a sliding bead-like knot that lets the bracelet expand and contract over the hand.
Step 4: Trim all cord ends to about 1cm past the knots. If using synthetic cord, carefully pass a flame near (not touching) the cut ends to seal them; if using 100% cotton cord, add a small dot of fabric glue instead to prevent fraying.
Assembly Steps
- Attach the heart to the folded cord center using a lark’s head knot through the ch-2 point, as described above.
- Knot 6–8 square knots on the left side of the heart, sliding a gold bead onto the filler strands partway through.
- Repeat on the right side for symmetry — count your knots to keep both sides equal in length.
- Try the bracelet against your wrist before closing; the finished loop (heart + both knotted sides, before the sliding closure) should measure about 14–15cm for an average adult wrist, with the sliding knot adding 1–2cm of adjustability.
- Complete the sliding closure knot as described in Part 3, then trim and seal all ends.
Beginner/Intermediate Tips
- Keep your magic ring tail long at the start — it’s much easier to tighten a loose ring than to fix one that’s pulled closed too early.
- Cotton crochet thread splits easily; use a hook with a slightly rounded tip if your stitches keep catching the fibers instead of sliding through.
- Square knots tighten more evenly if you keep the center filler strands taut with one hand while you knot with the other.
- If this is your first time working a sliding closure, practice the wrapping knot on a scrap piece of cord first — it’s the one step in this pattern that benefits most from a dry run.
Variations
- Ombre thread: Use two shades of the same color family for the heart — a darker shade for Rnd 1 and a lighter shade for Rnd 2 — for a subtle gradient effect.
- Double heart: Make two hearts at a slightly smaller scale (skip Rnd 2’s dc stitches, substitute hdc throughout) and space them along the band instead of one center motif.
- Anklet version: Extend each knotted side to 9–10cm instead of 6cm, and thread three beads per side instead of one, for a beachy anklet version of the same pattern.
- Necklace pendant: Skip the macrame band entirely and instead crochet a short chain or attach the heart to a thin cord necklace, using the same ch-2 point as the hanging loop.
Save this pattern for your next craft night, and tag your finished bracelet with #FoodieRippleCrochet — I’d love to see your color choices!



