
The Best Fluffy Pancakes recipe you will fall in love with. Full of tips and tricks to help you make the best pancakes.

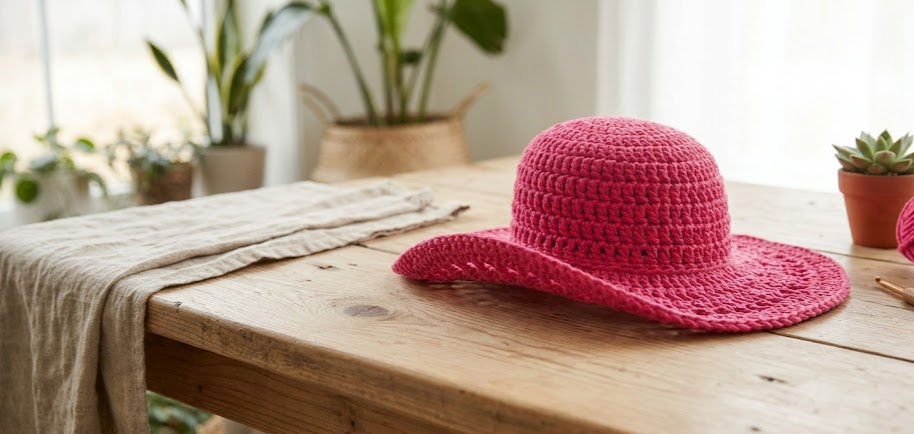
Summer calls for a hat that does double duty: real sun protection and a handmade look you won’t find on a store shelf. This crochet wide-brim sun hat pattern combines a snug, ribbed crown with an airy eyelet mesh body and a generously flared brim that shades your face, neck, and shoulders. Worked entirely in the round with basic single and double crochet stitches, it’s a project that rewards patience more than advanced skill — if you can single crochet, double crochet, and count to your stitch total, you can make this hat.
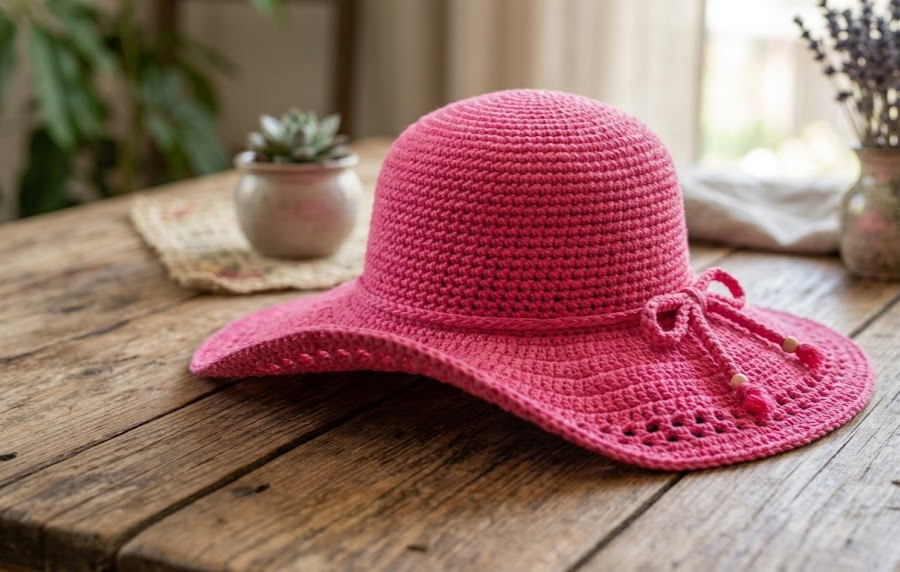
The finished piece has a soft, structured drape that lets it flex a little in the wind without losing its shape, thanks to the eyelet mesh section in the crown sides. The brim uses stacked increase rounds to flare outward gradually, so it lies flat and even instead of curling or ruffling. Make it in a single bold color like the hot pink shown here for a statement piece, or go with a neutral cotton for an everyday beach and garden hat. It’s an ideal project for using up a few skeins of cotton yarn and makes a lovely handmade gift for anyone who spends summer outdoors.
|
Difficulty
Intermediate
|
Time
6–8 Hours
|
|
Hook Size
4.5mm
|
Yarn Weight
Worsted / Aran Cotton
|
|
Finished Size
Adult (56cm head), 10cm brim
|
|
Gauge
16 stitches x 18 rows = 10cm x 10cm square, worked in double crochet, using a 4.5mm hook and medium weight (worsted/aran) cotton yarn.
Always crochet a gauge swatch before starting. Because this hat is worked in the round and shaped through a specific increase schedule, gauge affects the finished circumference and brim flare more than most projects — if your gauge runs tighter or looser, adjust your hook size up or down slightly until your swatch matches.
Materials List
- Medium weight (worsted/aran, category 4) cotton yarn, approximately 250–300g in hot pink (or your chosen color)
- 4.5mm crochet hook
- Stitch marker (to mark the start of each round)
- Yarn needle for weaving in ends
- Scissors
- Optional: fabric stiffener or diluted white glue, for a firmer, more structured brim
Abbreviations Table
| Abbreviation | Meaning |
|---|---|
| ch | chain |
| sl st | slip stitch |
| sc | single crochet |
| dc | double crochet |
| st(s) | stitch(es) |
| sp | space |
| rep | repeat |
| MR | magic ring |
| ( ) | stitch count at end of round |
| * * | repeat instructions between asterisks |
Pattern Instructions
Part 1: Crown (Top of Hat)
The crown starts as a flat circle worked from the center out, then transitions to straight rounds to form the top of the head.
Rnd 1: Make a magic ring (a adjustable loop that lets you crochet stitches into it and then pull the center tight, closing any gap at the top). Ch1, work 6 sc into the ring, pull tail to close, join with sl st to first sc. (6)
Rnd 2: Ch1, 2 sc in each st around, join with sl st. (12)
Rnd 3: Ch1, 1 sc, 2 sc in next st, rep around, join. (18)
Rnd 4: Ch1, 2 sc, 2 sc in next st, rep around, join. (24)
Rnd 5: Ch1, 3 sc, 2 sc in next st, rep around, join. (30)
Rnd 6: Ch1, 4 sc, 2 sc in next st, rep around, join. (36)
Rnd 7: Ch1, 5 sc, 2 sc in next st, rep around, join. (42)
Rnd 8: Ch1, 6 sc, 2 sc in next st, rep around, join. (48)
Rnd 9: Ch1, 7 sc, 2 sc in next st, rep around, join. (54)
At this point the flat circle should measure approximately 14–15cm across. This becomes the top of the crown.
Rnds 10–14: Ch1, sc in each st around, join with sl st. Work 5 rounds even (no increases). (54 each round)
This builds the depth of the crown down the sides of the head, roughly 5cm.
Part 2: Mesh Body (Eyelet Section)
This section creates the lightweight, breathable eyelet texture and adds a small amount of stretch for comfort.
Rnd 15: Ch3 (counts as first dc throughout), skip next st, 1 dc in next st, ch1, skip next st, rep around, join with sl st to top of starting ch3. (54 sts total: 27 dc + 27 ch-1 sps)
Rnds 16–20: Ch3, skip first ch-1 sp, 1 dc in next dc, ch1, skip next ch-1 sp, rep around, join to top of ch3. Repeat this round 5 times. (54 sts each round)
Technique note: for each mesh round, you are always working your dc directly into the dc stitch from the round below (not into the chain space), and your ch1 sits above the previous round’s ch-1 space. This keeps the eyelet holes stacking neatly in a column.
This mesh section should measure approximately 8cm deep and brings your total crown height (Parts 1 and 2 combined) to about 13cm — a standard adult depth.
Rnd 21 (close the mesh): Ch3, work 1 dc in each dc and 1 dc in each ch-1 sp around, join with sl st to top of ch3. (54)
This solid round closes the eyelet holes and creates a clean foundation for the brim.
Part 3: Brim (Wide Flared Brim)
The brim flares outward through a series of stacked increase rounds, alternating with plain rounds to let the fabric relax and lie flat.
Rnd 22: Ch3, 2 dc in same st as join, dc in next st, 2 dc in next st, dc in next st, rep around, join. (81)
Rnd 23: Ch3, dc in each st around, join. (81)
Rnd 24: Ch3, 2 dc in next st, dc in next 2 sts, 2 dc in next st, dc in next 2 sts, rep around, join. (108)
Rnd 25: Ch3, dc in each st around, join. (108)
Rnd 26: Ch3, 2 dc in next st, dc in next 3 sts, 2 dc in next st, dc in next 3 sts, rep around, join. (135)
Rnd 27: Ch3, dc in each st around, join. (135)
At this point the brim should extend roughly 9–10cm out from the base of the crown, giving good face and shoulder shade.
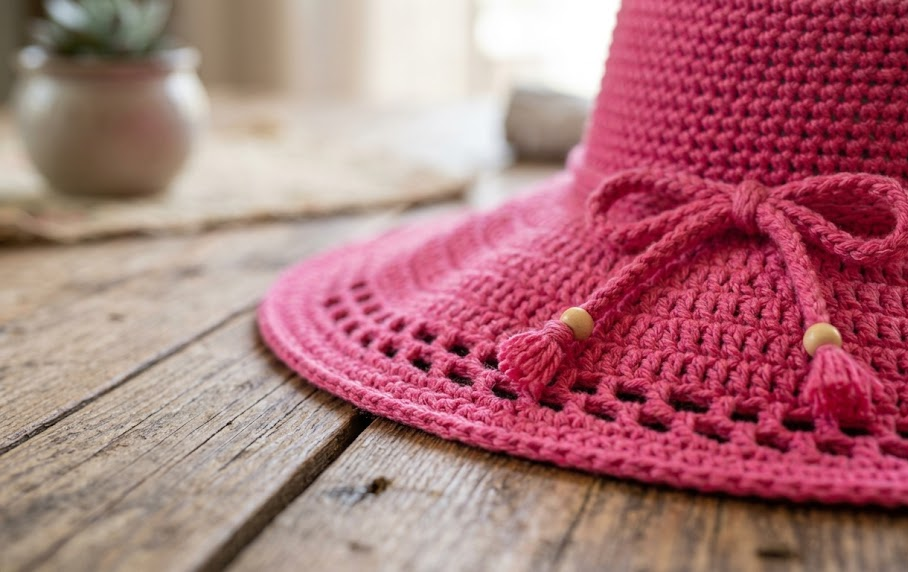
Rnd 28 (decorative eyelet edge): Ch3, skip next st, 1 dc in next st, ch1, skip next st, rep around, join to top of ch3. (approx. 135 sts total)
This final mesh round adds a delicate open border that echoes the crown’s eyelet texture and gives the brim edge a slightly softer, less bulky finish.
Rnd 29 (finishing edge): Ch1, sc in each st and each ch-1 sp around, join with sl st to first sc. Fasten off, leaving a 15cm tail for weaving in.
Assembly Steps
- Weave in the starting tail from the magic ring first, working it through the wrong side of a few stitches at the very top of the crown so it’s fully hidden.
- Weave in the fastening-off tail at the brim edge the same way, running it through 4–5 stitches before trimming.
- Try the hat on (or measure against a head form). The crown should sit comfortably around the head with the mesh section following the curve just above the ears; if it feels loose, block the crown section slightly smaller by dampening it and pinning to shape while drying.
- Steam block the entire hat: dampen lightly with a spray bottle or hover a steamer 5–8cm above the surface, then lay flat with the brim spread out evenly and let it dry fully before wearing. This step is what makes the brim lie flat instead of cupping or waving.
- Optional stiffening: mix fabric stiffener or a 50/50 glue-and-water solution, brush lightly onto the brim only (avoid the crown), reshape flat or with a slight curve, and let dry for 12–24 hours over a bowl or hat form to hold the shape.
Beginner/Intermediate Tips
- Use a stitch marker at the start of every single round — with 135 stitches by the final brim rounds, losing your round marker makes it very easy to lose count.
- When working the eyelet mesh in Part 2, resist the urge to skip ahead by eye. Count your dc stitches every round; a single missed ch-1 space will throw off the alignment of the holes for every round after it.
- If your brim starts to ruffle or wave during Rounds 22–27, your increases are too frequent for your gauge — space them out slightly (increase every 4th stitch instead of every 3rd) and continue.
- Cotton yarn has very little stretch or “give,” so if you’re unsure about head circumference, it’s safer to add one extra round in Part 1 before starting the mesh section rather than trying to adjust later.
- Block the hat even if you plan to stiffen it — blocking sets the stitch tension evenly, and stiffener alone won’t fix an uneven brim.
Variations
- Two-tone hat — work the crown (Parts 1 and 2) in one color and switch colors for the brim (Part 3) for a striking contrast.
- Petite brim version — stop the brim increases after Rnd 25 for a shorter, more casual brim that works well as an everyday sun hat.
- Kids’ size — reduce Part 1 to Rnd 7 (42 sts) before moving to the mesh section, and reduce Part 3 by one full increase round for a child-sized fit.
- Solid crown, no mesh — skip Part 2 entirely and continue straight sc rounds from Part 1 into the brim increases for a warmer, fully solid hat, great for cooler-weather wear.
- Trimmed edge — add a round of picot stitches (ch2, sl st into the first ch, sc in next st) around the final brim edge for a delicate scalloped finish.
Save This Pattern
Love this look? Save this pin so you can find your way back to this pattern anytime you’re ready to crochet your own wide-brim sun hat. #FoodieRippleCrochet



