
The Best Fluffy Pancakes recipe you will fall in love with. Full of tips and tricks to help you make the best pancakes.

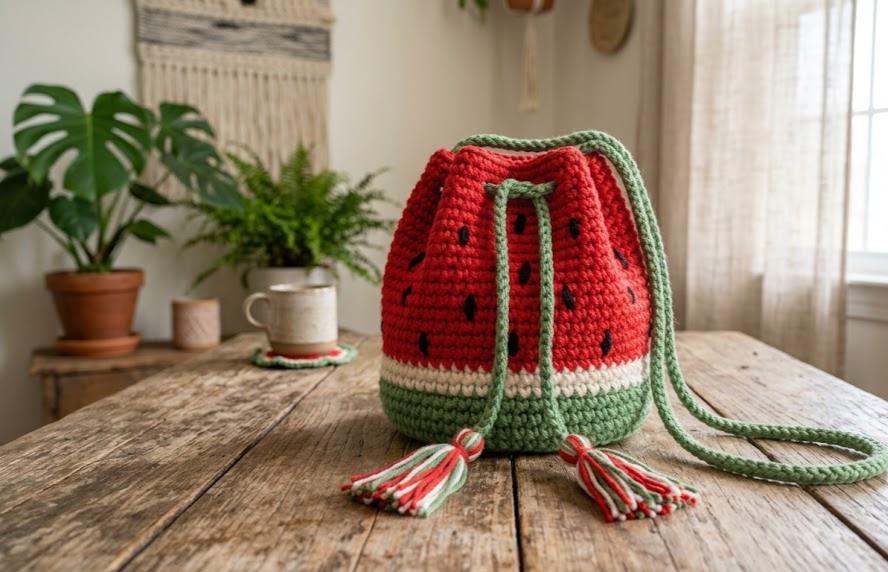
Nothing says summer quite like a bag shaped like everyone’s favorite picnic fruit. This crochet watermelon bucket bag combines a round, drawstring-close body with the unmistakable color-blocking of a watermelon slice: bright red “flesh,” a crisp white “rind,” and a deep green base, finished off with scattered black seed stitches for that playful, realistic touch. It’s roomy enough for a phone, keys, sunscreen, and a paperback, and light enough to sling over a shoulder for a beach day, farmers market run, or festival weekend.
This project is rated intermediate, mainly because of the color-changing rounds and the drawstring channel, but it’s very approachable if you’ve already made a basic amigurumi ball or a simple round bag. If you’ve never done a bucket-style bag before, this is a great first one to try: the shaping is forgiving, mistakes blend into the stitch pattern, and the finished result looks far more advanced than the actual skill required.
Whether you’re a crocheter who collects novelty bags, someone hunting for a fun handmade gift, or a maker who just wants a conversation-starter accessory for summer, this pattern is written so you can pick up your hook and yarn and go from a ball of cotton to a finished bag using nothing but the instructions below.
|
Difficulty
Intermediate
|
Time
6–8 hours
|
Hook Size
3.5mm (E/4)
|
Yarn Weight
DK / Light Worsted
|
Finished Size
18cm x 20cm
|
Gauge
18 stitches x 20 rows = 10cm x 10cm (4in x 4in) in single crochet, worked in rounds, using a 3.5mm (E/4) hook and DK weight cotton yarn.
Gauge is not critical to the function of this bag, but it will affect the finished size. Work a quick swatch of 18 sts x 20 rows in single crochet before starting; if your swatch is smaller than 10cm, go up a hook size, and if it’s larger, go down a hook size.
Materials List
- Green yarn (Base/Rind) – DK weight recycled cotton, approximately 100g
- White yarn (Rind Stripe) – DK weight recycled cotton, approximately 50g
- Red yarn (Flesh) – DK weight recycled cotton, approximately 150g
- Black yarn (Seeds) – DK weight recycled cotton, approximately 20g
- 3.5mm (E/4) crochet hook
- Yarn needle (tapestry needle) for weaving in ends and embroidering seeds
- Scissors
- Stitch marker
- 6 small stitch marker rings or plastic beads (for optional decorative eyelets, if desired)
- 120cm (47in) length of cord or crocheted rope, for the drawstring
- Optional: 2 wooden or plastic drawstring stoppers
Abbreviations Table
| Abbreviation | Meaning |
|---|---|
| ch | chain |
| sc | single crochet |
| sc2tog | single crochet 2 together (invisible decrease) |
| inc | increase (2 sc in same stitch) |
| st(s) | stitch(es) |
| rnd | round |
| sl st | slip stitch |
| BLO | back loop only |
| FLO | front loop only |
| MR | magic ring |
| ( ) | stitch count at end of round |
| [ ] | repeat instructions inside brackets |
Pattern Instructions
Part 1: Base (Green)
The base is worked in a spiral of single crochet, starting from a magic ring (a adjustable loop that lets you cinch the center hole closed once the first round is complete).
- Rnd 1: MR, 6 sc into ring (6)
- Rnd 2: inc in each st around (12)
- Rnd 3: [sc, inc] repeat around (18)
- Rnd 4: [sc 2, inc] repeat around (24)
- Rnd 5: [sc 3, inc] repeat around (30)
- Rnd 6: [sc 4, inc] repeat around (36)
- Rnd 7: [sc 5, inc] repeat around (42)
- Rnd 8: [sc 6, inc] repeat around (48)
- Rnd 9: [sc 7, inc] repeat around (54)
This gives you a flat circle roughly 15cm across. If you’d like a slightly larger bag, add one more increase round following the pattern (sc 8, inc) to reach 60 stitches, adjusting yarn amounts accordingly.
Part 2: Body — Green Section
Now we stop increasing and begin working straight up to form the sides of the bucket.
- Rnd 10: BLO sc in each st around (54)
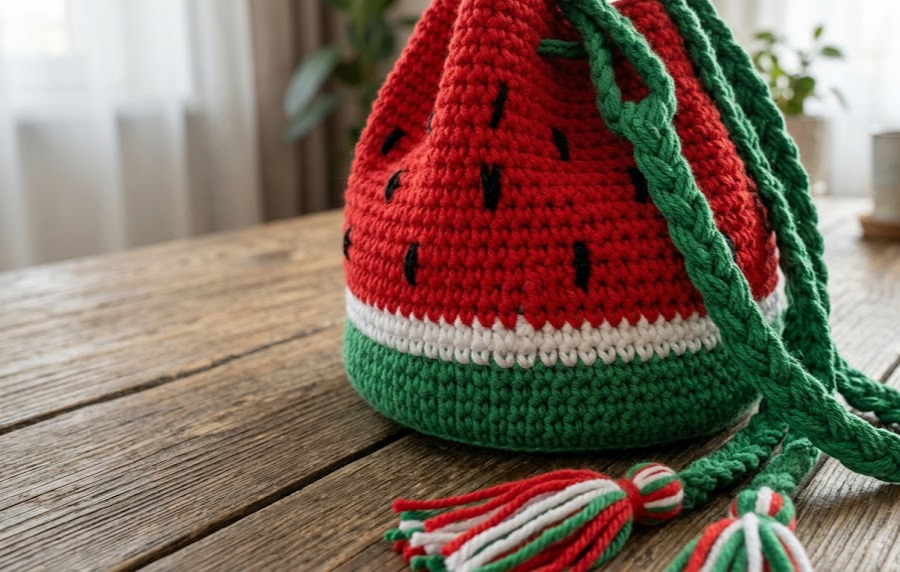
Working in the back loop only here creates a visible ridge line where the base meets the body, giving the bag a crisp, structured seam similar to the bottom edge of a store-bought bucket bag.
- Rnds 11–14: sc in each st around (54) — work 4 rounds even
Part 3: Rind Stripe (White)
Switch to white yarn. To change colors mid-round without a visible jog, complete the last stitch of the green round by pulling white yarn through the final two loops.
- Rnds 15–16: sc in each st around (54) — 2 rounds even in white
Part 4: Flesh (Red)
Switch to red yarn using the same color-change technique.
- Rnds 17–24: sc in each st around (54) — 8 rounds even in red
This red section forms the largest visible part of the bag. If you’d like a taller or shorter bag, add or remove rounds here in pairs to keep the proportions balanced.
Part 5: Drawstring Eyelet Round
- Rnd 25: [sc 6, ch 2, skip 2 sts] repeat around (54 sts + 6 eyelets)
This creates 6 evenly spaced eyelets that the drawstring cord will pass through. Count carefully so the eyelets land evenly around the circle.
- Rnd 26: sc in each st and in each ch-2 space around, treating each ch-2 as 2 sts (54)
Part 6: Top Border
- Rnd 27: sl st in each st around, then fasten off (54)
Leave a 20cm tail for seaming later, then weave in remaining ends.
Seed Embroidery
Using black yarn and a yarn needle, embroider small straight stitches (about 1cm long, in a teardrop or oval shape) scattered randomly across the red section. Aim for 15–20 seeds total, avoiding perfect rows so the pattern reads as natural and organic rather than gridded.
Strap and Drawstring
Drawstring Cord
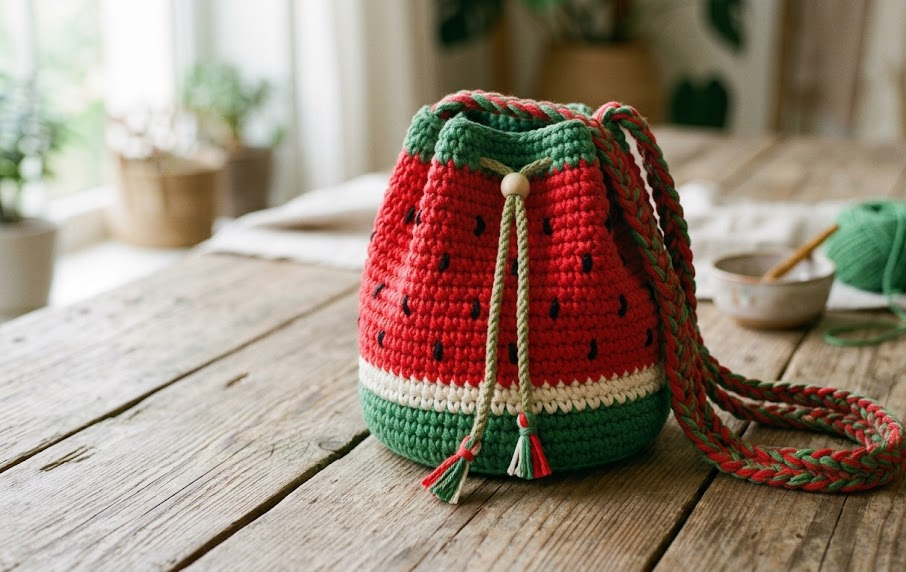
Chain 121 stitches, then sl st into the second chain from the hook and down the length of the chain to create a firm, twisted-looking cord (120cm finished length). Alternatively, braid three strands of yarn together to the same length. Weave the finished cord in and out of the 6 eyelets from Rnd 25, starting and ending at the same eyelet so both ends exit the bag from the same point. Knot the ends together or attach a wooden stopper bead, then trim and fluff the ends into small tassels about 3cm long.
Shoulder Strap
Chain 141 stitches (or adjust to your preferred drop length), sl st back down the chain the same way as the drawstring to create a sturdy, non-stretchy strap approximately 100cm long. Sew one end to the inside top edge of the bag at one eyelet point, and the other end to the opposite side, so the strap sits symmetrically when worn crossbody or over one shoulder.
Assembly Steps
- Weave in all yarn ends from color changes before attaching any straps, using a yarn needle to run each tail through 4–5 stitches on the wrong side.
- Lay the finished bag flat and check that the eyelet round sits evenly, with no eyelet noticeably higher or lower than the others.
- Thread the 120cm drawstring cord through all 6 eyelets, keeping tension even so the bag can cinch fully closed without puckering on one side.
- Position the shoulder strap ends 20–24cm apart at the top edge (roughly opposite each other), and sew each end flat using a whip stitch, going through both bag layers for extra strength, about 1.5cm down from the top edge.
- Attach tassels or stopper beads to the drawstring ends, about 8cm from the tip of the cord.
- Turn the bag right-side out (if worked inside-out) and steam-block lightly to help the color-change rounds sit flat.
Beginner/Intermediate Tips
- If your color changes look messy, don’t rip them out — a light steam block after finishing will relax the stitches and make the join much less visible.
- Keep a stitch marker in the last stitch of every round; because this bag is worked in a continuous spiral rather than joined rounds, it’s easy to lose track of where a round starts.
- When working the eyelet round, count your remaining stitches after every repeat to make sure your 6 eyelets land evenly — small counting errors compound quickly in a 54-stitch round.
- If your seed embroidery looks too “planted,” step back and look at the bag from a distance every few stitches rather than working seed-by-seed up close.
- Recycled cotton yarn (T-shirt yarn or cotton cord) gives this bag the sturdy, holds-its-shape structure it needs; a very soft or drapey yarn will make the bucket shape slouch.
Variations
- Pink Watermelon: Swap red for a soft blush pink and keep everything else the same for a “candy watermelon” colorway.
- Mini Pouch Version: Stop increasing at Rnd 6 (36 sts) for a small coin-purse-sized watermelon pouch, perfect for keys or lip balm.
- Striped Rind Bag: Alternate green and white in 2-round stripes all the way up instead of a single color-blocked flesh section, for a more abstract watermelon-inspired look.
- No-Strap Basket: Skip the shoulder strap entirely and use the finished piece as a small drawstring storage basket for yarn scraps, hair ties, or desk supplies.
- Layered Ruffle Top: Add a scalloped shell-stitch round just above the eyelets before the final slip stitch round for a decorative ruffled opening.
Save This Pattern
Loved this watermelon crochet bucket bag? Save this pin so you can find it again next time you’re ready to pick up your hook! Tag your finished bags and share your version with the community using #FoodieRippleCrochet — we love seeing your take on this pattern.



