
The Best Fluffy Pancakes recipe you will fall in love with. Full of tips and tricks to help you make the best pancakes.

There’s something irresistible about a handmade romper that feels both put-together and effortless — and this sage green crossover crochet romper delivers exactly that. With its asymmetric one-shoulder strap, fitted crochet bodice, and breezy ribbed shorts finished off with a matching self-fabric belt, this piece reads like a boutique find, but you can make it yourself with just a few skeins of yarn and a handful of evenings. It’s a wonderful project for warm-weather wardrobes, beach cover-ups, garden parties, or simply lounging in something you’re proud to have made. The two-tone sage and forest green colorway keeps it earthy and wearable, while the crossover strap and structured belt add a flattering, tailored silhouette. Whether you’re building out a handmade summer capsule or just want a showstopper piece for your next project, this romper pattern is worth the yarn.
This pattern is written for confident beginners to intermediate crocheters. It uses simple stitches worked in careful shaping, so if you’re comfortable with single crochet, increasing, and decreasing, you’re ready to go.
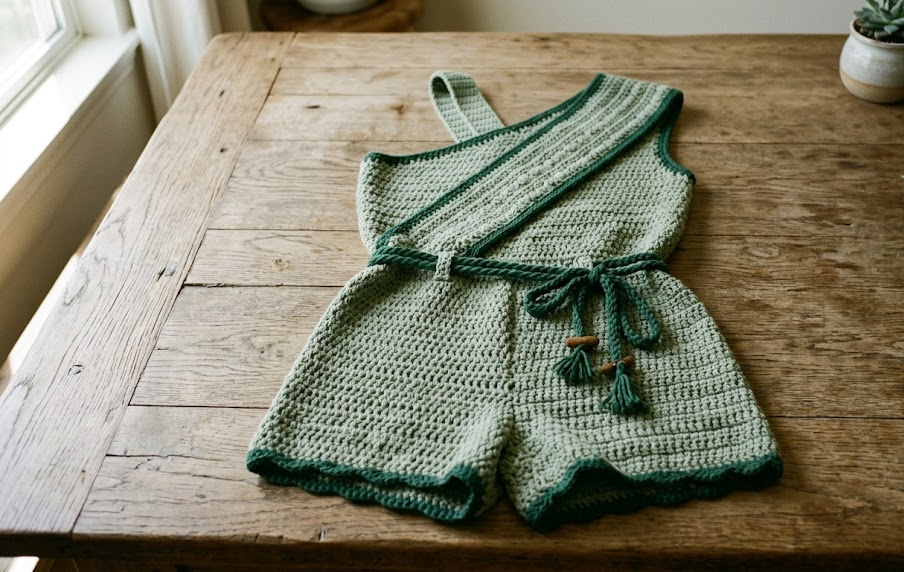
|
Difficulty
Intermediate
|
Time
8–10 hours
|
Hook Size
4.0mm & 3.5mm
|
Yarn Weight
Worsted (4)
|
Finished Size
Adult S/M
|
Gauge
14 sts x 16 rows = 10cm x 10cm (4in x 4in) in single crochet, using a 4.0mm (G/6) hook held with light-to-medium tension.
Gauge is important for a wearable garment like this one — take the time to make a swatch before starting, and size your hook up or down if your stitch count doesn’t match.
Materials List
- Worsted weight (Yarn Weight 4) cotton-blend yarn in Sage Green (main bodice color) — approximately 350g / 700m
- Worsted weight (Yarn Weight 4) cotton-blend yarn in Forest Green (trim, shorts, and belt color) — approximately 300g / 600m
- 4.0mm (G/6) crochet hook
- 3.5mm (E/4) crochet hook (for trim rounds)
- Yarn needle for weaving in ends
- Stitch markers (at least 6)
- Measuring tape
- One 3cm square or rectangular belt buckle (plastic or metal)
- Sewing pins (for assembly)
- Matching sewing thread and needle (to secure buckle)
Abbreviations
| Abbreviation | Meaning |
|---|---|
| ch | chain |
| sc | single crochet |
| hdc | half double crochet |
| dc | double crochet |
| st(s) | stitch(es) |
| sl st | slip stitch |
| inc | increase (2 sc in same stitch) |
| dec | decrease (single crochet 2 stitches together) |
| BLO | back loop only |
| FLO | front loop only |
| rnd(s) | round(s) |
| row(s) | row(s) |
| rep | repeat |
| sp | space |
| ( ) | stitch count at end of round/row |
Technique notes used throughout this pattern:
- BLO (back loop only): insert your hook only under the back loop of the stitch, leaving the front loop unworked. This creates a subtle ridge line, used here to define the waistband.
- Magic ring: a slip-knot-free adjustable loop used to start rounds worked in the round with a fully closed center. Wrap yarn around two fingers, pull a loop through, work your first round of stitches into the loop, then pull the tail to close it tight.
- Working in continuous rounds: rounds are not joined with a slip stitch; place a stitch marker in the first stitch of each round and move it up as you go so you always know where the round starts.
Pattern Instructions
Part 1: Bodice Front Panel
Worked flat, top-down, in Sage Green with the 4.0mm hook.
Row 1: Ch 22, sc in 2nd ch from hook and each ch across. (21 sts)
Row 2: Ch 1, turn. Inc in first st, sc across to last st, inc in last st. (23 sts)
Row 3: Ch 1, turn. Sc across. (23 sts)
Row 4: Ch 1, turn. Inc, sc across to last st, inc. (25 sts)
Rows 5–8: Repeat Rows 3–4 twice more, increasing 1 st each side every other row. (29 sts after Row 8)
This shaping widens the bodice from the underbust point down toward the natural waist, creating the fitted “V” taper visible in the front panel.
Rows 9–14: Ch 1, turn. Sc across, no shaping. (29 sts, 6 rows)
Bind off. Weave in ends.
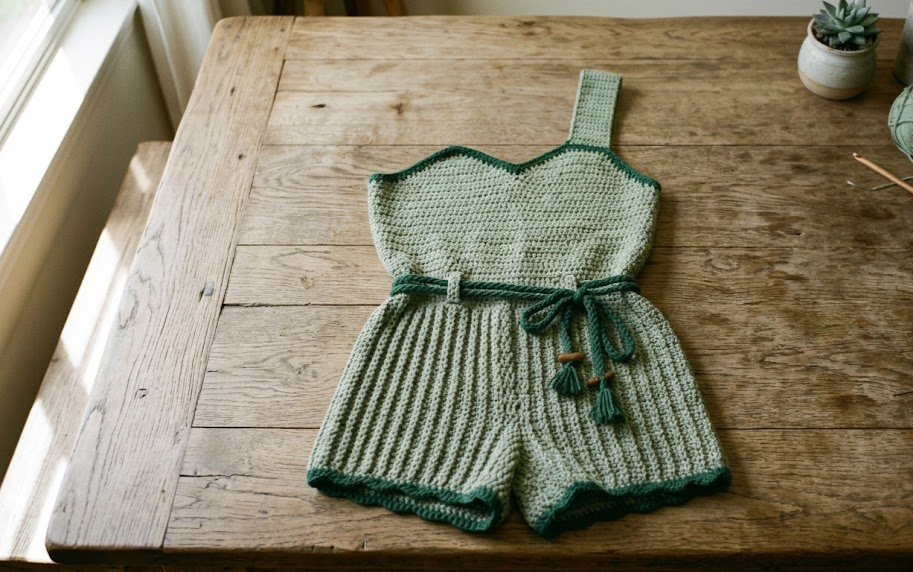
Part 2: Bodice Back Panel
Repeat Part 1 exactly, working a second identical panel. This becomes the back bodice piece.
Part 3: Crossover Strap
Worked as a long flat strip in Sage Green, edged in Forest Green.
Row 1: With Sage Green, ch 8, sc in 2nd ch from hook and across. (7 sts)
Rows 2–70: Ch 1, turn. Sc across. (7 sts, all rows)
Continue until the strap measures approximately 70cm (27.5in) unstretched — long enough to run diagonally from the top of the front bodice, over the shoulder, and down to the back waistband.
At the end of Row 70, do not fasten off. Change to Forest Green.
Edging Round: Ch 1, sc evenly around the entire outer edge of the strap, working 3 sc into each corner to turn smoothly. Join with a sl st to first sc. Fasten off, weave in ends.
Part 4: Waistband
Worked in the round in Forest Green using BLO throughout for a ribbed look, joining the front and back bodice pieces.
Setup: With right sides facing out, pin the bottom edge of the front panel to the bottom edge of the back panel at the side seams, leaving the top open. With Forest Green and the 4.0mm hook, join yarn at one side seam.
Rnd 1: Ch 1, sc evenly around the entire waist opening (through both layers at the side seams to join them), working approximately 58 sc total. (58 sts)
Rnds 2–6: Ch 1, sc in BLO of each st around. (58 sts, 5 rounds)
This BLO ribbing is what gives the waistband its defined horizontal texture and slight stretch, so it sits snugly at the natural waist.
Fasten off, weave in ends.
Part 5: Shorts
Worked in the round from the waistband down, in Forest Green, using the 4.0mm hook.
Rnd 1: Join Forest Green in any st along the bottom edge of the waistband. Ch 1, sc in each st around. (58 sts)
Rnds 2–20: Ch 1, sc in each st around, continuing in continuous rounds (no join, use a stitch marker). (58 sts, 19 rounds)
Work even for 20 rounds, or until the shorts measure approximately 18cm (7in) from the waistband to where you want to split for the leg openings.
Splitting for Legs — Rnd 21: Sc across 29 sts (first half), turn. You will now work each leg separately.
Leg 1, Rows 1–8: Ch 1, turn. Sc across all 29 sts. (29 sts, 8 rows) Fasten off.
Leg 2: Rejoin Forest Green to the remaining 29 sts from Rnd 21. Rows 1–8: Ch 1, turn. Sc across all 29 sts. (29 sts, 8 rows) Fasten off.
Sew the inner leg seams closed on each leg using a yarn needle and mattress stitch, leaving the leg openings unstitched. Weave in all ends.
Leg Cuff Edging (both legs): With the 3.5mm hook and Forest Green, join at the inner leg seam and sc evenly around each leg opening for 1 round to neaten the edge. (approximately 20 sts per cuff) Fasten off.
Part 6: Belt
Worked flat in Forest Green with the 3.5mm hook for a firmer fabric.
Row 1: Ch 6, sc in 2nd ch from hook and across. (5 sts)
Rows 2–90: Ch 1, turn. Sc across. (5 sts, all rows)
Continue until the belt measures approximately 75cm (29.5in), enough to wrap the waist and thread through the buckle with overlap.
Fasten off, weave in ends.
Assembly Steps
- Lay the front and back bodice panels right side out and pin the side seams together, leaving 10cm (4in) open at the top of each side for the strap ends to attach.
- Position one end of the crossover strap at the top left corner of the front bodice panel and the opposite end at the top right corner of the back bodice panel, so the strap will cross diagonally over one shoulder. Pin in place.
- Using a yarn needle and Sage Green yarn, whip stitch both ends of the strap securely to the bodice panels, working through both layers 3–4 times for strength — this is a load-bearing seam.
- Attach the bodice to the waistband as described in Part 4, making sure the front panel sits centered over the front of the waistband and the back panel centered over the back.
- Continue the shorts down from the waistband as written in Part 5.
- Thread the finished belt through the buckle, centering the buckle on the front of the belt strip, and hand-stitch the belt end to the back of the buckle bar using sewing thread for a secure, low-bulk finish.
- Try the romper on and mark where the belt should sit at the natural waist; the belt is not sewn to the romper, it wraps and tucks like a traditional fabric belt.
- Give the whole piece a light steam block to even out the stitches and help the ribbed waistband relax into shape.
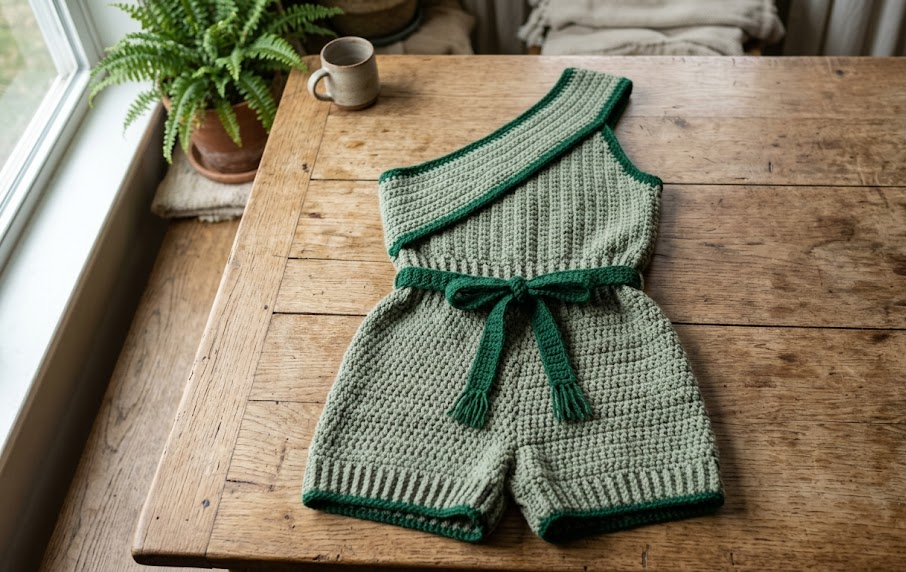
Beginner/Intermediate Tips
- Cotton-blend yarn holds its shape best for garments like this — avoid pure acrylic, which can stretch out of shape with wear.
- When working the crossover strap, check the fit against your shoulder every 15–20 rows rather than waiting until the end; strap length is the easiest measurement to get wrong.
- The BLO waistband rounds are worked more tightly than the rest of the piece on purpose — this is what gives it “rib knit” stretch and recovery, so don’t loosen your tension here even if it feels different.
- If your gauge swatch comes up short on stitch count, size up your hook by 0.5mm rather than trying to crochet tighter; consistent tension matters more than fighting a small hook.
- Block your side seams flat before sewing so you’re matching straight edges rather than curled ones.
Variations
- Halter Version: Skip the crossover strap and instead attach two separate straps that tie behind the neck for a halter silhouette.
- Two-Tone Shorts: Alternate 2 rounds of Sage Green with 2 rounds of Forest Green through Part 5 for a striped short instead of a solid color.
- Mini Dress: Continue Part 5 in the round without splitting for legs, working even rounds until you reach knee length, for a dress version of the same bodice and belt.
- Chunky Yarn Statement Piece: Rework the pattern with a Yarn Weight 5 chunky yarn and a 6.0mm hook for a bold, oversized textured version, perfect as a beach cover-up.
Save this pattern to your crochet board so you don’t lose it, and tag your finished romper with #FoodieRippleCrochet — I’d love to see your version!



