
The Best Fluffy Pancakes recipe you will fall in love with. Full of tips and tricks to help you make the best pancakes.

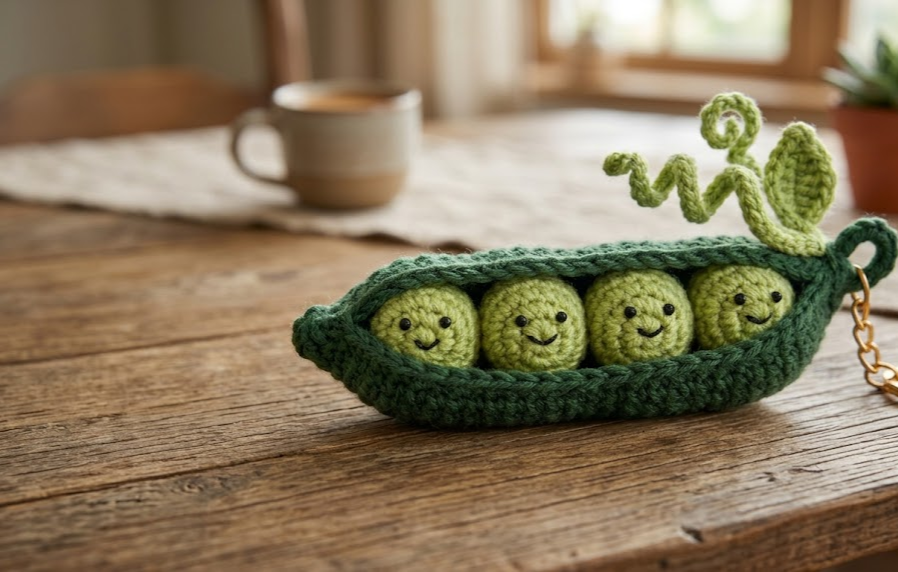
There’s something irresistibly charming about miniature amigurumi, and this tiny pea pod keychain might just be the cutest one yet. Three plump little peas nestled snugly inside a soft green pod, finished with a curling vine tendril and a keyring — it’s the kind of project that makes people stop and smile the second they spot it dangling from a backpack or set of keys.
This pattern is perfect for beginners who’ve already learned the basics of single crochet and want to try their first amigurumi shaping, as well as intermediate crocheters looking for a quick, satisfying make. It works up in under two hours, uses only small amounts of yarn, and is a fantastic way to use up leftover green scraps from other projects. Whether you’re making one for yourself, gifting a set to a plant-loving friend, or building up a little collection of nature-inspired keychains, this pea pod is a joy from cast-on to finished spiral vine.
|
Difficulty
Beginner-Friendly
|
Time
1.5–2 Hours
|
Hook Size
2.5mm
|
Yarn Weight
Sport/DK
|
Finished Size
5–6cm (2–2.5in)
|
Let’s get into the details so you can start crocheting your own today.
Gauge
- 6 sc x 6 rounds = 2.5cm (1in) worked in continuous rounds
- Hook used: 2.5mm
- Yarn used: Sport/DK weight yarn (approx. #2–3)
Amigurumi gauge doesn’t need to be exact, but aim for a tight, dense fabric so stuffing doesn’t peek through the stitches. If your peas look loose or gappy, try dropping down half a hook size.
Materials List
- Light green sport/DK weight yarn (for the peas) — small amount, under 10g
- Dark green sport/DK weight yarn (for the pod) — small amount, under 10g
- 2.5mm crochet hook
- Fiberfill stuffing
- Yarn needle (for sewing and weaving in ends)
- Small stitch marker (or scrap yarn) to mark round starts
- Safety eyes, 4–5mm (optional, or embroider tiny faces instead)
- Keyring or lobster clasp finding
- Small jump ring (optional, to attach the keyring)
Abbreviations Table
| Abbreviation | Meaning |
|---|---|
| MR | Magic Ring |
| ch | Chain |
| sc | Single Crochet |
| inc | Increase (2 sc in same stitch) |
| dec | Invisible Decrease (worked through front loops of next 2 sts, decreasing them into one) |
| st(s) | Stitch(es) |
| BLO | Back Loop Only |
| rnd | Round |
| sl st | Slip Stitch |
Pattern Instructions
Part 1: Peas (make 3, light green yarn)
Peas are worked in continuous rounds (no joining, no turning). Use a stitch marker to track the start of each round.
- Rnd 1: MR, work 6 sc into the ring, pull tail to close (6)
- Technique note: A Magic Ring lets you crochet into an adjustable loop and cinch it closed afterward, avoiding a hole at the center.
- Rnd 2: inc in each st around (12)
- Rnd 3: sc in each st around (12)
- Rnd 4: (sc, dec) around (8)
- Technique note: Invisible decrease keeps the surface smooth by working through the front loops only of two stitches at once.
- Attach safety eyes or plan embroidered face placement now, before closing further. Begin stuffing firmly.
- Rnd 5: dec around (4)
- Fasten off, leaving a 15cm (6in) tail for sewing. Finish stuffing lightly before pulling the tail through the remaining stitches to close.
Repeat for all 3 peas.
Part 2: Pod (dark green yarn)
- Ch 16.
- Rnd 1: Starting in the 2nd ch from hook, sc in next 14 ch, work 3 sc in the last ch (this turns the corner), then working back down the opposite side of the starting chain, sc in next 14 ch, inc in the final st (32)
- Technique note: This is called “working the second side of the chain” — after reaching the end of your starting chain, you rotate and crochet into the unused loops along the bottom to create an oval shape.
- Rnd 2: sc in BLO around (32)
- Technique note: Working in the Back Loop Only leaves the front loops free, creating a ridge line that becomes the natural fold/opening edge of the pod.
- Fasten off, leaving a long 25cm (10in) tail for sewing the pod together.
Part 3: Vine (dark green yarn)
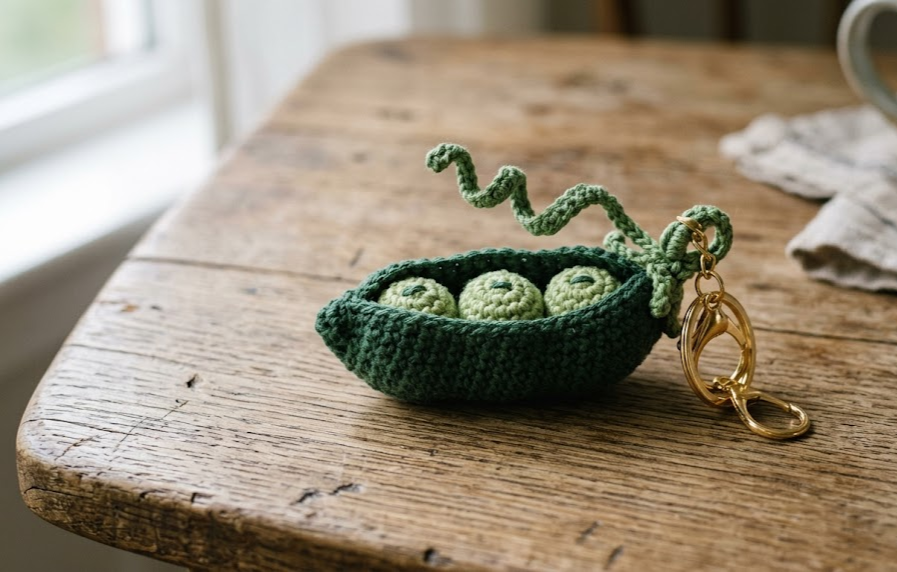
- Ch 8.
- Sc in 2nd ch from hook and in each ch back to the base (7 sc)
- Fasten off, leaving a short tail. Because the sc row pulls the chain tighter than it stretches, the strip naturally curls into a spiral. For a longer tendril, chain 12–14 instead of 8.
Assembly Steps
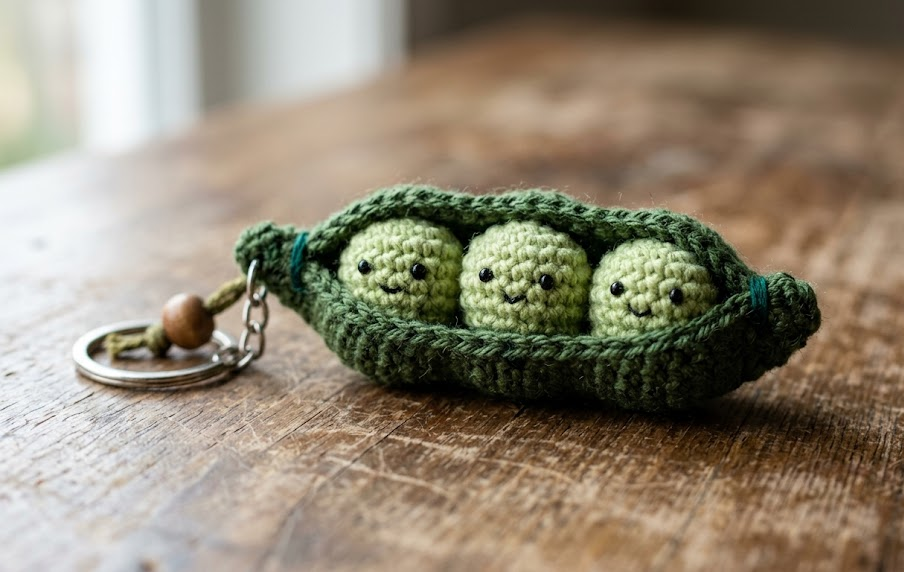
- Join the peas: Using the tail on each pea, whip stitch the three peas together side by side, sewing through the flattened bottoms so they form a straight row. This row should measure roughly 4cm (1.5in) long.
- Shape the pod: Lay the pod piece flat with the BLO ridge line running down the center — this is the fold line. Gently fold the pod in half lengthwise so the ridge sits at the front opening.
- Insert the peas: Place the joined row of peas inside the folded pod so they sit centered.
- Close the seams: Using the long tail, whip stitch the two short ends of the pod closed first. Then stitch about 1cm (3/8in) in along both long top edges starting from each end, leaving a center gap of about 2.5–3cm (1–1.2in) open so the peas remain visible, just like a real pod popped open.
- Attach the vine: Sew the vine’s straight (non-curled) end to the top corner of the pod with a few small stitches, then gently coil the vine with your fingers to enhance the spiral shape.
- Add the keyring: Sew a small jump ring or keychain finding to the top of the pod, near the vine attachment point, and weave in all remaining ends through the body of the pod to hide them.
Beginner/Intermediate Tips
- When starting your Magic Ring, leave a longer tail than you think you need — it makes cinching the ring closed and weaving in ends much easier on such a tiny scale.
- Use stitch markers religiously on small amigurumi like this; with only 32 stitches in the pod, it’s easy to lose track of your round start.
- Stuff the peas just enough to round them out — overstuffing on this scale can distort the invisible decrease rounds and make the tops look pointy instead of smooth.
- When working the second side of the starting chain for the pod, go slowly on the first attempt — it’s the trickiest part of this whole pattern, but once you’ve done it once it becomes second nature for future oval-shaped projects.
- Block your finished pea pod by lightly steaming it (holding a steamer a few inches away, never touching yarn directly) to help the oval hold its shape.
Variations
- Edamame Pod: Swap the yarn to a muted sage or olive green and use a slightly fuzzier boucle-style yarn for a cozy, textured edamame look.
- Pastel Rainbow Peas: Make each of the three peas a different pastel shade — pink, lavender, and mint — for a playful, non-realistic twist.
- Earring Version: Skip the keyring and instead attach a small earring hook to the top of the pod for a matching pair of pea pod earrings.
- Giant Pillow Pod: Scale the entire pattern up using chunky yarn and a 6mm hook to create a plush pea pod throw pillow for a nursery or reading nook.
- Ombre Peas: Use a gradient yarn for the peas so each one blends from light to dark green, adding subtle dimension to the row.



