The Best Fluffy Pancakes recipe you will fall in love with. Full of tips and tricks to help you make the best pancakes.
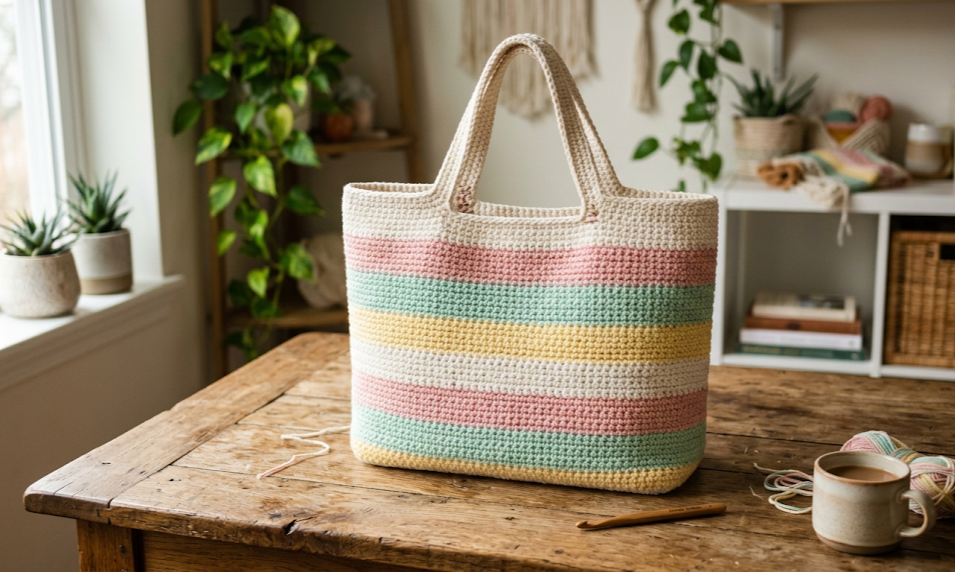
A cheerful, structured bag that works up fast and looks gorgeous in any pastel palette.
If you’ve been searching for the perfect free crochet tote bag pattern, your scroll ends here. This pastel striped crochet tote is structured, spacious, and surprisingly beginner-friendly. With its soft mint green, blush pink, creamy white, and buttery yellow stripes, this bag is the ultimate warm-weather accessory — ideal for trips to the farmers market, the beach, or a casual day out. Best of all, it requires zero sewing experience to assemble and uses only basic crochet stitches.
Whether you’re a beginner looking for your first functional crochet project or an intermediate crocheter who wants a quick and satisfying make, this pattern is for you. Let’s dive in!
|
Difficulty
Beginner
|
Time
8–12 Hours
|
Hook Size
4.0mm (G/6)
|
Yarn Weight
DK Weight (#3)
|
Finished Size
16″ × 12″ × 5″
|
Why You’ll Love This Crochet Tote Bag Pattern
This isn’t just another slouchy bag. The pastel striped crochet tote features:
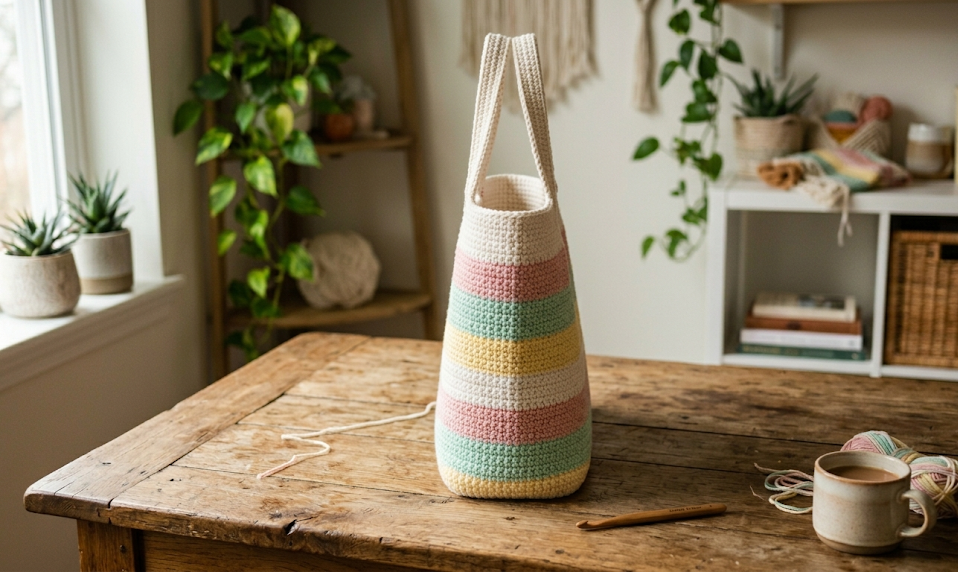
- A firm, flat rectangular base that holds its shape
- Tall, comfortable handles worked in a flat strip
- A classic stripe pattern that’s easy to customize with any colors
- A finished size that comfortably holds a water bottle, wallet, book, and more
- Clean finishing with no lining required
It’s one of those projects that looks far more complex than it actually is — which makes it incredibly satisfying to share on Pinterest and Instagram!
Materials List
To make this pastel striped crochet tote bag, you will need:
- Yarn A – Cream White: approx. 150g / 300 yards, cotton DK weight (e.g., Paintbox Simply DK or similar)
- Yarn B – Mint Green: approx. 100g / 200 yards, cotton DK weight
- Yarn C – Blush Pink: approx. 80g / 160 yards, cotton DK weight
- Yarn D – Pale Yellow: approx. 50g / 100 yards, cotton DK weight
- Crochet Hook: 4.0mm (US size G/6)
- Scissors
- Yarn needle (tapestry needle for weaving in ends)
- Stitch markers (optional but helpful)
- Measuring tape
Yarn tip: 100% cotton yarn is highly recommended for this project. It gives the bag structure, is washable, and holds the stripe colors beautifully without going fuzzy.
Abbreviations
| Abbreviation | Meaning |
|---|---|
| ch | chain |
| sc | single crochet |
| sl st | slip stitch |
| st(s) | stitch(es) |
| rep | repeat |
| RS | right side |
| WS | wrong side |
| BLO | back loop only |
| FLO | front loop only |
| turn | turn your work |
| pm | place marker |
| sp | space |
Gauge
16 sc × 18 rows = 4 inches (10 cm) in single crochet with 4.0mm hook and DK weight cotton yarn.
Gauge is important for this project because the bag needs structure. If your gauge is too loose, go down a hook size. Too tight? Go up a half size.
Finished Size
- Width: approximately 16 inches (40 cm) across
- Height: approximately 12 inches (30 cm) tall (excluding handles)
- Depth: approximately 5 inches (13 cm)
- Handle length: approximately 24 inches (60 cm) each
Pattern Instructions
Part 1: The Base
The base is worked flat in rows, then joined.
With Yarn A (Cream White) and 4.0mm hook:
- Ch 61.
- Row 1: Sc in 2nd ch from hook and in each ch across. (60 sc) Turn.
- Rows 2–20: Ch 1, sc in BLO across. (60 sc) Turn.
- Fasten off. You should have a firm rectangle approximately 15 inches × 5 inches.
Tip: Working into the back loop only (BLO) creates a subtle ridged texture that gives the base extra stiffness and grip.
Part 2: The Body (Sides)
The body is worked in the round, picking up stitches around all four edges of the base.
Joining round:
With Yarn A (Cream White), attach yarn to any corner of the base.
- Ch 1.
- Work 60 sc along the long edge, 20 sc along the short edge, 60 sc along the opposite long edge, 20 sc along the remaining short edge. (160 sc total)
- Sl st to join. Do NOT turn.
Now begin working in continuous rounds (use a stitch marker to track the beginning of each round).
Stripe Sequence
Work each color for 2 rounds before changing:
- Rounds 1–2: Yarn A (Cream White)
- Rounds 3–4: Yarn B (Mint Green)
- Rounds 5–6: Yarn A (Cream White)
- Rounds 7–8: Yarn C (Blush Pink)
- Rounds 9–10: Yarn A (Cream White)
- Rounds 11–12: Yarn B (Mint Green)
- Rounds 13–14: Yarn D (Pale Yellow)
- Rounds 15–16: Yarn B (Mint Green)
- Rounds 17–18: Yarn A (Cream White)
- Rounds 19–20: Yarn C (Blush Pink)
- Rounds 21–22: Yarn A (Cream White)
- Rounds 23–24: Yarn B (Mint Green)
- Rounds 25–26: Yarn A (Cream White)
- Rounds 27–28: Yarn C (Blush Pink)
- Round 29–30: Yarn A (Cream White)
Each round: Sc in each stitch around. (160 sc per round)
Tip on color changes: When changing colors, carry the unused yarn up the inside of the bag rather than cutting and re-joining. This minimizes ends to weave in and keeps the bag interior neat.
Part 3: The Top Border
With Yarn B (Mint Green):
- Round 1: Sc in each st around. (160 sc)
- Round 2: Ch 1 (counts as first sc), sc in each st around. Sl st to join.
- Fasten off and weave in ends.
Part 4: The Handles (Make 2)
The handles are worked flat and attached to the top of the bag.
With Yarn A (Cream White) and 4.0mm hook:
- Ch 7.
- Row 1: Sc in 2nd ch from hook and in each ch across. (6 sc) Turn.
- Rows 2–110: Ch 1, sc in each sc across. Turn.
- Fasten off, leaving a 12-inch tail for sewing.
Each handle should measure approximately 24 inches (60 cm) in length and 1.5 inches (4 cm) in width. If you want longer handles for a shoulder bag style, add more rows (about 8 rows = 1 extra inch).
Part 5: Handle Trim (Optional but Recommended)
For a polished look, edge each handle with Yarn B (Mint Green):
- With Yarn B, work a single crochet border around the entire perimeter of each handle strip. This adds structure and ties the color into the handles beautifully.
- Sl st to join. Fasten off.
Assembly Instructions
- Position handles: Place each handle symmetrically on the front and back of the bag, with the inner edges of the handle approximately 4 inches apart on each side and centered on the 60-stitch wide face.
- Pin in place: Use stitch markers or pins to secure the handles before sewing. Each handle end should overlap the top of the bag by about 3 inches (8 cm).
- Sew handles: Using a yarn needle and the long tails, whipstitch around the perimeter of each handle end at least twice for durability. Then work a small X pattern across the center for extra security. This is the most important step — these stitches bear all the bag’s weight, so take your time.
- Weave in all ends: Use the yarn needle to weave in every loose tail, going in at least two directions to lock the ends.
- Block (optional): Lightly mist the finished bag with water and pat it into shape. Allow to air dry flat. This gives the bag a much more polished, structured look.
Beginner Tips
Tension consistency is your best friend with stripe bags. Try to keep your grip the same throughout — looser tension = wider stripes, tighter = shorter. A quick swatch before you begin will save you surprises later.
Don’t cut yarn between stripes. Especially for colors you’re only skipping for 2 rounds, it’s far easier (and less wasteful) to carry the yarn up the inside. Your bag interior will have a couple of float loops, but no one will ever see those.
Mark your round start. In continuous rounds, it’s easy to lose count. A simple loop of contrasting yarn as a stitch marker at round 1 stitch 1 will save you a lot of confusion.
Your base matters most. A sloppy base = a bag that tips and sags. Take extra care on the base and the joining round — the rest flows naturally from there.
Cotton yarn is firm — be patient. Cotton has no stretch, so your hands may tire more quickly than with acrylic. Take breaks, shake out your hands, and keep your hook hold relaxed.
Color Variations to Try
One of the best things about this pattern is how versatile it is with different palettes:
- Earth tones: Terracotta, sand, olive, and rust for a boho fall look
- Classic nautical: Navy, white, and red for a timeless summer tote
- Monochrome: Work all stripes in shades of one color (cream through caramel through brown) for a sophisticated neutral bag
- Bold brights: Hot pink, turquoise, lemon yellow, and lime for a fun summer beach bag
- Seasonal pastels: Lilac, soft peach, sky blue, and mint for a spring Easter basket feel
The stripe pattern can also be modified — try wider 4-row stripes for a bolder look, or thin 1-row stripes for something more graphic.
Caring for Your Crochet Tote
Because this bag is made from cotton yarn, it is typically machine washable on a gentle cycle in cold water. Always check the label on your specific yarn for care instructions. Lay flat to dry to maintain the bag’s shape. Avoid hanging when wet — the water weight can stretch the handles.
Share Your Make!
Did you make this pastel striped crochet tote bag? We’d absolutely love to see it! Share your finished project on Pinterest and tag it with #FoodieRippleCrochet so we can find it and feature it in our favorites round-up.
Pin this free pattern to your crochet board so you always have it saved — and share it with a crafty friend who’d love a new project! Every pin helps more crocheters discover this free pattern. 📌
Happy hooking! – FoodieRipple


