The Best Fluffy Pancakes recipe you will fall in love with. Full of tips and tricks to help you make the best pancakes.
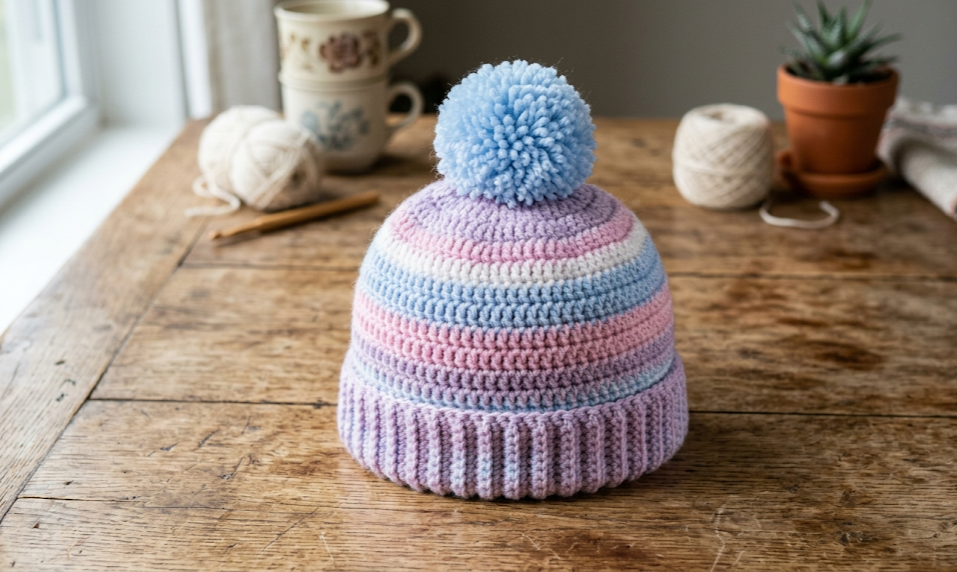
If you’ve been looking for a beginner-friendly crochet hat pattern that looks stunning and works up quickly, you’ve just found your new favorite project. The Bonnie Beanie is a pastel-striped crochet hat featuring soft blues, lavender, pink, and white yarns topped with a cheerful fluffy pompom. It’s cozy, colorful, and completely free — perfect for gifting or keeping for yourself.
Whether you’re picking up a crochet hook for the first time or you’re an experienced crafter looking for a relaxing weekend make, this pattern has you covered. Let’s dive in!
|
Difficulty
Beginner
|
Time
2–4 Hours
|
Hook Size
5.0 mm
|
Yarn Weight
Worsted (4)
|
Finished Size
21–22 in
|
Why You’ll Love This Pattern
The Bonnie Beanie is everything a crochet pattern should be: simple enough for beginners, satisfying enough for experienced makers, and versatile enough to customize in any color palette. The stripe sequence gives it an effortless boho-chic aesthetic, while the half double crochet stitch creates a dense, warm fabric that’s ideal for cooler seasons.
The finished beanie works for babies, children, and adults — just adjust your gauge and starting chain accordingly. And that pompom? Completely optional, but absolutely adorable.
Materials You’ll Need
- Yarn: Worsted weight (Category 4) yarn in 4–5 pastel colors (approximately 100–150 yards total)
- Color A: Soft White
- Color B: Baby Blue
- Color C: Lavender
- Color D: Blush Pink
- Color E: Light Aqua (optional)
- Hook: 5.0 mm (US H/8) crochet hook
- Notions: Yarn needle, scissors, stitch marker
- Optional: Pompom maker or cardboard for pompom
Abbreviations
| Abbreviation | Meaning |
|---|---|
| ch | chain |
| sl st | slip stitch |
| hdc | half double crochet |
| hdc2tog | half double crochet 2 together (decrease) |
| MR | magic ring |
| st(s) | stitch(es) |
| rep | repeat |
| rnd | round |
| sp | space |
Finished Size
- Adult size: approximately 21–22 inches circumference, 9 inches tall (blocked)
- Child size: approximately 18–19 inches circumference (adjust starting rounds)
Gauge
14 hdc × 10 rows = 4 inches in half double crochet
Gauge is not critical for this pattern, but it will affect finished size. Swatch if in doubt!
Pattern Instructions
Crown (Top of Hat)
Begin at the top of the hat and work downward in continuous rounds.
Rnd 1: Using Color A, make a magic ring. Ch 2 (does not count as st). Work 8 hdc into MR. Pull ring closed. (8 sts)
Rnd 2: 2 hdc in each st around. (16 sts)
Rnd 3: 2 hdc in next st, hdc in next st — rep around. (24 sts)
Rnd 4: 2 hdc in next st, hdc in next 2 sts — rep around. (32 sts)
Rnd 5: 2 hdc in next st, hdc in next 3 sts — rep around. (40 sts)
Rnd 6: 2 hdc in next st, hdc in next 4 sts — rep around. (48 sts)
Rnd 7: 2 hdc in next st, hdc in next 5 sts — rep around. (56 sts)
For a child’s hat, stop increasing here. For adult, continue one more increase round.
Rnd 8 (Adult only): 2 hdc in next st, hdc in next 6 sts — rep around. (64 sts)
Body of the Hat
Now work in straight rounds (no increasing or decreasing) to create the striped body. Change color at the end of each stripe section by cutting yarn and joining new color with a sl st.
Rnds 9–10: Color B — hdc in each st around. (64 sts)
Rnds 11–12: Color C — hdc in each st around.
Rnds 13–14: Color D — hdc in each st around.
Rnds 15–16: Color A — hdc in each st around.
Rnds 17–18: Color B — hdc in each st around.
Rnds 19–20: Color E (or repeat Color C) — hdc in each st around.
Continue stripes in your preferred sequence until hat measures approximately 7.5 inches from crown to brim edge.
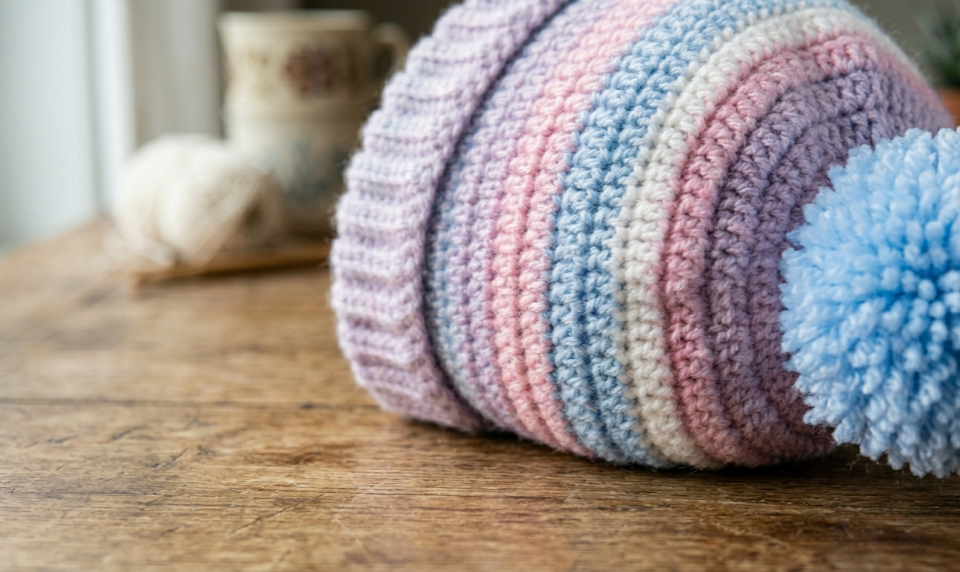
Ribbed Brim
The brim is worked in rows (back and forth) then seamed, OR you can work it as a folded edge.
Join Color A. Ch 8.
Row 1: Hdc in 3rd ch from hook and in each ch across. (6 sts) Ch 2, turn.
Row 2: Working in back loops only (BLO), hdc in each st across. Ch 2, turn.
Repeat Row 2 until ribbing fits snugly around the brim (approximately 56–64 rows for adult size).
Seam the short ends of the ribbing together using a sl st. Join ribbing to bottom edge of hat body using sl st.
Assembly
- Weave in all yarn ends using your yarn needle, being careful to secure each color change.
- Block the hat lightly by spritzing with water and shaping over a balloon or head form.
- Make a pompom using Color B yarn: wrap yarn around a pompom maker or 3-inch cardboard square approximately 80 times. Tie tightly in the center, cut loops, and trim to shape.
- Attach pompom securely to the crown of the hat using the yarn tail.
Beginner Tips
- Use a stitch marker at the beginning of each round so you don’t lose your place.
- Weave ends as you go — changing colors frequently can leave lots of tails. Secure each one after 2–3 rounds.
- Tension tip: If your hat is too tight, try going up half a hook size (5.5 mm). If it’s too loose, go down to a 4.5 mm.
- Magic ring alternative: If the magic ring feels tricky, ch 4 and sl st to form a ring instead.
- Don’t skip blocking! Even a light spray block will smooth out your stitches and help the hat hold its shape.
Variations to Try
- Solid Color Version: Use a single skein of variegated yarn for an automatic stripe effect without any color changes.
- No Pompom: Skip the pompom for a sleek, modern finish that works great for all genders.
- Baby Bonnie Beanie: Use DK weight yarn and a 4.0 mm hook. Work increase rounds 1–5 only, then reduce body rounds to 8–10. The brim can be a simple 2-round fold.
- Chunky Winter Version: Use super bulky yarn (Category 6) and a 9.0 mm hook for an ultra-cozy beanie that works up in under an hour.
- Holiday Edition: Swap the pastels for red, green, and white for a quick Christmas gift that anyone would love.
Share Your Make!
Made your Bonnie Beanie? We’d absolutely love to see it! Post your finished photo on Pinterest or Instagram and tag it with #FoodieRippleCrochet so we can share it with our community. Your version might just inspire another crafter to pick up their hook!
If you found this pattern helpful, save it to your crochet boards on Pinterest so you can find it again — and share it with a crafty friend who deserves a cozy handmade gift. Happy hooking! 🧡


