The Best Fluffy Pancakes recipe you will fall in love with. Full of tips and tricks to help you make the best pancakes.
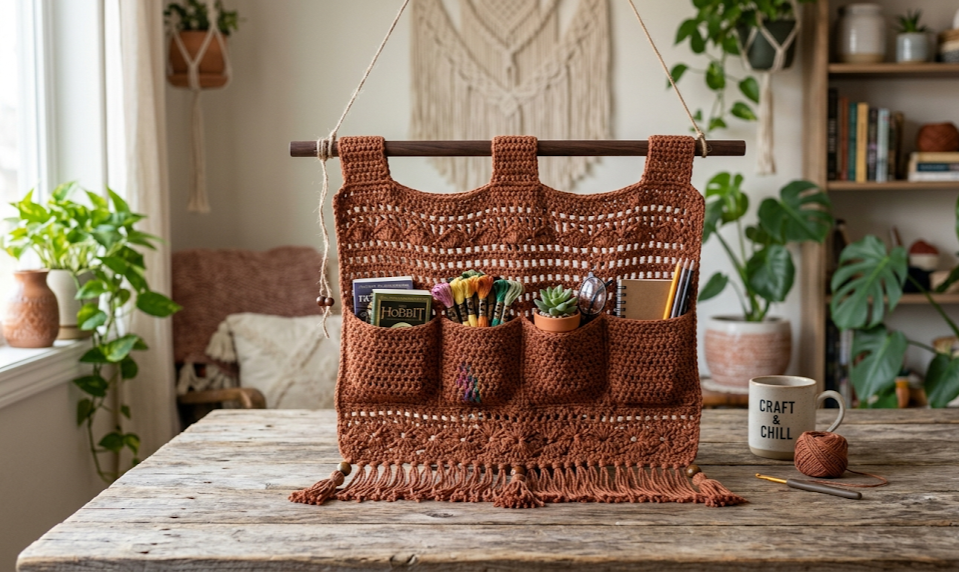
Transform your reading space into a cozy, textured haven with this gorgeous handmade creation. If you love blending practical home decor with a rustic, bohemian aesthetic, learning how to craft this beautiful wall hanging is the ultimate weekend project. Perfect for keeping your current reads, journals, glasses, and bookmarks organized, this stylish sleeve adds warmth and tactile beauty to any room.
This project is beautifully approachable, utilizing thick yarn to create a sturdy fabric that stands up to daily use. Whether you hang it right next to your favorite armchair, by your bedside, or over a desk, it serves as both a stunning piece of fiber art and a highly functional organizer. Dive into the free pattern below to craft your very own literary escape.
|
Difficulty
Easy / Advanced Beginner
|
Time
3–4 Hours
|
Hook Size
6.5 mm (K-10.5)
|
Yarn Weight
Bulky (Category 5)
|
Finished Size
11″ x 14″
|
Materials and Tools
Before starting, gather the following materials to ensure your project turns out beautifully sturdy and textured:
- Yarn: 2 skeins of Bulky Weight Yarn (Category 5) in a warm, earthy Terracotta Brown tone. Sturdy acrylic, wool blends, or cotton-acrylic blends work wonderfully to maintain structural integrity.
- Hook Size: 6.5 mm (US K-10.5) crochet hook (or size needed to obtain a firm, compact gauge).
- Wooden Dowel: One 12-inch long wooden dowel (approximately 0.5 inches in diameter) for mounting and hanging.
- Notions: Large-eye yarn needle for weaving in ends and assembly, sharp scissors, a measuring tape, and locking stitch markers.
Crochet Abbreviations
This pattern is written using standard US crochet terminology.
- ch: chain
- st(s): stitch(es)
- sc: single crochet
- hdc: half double crochet
- dc: double crochet
- sk: skip
- sp: space
- rep: repeat
- t-ch: turning chain
Pattern Instructions
This organizer is worked in one continuous panel that is later folded and seamed to create the deep pocket. The unique texture is achieved by combining dense, stabilizing stitches with a delicate openwork row that adds that classic bohemian window effect.
Main Panel Base
To begin, create a slip knot and chain loosely.
Row 1: Chain 37. Work 1 hdc in the 3rd ch from your hook (the skipped chains do not count as a stitch). Work 1 hdc in each remaining chain across to the end of the row. Turn. (35 hdc)
Row 2: Ch 2 (does not count as a stitch here or throughout). Work 1 hdc in the first stitch, and work 1 hdc in every stitch across the row. Turn. (35 hdc)
Establishing the Textured Body Stitch
Row 3: Ch 1 (does not count as a stitch). Work 1 sc in the first st. Work 1 dc in the next st, work 1 sc in the next st. Repeat from * to * across the row, ending with a sc in the very last stitch. Turn. (35 sts)
Row 4: Ch 2. Work 1 dc in the first st. Work 1 sc in the next st, work 1 dc in the next st. Repeat from * to * across the row, ending with a dc in the very last stitch. Turn. (35 sts)
Rows 5–18: Repeat Rows 3 and 4 alternately to create a beautifully thick, seed-stitch textured block. This dense texture gives the pocket the rigidity it needs to hold heavy books without stretching out over time.
Creating the First Boho Openwork Window Band
Row 19: Ch 4 (counts as 1 dc plus ch 1). Skip the first two stitches. Work 1 dc in the next stitch, ch 1, skip the next stitch. Repeat from * to * across the row until only two stitches remain. Skip the next stitch, and work 1 dc into the final stitch of the row. Turn. (17 openwork window spaces created)
Row 20: Ch 2. Work 1 hdc in the first dc stitch. Work 1 hdc into the ch-1 space, then work 1 hdc into the next dc stitch. Repeat from * to * across the row, placing your final hdc into the 3rd chain of the turning chain-4 from the previous row. Turn. (35 hdc)
Crafting the Backing Panel
Row 21: Ch 2. Work 1 hdc in each stitch across the row. Turn. (35 hdc)
Rows 22–46: Repeat Rows 3 and 4 alternately to build up the back panel of the organizer. This section lies flat against the wall, so maintain an even, firm tension throughout to prevent warping.
Creating the Top Boho Openwork Window Band
Row 47: Ch 4 (counts as 1 dc plus ch 1). Skip the first two stitches. Work 1 dc in the next stitch, ch 1, skip the next stitch. Repeat from * to * across the row until only two stitches remain. Skip the next stitch, and work 1 dc into the final stitch of the row. Turn. (17 openwork window spaces)
Row 48: Ch 2. Work 1 hdc in the first dc stitch. Work 1 hdc into the ch-1 space, then work 1 hdc into the next dc stitch. Repeat from * to * across the row, placing your final hdc into the 3rd chain of the turning chain-4. Turn. (35 hdc)
Rows 49–52: Ch 2. Work 1 hdc in each stitch across the row. Do not fasten off after Row 52.
Hanging Loops
The loops will secure the finished textile piece smoothly onto your wooden dowel.
Row 53 (Loop Base): Ch 1. Work 1 sc in each of the first 5 stitches. Turn. (Leave the remaining stitches unworked for now).
Rows 54–60: Ch 1. Work 1 sc across these 5 stitches. Turn. Fasten off after Row 60, leaving a long 10-inch tail for sewing the loop down later.
To make the second hanging loop, skip the next 25 unworked stitches along Row 52. Attach your yarn with a slip stitch into the 26th stitch (which should leave exactly 5 stitches remaining at the opposite edge).
Row 1: Ch 1. Work 1 sc into the same stitch as joining, and 1 sc in each of the remaining 4 stitches to the edge. Turn. (5 sc)
Rows 2–8: Ch 1. Work 1 sc across these 5 stitches. Turn. Fasten off, leaving a long 10-inch tail for assembly.
Assembly Steps
With the crocheted piece lying flat, it is time to assemble it into a functional wall hanging pocket.
Step 1: Pinning and Alignment
Lay the long rectangular panel flat on a clean surface with the right side facing upward. Fold the bottom edge of the panel (Row 1) upward toward the middle, aligning it just below the first openwork window strip (Row 19). Use your locking stitch markers to pin the double-layered side edges securely in place.
Step 2: Seaming the Sides
Thread your large-eye yarn needle with a matching length of terracotta yarn. Beginning at the bottom folded corner, whipstitch or mattress stitch through both layers along the outer edge, working up to the top of the pocket opening. Fasten off securely and weave in the yarn tail on the inside of the pocket. Repeat this seaming process on the opposite side of the pocket.
Step 3: Attaching the Hanging Loops
Fold the two top 5-stitch tabs over your wooden dowel toward the back side of the organizer. Using your yarn needle and the long tails left behind, stitch the ends of the tabs securely to the back of Row 52. Ensure the stitches are tight so the loops can easily hold the weight of your books.
Step 4: Adding the Hanging Cord
Cut a 24-inch piece of yarn or rustic twine. Tie each end firmly around the exposed outer ends of the wooden dowel, leaving a graceful drape in the center to hang the organizer on a wall hook or nail.
Beginner Tips for Success
- Check Your Gauge: Because this organizer is designed to hold items with a bit of weight, your stitches should be relatively firm. If you notice your fabric feels floppy or loose, drop down a half millimeter in hook size to ensure a tight, structural weave.
- Count Your Stitches: It can be easy to drop or add stitches accidentally when transitioning between the dense seed-stitch pattern and the openwork rows. Take a quick moment at the end of each row to ensure you still have exactly 35 stitches.
- Choose the Right Fiber: Cotton or wool blends offer fabulous structural longevity. Avoid ultra-soft single-ply yarns, as they tend to pill easily and stretch excessively under weight.
Beautiful Design Variations
- Two-Tone Boho: Crochet the main pocket body in a deep clay tone and switch to a cream or linen shade for the openwork bands and hanging loops to create an eye-catching contrast.
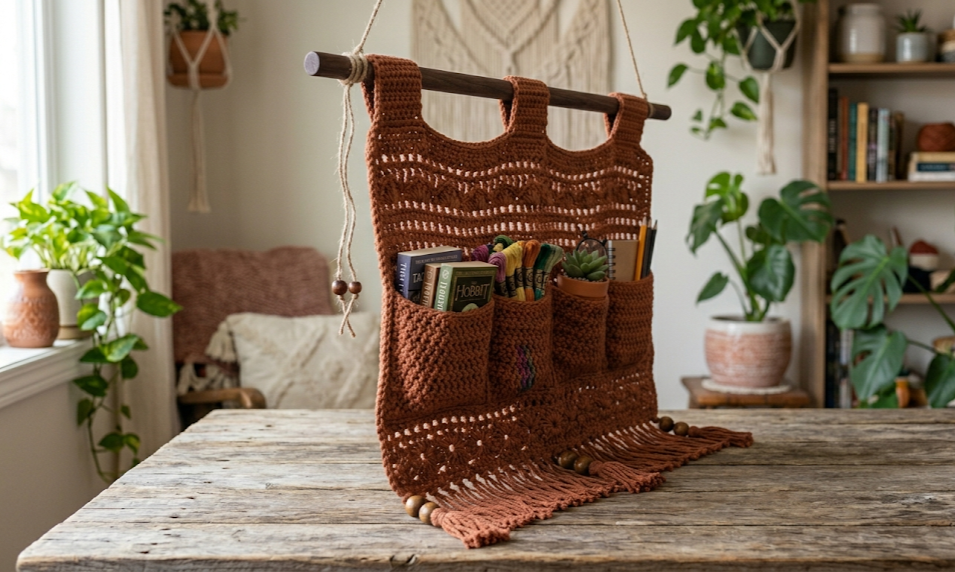
- Fringe Benefits: For an even stronger bohemian vibe, add a 4-inch long yarn fringe across the bottom folded edge of the organizer.
- Beaded Accents: Slide large wooden craft beads onto your hanging cord before tying it to the dowel for an added touch of natural texture.
Love this pattern? Save it to your favorite crafting boards on Pinterest so you can make it later! Take a quick photo of your finished creation and share it with us online using our signature community hashtag.
#FoodieRippleCrochet


