The Best Fluffy Pancakes recipe you will fall in love with. Full of tips and tricks to help you make the best pancakes.
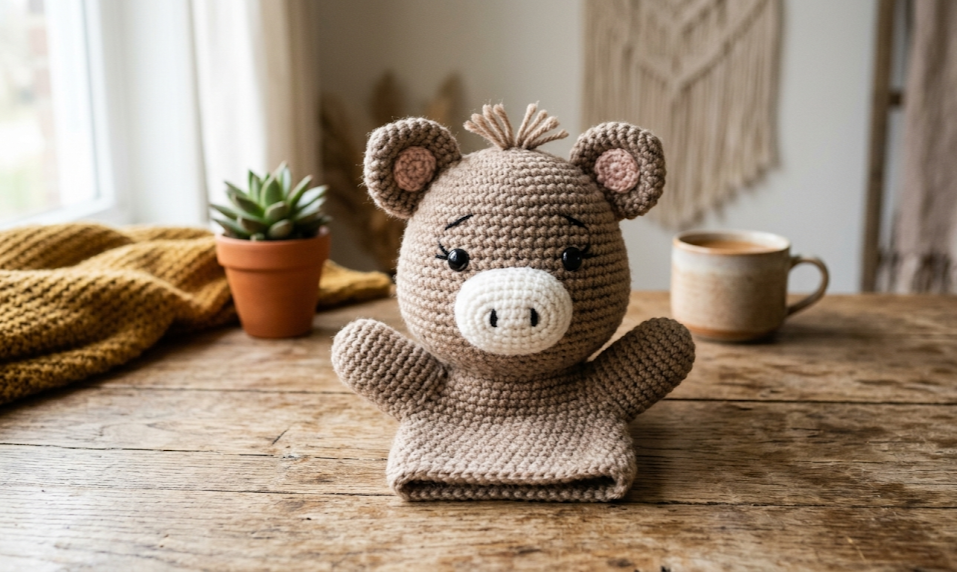
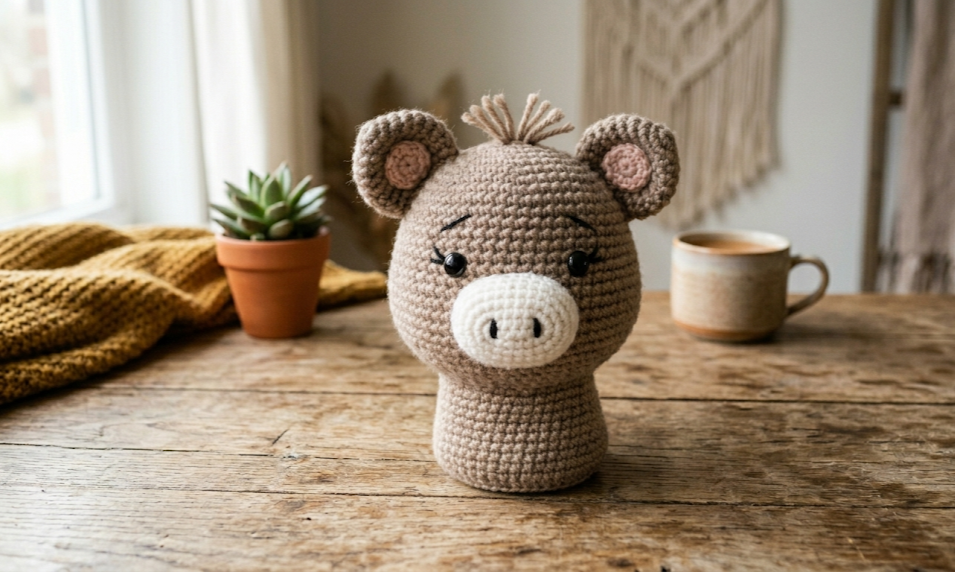
There is something undeniably magical about slipping a hand puppet over your fingers and watching a character come to life. This crochet boar hand puppet amigurumi combines the charm of classic amigurumi construction with the playful function of a hand puppet, making it one of the most rewarding projects any crocheter can tackle. With its round sandy-brown head, wide white snout, tiny embroidered nostrils, and delightfully chunky little ears, this boar puppet is equal parts adorable and expressive. Whether you are creating it for a child’s puppet show, a nursery decoration, a woodland-themed party, or simply because you love making things with personality, this pattern delivers a finished piece that looks like it belongs in a premium craft boutique.
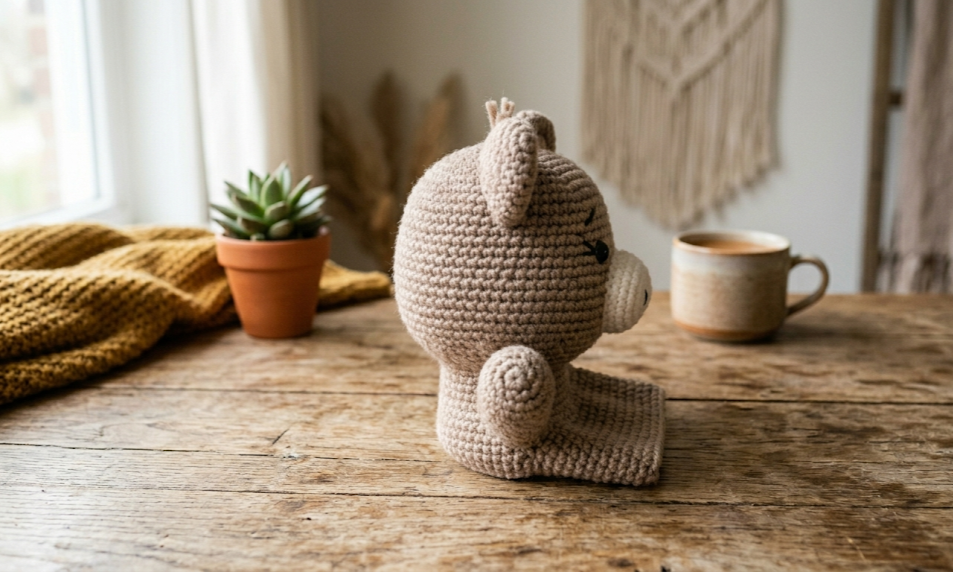
This pattern is written for crocheters with some experience working in the round and assembling amigurumi pieces. If you have made a basic stuffed animal before, you have all the skills needed to complete this project. The puppet body is worked as an open tube — no closing at the bottom — which makes it uniquely different from standard amigurumi and gives a child’s hand a comfortable, secure fit. The head and ears are worked separately and sewn on, allowing you to position them precisely for maximum character expression. Read all the way through before casting on, gather your materials, and prepare to fall completely in love with this little forest creature.
|
Difficulty
Intermediate
|
Time
4–6 Hours
|
Hook Size
4.0 mm (G/6)
|
Yarn Weight
Bulky (Size 5)
|
Finished Size
20 cm × 12 cm
|
Gauge
14 single crochet stitches × 16 rows = 10 cm square
Hook used: 4.0 mm (US G/6)
Yarn weight: Bulky weight, Size 5
Gauge is important for this puppet because the head must sit proportionally over the body tube. Work a 15-stitch, 18-row swatch in single crochet before beginning and adjust your hook size up or down as needed to match gauge. A too-loose gauge will result in a floppy head and visible stuffing.
Materials List
- Yarn A – Sandy Brown / Warm Taupe: Bulky weight (Size 5), approximately 120 g / 200 m (e.g., Lion Brand Pound of Love in Butterscotch, or any comparable bulky yarn in warm beige-brown)
- Yarn B – White or Off-White: Bulky weight (Size 5), approximately 15 g / 25 m (for the snout)
- Hook: 4.0 mm (US G/6)
- Safety eyes: 12 mm black, 2 pieces
- Polyester fiberfill stuffing: Approximately 60 g
- Yarn needle: For sewing and weaving in ends
- Stitch markers: 2–3 locking markers
- Scissors
- Black embroidery thread or black yarn: For nostrils and eyelash detail
- Embroidery needle
Abbreviations
| Abbreviation | Meaning |
|---|---|
| sc | single crochet |
| inc | increase — 2 sc in the same stitch |
| dec | invisible decrease — insert hook through front loops only of next 2 stitches, yarn over, pull through both, yarn over, pull through 2 loops |
| sl st | slip stitch |
| ch | chain |
| MR | magic ring — adjustable loop used to start working in the round with no hole at center |
| BLO | back loop only — insert hook under the back loop only of the stitch |
| rnd | round |
| st(s) | stitch(es) |
| FO | fasten off |
| PM | place marker |
Pattern Instructions
PART 1 — HEAD
The head is worked in continuous spiral rounds. Use a stitch marker to track the beginning of each round.
With Yarn A and 4.0 mm hook:
- Rnd 1: MR, 6 sc into ring, pull ring closed. (6)
- Rnd 2: Inc in each st around. (12)
- Rnd 3: [Sc 1, inc] × 6. (18)
- Rnd 4: [Sc 2, inc] × 6. (24)
- Rnd 5: [Sc 3, inc] × 6. (30)
- Rnd 6: [Sc 4, inc] × 6. (36)
- Rnd 7: [Sc 5, inc] × 6. (42)
- Rnd 8–14: Sc in each st around. (42) — 7 rounds even
- Rnd 15: [Sc 5, dec] × 6. (36)
- Rnd 16: [Sc 4, dec] × 6. (30)
At this point, insert safety eyes between Rnds 10 and 11, approximately 10 stitches apart. Embroider short eyelash lines above each eye using black embroidery thread before proceeding, as this is easier while the head is still open.
- Rnd 17: [Sc 3, dec] × 6. (24)
Begin stuffing the head firmly. Continue stuffing as you decrease.
- Rnd 18: [Sc 2, dec] × 6. (18)
- Rnd 19: [Sc 1, dec] × 6. (12)
- Rnd 20: [Dec] × 6. (6)
FO, leave a short tail, thread through remaining 6 stitches and pull tight to close. Weave in end.
PART 2 — SNOUT
The snout is a small flattened oval worked flat and then shaped into a disk.
With Yarn B (White) and 4.0 mm hook:
- Rnd 1: MR, 6 sc into ring. (6)
- Rnd 2: Inc in each st around. (12)
- Rnd 3: [Sc 1, inc] × 6. (18)
- Rnd 4: Sc in each st around. (18)
Sl st to close round. FO, leave a 30 cm tail for sewing.
Lightly stuff the snout or leave unstuffed for a flatter look (the flat version photographs more cleanly). Using black embroidery thread, embroider two oval nostrils side by side at the center front of the snout disk.
PART 3 — EARS (make 2)
Each ear is a small rounded half-dome. No stuffing needed.
With Yarn A and 4.0 mm hook:
- Rnd 1: MR, 6 sc into ring. (6)
- Rnd 2: Inc in each st around. (12)
- Rnd 3: [Sc 1, inc] × 6. (18)
- Rnd 4: Sc in each st around. (18)
- Rnd 5: [Sc 1, dec] × 6. (12)
FO, leave a 25 cm tail for sewing. Do not stuff. Flatten the ear into a rounded cup shape before sewing.
PART 4 — PUPPET BODY TUBE
The body is an open-ended tube. The bottom stays open for the hand to enter. The top will be sewn to the head.
With Yarn A and 4.0 mm hook:
- Foundation: Ch 30. Join with sl st to form a ring, being careful not to twist the chain. Working in the round on a chain: when joining a chain to form a ring, the first ch becomes the base of your first sc. Insert marker at join point.
- Rnd 1–20: Sc in each st around. (30) — 20 rounds even
At the end of Rnd 20, sl st to close. FO, leaving a 40 cm tail for attaching the head. Do not stuff the body.
PART 5 — ARM STUBS (make 2)
These are small rounded nubs positioned at the sides of the body tube near the top.
With Yarn A and 4.0 mm hook:
- Rnd 1: MR, 6 sc into ring. (6)
- Rnd 2: Inc in each st around. (12)
- Rnd 3–5: Sc in each st around. (12) — 3 rounds even
- Rnd 6: [Dec] × 6. (6)
FO, leave a 25 cm tail. Lightly stuff. Thread tail through remaining 6 stitches and pull tight to close.
Assembly Steps
- Attach snout to head: Position the snout disk centered on the front lower portion of the head, between Rnds 13 and 16 (approximately 2 cm above the bottom opening of the head). Pin in place. Using the long tail and a yarn needle, whip stitch all the way around the snout perimeter, pulling firmly for a clean join. Weave in end.
- Attach ears to head: Position each ear on either side of the top of the head, approximately 3 cm from the center top seam and about 4 stitches back from the face front. The ear should cup slightly forward. Pin and sew in place using whip stitch around the base of each ear. Weave in ends.
- Connect head to body tube: Hold the body tube with the open bottom facing down. Align the top open edge of the tube with the bottom opening of the head (the head’s Rnd 19–20 area). Using the long tail left on the body tube, whip stitch the tube to the head all the way around, working through both layers. The head should sit firmly centered on the tube with approximately 1–2 cm of the body top edge tucked inside the head base. Weave in all ends.
- Attach arm stubs: Position each arm stub on the side of the body tube, approximately 3 cm down from the head attachment seam. The stub should point slightly forward and outward. Sew firmly in place with whip stitch. Weave in ends.
- Final check: Insert your hand into the puppet to test fit. Adjust any seams that feel tight or lumpy. The puppet should fit a child’s hand (ages 4–10) or an adult’s three fingers comfortably.
Beginner and Intermediate Tips
On working in a magic ring: The magic ring (MR) creates a tight, adjustable center with no hole. Make a loop, insert the hook through the loop, draw up yarn, chain 1, then work your required stitches around the loop before pulling the free yarn tail to close. Always pull the tail fully closed before proceeding to Round 2.
On invisible decreases: The standard decrease in amigurumi pulls two front loops together to reduce visible gaps. Always insert through both front loops in one motion, not consecutively. This keeps the decrease row looking smooth and even.
On stuffing firmness: The head should be stuffed quite firmly — more than feels natural. A lightly stuffed amigurumi head droops over time, especially in a puppet where it will be handled regularly. Stuff in small amounts and press down between each addition.
On embroidering nostrils: Use a blunt embroidery needle and black yarn or thread. Work two small oval satin stitches side by side, about 0.5 cm apart, centered vertically on the snout disk. Keep your tension even so both nostrils match in size.
On positioning safety eyes: Always position, check from the front, recheck from a distance, and only then push the washer backing onto the post. Safety eye backings cannot be removed without cutting, so placement must be confirmed before locking them in.
Variations
- Piglet Version: Substitute Yarn A with a soft dusty pink bulky yarn and Yarn B with a deeper rose pink. Shorten the ears to 3 rounds and curve them forward for a classic piglet look. Works beautifully as a companion to the boar.
- Mini Finger Puppet Set: Work the head at 60% scale (reduce each increase round by one step) and skip the body tube entirely. Attach a small crocheted ring base (ch 15, join, sc 3 rounds) to create a finger puppet. Make a set of woodland animals using the same head formula.
- Woodland Color Palette: Use a deep charcoal grey yarn for a classic wild boar look. Add a few rows of lighter grey across the snout area for realistic facial contrast. Use 9 mm amber safety eyes for a more dramatic adult boar appearance.
- Seasonal Costume Puppet: Add a tiny crocheted Santa hat (small red cone with white brim worked in the round) for a holiday version, or a small crocheted flower crown for a spring birthday puppet. Both accessories attach easily with a few whip stitches at the top of the head.
Save This Pattern on Pinterest!
If this crochet boar hand puppet brought a smile to your face, save it to your favorite crochet board so you can find it again easily! Share your finished puppet using #FoodieRippleCrochet — there is nothing better than seeing these little boars come to life in different yarn colors and sizes. Happy crocheting! 🐗


