The Best Fluffy Pancakes recipe you will fall in love with. Full of tips and tricks to help you make the best pancakes.
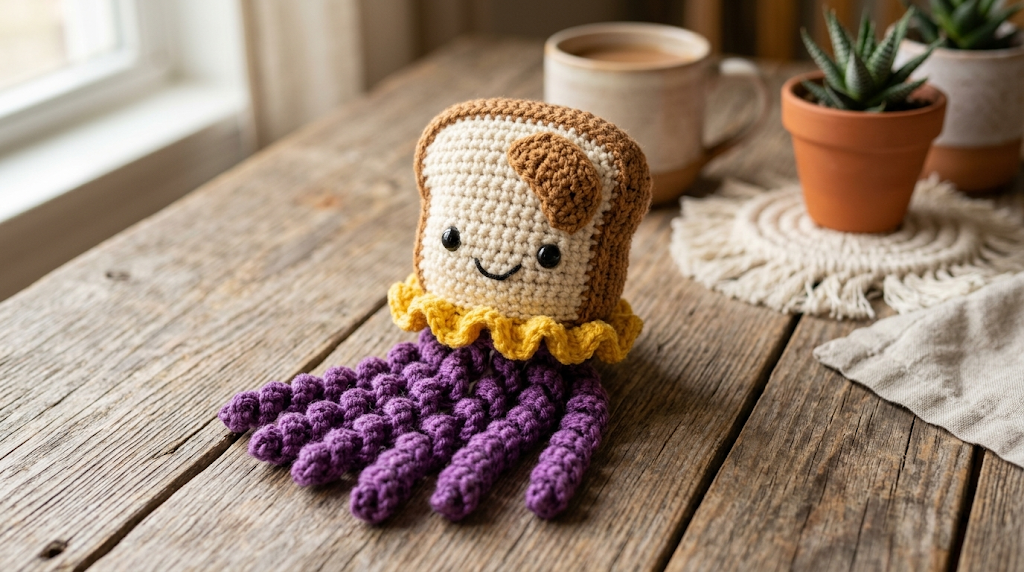
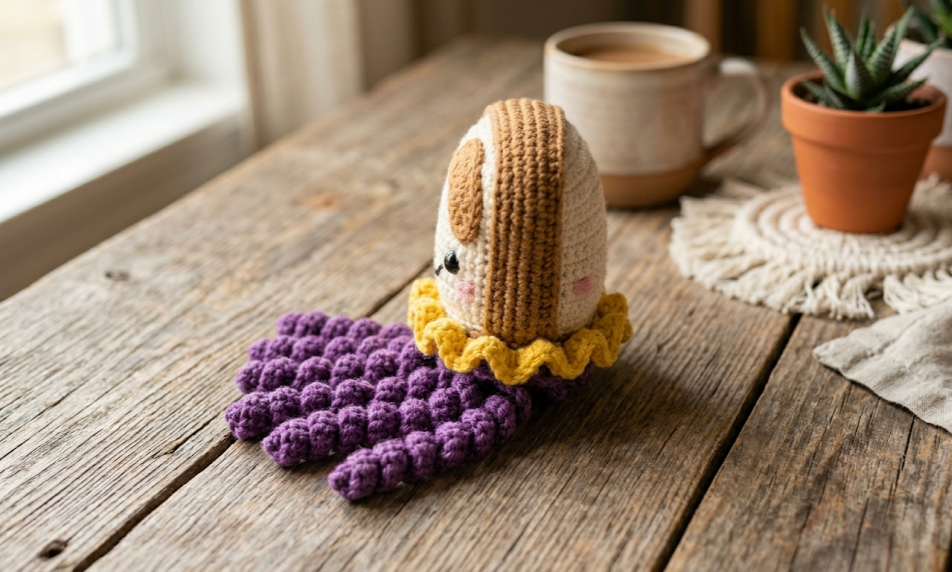
If you’ve ever wished your lunch could also be an ocean creature, this crochet pattern is exactly the project your hook has been waiting for. The Peanut Butter Jellyfish Amigurumi combines two of the most beloved things in the world — a friendly slice of toast and a flowing jellyfish — into one irresistibly quirky plushie. With a cream-and-brown toast head complete with rosy cheeks and a big-eyed smile, a cheerful yellow ruffle collar, and long twisted purple tentacles cascading below, this stuffed toy is as much a conversation piece as it is a cuddle companion.
Whether you’re making this for a child who loves underwater creatures, a food-pun enthusiast, or simply yourself because life is better with a jellyfish sandwich, this free amigurumi pattern walks you through every single step. Intermediate crocheters will find it manageable and fun, while adventurous beginners willing to tackle a few new techniques will come out the other side with a genuine showstopper.
Finished size is approximately 30–35 cm (12–14 inches) tall including tentacles, making it a generous, huggable toy. The toast head itself measures about 15 cm × 15 cm (6 × 6 inches).
|
Difficulty
Intermediate
|
Time
6–10 Hours
|
Hook Size
5.0 mm (H/8)
|
Yarn Weight
Bulky (5–6)
|
Finished Size
30–35 cm tall
|
Gauge
Work a 10 cm × 10 cm gauge swatch before beginning to ensure your finished size matches.
- 10 sc × 11 rows = 10 cm × 10 cm
- Hook: 5.0 mm (US H/8)
- Yarn weight: Bulky / Super Bulky (Weight 5–6)
This pattern uses chunky yarn, which gives the plushie its satisfying, plush texture. Adjust hook size up or down if needed to achieve a tight, stuffing-hiding fabric.
Materials List
Yarn:
- Color A — Cream / Off-White (bulky, weight 5–6): approx. 150 g / 280 m for the toast face and body
- Color B — Golden Brown (bulky, weight 5–6): approx. 80 g / 150 m for the toast border/crust
- Color C — Grape Purple (bulky, weight 5–6): approx. 200 g / 370 m for the ruffle and all tentacles
- Color D — Sunflower Yellow (bulky, weight 5–6): approx. 40 g / 75 m for the collar ruffle trim
- Color E — Dusty Rose / Blush (worsted, weight 4): small amount for embroidered blush cheeks
Tools & Notions:
- 5.0 mm (US H/8) crochet hook (main)
- 4.0 mm (US G/6) crochet hook (blush embroidery optional)
- Two 18 mm black safety eyes
- Polyfill stuffing (approx. 150 g)
- Yarn needle (blunt-tip tapestry needle)
- Stitch markers
- Scissors
- Optional: 2 small pink buttons or felt circles for cheeks as an alternative to embroidery
Abbreviations
| Abbreviation | Meaning |
|---|---|
| MR | Magic ring — pull yarn into an adjustable loop, work stitches into the ring, then pull the tail to close |
| ch | Chain |
| sc | Single crochet |
| inc | Increase — work 2 sc into the same stitch |
| dec | Invisible decrease — insert hook under front loops only of next 2 stitches, yarn over and pull through both, yarn over and pull through 2 loops |
| sl st | Slip stitch |
| BLO | Back loop only — insert hook into the back loop of the stitch only |
| FLO | Front loop only — insert hook into the front loop of the stitch only |
| hdc | Half double crochet |
| dc | Double crochet |
| ch-sp | Chain space |
| sk | Skip |
| pm | Place marker |
| RS | Right side |
| WS | Wrong side |
| rep | Repeat |
| rnd | Round |
| ( ) | Stitch count at end of round |
Pattern Instructions
Part 1: Toast Front Panel (Color A — Cream)
Begin with Color A and a 5.0 mm hook.
Ch 20.
Row 1: Sc in 2nd ch from hook and in each ch across. Turn. (19 sc)
Row 2: Ch 1, sc in each sc across. Turn. (19 sc)
Rows 3–20: Rep Row 2. (19 sc per row — you will have 20 rows total)
Fasten off, leaving a long tail for seaming. Set aside.
Part 2: Toast Back Panel (Color B — Golden Brown)
The crust panel uses golden brown for the entire back to mimic the toasted edge.
With Color B and 5.0 mm hook, work exactly as Toast Front Panel (Part 1).
Fasten off, leaving a long tail for seaming.
Part 3: Toast Border / Side Gusset (Color B — Golden Brown)
This narrow strip creates the “crust” edge all around the toast and joins the front and back panels.
Ch 5.
Row 1: Sc in 2nd ch from hook and in each ch across. Turn. (4 sc)
Row 2: Ch 1, sc in each sc across. Turn. (4 sc)
Rep Row 2 until the strip measures approx. 62 cm (24.5 inches) — long enough to go all the way around all four sides of the square toast, plus a 2 cm overlap for joining.
Fasten off, leaving a long tail.
Assembly Note for Toast Body: Pin the gusset strip around the perimeter of the cream front panel (RS facing out), matching corners. Use a yarn needle and mattress stitch or whip stitch to join the gusset to the front panel on all four sides. Then attach the golden brown back panel in the same way, leaving the bottom edge open for stuffing. Stuff firmly, then close the bottom edge.
For the corner curves: At each corner of the square, work 3 extra stitches into the corner stitch on the gusset to ease the turn without puckering.
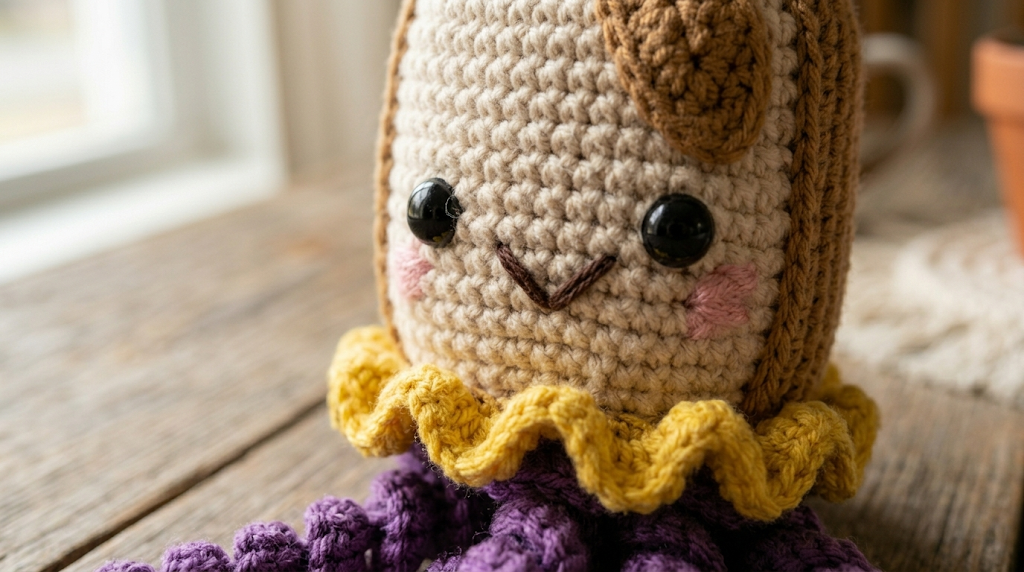
Insert safety eyes between Row 9 and Row 10, centered horizontally — place them approximately 5 cm apart (about 6 stitches between inner edges). Secure washers firmly on the WS before closing the panel.
Embroider the smile with a length of dark brown or black yarn, using a curved V-shape approximately 3 cm wide, positioned 2 cm below the safety eyes.
Embroider the blush cheeks with Color E (dusty rose), using 3–4 satin stitches in a small oval shape under each eye, approximately 1.5 cm wide.
Part 4: Jellyfish Ruffle Collar — Inner Trim (Color D — Yellow)
With Color D and 5.0 mm hook, ch 50 and join with sl st to form a ring. Be careful not to twist the chain.
Rnd 1: Ch 1, sc in each ch around. (50 sc)
Rnd 2 (ruffle): Ch 3 (counts as dc), 2 dc in same st, 3 dc in each sc around. Join with sl st to top of ch-3. (150 dc)
Fasten off, leaving a long tail for attaching.
Part 5: Jellyfish Ruffle Collar — Outer Ruffle (Color C — Purple)
With Color C and 5.0 mm hook, ch 70 and join with sl st to form a ring.
Rnd 1: Ch 1, sc in each ch around. (70 sc)
Rnd 2: Ch 1, sc in each sc around. (70 sc)
Rnd 3 (ruffle): Ch 3 (counts as dc), 2 dc in same st, 3 dc in each sc around. Join with sl st to top of ch-3. (210 dc)
Fasten off, leaving a long tail for attaching.
Part 6: Tentacles (Color C — Purple) — Make 8
Each tentacle is a twisted rope made from long chains. This creates the characteristic twisted braid appearance.
For each tentacle:
Step 1: With Color C, ch 80. Do not turn.
Step 2: Work 1 sl st back into each ch from the hook end back to the beginning. This causes the chain to spiral and twist naturally into a rope-like tentacle.
Fasten off, leaving a 10 cm tail at each end for attaching.
Technique note: Working sl sts back along a foundation chain creates the twisted rope effect. The tighter you work, the more defined the spiral. Keep tension consistent for uniform tentacles.
Make 8 tentacles total. You may vary the starting chain count (ch 60 to ch 100) to create varied tentacle lengths for a more organic, natural look.
Assembly Steps
- Lay out the toast body with the cream front face up. Identify the bottom edge (the open seam line where the ruffle will attach).
- Attach the yellow ruffle collar (Part 4) around the bottom edge of the toast body, approximately 1–2 cm from the bottom. Using the long tail and a yarn needle, whip stitch the base round of the yellow ruffle to the outside of the toast body, centering the ruffle around the entire bottom perimeter. The ruffle should fan outward and upward slightly.
- Attach the purple ruffle collar (Part 5) directly on top of or just below the yellow ruffle, overlapping by approximately 1 cm. Whip stitch the base round to the toast body. The purple ruffle should extend outward and downward, creating layered ruffle depth.
- Attach the tentacles: Arrange 8 tentacles evenly around the bottom edge of the toast body, tucking the top end of each tentacle up into the ruffle collar by 2–3 cm and securing firmly with several stitches. Space tentacles approximately 4–5 cm apart. Allow tentacles to hang freely downward.
- Final check: Fluff ruffles outward and arrange tentacles so they hang evenly. The finished toy should stand approximately 30–35 cm tall (12–14 inches) including tentacles.
Beginner & Intermediate Tips
Tight tension is key for amigurumi. Working single crochet tightly prevents stuffing from showing through the fabric. If you can see the stuffing, try going down a hook size.
The invisible decrease (dec) is worked through the front loops only of two consecutive stitches. This creates a much smoother surface than a standard decrease and is especially visible on flat front panels like this toast face.
Magic ring closure: After working your first round into a magic ring, pull the tail yarn firmly to close the center hole completely before proceeding to Round 2.
Safety eyes must be inserted before closing the panels. Once stuffed and seamed, you cannot add safety eyes. Position them, check the placement from the front, then secure the washers from the back.
For the twisted tentacles: If your tentacles are curling in the wrong direction, try working the slip stitches on the return more loosely. The natural curl direction depends on your yarn’s ply twist.
Assembling the ruffles: Pin both ruffle layers in place with stitch markers or straight pins before sewing to ensure even spacing before committing to stitching.
Variations
- Strawberry Jam Jellyfish: Swap cream/brown yarn for hot pink (face) and deep red (crust), with raspberry-colored tentacles and a white ruffle trim. Add seed stitch embroidery dots for seeds.
- Mini PB&J Set: Make the jellyfish at half scale using worsted-weight yarn and a 4.0 mm hook. Create a matching grape jelly jellyfish (purple face, cream crust, green tentacles) as a pair.
- Chunky Wall Hanging: Omit the back panel entirely. Crochet only the face on a flat piece, add a wooden dowel or driftwood rod through the top, and let extra-long tentacles (ch 120+) cascade down for a boho wall hanging.
- Glow-in-the-Dark Tentacles: Use glow-in-the-dark acrylic yarn for the tentacles only. This creates a magical nighttime effect for a child’s bedroom.
- PB & Banana Jellyfish: Replace the purple ruffles and tentacles with warm yellow, and embroider small banana slice shapes along the toast front using satin stitch.
Want to save this free pattern? Pin it to your crochet board so you can find it later — and share your finished Peanut Butter Jellyfish using #FoodieRippleCrochet on Pinterest!


