The Best Fluffy Pancakes recipe you will fall in love with. Full of tips and tricks to help you make the best pancakes.
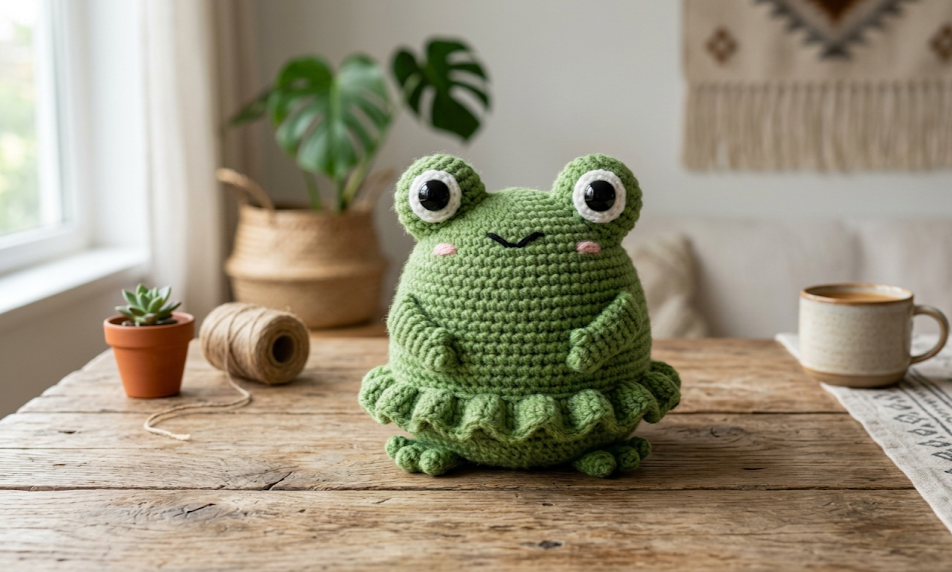
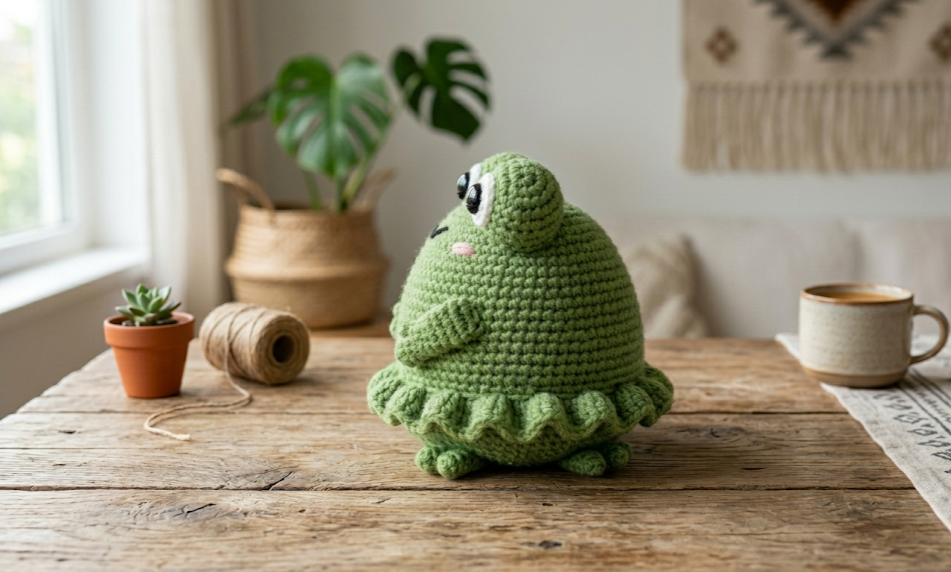
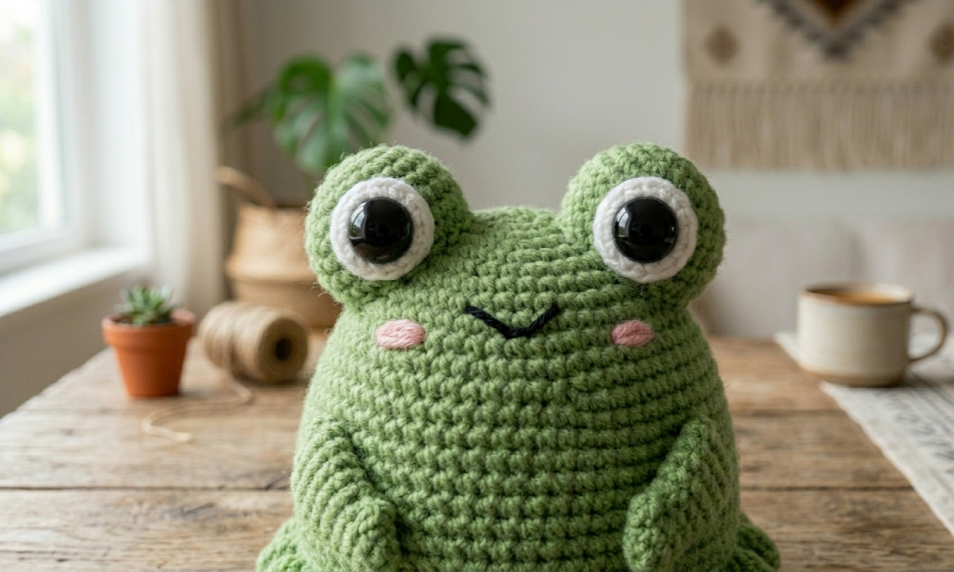
If there’s one amigurumi that makes everyone stop and smile, it’s the crochet frog. Round, roly-poly, and bursting with personality, this chubby frog amigurumi features an oversized domed body, big expressive eyes, rosy cheek blushes, a tiny curved smile, and the most adorable detail of all — a ruffled skirt of frog legs fanning out from the base. It’s whimsical, it’s summery, and it’s exactly the kind of handmade treasure that belongs on a shelf, in a gift bag, or in the arms of someone who needs a little green joy in their life.
This pattern is designed for intermediate crocheters who are comfortable working in the round and have made at least one amigurumi before. If you’ve crocheted a magic ring, worked a magic ring increase round, and attached safety eyes, you’re ready for this project. The frog comes together in a single weekend and uses minimal materials — a small amount of green, black, white, and pink yarn is all you need.
Whether you’re making it as a summer gift, a nursery decoration, or just a fun stash-buster weekend project, this cheerful little frog is guaranteed to delight.
|
Difficulty
Intermediate
|
Time
4–6 Hours
|
Hook Size
3.5 mm (E/4)
|
Yarn Weight
DK (#3)
|
Finished Size
~12 cm tall
|
Gauge
Gauge: 18 sc × 20 rows = 10 cm × 10 cm (4 in × 4 in)
Hook size used: 3.5 mm (E/4)
Yarn weight used: DK weight (#3)
Gauge is important in amigurumi for achieving a firm, tight fabric that doesn’t show stuffing through the stitches. Work a gauge swatch before starting and adjust your hook size up or down as needed to match.
Materials List
- Yarn A (Green): DK weight, medium green — approx. 80 g / 175 m
- Yarn B (Pink/Blush): DK weight, dusty rose or blush pink — approx. 10 g / 22 m
- Yarn C (White): DK weight, white — approx. 10 g / 22 m
- Yarn D (Black): DK weight or fingering, black — approx. 5 g / 15 m (also used for embroidering the smile)
- Crochet hook: 3.5 mm (E/4)
- Safety eyes: Two 18 mm black safety eyes
- Polyester fiberfill stuffing: Approx. 50–70 g
- Yarn needle: For sewing and weaving in ends
- Stitch markers: 2–3
- Scissors
Abbreviations
| Abbreviation | Meaning |
|---|---|
| MR | Magic Ring — pull a loop of yarn into a circle, work stitches into the center, then pull the tail to close |
| sc | Single crochet |
| inc | Increase — 2 sc worked into the same stitch |
| dec | Invisible decrease — insert hook under front loops only of the next 2 stitches simultaneously, yarn over and pull through both, yarn over and pull through 2 loops |
| sl st | Slip stitch |
| ch | Chain |
| BLO | Back loop only — insert hook into the back loop of the stitch only; creates a visible ridge on the fabric |
| FLO | Front loop only — insert hook into the front loop of the stitch only |
| rnd | Round |
| st(s) | Stitch(es) |
| rep | Repeat |
| sk | Skip |
Pattern Instructions
PART 1: BODY (worked in green yarn, from top down)
The body is the largest piece and forms the dome of the frog’s head and torso as a single continuous sphere.
Rnd 1: MR, 6 sc into ring, pull ring closed. (6)
Rnd 2: Inc in each st around. (12)
Rnd 3: Sc 1, inc rep 6 times. (18)
Rnd 4: Sc 2, inc rep 6 times. (24)
Rnd 5: Sc 3, inc rep 6 times. (30)
Rnd 6: Sc 4, inc rep 6 times. (36)
Rnd 7: Sc 5, inc rep 6 times. (42)
Rnd 8: Sc 6, inc rep 6 times. (48)
Rnd 9: Sc 7, inc rep 6 times. (54)
Rnd 10: Sc 8, inc rep 6 times. (60)
Rnds 11–20: Sc in each st around. (60) [10 rounds even]
Rnd 21: Sc 8, dec rep 6 times. (54)
Rnd 22: Sc 7, dec rep 6 times. (48)
Rnd 23: Sc 6, dec rep 6 times. (42)
Attach safety eyes now, between Rnds 8–10, approximately 10 stitches apart. The eye placement before closing the body is essential — once the opening is too small, attaching them becomes very difficult.
Rnd 24: Sc 5, dec rep 6 times. (36)
Begin stuffing firmly with fiberfill. Continue stuffing as you decrease.
Rnd 25: Sc 4, dec rep 6 times. (30)
Rnd 26: Sc 3, dec rep 6 times. (24)
Rnd 27: Sc 2, dec rep 6 times. (18)
Rnd 28: Sc 1, dec rep 6 times. (12)
Rnd 29: Dec 6 times. (6)
Fasten off, leaving a 15 cm tail. Thread tail through a yarn needle, weave through the front loop of each remaining stitch, and pull tight to close. Weave in end.
PART 2: EYE RINGS (worked in white yarn, make 2)
These white circles are sewn around the base of each safety eye to give the classic cartoon frog look.
Rnd 1: MR, 6 sc into ring. (6)
Rnd 2: Inc in each st around. (12)
Rnd 3: Sc 1, inc rep 6 times. (18)
Rnd 4: Sc in each st around. (18)
Sl st to join. Fasten off, leaving a 25 cm sewing tail. The eye ring will be positioned over each safety eye and sewn down around the outer edge.
PART 3: BLUSH CHEEKS (worked in pink/blush yarn, make 2)
Rnd 1: MR, 6 sc into ring. (6)
Rnd 2: Inc in each st around. (12)
Sl st to join. Fasten off, leaving a 20 cm sewing tail.
PART 4: FROG LEG RUFFLE (worked in green yarn)
This ruffle is worked directly onto the body along the bottom edge after the body is complete, creating the splayed frog leg skirt. You will work into the BLO of the final round (Rnd 29 closing stitches are gone — instead, work back into the visible round just above where you closed).
Tip: To find the correct round to ruffle, look for the last complete, even round on the underside of the body — this is typically Rnd 27 or the visible base edge. Using a stitch marker, mark the bottom center-front stitch.
With green yarn, join with sl st to any st along the base round.
Rnd 1 (Ruffle Setup): Working in FLO only around the base edge, sc in each st around. (24–30 sts depending on base round chosen)
FLO = front loop only — insert the hook into the front-facing loop of the stitch; this leaves the back loop free and creates a distinct ridge.
Rnd 2: Sc 1, inc rep around. (approx. 36–45)
Rnd 3: Sc 2, inc rep around. (approx. 48–60)
Rnd 4: Ch 1, working in FLO, sc in each st around. Do not join; fasten off and weave in ends. (same count as Rnd 3)
The ruffle will naturally flare outward to mimic a ring of frog legs.
Assembly Steps
- Position and sew eye rings: Center each white eye ring disk over the installed safety eye. The ring should sit flush against the body. Using the sewing tail and a yarn needle, whip stitch around the outer edge of each white disk, attaching it to the body surface all the way around. Pull snugly so no gap shows between disk and body. Tie off and weave in ends.
- Position blush cheeks: Place the two pink cheek ovals on the front face of the frog, approximately 1.5 cm below and 2 cm to either side of the center point between the eyes. The cheeks should sit at a slight diagonal angle, mirroring each other. Pin in place before sewing. Whip stitch all the way around each cheek using the sewing tail. Weave in ends.
- Embroider the smile: Thread a yarn needle with a 30 cm length of black yarn (or use embroidery floss for a finer line). Beginning at the center-front of the face, approximately 1 cm below the cheeks, embroider a small curved U-shape smile using 2–3 satin stitches for width. The smile should span approximately 1.5–2 cm across. Do not pull too tightly — keep the curve gentle and soft. Tie off on the inside and weave in ends.
- Finish the ruffle: If the ruffle has any gaps or uneven sections, use a yarn needle threaded with green yarn to tack down individual stitches so the ruffle fans evenly in all directions. The completed ruffle should extend approximately 2–3 cm outward from the body base.
- Final check: Stand the frog upright. The ruffle should allow it to balance on a flat surface. If it tips forward, lightly re-stuff the lower back portion through the closing hole using a pencil or blunt tool, then use a few ladder stitches to re-close.
Beginner & Intermediate Tips
- Magic ring tension: When working the MR, hold the ring firmly with your index finger and thumb while completing the first round. Pull the tail slowly and evenly to close without distorting the center.
- Invisible decrease: The dec abbreviation in this pattern refers specifically to the invisible decrease. Insert your hook into the front loop only of the next stitch, then the front loop only of the stitch after that, and complete the decrease as one sc. This method avoids the visible gap left by a standard sc2tog and is essential for clean amigurumi work.
- Safety eye placement before closing: This is the most common amigurumi mistake. Always attach safety eyes while the opening is still wide enough for your fingers. Once Rnd 24 is reached, access becomes very difficult. If you miss this window, use needle-felted eyes or embroidered circles instead.
- Stuffing density: This frog is meant to be very firmly stuffed to hold its dome shape. Add fiberfill gradually from Rnd 25 onward. When complete, the body should not compress more than 2–3 mm under thumb pressure.
- Ruffle tension: Keep your tension slightly looser than usual when working the ruffle rounds. A tight ruffle will curl inward rather than flare outward.
Variations
- Pastel Spring Frog: Work the body in mint or lilac instead of green for a fantasy-colored frog. Pair with lemon yellow cheeks for a springtime palette.
- Tiny Keychain Frog: Use fingering weight yarn and a 1.75 mm hook to create a miniature version approximately 4 cm tall. Attach a swivel key ring through the top of the head before closing.
- Toad Version: Work the body in warm brown or olive yarn and add small bumps by working French knots in scattered positions across the upper body after assembly.
- Standing Frog with Legs: Instead of the ruffle, crochet four individual legs (two longer back legs and two shorter front legs) in green yarn and attach them to the sides and base of the body to create a standing or sitting pose.
- Seasonal Dress Frog: Leave the ruffle as is but add a tiny crocheted accessory — a bow in red yarn for Christmas, a sunflower in yellow and brown for summer, or a tiny crown in gold for a fairy-tale frog prince.
If this little frog made you smile as much as it makes us smile, save this pattern to your Pinterest boards so you can come back to it whenever you need a quick, cheerful make. Share your finished frog with us using #FoodieRippleCrochet — we absolutely love seeing your creations!


