The Best Fluffy Pancakes recipe you will fall in love with. Full of tips and tricks to help you make the best pancakes.
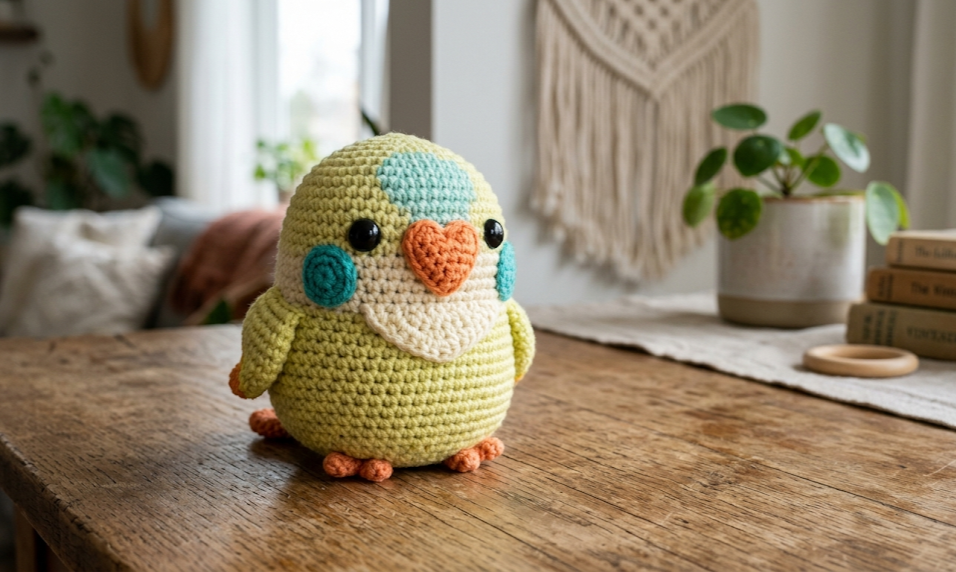
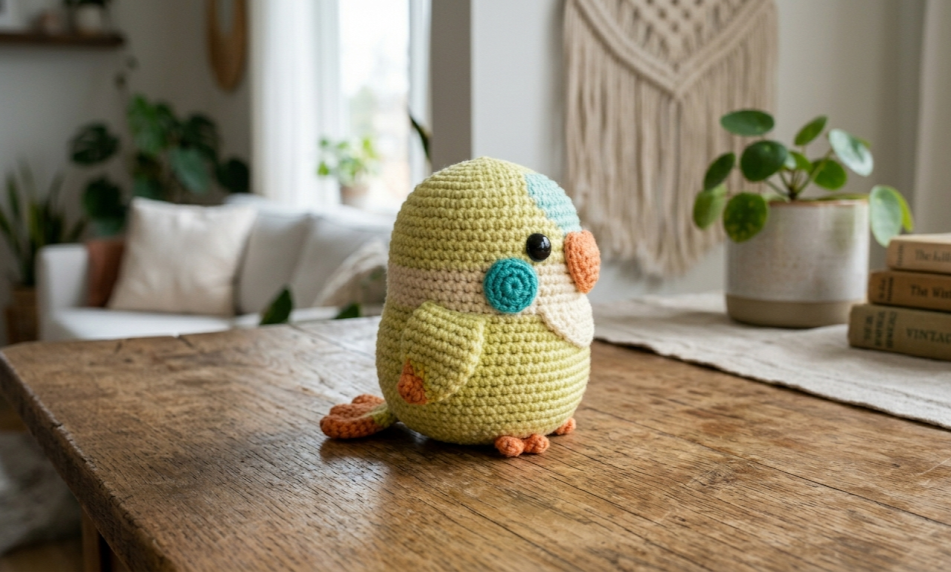
There is something irresistibly cheerful about a round, pudgy crocheted bird sitting in the palm of your hand. This crochet lovebird amigurumi captures everything that makes the genre so addictive — a satisfying spherical shape worked in the round, punchy color contrasts, and a heart-shaped beak that tips the cuteness scale completely over the edge. Worked in pale yellow-green with teal cheek patches and a bright orange heart beak, this little bird has all the warmth of a summer afternoon tucked into about 10 centimeters of yarn.
Whether you’re looking for a quick weekend project, a handmade gift for a bird lover, a keepsake for a baby nursery, or simply an excuse to use up those small yarn scraps sitting in your craft bin, this pattern delivers. It’s approachable for intermediate crocheters and satisfying enough to make in multiples — one for every color of the rainbow.
|
Difficulty
Intermediate
|
Time
3–5 Hours
|
Hook Size
3.5 mm
|
Yarn Weight
DK
|
Finished Size
~10 cm
|
Gauge
10 sc × 11 rows = 10 cm × 10 cm worked in single crochet in the round, using a 3.5 mm hook and DK weight yarn.
Gauge matters here because the amigurumi is stuffed and the stitch tension determines the final size and how tightly the polyfill is contained. If your gauge swatch is larger than specified, go down half a hook size. If it’s smaller, go up half a size. Always complete a 15-stitch-wide, 15-round swatch in the round and measure the center 10 cm before beginning.
Materials List
- Main Color (MC): Pale yellow-green DK weight yarn — approximately 40 g / 85 m
- Color A: Teal DK weight yarn — approximately 8 g / 17 m (cheek patches)
- Color B: Orange DK weight yarn — approximately 3 g / 6 m (beak)
- 3.5 mm crochet hook
- Two 12 mm black safety eyes
- Polyfill stuffing — approximately 15–20 g
- Yarn needle
- Scissors
- Stitch marker
Optional: A small amount of black embroidery floss for extra eye detailing or eyelash accents.
Abbreviations
| Abbreviation | Meaning |
|---|---|
| MC | Main color |
| A | Color A (teal) |
| B | Color B (orange) |
| ch | Chain |
| sl st | Slip stitch |
| sc | Single crochet |
| inc | Increase — 2 sc worked into the same stitch |
| dec | Invisible decrease — insert hook through front loops only of next 2 stitches simultaneously, yarn over, pull through both front loops, yarn over, pull through both loops on hook |
| MR | Magic ring — an adjustable loop used to start rounds with zero center hole |
| BLO | Back loop only — insert hook through only the back loop of the stitch |
| FO | Fasten off |
| rnd | Round |
| st(s) | Stitch(es) |
Technique notes:
- Magic ring (MR): Make a loop with yarn, insert hook, pull up a loop, chain 1 (does not count as a stitch), then work the specified number of sc into the loop. Pull the tail end to close the center hole.
- Invisible decrease (dec): Rather than inserting through both loops of two stitches separately, this method picks up only the front loops of the next two stitches together. This eliminates the visible “V gap” that a standard decrease leaves and keeps the fabric smooth — essential for tight amigurumi surfaces.
- Working in continuous rounds: Do not join rounds with a slip stitch unless stated. Use a stitch marker to track the start of each round, moving it up as work progresses.
Pattern Instructions
PART 1: BODY (worked in MC)
The body is a single sphere shaped by increases and decreases. The safety eyes are inserted before closing.
Rnd 1: MR, 6 sc into ring. Pull ring closed. (6)
Rnd 2: Inc in each st around. (12)
Rnd 3: [Sc 1, inc] × 6. (18)
Rnd 4: [Sc 2, inc] × 6. (24)
Rnd 5: [Sc 3, inc] × 6. (30)
Rnd 6: [Sc 4, inc] × 6. (36)
Rnd 7: [Sc 5, inc] × 6. (42)
Rnd 8: [Sc 6, inc] × 6. (48)
Rnds 9–16: Sc in each st around. (48) — 8 rounds even
Rnd 17: [Sc 6, dec] × 6. (42)
Rnd 18: [Sc 5, dec] × 6. (36)
→ Insert safety eyes now. Position them between Rnds 12–13, approximately 8 stitches apart (about 4 stitches to the left and right of center front). Secure backings firmly on the inside.
Rnd 19: [Sc 4, dec] × 6. (30)
Rnd 20: [Sc 3, dec] × 6. (24)
→ Begin stuffing now. Fill firmly with polyfill. The body should feel taut but not distorted — add stuffing incrementally through the remaining rounds.
Rnd 21: [Sc 2, dec] × 6. (18)
Rnd 22: [Sc 1, dec] × 6. (12)
Rnd 23: Dec × 6. (6)
FO, leaving a 15 cm tail. Thread tail through yarn needle. Insert needle through the front loop of each remaining 6 stitches in sequence, pull tight to close the hole, and weave in securely on the inside.
PART 2: CHEEK PATCHES (make 2, worked in Color A — teal)
Each cheek is a small flat circle.
Rnd 1: MR, 6 sc. Pull ring closed. (6)
Rnd 2: Inc in each st around. (12)
Rnd 3: [Sc 1, inc] × 6. (18)
FO, leaving a 20 cm sewing tail. Do not stuff. The circle should lie flat and measure approximately 3.5 cm across.
PART 3: HEART BEAK (worked in Color B — orange)
The beak is a small heart worked as two joined bumps.
First bump:
Rnd 1: MR, 6 sc. (6)
Rnd 2: Inc in each st around. (12)
Sl st to close round. Do not FO. Set aside.
Second bump:
Repeat First bump, but do NOT fasten off after the sl st.
Joining round: Hold both bumps side by side, flat. Insert hook into next available stitch on Second bump, sc across 6 stitches of Second bump, then sc across 6 stitches of First bump, joining them into a single heart outline. (12)
Sl st to join. FO, leaving a 20 cm sewing tail. Lightly press flat with fingers — do not stuff. The heart shape should measure approximately 2.5 cm wide × 2 cm tall.
Assembly Steps
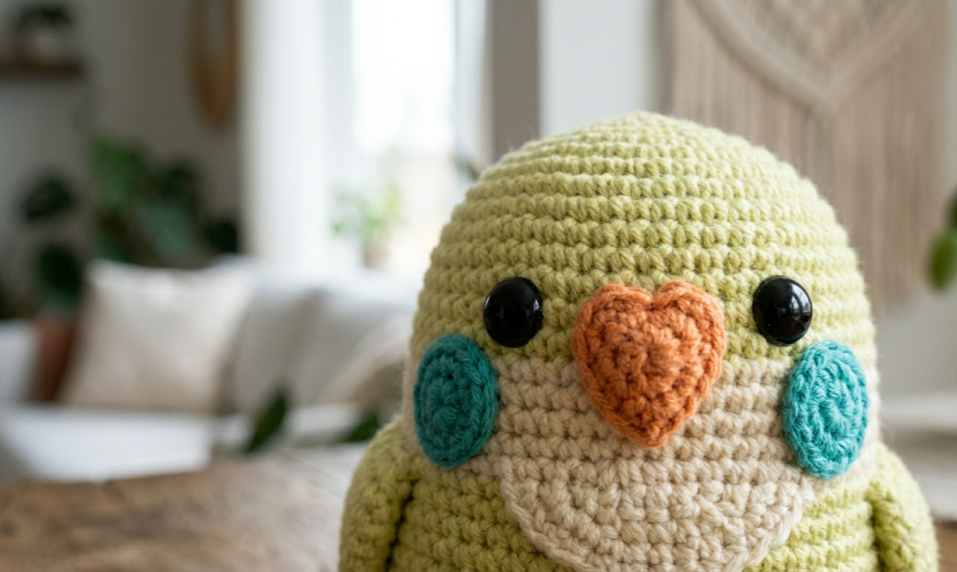
Assembly order matters: attach cheeks first so they frame the eyes correctly, then center the beak below.
- Position the cheek patches. Place one teal circle on each side of the face, centered directly beside each safety eye. The inner edge of each cheek should nearly touch the outer edge of the safety eye washer (approximately 0.5 cm clearance). Pin in place before sewing.
- Sew cheek patches. Using the sewing tail and yarn needle, whipstitch around the full perimeter of each cheek circle, catching the body stitches underneath. Pull thread through to the inside and knot securely. Weave in ends through the body interior — at least 3 cm of weaving to secure.
- Position the heart beak. Center the beak on the face, approximately 1–1.5 cm below the midpoint between the two safety eyes. The top arch of the heart should face upward. The beak will sit directly below center.
- Sew the beak. Using the sewing tail, whipstitch around the full perimeter of the heart shape. Pull tight so the beak sits slightly raised from the surface (giving it a 3D puffy effect). Knot and weave in through the body interior at least 3 cm.
- Final check. With all pieces attached, the finished bird should measure approximately 9–11 cm in height and 9–10 cm in width at the widest point of the body sphere. Adjust stuffing firmness if needed through the last closed stitches using a yarn needle to redistribute.
Beginner & Intermediate Tips
Getting a smooth sphere: The key to amigurumi sphere shaping is consistent tension. Work your increases and decreases with moderate tightness — too loose and gaps form; too tight and the hook becomes difficult to insert cleanly.
Safety eye placement: Place safety eyes before closing the sphere past Rnd 18. Once the opening is too small, positioning becomes guesswork. A good rule: lay the body flat after Rnd 16 and mark the eye positions with pins before committing.
Invisible decrease technique: This is non-negotiable for this project. A standard decrease on a pale, thin yarn will show gaps. Practice the invisible decrease on a small swatch until it feels natural before working the closing rounds of the body.
Stuffing incrementally: Don’t wait until Rnd 22 to stuff. Add polyfill steadily from Rnd 20 onward. This ensures even distribution and prevents the sphere from collapsing into a lopsided shape on one side.
Heart beak shaping: If the two bumps don’t naturally form a heart after joining, use your fingers to gently press the top center inward (the cleft of the heart) before sewing. A light finger press is all that’s needed.
Cheek patch tension: When whipstitching the cheeks, keep your tension even and work into every stitch around the perimeter. Uneven sewing tension causes the circle to pucker and lift off the surface instead of lying flat and smooth.
Variations
- Rainbow Flock: Make five birds in different body colors — coral, lavender, sky blue, mint, and pale peach — keeping the teal cheeks and orange beak consistent across all of them. Display as a group on a shelf for a cheerful summer vignette.
- Keychain Bird: Work the body pattern through Rnd 6 only (36 stitches), then begin the decrease sequence immediately. Close at Rnd 14. Attach a lobster clasp ring through a chain loop at the top for a chunky, adorable bag charm.
- Seasonal Color Swaps: For autumn, use burnt orange as the MC, dark brown cheeks, and a yellow beak. For winter, use white MC, silver-grey cheeks, and a red heart beak to suggest a robin. For spring, use soft pink MC with sage green cheeks.
- Cockatiel Version: Work the body in white or grey MC. Add a small crocheted triangular crest by chaining 8, sc back down to base, and sewing to the top of the head. Use yellow for cheeks instead of teal and replace the heart beak with a small oval worked in light grey.
Ready to Make Your Own?
This chubby little lovebird is the kind of project that makes you want to clear the afternoon and just crochet. Save this pattern to your Pinterest boards so you can come back to it anytime — and tag your finished birds with #FoodieRippleCrochet so the whole community can admire your flock!


