The Best Fluffy Pancakes recipe you will fall in love with. Full of tips and tricks to help you make the best pancakes.
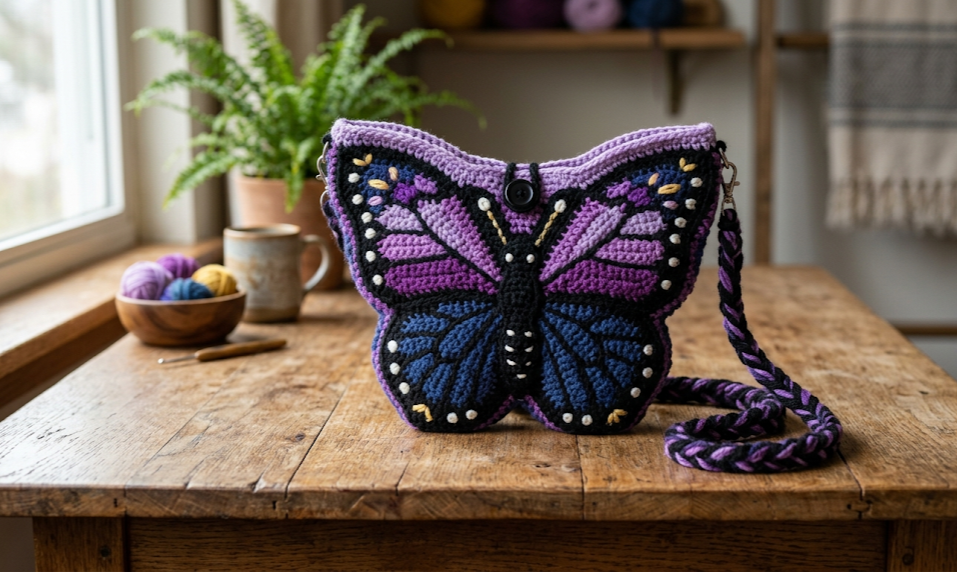
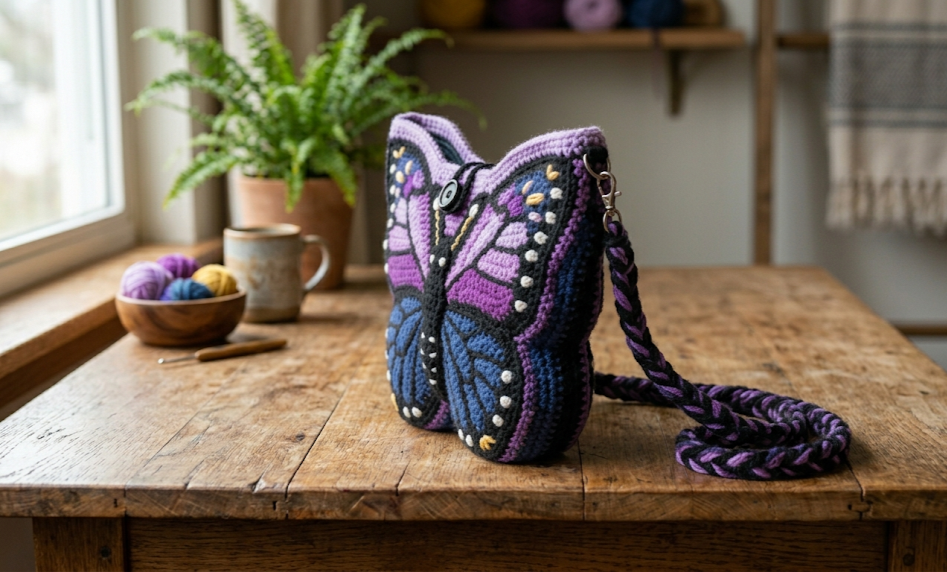
There is something undeniably magical about carrying a bag that looks like it just landed from a summer garden. This crochet butterfly bag is a flat, structured purse shaped entirely like a butterfly in full wingspan — complete with upper and lower wings, bold color-block sections in purple, lavender, and dark blue outlined in jet black, and tiny white bobble dots that mimic the real markings of a morpho or swallowtail. The finished piece sits comfortably in one hand, measures approximately 32 cm (12.5 in) wide and 22 cm (8.5 in) tall, and closes with a zip or button at the body center. It is the kind of accessory that stops conversations at farmers markets, craft fairs, and summer festivals alike.
This pattern is written for intermediate crocheters. If you have worked color changes, flat shaping, and basic seaming before, you have everything you need. The bag is worked in flat panels that are seamed together and lined with a simple fabric insert for structure. Every stitch count is provided, and every non-obvious technique is explained the first time it appears.
|
Difficulty
Intermediate
|
Time
6–9 Hours
|
Hook Size
4.0 mm
|
Yarn Weight
Worsted
|
Finished Size
32 × 22 cm
|
Gauge
18 sc × 20 rows = 10 cm (4 in) square
Hook: 4.0 mm (US G/6)
Yarn weight: Worsted (Category 4)
Always work a gauge swatch before beginning. An incorrect gauge will change the finished size of each wing panel and affect how the assembled bag lies flat. Block your swatch under a damp cloth and measure after it dries.
Materials
- Color A — Black: 150 g / approx. 275 m worsted weight yarn
- Color B — Deep Purple: 60 g / approx. 110 m worsted weight yarn
- Color C — Lavender: 50 g / approx. 90 m worsted weight yarn
- Color D — Dark Navy Blue: 60 g / approx. 110 m worsted weight yarn
- Color E — White or Cream: 15 g / approx. 30 m worsted weight yarn (for dot accents)
- 4.0 mm (US G/6) crochet hook
- Yarn needle for weaving ends
- Stitch markers (at least 6)
- 25 cm (10 in) zipper OR 2 large buttons + yarn for button loops
- Lining fabric: 35 × 25 cm (14 × 10 in) piece of cotton or felt
- Sewing needle and thread to match lining
- Scissors
- Optional: 2 mm wire for wing stiffening (floral or craft wire, 60 cm length)
- Optional: thin fusible interfacing for added structure
Abbreviations
| Abbreviation | Meaning |
|---|---|
| ch | chain |
| sl st | slip stitch |
| sc | single crochet |
| hdc | half double crochet |
| dc | double crochet |
| inc | increase — work 2 sc in same stitch |
| dec | decrease — invisible decrease: insert hook in front loop of next st, then front loop of following st, yarn over and pull through both loops, yarn over and pull through remaining 2 loops |
| BLO | back loop only — insert hook under only the back loop of a stitch |
| FLO | front loop only — insert hook under only the front loop of a stitch |
| sk | skip |
| rep | repeat |
| pm | place marker |
| RS | right side |
| WS | wrong side |
| st(s) | stitch(es) |
| ( ) | stitch count at end of row/round |
Invisible decrease: Rather than the standard sc2tog, the invisible decrease uses only the front loops of two consecutive stitches, which closes more neatly and hides the decrease line. This is used throughout the wing shaping.
BLO: Working into the back loop only creates a ridge line on the right side, used here for color-block definition between wing sections.
Pattern Instructions
The butterfly bag is made of four wing panels (upper right, upper left, lower right, lower left), a small body center piece, and optional wire channels. All panels are worked flat in rows.
PART 1: UPPER RIGHT WING
Foundation: With Color A (Black), ch 32.
Row 1 (WS): sc in 2nd ch from hook, sc across. (31 sc)
Row 2 (RS): ch 1, turn. inc in first st, sc to last st, inc. (33 sc)
Row 3: ch 1, turn. sc across. (33 sc)
Row 4: ch 1, turn. inc in first st, sc to last st, inc. (35 sc)
Row 5: ch 1, turn. sc across. (35 sc)
Row 6: ch 1, turn. inc, sc 16, pm, sc 16, inc. (37 sc)
Row 7: ch 1, turn. sc across. (37 sc)
Row 8: ch 1, turn. inc, sc across to last st, inc. (39 sc)
Change to Color B (Deep Purple) at end of Row 8. To change color: work last stitch of row until final yarn over, drop current yarn, draw new yarn through to complete the stitch. Carry old yarn loosely along edge or cut and weave.
Row 9 (Color B): ch 1, turn. BLO sc across. (39 sc)
Row 10: ch 1, turn. sc across. (39 sc)
Row 11: ch 1, turn. dec, sc to last 2 sts, dec. (37 sc)
Row 12: ch 1, turn. sc across. (37 sc)
Row 13: ch 1, turn. dec, sc to last 2 sts, dec. (35 sc)
Change to Color C (Lavender) at end of Row 13.
Row 14 (Color C): ch 1, turn. BLO sc across. (35 sc)
Row 15: ch 1, turn. sc across. (35 sc)
Row 16: ch 1, turn. dec, sc to last 2 sts, dec. (33 sc)
Row 17: ch 1, turn. sc across. (33 sc)
Row 18: ch 1, turn. dec, sc to last 2 sts, dec. (31 sc)
Row 19: ch 1, turn. sc across. (31 sc)
Row 20: ch 1, turn. dec, sc to last 2 sts, dec. (29 sc)
Change to Color A (Black) at end of Row 20.
Row 21 (Color A): ch 1, turn. BLO sc across. (29 sc)
Row 22: ch 1, turn. dec, sc across to last 2 sts, dec. (27 sc)
Row 23: ch 1, turn. dec, sc across to last 2 sts, dec. (25 sc)
Row 24: ch 1, turn. sc across. (25 sc)
Row 25: ch 1, turn. dec, sc to last 2 sts, dec. (23 sc)
Row 26: ch 1, turn. dec across to last 2 sts, dec. (21 sc)
Fasten off, leave a 30 cm tail for seaming.
PART 2: UPPER LEFT WING
Work as Upper Right Wing, mirroring all increases and decreases (increase at end of rows where right wing increased at beginning, and vice versa). Use the same color sequence (A → B → C → A). Fasten off.
PART 3: LOWER RIGHT WING
Lower wings are shorter and rounder than upper wings.
With Color A (Black), ch 24.
Row 1 (WS): sc in 2nd ch from hook, sc across. (23 sc)
Row 2: ch 1, turn. inc, sc to last st, inc. (25 sc)
Row 3: ch 1, turn. sc across. (25 sc)
Row 4: ch 1, turn. inc, sc to last st, inc. (27 sc)
Row 5: ch 1, turn. sc across. (27 sc)
Change to Color D (Dark Navy Blue) at end of Row 5.
Row 6 (Color D): ch 1, turn. BLO sc across. (27 sc)
Row 7: ch 1, turn. sc across. (27 sc)
Row 8: ch 1, turn. dec, sc to last 2 sts, dec. (25 sc)
Row 9: ch 1, turn. sc across. (25 sc)
Row 10: ch 1, turn. dec, sc to last 2 sts, dec. (23 sc)
Change to Color C (Lavender) at end of Row 10.
Row 11 (Color C): ch 1, turn. BLO sc across. (23 sc)
Row 12: ch 1, turn. dec, sc to last 2 sts, dec. (21 sc)
Row 13: ch 1, turn. dec, sc to last 2 sts, dec. (19 sc)
Change to Color A (Black) at end of Row 13.
Row 14 (Color A): ch 1, turn. BLO sc across. (19 sc)
Row 15: ch 1, turn. dec, sc to last 2 sts, dec. (17 sc)
Row 16: ch 1, turn. dec, sc to last 2 sts, dec. (15 sc)
Row 17: ch 1, turn. dec, sc to last 2 sts, dec. (13 sc)
Fasten off, leave a 30 cm tail for seaming.
PART 4: LOWER LEFT WING
Work as Lower Right Wing in mirror. Fasten off.
PART 5: BODY CENTER
With Color A (Black), ch 7.
Row 1: sc in 2nd ch from hook, sc across. (6 sc)
Rows 2–20: ch 1, turn. sc across. (6 sc)
Fasten off after Row 20. This strip forms the central body of the butterfly and the bag opening.
PART 6: WHITE DOT ACCENTS (make 8–10)
With Color E (White), magic ring. A magic ring is an adjustable starting loop: wrap yarn around two fingers, insert hook through the loop, draw up a loop of working yarn, ch 1, then work stitches into the center of the ring. Pull the tail to close the hole before slip-stitching to join.
Round 1: ch 1, work 6 sc into magic ring, pull ring closed, sl st to first sc to join. (6 sc)
Round 2: ch 1, 2 sc in each st around, sl st to join. (12 sc)
Fasten off, leave a 15 cm tail for sewing. These are small flat circles placed at intervals on the wings.

Assembly Steps
- Block all panels under a damp towel. Pin each wing to finished measurements (upper wings approx. 18 cm / 7 in tall; lower wings approx. 13 cm / 5 in tall). Allow to dry completely before assembly.
- Pair front and back panels. For a structured bag, cut a second set of four wing panels from lining fabric, trimming each 0.5 cm (¼ in) smaller on all edges.
- Optional wire stiffening: Cut craft wire into four pieces, each approximately 15 cm (6 in). Fold a small loop at each end to prevent poking. Lay one wire along the outer curved edge of each upper wing crochet panel before joining front and back panels. The wire should sit 1 cm inside the outer edge.
- Join front and back: Hold one crochet front panel and matching crochet back panel with wrong sides together. Using Color A and a 4.0 mm hook, sc through both layers around the entire outer edge, working 3 sc in each corner point to keep the shape flat. Leave the straight inner edge (where it will attach to the body center) unjoined. Repeat for all four wings. (Each wing outer seam: approx. 55–60 sc around.)
- Attach white dot circles: Using a yarn needle and Color E tails, sew 2–3 white dot circles onto each upper wing (spaced approx. 3 cm / 1.2 in apart) and 1 on each lower wing. Weave all tails to the wrong side.
- Sew lining: Fold lining fabric into a pouch shape the same width and height as the combined body opening (approx. 6 cm wide × 20 cm tall). Sew side seams with thread, leaving the top open. Insert lining inside the body strip panel with wrong sides together and whip-stitch around the top edge.
- Assemble wings to body: Align the straight inner edges of both upper wings at the top of the body center strip, right sides facing out. Pin and sc the upper wings to the top 10 cm (4 in) of the body strip on each side. Repeat with lower wings, attaching them to the lower 10 cm (4 in) of the body strip on each side.
- Install closure: For a zipper: hand-stitch a 25 cm zipper along the open top edge of the body strip, between the upper wing attachment points. For buttons: sew 2 buttons on one side of the body strip opening; crochet 2 button loops (ch 8, sl st to form a loop) and sew them to the opposite side, spacing them 5 cm (2 in) apart.
- Finishing: Weave in all remaining ends. If desired, add a short strap by chaining 80 in Color A and sc back along the chain, attaching each end to the inner edge of the body strip with a secure knot and tail weave.
Beginner/Intermediate Tips
- Color changes on flat rows: Always change color on the last yarn-over of the final stitch in a row. This ensures the new color appears cleanly at the beginning of the next row.
- BLO ridge lines: Work the BLO row slowly — it is easy to accidentally split the yarn and miss a loop. A well-placed stitch marker at the beginning and end of each BLO row helps you track your position.
- Keeping wings symmetrical: After completing each pair of wings, hold them back-to-back and count rows to check alignment before blocking. Small differences are easier to correct before assembly.
- Wire handling: If using craft wire, use round-nose pliers to form the end loops. Sharp wire ends can split yarn fibers and create holes in the panel over time.
- Blocking is not optional: Worsted yarn has enough memory to pull out of shape without blocking. Proper blocking makes the color-block edges crisp and the wing curves smooth.
Variations
- Monochrome Shadow: Work all four wings in a single dark color (deep burgundy, forest green, or midnight blue) without color changes. Add black BLO ridge lines using surface slip stitches after assembly for a sleek, modern look.
- Mini Coin Purse: Scale down to a hook size of 2.5 mm and fingering-weight yarn. The resulting butterfly measures about 12 cm (4.7 in) wide — perfect as a coin purse or earphone holder.
- Stained Glass Effect: Use variegated yarn in the wing fill sections with a solid contrasting border, evoking stained glass windows. Works especially beautifully in autumn tones — amber, rust, and gold.
- Wall Art Panel: Skip the lining, zipper, and body strip entirely. Mount all four wings flat on a wooden embroidery hoop or driftwood branch for a bohemian wall hanging. Add hanging cord through the body center.
If this crochet butterfly bag pattern inspired you, save it to your crochet boards on Pinterest so you can find it again whenever you are ready to make one for yourself or as a gift. Tag your finished bags with #FoodieRippleCrochet — we love seeing your colorful creations take flight.


