The Best Fluffy Pancakes recipe you will fall in love with. Full of tips and tricks to help you make the best pancakes.
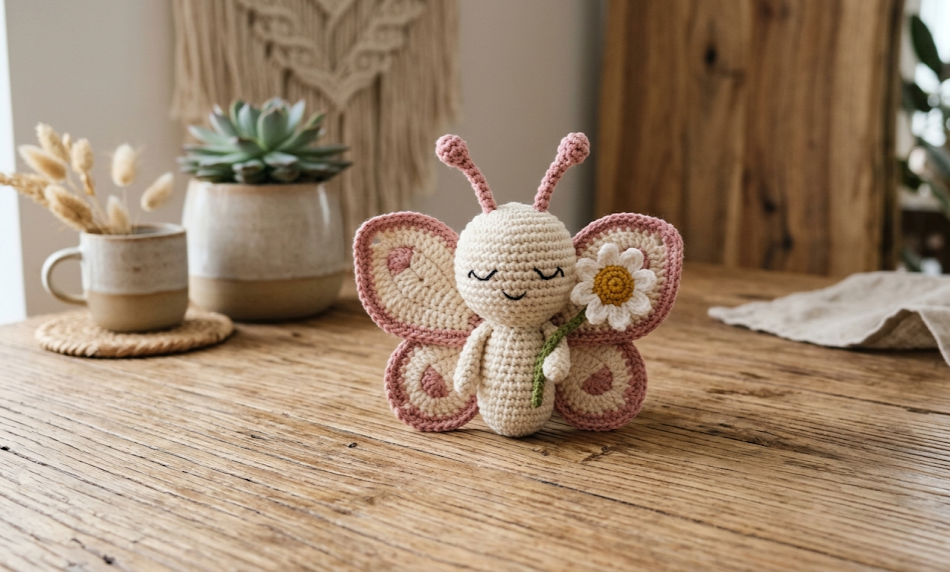
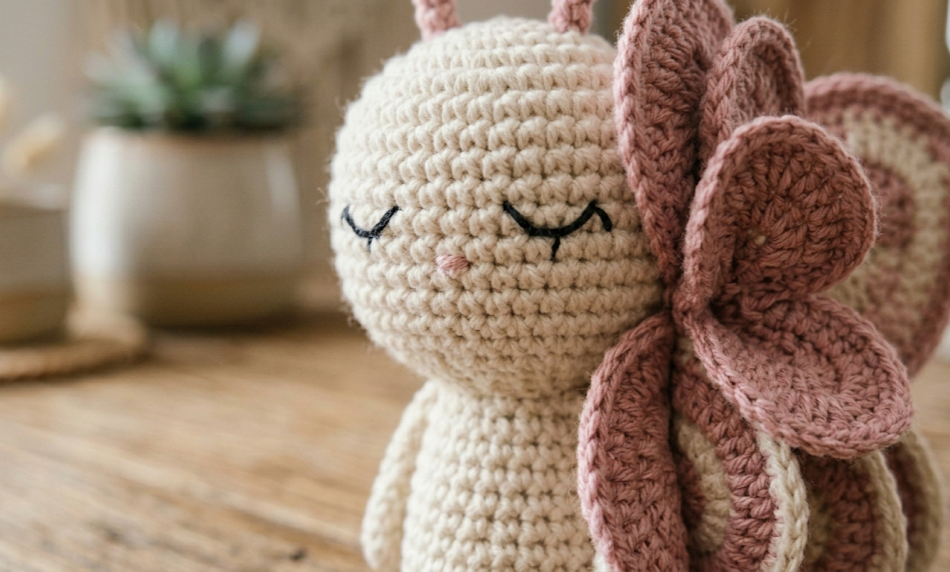
There is something irresistibly sweet about a crocheted butterfly that seems to drift right out of a garden dream. Elving the Butterfly Amigurumi is a charming, softly feminine crochet project that brings together a round sleeping-faced butterfly doll and a hand-crocheted daisy flower she holds like a tiny gift. With her layered cream wings edged in dusty rose, coiled antennae topped with little bobbles, and peaceful embroidered expression, Elving is the kind of finished piece that stops people in their tracks. She works up in fine yarn with a small hook, producing a delicate, detailed texture that makes her look almost too refined to be yarn — yet every stitch is visible and beautifully tactile.
This pattern is ideal for intermediate crocheters who are comfortable with amigurumi basics like magic rings, single crochet in the round, increases and decreases, and basic assembly. The finished butterfly stands approximately 12 cm tall from the base of her body to the tips of her antennae, and the daisy flower measures about 7 cm in diameter. She makes an exceptional gift, nursery decoration, shelf display piece, or photography prop. She can also be made larger simply by sizing up your yarn and hook.
Everything you need to complete Elving from start to finish is written right here — no external references needed.
|
Difficulty
Intermediate
|
Time
4–6 Hours
|
Hook Size
2.5 mm
|
Yarn Weight
Fingering #1
|
Finished Size
~12 cm tall
|
Gauge
26 sc × 28 rows = 10 cm × 10 cm using a 2.5 mm hook and fingering weight (#1) yarn, worked in continuous rounds in single crochet.
Before starting, crochet a small gauge swatch in the round and adjust your hook size up or down if needed. Gauge matters for achieving the correct finished proportions, especially for the head-to-body size ratio.
Materials
- Yarn A — Cream / Off-White: fingering weight (#1), approximately 40 g
- Yarn B — Dusty Rose / Mauve: fingering weight (#1), approximately 20 g
- Yarn C — Mustard Yellow / Golden: fingering weight (#1), approximately 5 g
- Crochet hook: 2.5 mm
- Safety eyes: 8 mm × 2 (black)
- Polyfill stuffing: moderate amount
- Yarn needle for assembly and embroidery
- Stitch markers (locking type recommended)
- Scissors
- Black embroidery thread or yarn for face details (eyelashes, smile)
- Wire (optional): 20 cm of floral wire for antennae stiffening
Abbreviations
| Abbreviation | Meaning |
|---|---|
| sc | single crochet |
| inc | increase — 2 sc in same stitch |
| dec | invisible decrease — insert hook in front loops only of next 2 sts, yarn over, pull through, yarn over, pull through 2 loops |
| sl st | slip stitch |
| ch | chain |
| MR | magic ring |
| BLO | back loop only |
| FLO | front loop only |
| st(s) | stitch(es) |
| rnd | round |
| rep | repeat |
| sk | skip |
| sp | space |
Pattern Instructions
PART 1: HEAD
Use Yarn A (cream). Work in continuous rounds unless otherwise stated. Place a stitch marker at the beginning of each round and move it up as you go.
Magic ring (MR): Make a loop with the tail end of yarn, insert hook, pull up a loop, chain 1 to begin — this creates an adjustable closed center for the first round of increases.
- Rnd 1: 6 sc in MR. (6)
- Rnd 2: Inc in each st around. (12)
- Rnd 3: [Sc 1, inc] × 6. (18)
- Rnd 4: [Sc 2, inc] × 6. (24)
- Rnd 5: [Sc 3, inc] × 6. (30)
- Rnd 6: [Sc 4, inc] × 6. (36)
- Rnd 7: [Sc 5, inc] × 6. (42)
- Rnd 8: [Sc 6, inc] × 6. (48)
- Rnds 9–16: Sc in each st around. (48) [8 rounds even]
- Rnd 17: [Sc 6, dec] × 6. (42)
- Rnd 18: [Sc 5, dec] × 6. (36)
At this point, insert and secure safety eyes between Rnds 11 and 12, spaced 12 sts apart. Embroider eyelashes with black thread above each eye using 3 short diagonal stitches. Embroider a small curved smile below and between the eyes using a running stitch arc.
- Rnd 19: [Sc 4, dec] × 6. (30)
- Rnd 20: [Sc 3, dec] × 6. (24)
Begin stuffing firmly. Continue stuffing as you close.
- Rnd 21: [Sc 2, dec] × 6. (18)
- Rnd 22: [Sc 1, dec] × 6. (12)
- Rnd 23: [Dec] × 6. (6)
Fasten off, leaving a long tail. Thread tail through front loops of remaining 6 sts, pull to close. Weave in.
PART 2: BODY
Use Yarn B (dusty rose). Work in continuous rounds.
- Rnd 1: 6 sc in MR. (6)
- Rnd 2: Inc in each st around. (12)
- Rnd 3: [Sc 1, inc] × 6. (18)
- Rnd 4: [Sc 2, inc] × 6. (24)
- Rnds 5–9: Sc in each st around. (24) [5 rounds even]
- Rnd 10: [Sc 2, dec] × 6. (18)
- Rnd 11: [Sc 1, dec] × 6. (12)
Stuff lightly. Do not close — leave open for joining to head.
- Rnd 12: [Dec] × 6. (6)
Fasten off with long tail for sewing.
PART 3: UPPER WINGS (make 2)
Use Yarn A (cream). These are flat, worked in rows, then shaped with a border in Yarn B.
- Ch 14.
- Row 1: Starting in 2nd ch from hook, sc 13. Ch 1, turn. (13)
- Row 2: Inc, sc 11, inc. Ch 1, turn. (15)
- Row 3: Inc, sc 13, inc. Ch 1, turn. (17)
- Rows 4–7: Sc in each st across. Ch 1, turn. (17)
- Row 8: Dec, sc 13, dec. Ch 1, turn. (15)
- Row 9: Dec, sc 11, dec. Ch 1, turn. (13)
- Row 10: Dec, sc 9, dec. (11)
Do not fasten off. Switch to Yarn B and work 1 round of sc border around entire wing piece, working 3 sc in each corner. Sl st to join. Fasten off, weave in ends. Make 2.
PART 4: LOWER WINGS (make 2)
Use Yarn A (cream). These are smaller, rounder.
- Rnd 1: 6 sc in MR. (6)
- Rnd 2: Inc in each st around. (12)
- Rnd 3: [Sc 1, inc] × 6. (18)
- Rnd 4: [Sc 2, inc] × 6. (24)
- Rnd 5: Sc in each st around. (24)
- Rnd 6: [Sc 2, dec] × 6. (18)
Sl st to join, do not stuff. Switch to Yarn B, work 1 rnd sc border. Fasten off, weave in. Make 2.

PART 5: ANTENNAE (make 2)
Use Yarn B (dusty rose). These are crocheted tubes around optional floral wire for stiffness.
- Ch 20.
- Starting in 2nd ch from hook, sl st in each ch back to start. (19 sl sts)
Working along the second side of the chain: insert your hook under both loops of each original foundation chain stitch, working back in the opposite direction — this creates a flat, two-sided cord.
Fasten off, leaving a long tail for attachment.
Bobble tips: With Yarn B, make a small pompom-style bobble:
- MR, 6 sc, sl st to close, pull yarn through to stuff lightly, gather and close. Make 2. Sew one to the tip of each antenna.
If using wire: Before crocheting the tube, fold a 10 cm piece of floral wire in half. Insert the folded wire into the finished antenna tube before sewing to head. Bend the wire to shape the antenna into a gentle curve.
PART 6: DAISY FLOWER
Center (Yarn C — mustard yellow):
- Rnd 1: 6 sc in MR. (6)
- Rnd 2: Inc in each st around. (12)
- Rnd 3: [Sc 1, inc] × 6. (18)
- Rnds 4–5: Sc in each st around. (18)
- Rnd 6: [Sc 1, dec] × 6. (12)
Stuff lightly and close (dec × 6, fasten off). This creates the raised dome center.
Petals (Yarn A — cream, make 12):
- Ch 8.
- Starting in 2nd ch from hook, sc 1, hdc 1, dc 2, hdc 1, sc 1, sl st in last ch. (7 sts + sl st)
Fasten off each petal, leaving a tail.
Assembly of flower: Arrange 12 petals around the base of the mustard dome, stitching each petal root to the underside of the dome with the tail. Pack petals tightly so they radiate outward evenly. Weave in all ends.
Stem (optional, Yarn A):
- Ch 25.
- Sl st in each ch back to start. Fasten off with tails at both ends for attaching to flower and to Elving’s hand/body.
Assembly Steps
- Attach head to body: With body opening facing up, align the top of the body piece centered beneath the head. Using the long tail from the body, sew the body securely to the base of the head using whipstitch through corresponding stitches. The head should sit directly on top with no visible gap. Total height of head + body: approximately 10 cm.
- Attach upper wings: Position one upper wing on each side of the body/head join, angling them slightly upward and backward (like a resting butterfly). The inner edge of each wing should overlap the body by approximately 1 cm. Sew through 5–6 stitches along the inner wing edge on each side.
- Attach lower wings: Position the lower wings below the upper wings on each side, angling them downward and outward. Sew in the same manner, overlapping the body by approximately 1 cm. The two wings on each side should form a paired butterfly-wing silhouette.
- Attach antennae: Insert the base of each antenna into the top of the head, approximately 1.5 cm apart and 1 cm back from center. Push each antenna base 1 cm into the stuffed head and secure with several stitches. Curve the antennae forward naturally.
- Attach or position daisy flower: The daisy is designed to be held loosely by Elving. Optionally, tack the stem to her front body with 1–2 stitches so she “holds” it, or leave it detachable as a separate prop. Stem tip should sit against her lower body at approximately the level of Rnd 5 of the body.
Beginner / Intermediate Tips
- Tension with fine yarn: Fingering weight on a 2.5 mm hook can feel tight. Relax your grip and crochet loosely enough that your hook enters each stitch without forcing. Tight tension causes distorted amigurumi.
- Invisible decrease: This technique (working through front loops only of 2 stitches) creates a much flatter, less visible decrease line than a standard sc2tog. Always use it for amigurumi when decreasing.
- Safety eyes before closing: It is much harder to insert safety eyes once the opening is too small. Insert both eyes at Rnd 18 before you decrease past Rnd 20.
- Stuffing consistently: Firm, even stuffing without lumps is key to a smooth head shape. Use the eraser end of a pencil to push small amounts of stuffing into tight areas near the closure.
- Wing shaping: If your wings curl during blocking, lightly steam block them flat before sewing on. Hold a steam iron 5 cm above the wing surface and let steam penetrate, then lay flat to cool.
- Antenna wire safety: If Elving is intended for children, omit the wire and rely solely on the crocheted cord, which will be softer and flexible.
Variations
- Monarch Butterfly Edition: Swap cream for deep orange and replace the dusty rose with black yarn. Add veined wing detail using black embroidery thread in long straight stitches. Finish with a sunflower instead of a daisy.
- Mini Elving: Use lace weight (#0) yarn and a 1.75 mm hook to create a 7 cm butterfly charm. Perfect for bag clips, gift toppers, or ornament sets.
- Seasonal Colorways: Make Elving in autumn tones — burnt sienna, harvest gold, and rust — for a fall shelf display. Or try icy lavender and white for a winter fairy butterfly with a snow crystal accessory instead of a daisy.
- Butterfly Mobile: Make five Elvings in different pastel colorways and suspend them from a driftwood branch with varying thread lengths. Group them above a crib or reading nook for a whimsical installation.
If you loved making Elving the Butterfly Amigurumi, save this pattern to your Pinterest boards so you can find it again — and share your finished butterfly with the hashtag #FoodieRippleCrochet so the community can see your beautiful work!


