The Best Fluffy Pancakes recipe you will fall in love with. Full of tips and tricks to help you make the best pancakes.
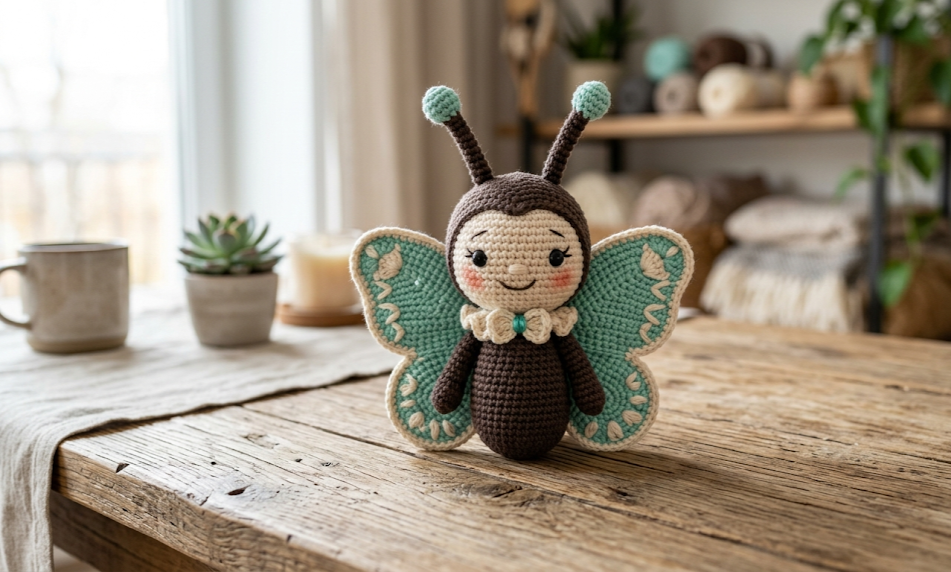
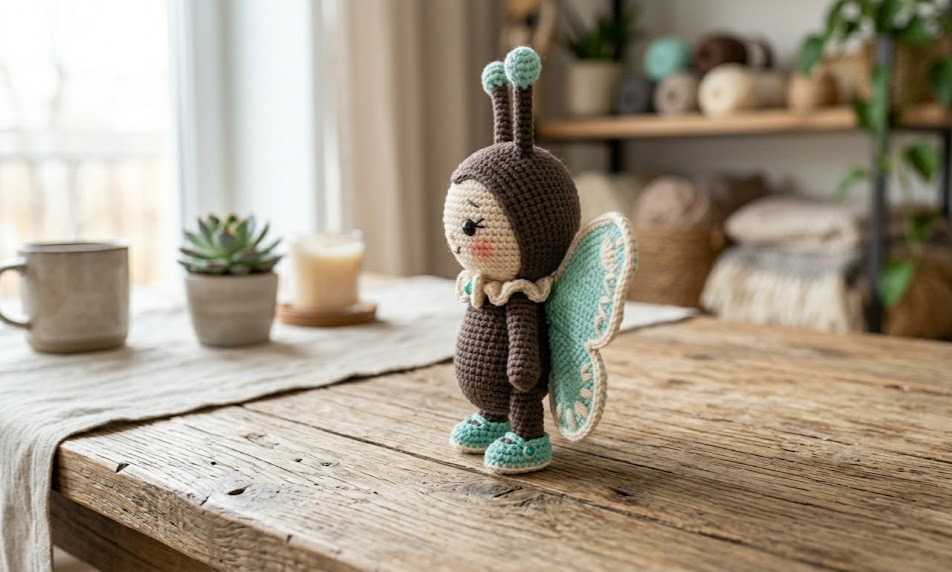
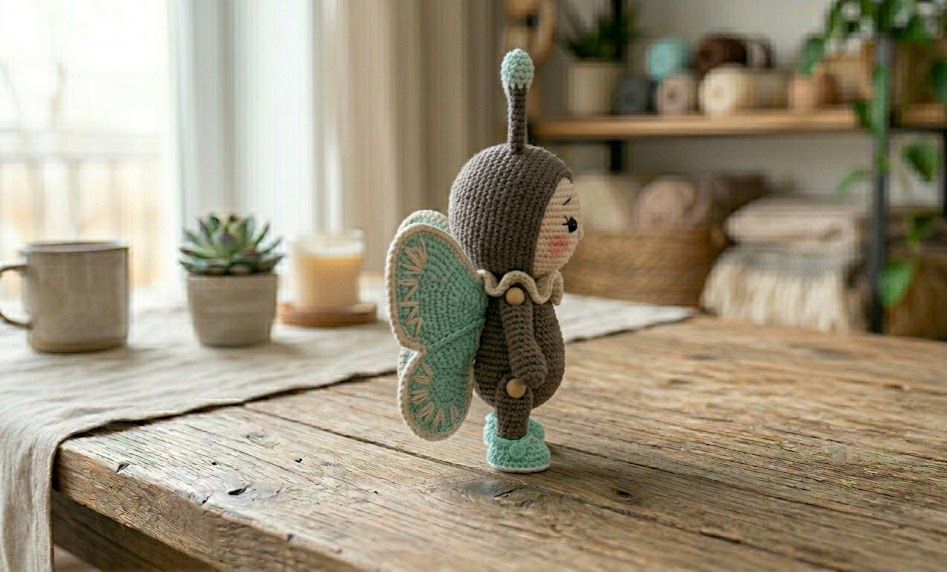
There is something truly magical about a crochet doll that looks like it stepped right out of a fairy garden. This Butterfly Doll Amigurumi is exactly that — a whimsical, detailed stuffed character dressed in a chocolate-brown bodysuit with sweeping mint-teal wings, a delicate cream collar and bow, and little teal ankle boots that finish her look with charm. Standing approximately 25 cm (10 inches) tall, she is the perfect size to sit on a shelf, be gifted to a child, or become the centerpiece of a handmade collection.
This pattern is designed for intermediate crocheters who are comfortable with basic amigurumi construction — working in continuous rounds, magic rings, and shaping with increases and decreases. The reward for the effort is enormous: a structured, poseable doll with personality in every stitch. Whether you are making her for a butterfly enthusiast, a little girl who loves whimsical toys, or simply because you want a satisfying weekend project, this butterfly doll will not disappoint.
|
Difficulty
Intermediate
|
Time
10–14 Hours
|
Hook Size
2.5 mm
|
Yarn Weight
Fingering / Sport
|
Finished Size
~25 cm / 10 in
|
Gauge
Before beginning, work a gauge swatch to ensure your finished doll matches the dimensions in this pattern.
Gauge: 26 single crochet × 28 rows = 10 cm × 10 cm (4 in × 4 in)
Hook: 2.5 mm
Yarn Weight: Fingering / Sport weight (CYCA #1–2)
Maintaining tight gauge is essential in amigurumi to prevent the stuffing from showing through the fabric. If your swatch is larger than specified, move down to a 2.25 mm hook. If it is smaller, try a 2.75 mm hook.
Materials List
- Dark Brown Yarn (Fingering/Sport weight) — approx. 120 g — for head, body, hair cap, arms, legs, and bodysuit
- Mint / Teal Yarn (Fingering/Sport weight) — approx. 60 g — for wings, shoes, and antenna tips
- Cream / Off-White Yarn (Fingering/Sport weight) — approx. 25 g — for collar, bow, and torso panel
- 2.5 mm crochet hook
- Polyester fiberfill stuffing — approx. 80–100 g
- Two 10 mm black safety eyes
- Black embroidery floss — for eyelashes and facial features
- Blush embroidery floss or felt — for cheek details (optional)
- Yarn needle for assembly
- Stitch markers — at least 4
- Scissors
Abbreviations
| Abbreviation | Meaning |
|---|---|
| ch | chain |
| sl st | slip stitch |
| sc | single crochet |
| inc | increase (2 sc in same stitch) |
| dec | invisible decrease (insert hook through front loops of next 2 sts, pull up loop, yarn over, draw through all 3 loops) |
| BLO | back loop only (work through the back loop of the stitch only) |
| FLO | front loop only (work through the front loop of the stitch only) |
| MR | magic ring (adjustable ring; pull tight after first round) |
| st(s) | stitch(es) |
| rnd | round |
| rep | repeat |
| pm | place marker |
| RS | right side |
| WS | wrong side |
Invisible decrease (dec): Insert hook through the front loops only of the next two stitches simultaneously, yarn over and pull up a loop, yarn over and draw through both loops. This creates a flatter, less visible decrease than the standard two-together method.
Magic ring (MR): Make a loop with your yarn, insert hook, pull up a working loop, chain 1, then work the required number of stitches into the ring before pulling the tail to close.
Pattern Instructions
PART 1 — HEAD (Dark Brown)
Rnd 1: MR, 6 sc into ring. (6)
Rnd 2: Inc in each st around. (12)
Rnd 3: [Sc 1, inc] × 6. (18)
Rnd 4: [Sc 2, inc] × 6. (24)
Rnd 5: [Sc 3, inc] × 6. (30)
Rnd 6: [Sc 4, inc] × 6. (36)
Rnd 7: [Sc 5, inc] × 6. (42)
Rnd 8: [Sc 6, inc] × 6. (48)
Rnds 9–16: Sc in each st around. (48) [8 rounds]
Rnd 17: [Sc 6, dec] × 6. (42)
Rnd 18: [Sc 5, dec] × 6. (36)
→ Attach safety eyes between Rnds 12–13, approximately 10 sts apart. Embroider eyelashes above each eye with 3 small straight stitches using black floss. Add blush cheeks below eyes if desired.
Rnd 19: [Sc 4, dec] × 6. (30)
Rnd 20: [Sc 3, dec] × 6. (24)
Stuff head firmly.
Rnd 21: [Sc 2, dec] × 6. (18)
Rnd 22: [Sc 1, dec] × 6. (12)
Rnd 23: Dec × 6. (6)
Close with sl st, fasten off, leave a 25 cm tail for sewing.
PART 2 — BODY (Dark Brown)
Rnd 1: MR, 6 sc. (6)
Rnd 2: Inc × 6. (12)
Rnd 3: [Sc 1, inc] × 6. (18)
Rnd 4: [Sc 2, inc] × 6. (24)
Rnd 5: [Sc 3, inc] × 6. (30)
Rnd 6: [Sc 4, inc] × 6. (36)
Rnds 7–10: Sc in each st around. (36) [4 rounds]
Rnd 11: [Sc 4, dec] × 6. (30)
Rnds 12–16: Sc in each st around. (30) [5 rounds]
Rnd 17: [Sc 3, dec] × 6. (24)
Rnds 18–19: Sc in each st around. (24) [2 rounds]
Stuff body firmly.
Rnd 20: [Sc 2, dec] × 6. (18)
Leave open for attaching head.
PART 3 — ARMS (Dark Brown, make 2)
Rnd 1: MR, 6 sc. (6)
Rnd 2: Inc × 6. (12)
Rnds 3–5: Sc in each st around. (12) [3 rounds]
Rnd 6: [Sc 1, dec] × 4. (8)
Rnds 7–18: Sc in each st around. (8) [12 rounds]
Stuff lightly (arms should be slightly floppy). Close flat with 4 sc across. Fasten off, leave 20 cm tail.
PART 4 — LEGS (Dark Brown for upper leg; Mint for shoe)
Shoe (Mint/Teal):
Rnd 1: Ch 4, sc in 2nd ch from hook, sc 1, 3 sc in last ch; working along the second side of the chain (turn work and crochet back along the underside of the starting chain), sc 1, 2 sc in first ch. (9)
Second side of chain: After reaching the end of the foundation chain, rotate your work 180° and crochet back along the underside loops of the same chain to form an oval base.
Rnd 2: Inc, sc 1, inc × 3, sc 1, inc × 2. (15)
Rnd 3: Sc 1, inc, sc 1, [sc 1, inc] × 3, sc 1, [sc 1, inc] × 2. (21)
Rnds 4–5: Sc in each st around. (21) [2 rounds]
Rnd 6: BLO sc in each st around. (21)
BLO (back loop only): Insert hook into only the back loop of each stitch. This creates a ridge that defines the sole-to-upper edge of the shoe.
Rnd 7: Sc 7, dec × 3, sc 5. (18)
Rnd 8: Sc 6, dec × 3, sc 3. (15)
Switch to Dark Brown.
Rnds 9–20: Sc in each st around. (15) [12 rounds]
Stuff firmly. Close flat with 7–8 sc across. Fasten off, leave 25 cm tail.
PART 5 — HAIR CAP (Dark Brown)
Rnd 1: MR, 6 sc. (6)
Rnd 2: Inc × 6. (12)
Rnd 3: [Sc 1, inc] × 6. (18)
Rnd 4: [Sc 2, inc] × 6. (24)
Rnd 5: [Sc 3, inc] × 6. (30)
Rnd 6: [Sc 4, inc] × 6. (36)
Rnd 7: [Sc 5, inc] × 6. (42)
Rnd 8: [Sc 6, inc] × 6. (48)
Rnds 9–13: Sc in each st around. (48) [5 rounds]
Do not stuff. Leave open at base. Fasten off, leave 30 cm tail for sewing over head.
PART 6 — ANTENNAE (Dark Brown base; Mint tip ball)
Stem (make 2, Dark Brown):
Ch 15, sl st back along chain from 2nd ch from hook to end. Fasten off, leave 10 cm tail.
Tip ball (make 2, Mint/Teal):
Rnd 1: MR, 6 sc. (6)
Rnd 2: Inc × 6. (12)
Rnd 3: Sc in each st around. (12)
Rnd 4: Dec × 6. (6)
Stuff lightly. Close. Sew one ball to each antenna stem end.
PART 7 — WINGS (Mint/Teal, make 2 upper + 2 lower)
Upper Wings (make 2):
Ch 14.
Row 1: Sc in 2nd ch from hook, sc 11, 3 sc in last ch; working along second side of chain, sc 11, inc in first ch. (28)
Row 2: Turn, ch 1, inc, sc 12, inc × 2, sc 12, inc. (32)
Row 3: Turn, ch 1, sc in each st. (32)
Row 4: Turn, ch 1, dec, sc 12, dec × 2, sc 12, dec. (28)
Rows 5–8: Continue shaping with dec at each outer edge every RS row to create curved top wing shape. (approx. 20 sts at end of Row 8)
Fasten off. Work one round of sc border around each wing. Fasten off.
Lower Wings (make 2):
Ch 10.
Row 1: Sc in 2nd ch from hook, sc 8, 3 sc in last ch; sc 8 along second side, inc in first ch. (22)
Row 2: Turn, ch 1, inc, sc 10, inc, sc 10, inc. (25)
Rows 3–5: Sc even. (25)
Fasten off. Work sc border around each lower wing. Fasten off.
PART 8 — COLLAR (Cream)
Ch 30.
Row 1: Sc in 2nd ch from hook, sc to end. (29)
Row 2: Turn, ch 1, [sc 1, inc] × 14, sc 1. (43)
Row 3: Turn, ch 1, sc in each st. (43)
Row 4: Turn, ch 1, sc 1, [ch 3, skip 2, sc 1] × 14. (lace edge)
Fasten off. Leave tails for tying into bow.
Assembly Steps
- Attach head to body: Sew the open base of the head (18 sts) to the open top of the body (18 sts), aligning center back. Add additional stuffing through the neck before closing completely. The neck join should measure approximately 6 cm wide.
- Sew hair cap: Place the dark brown hair cap over the top two-thirds of the head. Sew around the base of the cap, approximately at Rnd 16 of the head. The cap edge sits about 1.5 cm above the safety eyes.
- Attach antennae: Insert each antenna stem base through the top of the hair cap at the crown, approximately 1 cm apart. Sew base tails securely to the inside of the cap. Antennae should stand 4–5 cm above the cap.
- Attach arms: Position arms on each side of the body at Rnd 3 from the neck join. Sew securely through the flat closed end of each arm. Arms should hang approximately 1 cm below the neck.
- Attach legs: Sew legs to the base of the body, spaced approximately 2 cm apart from center. Each leg flat end aligns with Rnd 1 of the body base. Legs should extend 8–9 cm below the body.
- Attach wings: Layer one upper wing and one lower wing on each side of the back body, upper wing starting at Rnd 4 from neck, lower wing at Rnd 10. Sew securely along the straight inner edge of each wing. Wings should extend 6–7 cm from body on each side.
- Add collar and bow: Wrap the cream collar piece around the doll’s neck at the body-head join. Tie the long end tails into a small bow at the front center. Secure the bow knot with a few stitches so it does not slide.
Beginner and Intermediate Tips
Tight gauge matters: Because this is a small-scale doll, loose stitches will show the stuffing and affect the silhouette. Check your gauge swatch before starting and maintain even tension throughout.
Invisible decrease: Standard sc2tog creates a visible bump. Use the invisible decrease (front loops only method) throughout for a cleaner doll surface, especially on the face where every stitch is visible.
Stuffing firmness: The head and lower body should be stuffed quite firmly so the doll holds its shape when standing. Arms should be stuffed only lightly so they remain flexible and naturally drape.
Safety eye placement: Before securing safety eyes permanently, pin them in place with straight pins and check from all angles. Once the washers are on, eyes cannot be repositioned.
Wing shaping: The wings are worked flat in rows rather than in the round. Block each wing lightly with a damp cloth and allow to dry flat before assembly — this will give them a neater, more structured appearance.
Assembling antennae: The chain-stitch antenna stems are naturally curly. Lightly steam or wet-block them slightly curled before sewing to the hair cap for a more natural look.
Variations
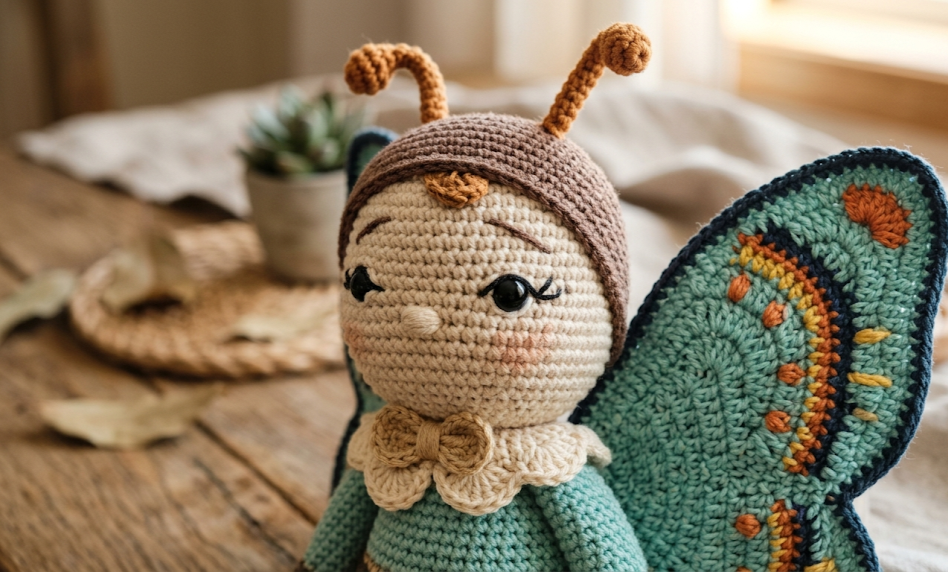
- Monarch Butterfly Colorway: Replace mint teal with deep orange yarn for the wings and use black for the body and hair cap, with small cream/white spot details embroidered onto the wings using a yarn needle — an instant Monarch.
- Fairy Doll Version: Swap the butterfly wings for long, narrow oval shapes in iridescent or sparkle yarn and add a tiny crown at the top of the hair cap using gold wire and seed beads.
- Smaller Keychain Doll: Use 1.5 mm hook and thread-weight yarn to reduce the finished size to approximately 8–10 cm. Omit armature; use a lobster clasp sewn to the head crown for a wearable charm.
- Seasonal Color Set: Make a collection in four colorways — soft pink for spring, sunshine yellow for summer, burnt orange for autumn, and icy white for winter — each with matching shoe and wing color to represent the seasons.
- Poseable Wire Armature Version: Insert chenille or pipe cleaner wire through both arms and both legs before stuffing, looping the wire through the body center. This allows the doll’s limbs to be bent into display poses.
Save this pattern to your Pinterest boards so you can find it whenever you’re ready to start! 🦋 Whether you make one for a gift or keep her for yourself, this Butterfly Doll Amigurumi is a project you’ll be proud to show off. Tag your finished doll with #FoodieRippleCrochet — we’d love to see her!


