The Best Fluffy Pancakes recipe you will fall in love with. Full of tips and tricks to help you make the best pancakes.
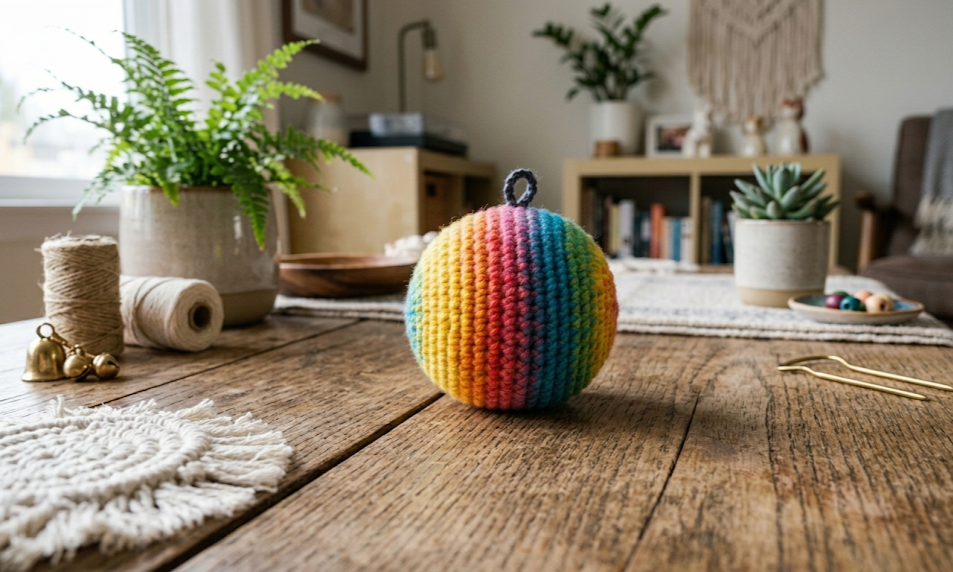
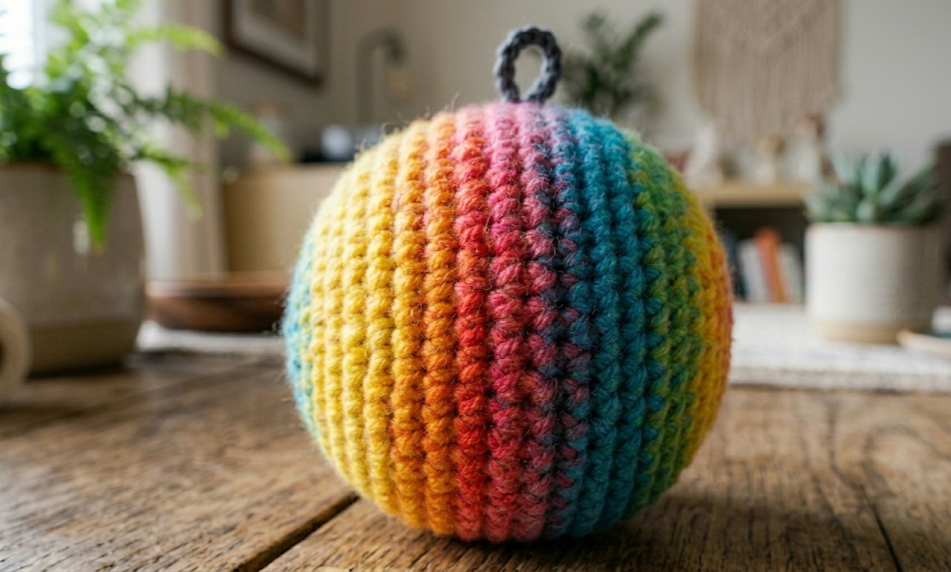
There is something irresistible about a little crocheted ball that fits perfectly in a cat’s paw. Bouncy, lightweight, and completely customizable, the crochet rainbow cat toy ball is one of those projects that brings as much joy to the maker as it does to the pet. Worked up in cheerful vertical stripes of yellow, orange, red, pink, blue, and green, this softball-sized toy is stuffed firm enough to bat across the floor and small enough to carry in tiny feline jaws. Whether you are a longtime crochet lover looking for a quick weekend make or a beginner ready to tackle your very first project in the round, this pattern is the perfect starting point. It uses only the single crochet stitch, requires no special techniques beyond a magic ring, and can be completed start to finish in one to two hours. Make one for your own cat, batch them up as handmade gifts, or donate a bag of them to your local animal shelter — these little balls are always welcome.

|
Difficulty
Beginner
|
Time
1–2 Hours
|
Hook Size
4.0 mm
|
Yarn Weight
Worsted
|
Finished Size
6 cm / 2.5 in
|
Gauge
16 sc × 18 rows = 10 cm (4 in) square
Hook: 4.0 mm
Yarn: Worsted weight (Category 4)
Gauge is important for this project because the finished ball needs to be dense enough that stuffing does not peek through the stitches. Work a small gauge swatch and adjust your hook size up or down as needed. A tighter fabric (smaller hook) is preferable for cat toys so there is no risk of claws catching in loose loops.
Materials List
- Yarn A (Yellow): Worsted weight, approx. 5 g / 10 m
- Yarn B (Orange): Worsted weight, approx. 5 g / 10 m
- Yarn C (Red): Worsted weight, approx. 5 g / 10 m
- Yarn D (Pink/Magenta): Worsted weight, approx. 5 g / 10 m
- Yarn E (Blue): Worsted weight, approx. 5 g / 10 m
- Yarn F (Green): Worsted weight, approx. 5 g / 10 m
- Crochet hook: 4.0 mm
- Polyester fiberfill stuffing: approx. 15–20 g
- Yarn needle: for weaving in ends
- Scissors
- Stitch marker: to track round beginnings
- Optional: a small jingle bell or crinkle insert to place inside before closing (ensure it is fully enclosed and cat-safe)
Abbreviations
| Abbreviation | Meaning |
|---|---|
| MR | Magic ring |
| sc | Single crochet |
| inc | Increase — work 2 sc into the same stitch |
| dec | Invisible decrease — insert hook under front loops only of next 2 stitches and sc them together |
| sl st | Slip stitch |
| ch | Chain |
| st(s) | Stitch(es) |
| BOR | Beginning of round |
| CC | Color change |
| FO | Fasten off |
| ( ) | Stitch count at end of round |
Technique Notes:
- Magic ring (MR): Loop yarn around your fingers to form a ring, insert hook through the center, draw up a loop, and chain 1 to begin. Pull the tail to close the ring tightly once the first round is complete. This creates a seamless, adjustable center with no hole.
- Invisible decrease (dec): Insert hook under the front loop only of the first stitch, then under the front loop only of the next stitch, yarn over and pull through both loops, yarn over and pull through the remaining 2 loops. This creates a flatter, less visible decrease than a standard sc2tog.
- Color change (CC): To switch colors at the end of a stitch, work the last single crochet of the old color until two loops remain on the hook, then draw the new color through both loops to complete the stitch. Do not cut the old color — carry it loosely up the inside of the ball.
Pattern Instructions
The ball is worked in continuous rounds (no joining, no turning). Place a stitch marker at the beginning of each round and move it up as you go.
Part 1: First Half of the Ball (Increase Section)
Using Yarn A (Yellow), make a magic ring.
Round 1: 6 sc into MR, pull tail to close ring. (6)
Round 2: Inc in each st around. (12)
Round 3: Sc 1, inc repeat around. (18) — Join Yarn B (Orange) on last st of this round.
Round 4: Sc 2, inc repeat around. (24) — Join Yarn C (Red) on last st.
Round 5: Sc 3, inc repeat around. (30) — Join Yarn D (Pink) on last st.
Round 6: Sc 4, inc repeat around. (36) — Join Yarn E (Blue) on last st.
Round 7: Sc 5, inc repeat around. (42) — Join Yarn F (Green) on last st.
Round 8: Sc 6, inc repeat around. (48) — Join Yarn A (Yellow) on last st.
Part 2: Middle of the Ball (Even Rounds)
Rounds 9–12: Sc in each st around, changing color every round in the sequence: Orange, Red, Pink, Blue. (48 each round)
Part 3: Second Half of the Ball (Decrease Section)
Round 13: Sc 6, dec repeat around, using Green. (42)
Round 14: Sc 5, dec repeat around, using Yellow. (36)
Round 15: Sc 4, dec repeat around, using Orange. (30)
Round 16: Sc 3, dec repeat around, using Red. (24)
Before continuing, stuff the ball firmly with polyester fiberfill. If adding a jingle bell or crinkle insert, place it in the center of the stuffing now. The ball should feel dense and round, not floppy. Add more stuffing if needed.
Round 17: Sc 2, dec repeat around, using Pink. (18)
Round 18: Sc 1, dec repeat around, using Blue. (12)
Round 19: Dec around, using Green. (6)
FO, leaving a 20 cm tail. Thread tail onto yarn needle, weave through the front loops of all 6 remaining stitches, pull tight to close the opening completely. Weave in tail securely on the inside.
Assembly Steps
- Close and secure the top: After fastening off, thread the yarn tail through all 6 remaining stitches and pull firmly to close the hole. Run the needle back through the interior of the ball twice to anchor the closure, then trim. The top should be smooth with no visible gap.
- Weave in all color-change ends: Thread each yarn tail onto the needle and weave it at least 3–4 cm through the interior stuffing and stitches in different directions. Because this is a cat toy that will be batted around, extra-secure end weaving is important. Trim ends close.
- Check firmness: Squeeze the finished ball — it should spring back and hold its round shape. If it feels soft or dented, carefully open the top a few stitches, add more stuffing, and re-close.
- Finished diameter: The completed ball should measure approximately 6 cm (2.5 in) across at its widest point when stuffed to firmness.
- Jingle bell check (if used): Shake the ball gently — the bell should produce a clear sound. Ensure the ball is completely closed with no opening where the bell could escape. Cat safety is the priority.
Beginner and Intermediate Tips
Working in a magic ring: If the magic ring feels slippery at first, work your Round 1 stitches snugly and hold the ring and tail between your thumb and forefinger while crocheting. Pull the tail firmly before moving to Round 2 to close the center hole completely.
Carrying yarn on the inside: Rather than cutting and re-joining every color, carry unused yarn loosely up the inside of the ball. This significantly reduces the number of ends to weave in. Just make sure the carried strands are not pulled tightly enough to distort the outer stitches.
Keeping the stripe pattern tidy: Color changes happen at the end of a round, so all stripes are one round tall in the increase and decrease sections. The middle section (Rounds 9–12) gives you the widest visible stripe band. Consistent tension across all colors will keep the stripes looking crisp and even.
Stuffing at the right time: Do not wait until all decrease rounds are complete before stuffing — the opening will be too small. Add stuffing during Round 16–17 when the opening is still wide enough to push fiberfill in easily with a pencil or dowel.
Invisible decrease for a smooth surface: The invisible decrease keeps the surface of the ball looking uniform without the bumpy appearance of a standard decrease. It is worth practicing this technique on a small swatch before starting.
Variations
1. Solid Color Ball:
Skip all color changes and work the entire ball in a single yarn color. This is ideal for beginners who want to practice the sphere shape without managing multiple yarns. Choose a bright color like teal or mustard for visual appeal in photos.
2. Mini Kitten Ball (4 cm):
Use fingering weight yarn (Category 1) and a 2.5 mm hook. Reduce the increase section to 5 rounds and the even section to 2 rounds, then mirror the decreases. The finished toy will be tiny and perfect for young kittens or as a stocking stuffer.
3. Catnip-Infused Ball:
Before closing the ball, place a small sachet of dried catnip inside the stuffing. Use a small drawstring pouch made from muslin fabric to contain the catnip so it does not mix directly with the fiberfill. This makes the toy irresistible to catnip-sensitive cats.
4. Gradient Ombre Ball:
Instead of six distinct colors, use a single gradient or ombre yarn that transitions through multiple colors naturally. This eliminates color changes entirely while still producing a beautifully varied finished ball. Look for self-striping sock yarn for a finer, more intricate result.
5. Festive Holiday Ball:
Work the ball in red and white stripes for Christmas, or orange and black for Halloween. Use these as tree ornaments (stuff lightly and add a ribbon loop before closing) or as seasonal pet gifts. A touch of metallic thread carried alongside the main yarn adds a festive shimmer without changing the stitch structure.
If you made this rainbow cat toy ball, save this pattern to your boards so you can come back to it anytime! Tag your finished makes with #FoodieRippleCrochet on Pinterest — we would love to see every colorful little ball you create. Your fur baby deserves handmade, and you deserve a quick win at the crochet hook.


