
The Best Fluffy Pancakes recipe you will fall in love with. Full of tips and tricks to help you make the best pancakes.

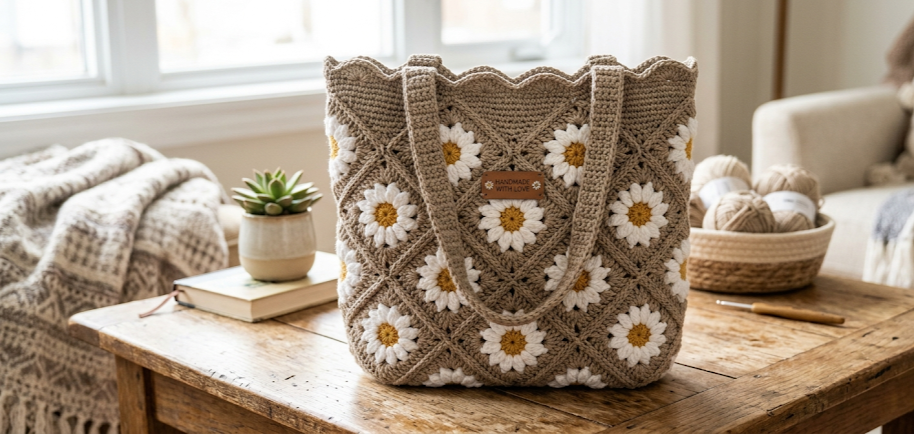
There is something endlessly cheerful about a bag that blooms. The Crochet Daisy Granny Square Tote Bag is one of those projects that earns compliments before it is even finished — the moment those white petals start popping against a warm taupe background, the whole thing starts to look like a garden in your hands. This free crochet pattern walks through every step of making a structured, everyday tote built entirely from daisy granny squares, joined seamlessly and finished with a graceful scalloped top edge and long twin shoulder handles. It is the kind of bag that works at a farmers’ market, a beach afternoon, a library trip, or anywhere a little handmade charm is welcome. If you have made granny squares before and are comfortable joining motifs, this pattern is well within reach.
|
Difficulty
Intermediate
|
Time
12–16 Hours
|
Hook Size
4.0 mm
|
Yarn Weight
DK / Light Worsted
|
Finished Size
36 cm × 32 cm
|
Gauge
Work a 10 cm × 10 cm gauge swatch in single crochet using your 4.0 mm hook and DK weight yarn before beginning. Gauge: 18 stitches × 20 rows = 10 cm in single crochet.
One completed daisy granny square measures approximately 9 cm × 9 cm blocked. Gauge is important for the finished bag size. If your squares are coming out larger, drop down to a 3.75 mm hook. If smaller, move up to a 4.5 mm hook.
Materials
- Yarn A (Taupe/Linen): DK weight, approx. 280 m / 100 g — 2 skeins
- Yarn B (White): DK weight, approx. 150 m / 50 g — 1 skein
- Yarn C (Golden Yellow): DK weight, approx. 60 m / 25 g — 1 small skein or cake
- Hook: 4.0 mm crochet hook
- Yarn needle for weaving in ends
- Scissors
- Stitch markers (at least 4)
- Blocking mats and pins (strongly recommended for granny squares)
- Optional: Small leather or faux-leather bag label for center front, sew-on snap or magnetic clasp for closure
Abbreviations
| Abbreviation | Meaning |
|---|---|
| ch | chain |
| sl st | slip stitch |
| sc | single crochet |
| dc | double crochet |
| hdc | half double crochet |
| sp | space |
| sk | skip |
| rep | repeat |
| BLO | back loop only |
| RS | right side |
| WS | wrong side |
| MC | main color (Taupe) |
| CC1 | contrasting color 1 (White) |
| CC2 | contrasting color 2 (Golden Yellow) |
| rnd | round |
| st(s) | stitch(es) |
| [ ] | repeat instructions inside brackets the number of times stated |
| ( ) | stitch count at end of round |
Pattern Instructions
Part 1: Daisy Granny Square (Make 24)
Each square is worked in the round from the center outward. A magic ring is used to begin — to make a magic ring: loop yarn into a circle with the tail crossing over the working yarn, insert hook through the loop, draw up a loop, and chain as directed; pull the tail to close the center hole.
Round 1 (CC2 — Golden Yellow):
Make a magic ring. Ch 3 (counts as first dc), work 11 dc into the ring, sl st to top of ch-3 to join. Pull magic ring closed. (12 dc)
Round 2 (CC1 — White):
Join CC1 with sl st to any st. Ch 1. [Sc in same st, ch 3, sk 1 st] 6 times, sl st to first sc to join. (6 sc, 6 ch-3 spaces)
Round 3 (CC1 — White — Petals):
Sl st into first ch-3 sp. Ch 1. Work (1 sc, 1 hdc, 3 dc, 1 hdc, 1 sc) into each ch-3 sp around — this creates 6 petals. Sl st to first sc to join. (6 petals, 42 sts total)
Round 4 (Yarn A — Taupe):
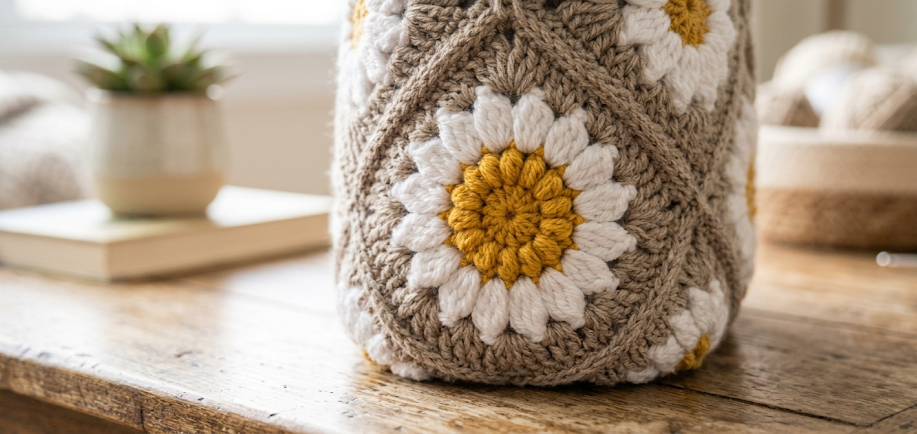
Join Yarn A with sl st to the back loop of any sc at the base of a petal. Note: Working into the BLO here — insert hook under only the back loop of the stitch — allows the petals to stand forward naturally.
Ch 3 (counts as dc), dc in same BLO st. [Ch 2, 2 dc in BLO of sc at base of next petal] 5 times, ch 2, sl st to top of ch-3. (12 dc, 6 ch-2 sp)
Round 5 (Yarn A — Taupe — Square Shaping):
Ch 3, dc in same sp. 2 dc in next st. (2 dc, ch 2, 2 dc) in ch-2 sp [corner], 2 dc in each of next 2 sts. Rep from * to * 5 more times, but note: only 4 of the 6 ch-2 spaces become corners. Work as follows:
- (2 dc, ch 2, 2 dc) into corner ch-2 sp, [2 dc in each of next 2 sts, 2 dc in next ch-2 sp] twice — rep 3 more times to complete 4 corners.
Sl st to top of ch-3. (48 dc, 4 corner ch-2 sp)
Round 6 (Yarn A — Taupe — Border):
Sl st to corner ch-2 sp. Ch 3, (dc, ch 2, 2 dc) in same sp [first corner made]. Dc in each st across side, (2 dc, ch 2, 2 dc) in next corner ch-2 sp. Rep from * to * around all 4 sides. Sl st to top of ch-3. (64 dc, 4 corner ch-2 sp)
Fasten off. Weave in ends. Block each square to 9 cm × 9 cm.
Part 2: Joining the Squares
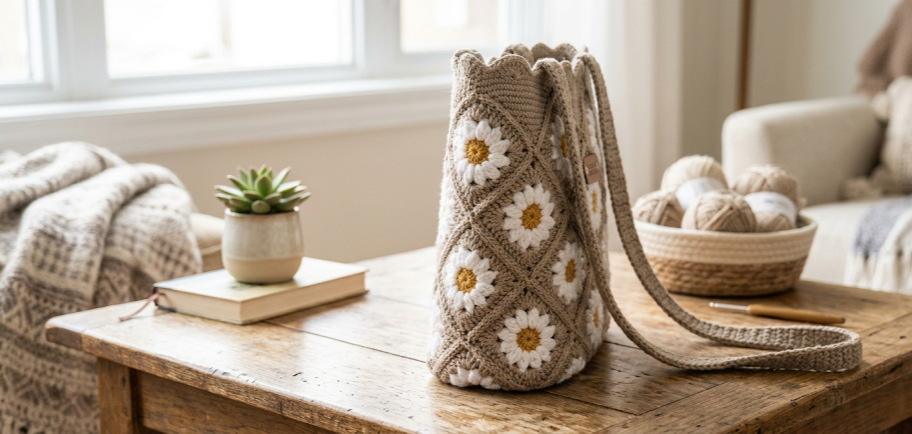
You will need 24 squares arranged in a 4 × 6 grid (4 squares wide, 6 squares tall) for the bag body. The bag is worked flat and seamed at the sides.
Layout: Place squares RS up in your grid. Alternate the diagonal tilt direction of petals between squares for visual texture if desired.
Join Method (Flat Slip Stitch Join):
A flat slip stitch join creates a visible, slightly raised ridge on the RS — it gives the patchwork a graphic, structured look that suits this bag perfectly.
Hold two squares WS together. Join Yarn A with sl st at any corner ch-2 sp. Ch 1. Sl st through both corner sp. Working along the edge, sl st through each corresponding stitch pair across the row. At the end, sl st through both corner ch-2 sp. Fasten off.
Join all squares into rows of 4, then join rows together to create the full panel (4 wide × 6 tall). Finished panel dimensions: approx. 36 cm × 54 cm.
Fold the joined panel in half so it measures 36 cm wide × 27 cm tall. Sl st the two side seams together using Yarn A. Leave top open. (This creates a tube with an open top.)
Part 3: Base (Optional Reinforcement)
For a sturdier base, work a flat rectangle in sc using Yarn A:
Ch 37. Turn.
Row 1–14: Sc in each ch across. (36 sc per row)
Work until rectangle measures approx. 36 cm × 10 cm. Sew to the bottom interior of the bag using a yarn needle and Yarn A, stitching through both layers all the way around the perimeter.
Part 4: Scalloped Top Edge
With RS facing, join Yarn A at one side seam at the top opening.
Rnd 1: Ch 1. Sc evenly around the entire top opening, placing 1 sc per stitch and 2 sc into each corner sp. Sl st to join. Count and adjust so total is divisible by 7.
Rnd 2 (Scallop): Ch 1. Sk 2 sts, 5 dc in next st, sk 2 sts, sl st in next st. Rep from * to * around. Sl st to first ch-1. Fasten off.
Part 5: Handles (Make 2)
With Yarn A, ch 101.
Row 1: Sc in 2nd ch from hook and in each ch across. (100 sc)
Row 2: Ch 1, turn. Sc in BLO of each st across. (100 sc)
Rows 3–6: Rep Row 2.
Fold handle in half lengthwise (WS together) so it forms a flat strap approx. 1.5 cm wide. Sl st through both edges all the way along the long side to close. Fasten off.
Handle length when finished: approx. 48 cm (shoulder length).
Assembly Steps
- Block all 24 squares to 9 cm × 9 cm before joining — this step is not optional for even, professional-looking seams.
- Lay out squares in a 4 × 6 grid. Pin and join all horizontal seams first, then all vertical seams.
- Fold joined panel in half. Seam both side edges using flat sl st join. Leave the top 27 cm open.
- If adding the base rectangle, insert it into the bottom of the bag and stitch all the way around the perimeter with a yarn needle, approx. 0.5 cm from the edge.
- Work the scalloped top edge as written.
- Position handles: each handle end should sit approximately 9 cm from each side seam, measured from the outside edge inward. Pin both ends of each handle to the inside of the bag top edge, with ends overlapping 4 cm down from the opening.
- Using a yarn needle and Yarn A, sew each handle end in a square stitch pattern (up, across, down, across) for maximum strength. Reinforce by stitching the square twice.
- Optional: Sew a magnetic clasp or snap to the WS of the top edge, centered, 2 cm below the scalloped border.
- Optional: Stitch a leather or faux-leather label to the RS center front of the bag between the 3rd and 4th rows of squares, centered horizontally.
Beginner & Intermediate Tips
- Tension consistency across squares: Work all 24 squares in a single sitting if possible, or take note of your hook hold and tension before taking a break. Inconsistent tension between sessions creates uneven squares that are hard to block into shape.
- Magic ring tightness: After completing Round 1, pull the tail end firmly and weave it in before proceeding. A loose magic ring will show as an open hole at the center of your daisy.
- Petal pop: The BLO join in Round 4 is what makes the petals lift forward. If you accidentally work through both loops, the petals will lie flat against the background — go back and redo it.
- Blocking matters more than usual here: Because granny squares curl at the edges naturally, blocking to exact dimensions before joining is what makes the seam lines sharp and straight.
- Handle durability: The folded sc strap is already quite strong, but for very heavy loads, consider running a strip of grosgrain ribbon or twill tape inside the handle before seaming it closed.
Variations
- Pastel Spring Bag: Swap the taupe for a soft sage green or dusty lilac, keep white petals and yellow centers. Work a matching pastel lining in cotton fabric.
- Monochrome Textured Version: Work every round of the granny square in a single neutral — oatmeal, cream, or charcoal. The daisy shape becomes a subtle textural motif rather than a color contrast statement.
- Mini Clutch: Reduce to a 2 × 3 grid of squares for a clutch measuring approx. 18 cm × 27 cm. Skip handles; add a zipper along the top.
- Market Bag with Cotton Yarn: Use a lightweight cotton yarn at a 3.5 mm hook for a breezy, slightly drapey version that is machine washable — perfect for grocery runs or beach days.
- Mixed Motif Tote: Alternate daisy squares with plain solid granny squares in taupe, creating a checkerboard-style grid. This uses less contrasting yarn and gives the bag a more graphic, modern look.
Love this pattern? Save it for later and share your finished bag on Pinterest using #FoodieRippleCrochet — it means the world to see your makes! 🌼



