
The Best Fluffy Pancakes recipe you will fall in love with. Full of tips and tricks to help you make the best pancakes.

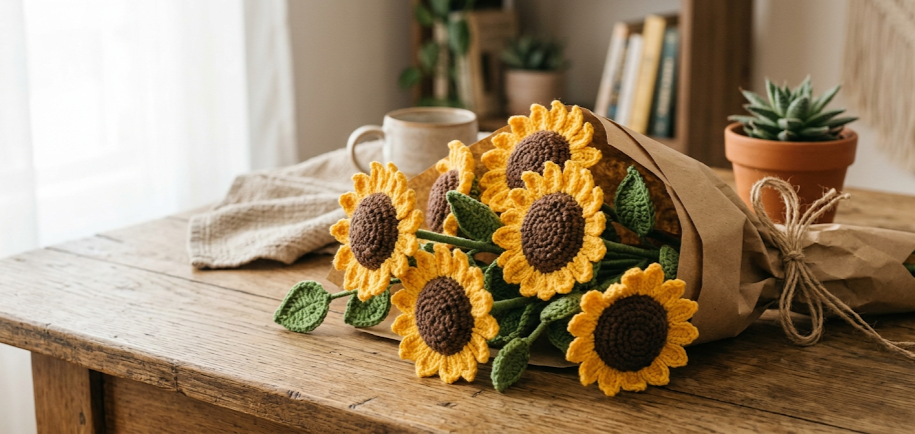
There is something quietly extraordinary about a bouquet that never wilts. A crochet sunflower bouquet captures everything that makes sunflowers so beloved — their bold golden petals, their rich chocolate centers, their tall green stems — and turns it into something that lasts forever. Whether it is displayed in a glass vase on a kitchen windowsill, gifted to a friend who deserves something handmade, or propped in a corner of a nursery, this bouquet brings warmth without any watering required. This pattern produces three to five full sunflowers, each with individually crocheted petals, a textured spiral center, a sturdy wire-reinforced stem, and a shaped leaf. The finished bouquet is wrapped in kraft paper and tied with ribbon for a florist-quality presentation straight from your hook. Beginners will find this pattern approachable and confidence-building. The stitch vocabulary is small — magic ring, single crochet, half double crochet, double crochet, and treble crochet — and each component is small enough to finish in a single sitting.
|
Difficulty
Beginner
|
Time
4–6 Hours
|
Hook Size
4.0 mm
|
Yarn Weight
Worsted (#4)
|
Finished Size
35–40 cm Tall
|
Gauge
16 sc × 18 rows = 10 cm / 4 inches worked in single crochet with a 4.0 mm hook and worsted weight yarn.
Gauge is not critical for this decorative project, but working to gauge ensures the centers and petals are proportional to each other. If your center turns out significantly larger than 5 cm in diameter, try a 3.5 mm hook. If it is much smaller, move up to a 4.5 mm hook.
- Hook size used: 4.0 mm
- Yarn weight used: Worsted (#4)
Materials List
- Yellow yarn (worsted weight, #4) — approximately 80–100 g total for 3–5 flowers
- Brown yarn (worsted weight, #4) — approximately 30–40 g total for centers
- Green yarn (worsted weight, #4) — approximately 50–60 g total for stems and leaves
- Crochet hook: 4.0 mm (US G/6)
- Floral wire: 18–20 gauge, cut to 30–35 cm lengths (one per flower)
- Yarn needle for weaving in ends and assembly
- Scissors
- Stitch marker to mark round beginnings
- Fiberfill or felt circle (optional, for stuffing the center dome)
- Kraft wrapping paper — one sheet, approximately 50 × 60 cm
- Ribbon — 60–80 cm, any color (cream or brown recommended)
- Pliers (for bending wire tips safely)
Abbreviations
| Abbreviation | Meaning |
|---|---|
| MR | Magic Ring |
| ch | Chain |
| sl st | Slip Stitch |
| sc | Single Crochet |
| hdc | Half Double Crochet |
| dc | Double Crochet |
| tr | Treble Crochet |
| inc | Increase (2 sc in same stitch) |
| dec | Invisible Decrease (insert hook in front loop of next 2 sts, pull through, complete sc) |
| BLO | Back Loop Only |
| st(s) | Stitch(es) |
| rep | Repeat |
| sp | Space |
| rnd | Round |
| RS | Right Side |
Pattern Instructions
PART 1: CENTER (Brown)
Work in continuous rounds. Place a stitch marker at the beginning of each round and move it up as you go.
Rnd 1: MR, 6 sc into ring, pull ring closed. (6)
Magic ring: wrap yarn around fingers to form a loop, insert hook through loop, draw up a loop and chain 1 to start, then work stitches into the ring. Pull the tail to close.
Rnd 2: Inc in each st around. (12)
Rnd 3: [Sc 1, inc] rep 6 times. (18)
Rnd 4: [Sc 2, inc] rep 6 times. (24)
Rnd 5: [Sc 3, inc] rep 6 times. (30)
Rnd 6: [Sc 4, inc] rep 6 times. (36)
Work Rnd 5 and Rnd 6 as flat rounds — do not join, keep spiral. The center should now measure approximately 5 cm in diameter and sit flat. Fasten off, leaving a long tail of at least 25 cm for sewing. Weave in starting tail securely.
Optional: lightly block the center face-down under a damp cloth for a flatter, rounder shape.
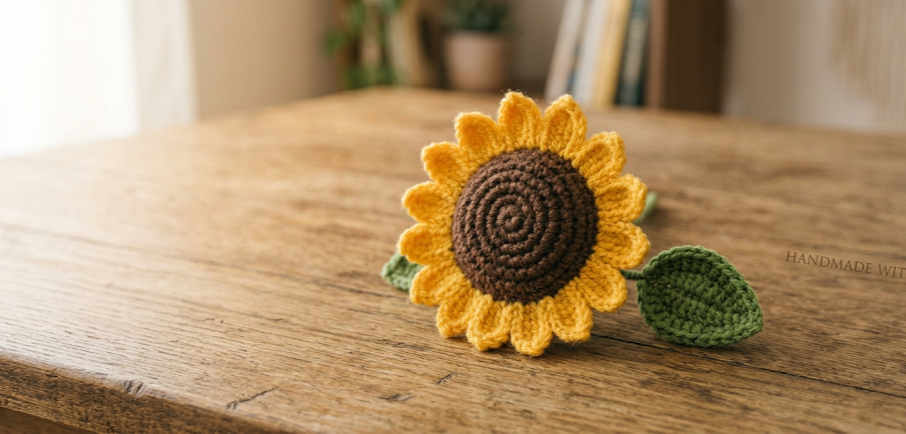
PART 2: PETALS (Yellow) — Make 10 per flower
Each petal is worked individually and sewn to the back of the center.
Foundation: Ch 4, sl st into first ch to form a small loop. OR begin directly in MR.
Row 1 (RS): Into the loop, work: sc 1, hdc 1, dc 2, tr 2, dc 2, hdc 1, sc 1. (10 sts)
Treble crochet: yarn over twice, insert hook, pull up a loop (4 loops on hook), [yarn over, draw through 2 loops] 3 times.
Row 2: Sl st back along the base of the petal to the starting point.
Do NOT fasten off yet — leave a 10 cm tail for attachment. Each petal should form a gentle teardrop shape approximately 3–4 cm long.
Tip: Keep tension slightly loose on petals so they curl gently outward rather than lying flat.
To attach: Sew 10 petals evenly around the back edge of the center, with petal tips pointing outward. Use the long tail from the center for additional anchoring. Weave all petal tails through to the back of the center piece.
PART 3: LEAF (Green) — Make 1–2 per flower
Ch 11. Work the leaf along both sides of the foundation chain.
Row 1 (first side): Starting in 2nd ch from hook: sc 1, hdc 1, dc 2, hdc 1, sc 1, sl st into next ch. Turn, do not cut. (6 sts + sl st)
Row 2 (second side): Working back along the opposite side of the same foundation chain: sc 1, hdc 1, dc 2, hdc 1, sc 1. (6 sts)
Second side of chain: rotate the work 180°, insert hook under the unused bottom loops of the original chains, and work back toward the starting point. This creates a symmetrical two-sided leaf.
Sl st into starting point to close the leaf base. Fasten off, leaving a 15 cm tail for sewing to stem. The finished leaf should measure approximately 4–5 cm long and 2.5 cm wide at the widest point. Block lightly with a damp cloth if desired for a crisp shape.
PART 4: STEM (Green)
The stem is worked as a tube around the floral wire.
Prepare the wire: Using pliers, bend the top 1.5 cm of the wire into a small hook or loop. This anchor prevents the wire from pulling through the flower center.
Foundation: MR, 6 sc. Do not join. Work in continuous spiral. (6)
All subsequent rounds: Sc 1 in each st around. (6)
Continue until the tube measures 28–32 cm in length (or desired stem height). The tube should fit snugly around the wire — do not stretch it.
Insert the floral wire into the stem tube as you work, or slide it in before closing. The bent top should sit at the closed end of the tube.
To close the stem top: When the tube is the correct length, sl st to close, insert wire so the bent end is at the top, then use the yarn tail and needle to sew the top opening shut around the wire. Run the needle through several times to secure firmly.
Fasten off at the bottom. Leave a 5 cm yarn tail at the base — this will be tucked inside the bouquet wrap.
Attach leaf: Sew one or two leaves onto the stem approximately 8–10 cm up from the bottom of the stem, using the leaf tail. Wrap the tail around the stem twice before knotting for extra security.
PART 5: ATTACHING FLOWER TO STEM
Push the bent wire tip up through the center of the flower — entering from the back, through the spiral center. The wire hook should catch in the yarn on the front face. Pull the stem snugly so the flower head sits directly on top of the tube. Using the remaining center tail, sew around the base of the center to the top of the stem tube, making 4–6 stitches to anchor the flower head firmly. It should not wobble.
Assembly Steps
- Make all components first. For a bouquet of 3 flowers: 3 centers, 30 petals, 3 stems (28–32 cm), 4–6 leaves.
- Attach petals to all centers before joining to stems.
- Join flowers to stems as described in Part 5. Pull firmly — the wire hook should hold even without glue.
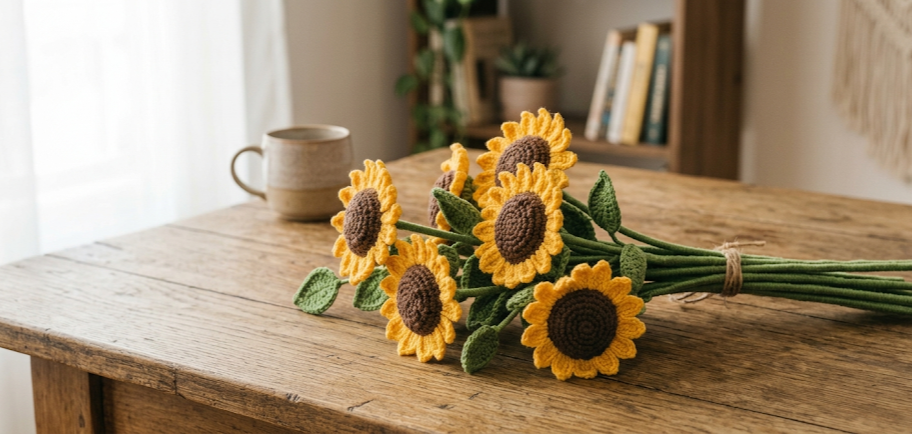
- Arrange stems side by side. Place the tallest flower in the center, with shorter flowers (trim wire slightly if needed) flanking it on each side. Stagger heights by approximately 3–5 cm for a natural florist look.
- Bind stems together at a point approximately 10 cm from the bottom, using a length of green yarn or floral tape. Wrap firmly 8–10 times and knot.
- Wrap in kraft paper. Cut one sheet approximately 50 × 60 cm. Place bouquet diagonally on the paper, fold one corner up and over the stems, then fold the sides in. The paper should reach no higher than 12–15 cm up the stems, leaving the flowers fully visible.
- Tie with ribbon at the paper gathering point. Tie a bow with tails of approximately 15 cm each.
Beginner and Intermediate Tips
Use a stitch marker religiously. The center is worked in a continuous spiral — there are no joining slip stitches between rounds. Without a marker, it is very easy to lose your place, especially in Rounds 4–6 where the stitch counts are higher.
Block your petals. Even a quick press under a damp towel for 10 minutes makes a dramatic difference. Petals lie flatter, curl more naturally at the tips, and the finished flower looks more realistic.
Check your center is flat after Round 6. If it is cupping upward, your tension is too tight. Rip back and work the final two rounds with looser tension, or swap to a 4.5 mm hook for those rounds only.
Floral wire handling. Always bend the tips with pliers, never fingers — 18-gauge wire has sharp cut ends. Keep wire away from children during the crafting process.
Petal attachment order matters. Place the first petal, then the petal directly opposite (180°), then fill in the remaining 8 evenly. This method prevents clustering.
Stem tube tension. The stem tube looks neatest when the tension is firm enough that individual stitches are not visible. If the tube is loose and lacy, tighten your tension or drop a hook size for the stem only.
Variations
1. Autumn Harvest Bouquet: Swap yellow for deep burnt orange and replace the brown center with a terracotta or rust-colored yarn. Add a few mini pumpkin amigurumi between the flowers for a fall centerpiece.
2. Mini Sunflower Bunch: Use fingering weight yarn and a 2.0 mm hook to make flowers approximately half the size. These make charming boutonnieres, gift toppers, or earring components.
3. Sunflower Pot Display: Skip the kraft paper wrap and instead insert stems into a small crocheted pot or mason jar filled with pebbles or floral foam. Space stems approximately 3–4 cm apart for a standing arrangement.
4. Monochrome Textured Version: Work the entire flower in shades of cream and off-white yarn for a bohemian dried-flower aesthetic. This version photographs beautifully in neutral interiors.
If this pattern brought some handmade sunshine into your day, save it to your Pinterest boards so you can come back to it anytime — and share what you make using #FoodieRippleCrochet. Every flower you hook is one that blooms forever.



